
 Help
Help


love it mate, rear wheel sits loverly. Angle of the rear damper looks nice, can go a few mm longer now then. Loadsa droop, tbh the frp could do with a bit more, but the beam wont physically droop any lower, but the back end can wander a little too far if your a little sideways over a small crest or something, but your's will handle completely different to frp anyway, but looking good mate. Always starts to come together when you get the arches on.
I completely moved the filler neck, as you will probably do anyway, but obv was going to be pelted in the oem location.
24V V6 Cosworth Puma Project
Rate Topic:
 5 Votes
#341

- Group: Members
- Posts: 1252
- Joined: 08-January 07
- Location:Hereford
Posted 11 August 2010 - 06:16 PM

All stuff puma - puma technical & all things rebuilt...
See my website for Snow School Information
#342

- Group: Members
- Posts: 583
- Joined: 01-April 10
- Location:NW Scotland Highlands
Posted 12 August 2010 - 09:28 AM
Cheers Ty,
Cheers Harry,
No mate I'm leaving the filler where it is, because my tank will be sitting in behind the beam, N/S and 2/3rds across to right, to allow for exhaust on O/S.
Filler pipe will be running right down the rear so when I weld the wheeltubs in I'm going to do it in such a way that the filler pipe is protected inside steelwork
Cheers Dave
It's nice to be important but it's more important to be nice !!
#344
- Group: Members
- Posts: 583
- Joined: 01-April 10
- Location:NW Scotland Highlands
Posted 17 August 2010 - 06:17 PM
Hi Dawesy,
Yes Matey, managed some more work today after my marathon 4 days of "double shifts", working solid from Wednesday night to Saturday night lol.
Got back on the Puma today.
Started by rough cutting the original rear bumper from its moulded plastic mounting section, then using a hot air gun, I removed the last bits of the old bumper from their bonding to the mounting frame.....
That leaves me with a "cleaned" original mounting moulding and the new widearch bumper moulding.....
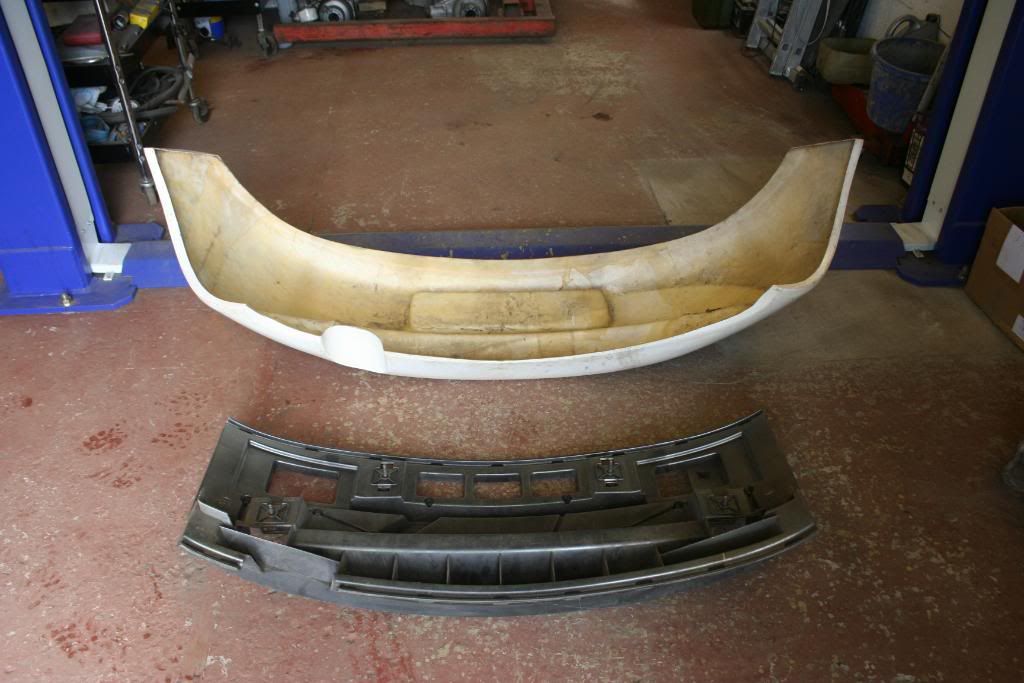
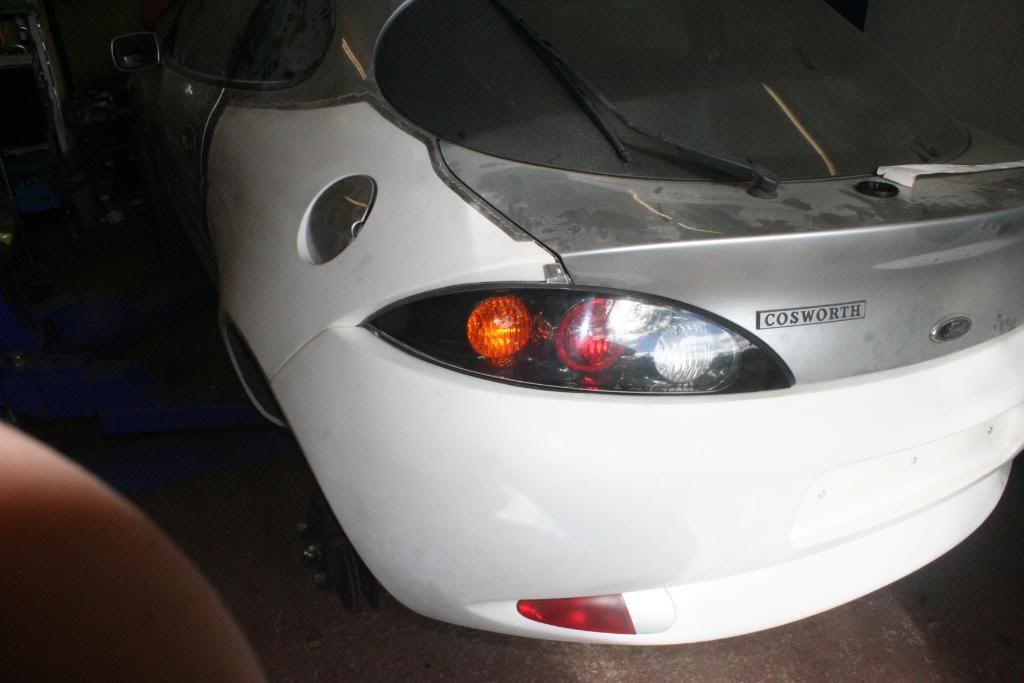
They need to be temporarily attached, before bonding just to make sure it's all central, and to cut out the fog light and index plate lamp holes etc. Like this.....
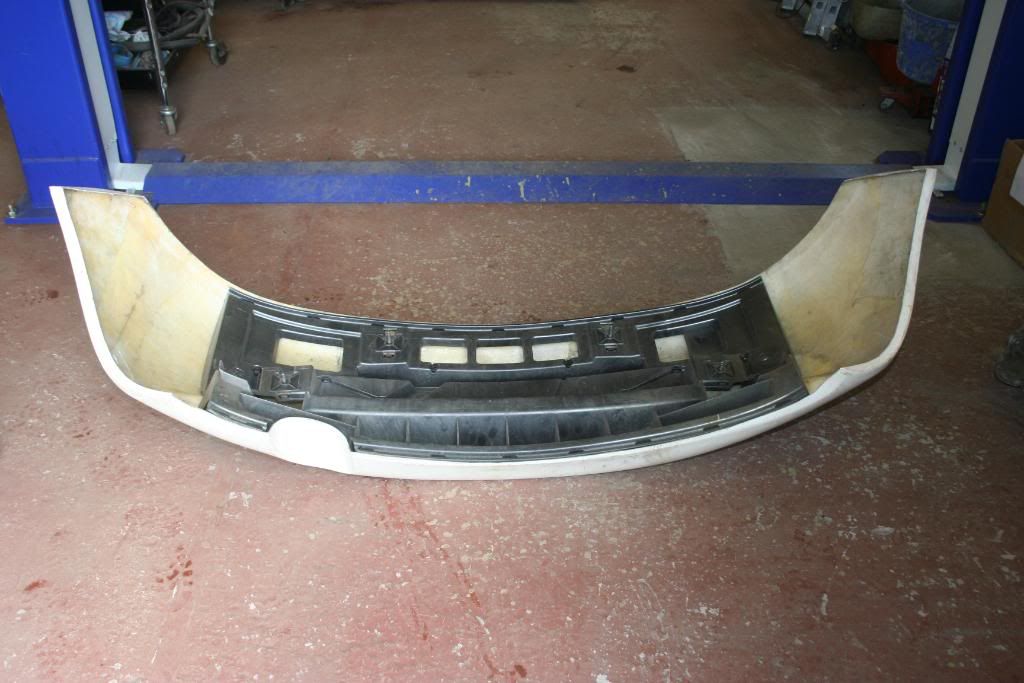
I attached the frame with 3 "hidden" screws and nuts behind the number plate, and a few temporary rivets along the bonding lip. Fitted bumper to car and checked alignment and also the fit against the N/S rear quarter.....
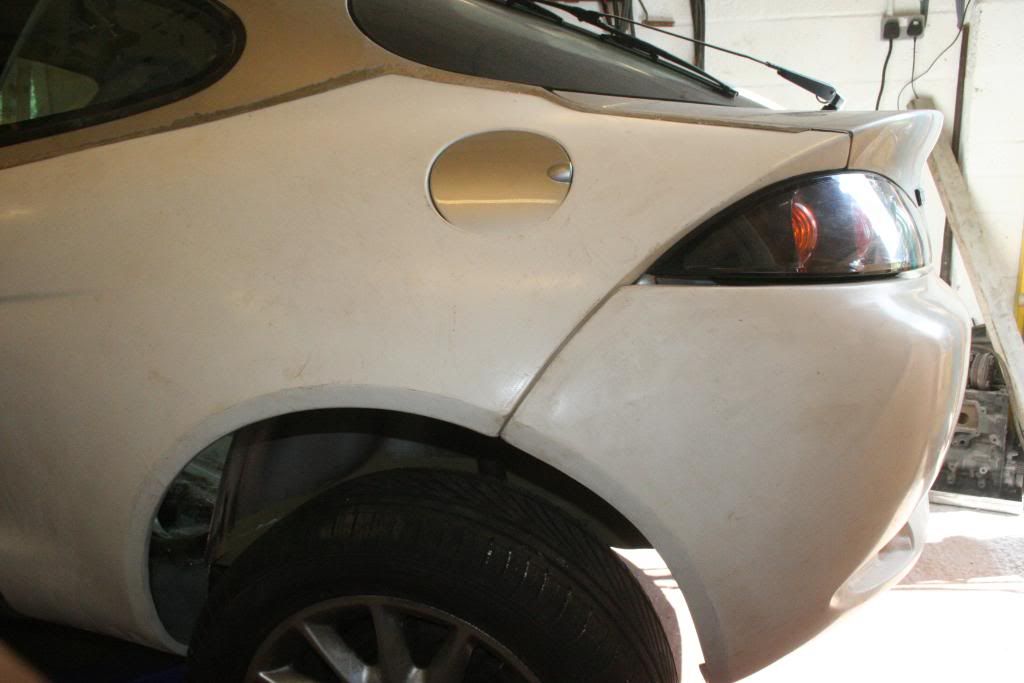
I reckon the fit is very good, the gap under the N/S Rear lamp is just a few mm too large, but slight elongation of the lamp mounting holes will sort this, so I'm happy with the fit so far.
Coffee and Hamlet time
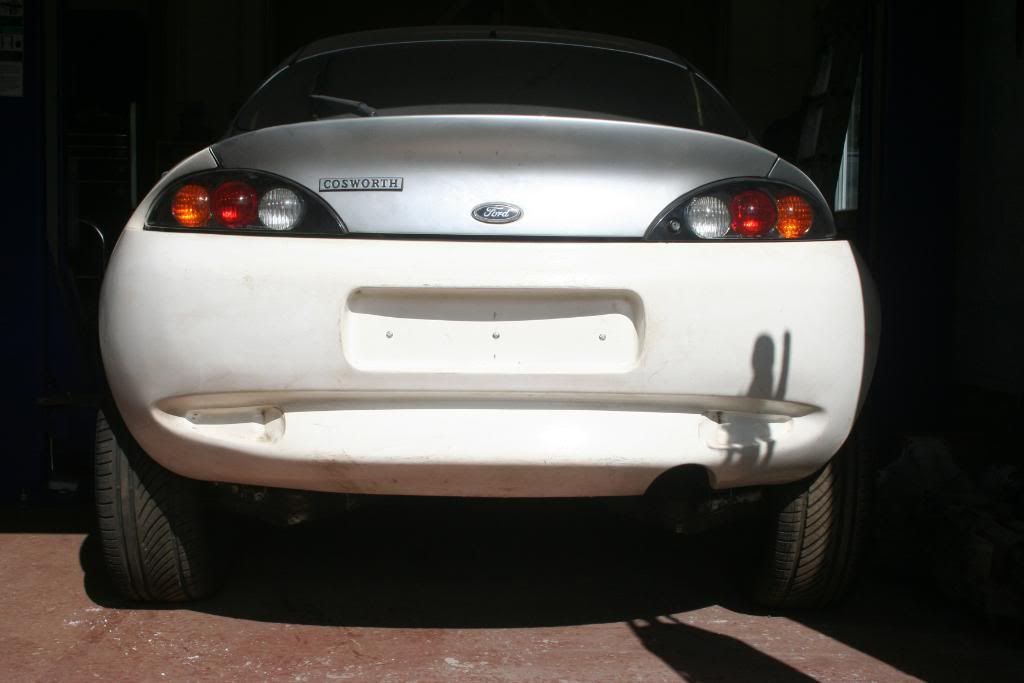
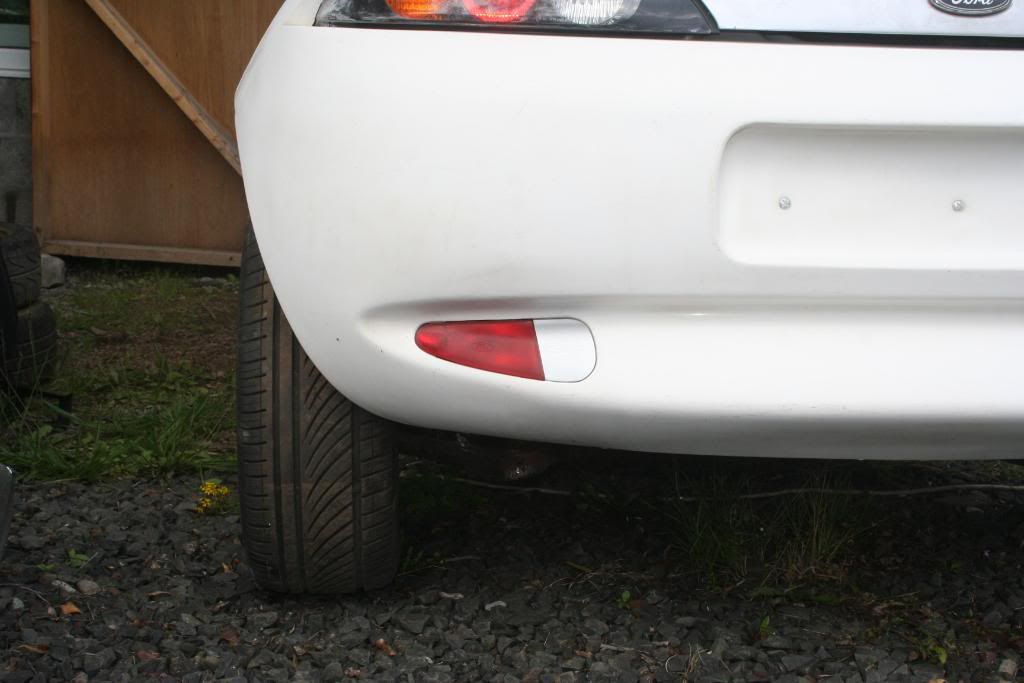
Decided to fit the rear fog lamp on the N/S and the little plastic clip in blank, a very slow process of cutting and filing, a little bit at a time. Pleased with the results tho.....
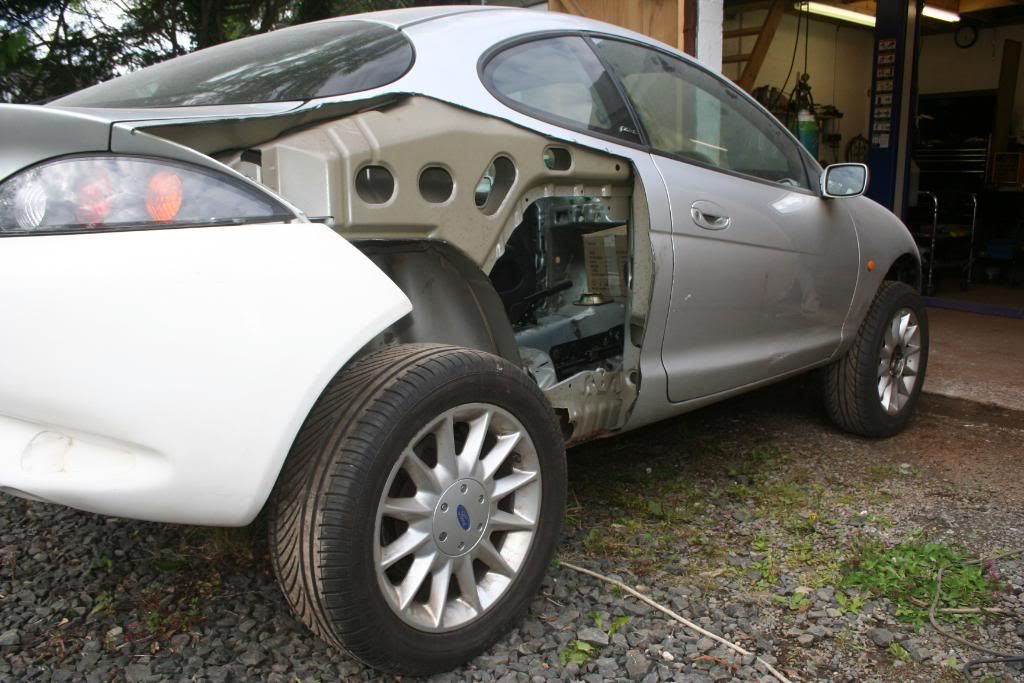
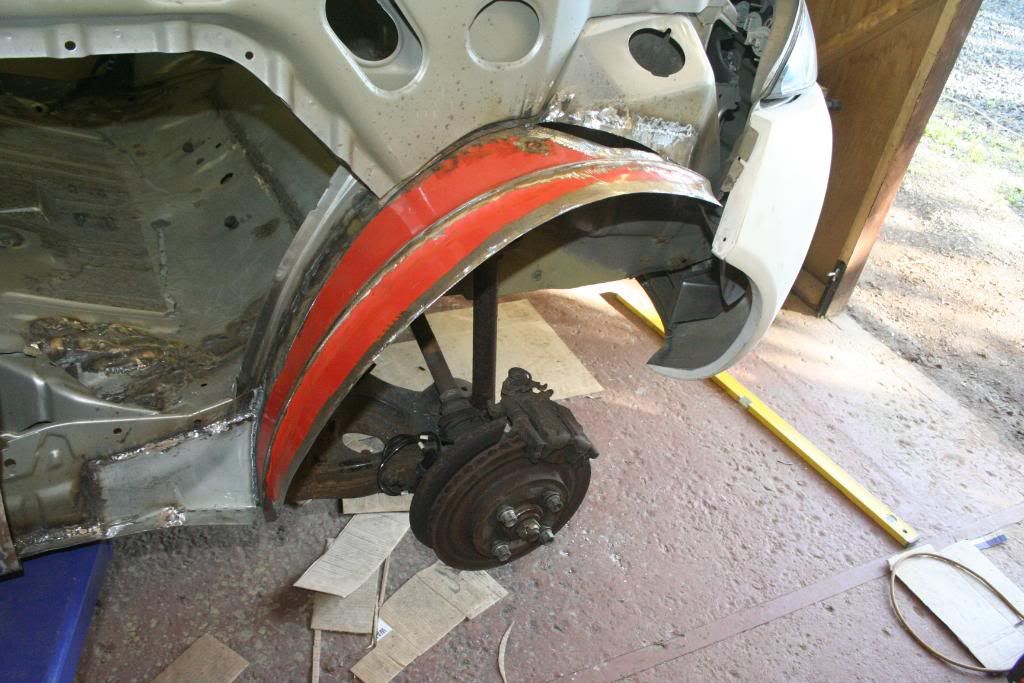
Final job for the day was to rough cut the O/S rear quarter panel off, and the inner wheelarch. It's now ready for rear bumper and lamp removal, and then start all the trimming and temporary fitting of the O/S widearch quarter panel, hopefully tommorow.
Here's where I finished today.....
So, Cheers for now, hopefully more pix tommoz,
Dave
Yes Matey, managed some more work today after my marathon 4 days of "double shifts", working solid from Wednesday night to Saturday night lol.
Got back on the Puma today.
Started by rough cutting the original rear bumper from its moulded plastic mounting section, then using a hot air gun, I removed the last bits of the old bumper from their bonding to the mounting frame.....
That leaves me with a "cleaned" original mounting moulding and the new widearch bumper moulding.....
They need to be temporarily attached, before bonding just to make sure it's all central, and to cut out the fog light and index plate lamp holes etc. Like this.....
I attached the frame with 3 "hidden" screws and nuts behind the number plate, and a few temporary rivets along the bonding lip. Fitted bumper to car and checked alignment and also the fit against the N/S rear quarter.....
I reckon the fit is very good, the gap under the N/S Rear lamp is just a few mm too large, but slight elongation of the lamp mounting holes will sort this, so I'm happy with the fit so far.
Coffee and Hamlet time
Decided to fit the rear fog lamp on the N/S and the little plastic clip in blank, a very slow process of cutting and filing, a little bit at a time. Pleased with the results tho.....
Final job for the day was to rough cut the O/S rear quarter panel off, and the inner wheelarch. It's now ready for rear bumper and lamp removal, and then start all the trimming and temporary fitting of the O/S widearch quarter panel, hopefully tommorow.
Here's where I finished today.....
So, Cheers for now, hopefully more pix tommoz,
Dave
It's nice to be important but it's more important to be nice !!
#345
- Group: Members
- Posts: 1252
- Joined: 08-January 07
- Location:Hereford
Posted 17 August 2010 - 07:25 PM
on mine i didn't bother putting the rear bumper insert back in, i fibreglassed some bolts onto it directly to save some weight. I also added two small brackets next to the lights. Did save some weight. But i guess you don't need to save as much weight as me cos my engine is slow as lol
All stuff puma - puma technical & all things rebuilt...
See my website for Snow School Information
#346

- Group: Members
- Posts: 153
- Joined: 14-February 10
- Location:Nottingham
Posted 17 August 2010 - 11:01 PM
awesome!! again

Now being broken. Please check the for sale thread.
#347
- Group: Members
- Posts: 583
- Joined: 01-April 10
- Location:NW Scotland Highlands
Posted 18 August 2010 - 09:25 AM
Thanks again guys
Harry,
I am probably going to have to add a bit of weight to my car, as the new MSA cat 2 regs say with a 3.0 litre engine it must be a minimum of 1100kg, and atm its a fair bit less than that, I will have to see how the weight is once the cage is in
That plastic bumper mounting weighs less than half what I took out in sound deadning lololol !!
It also makes the rear bumper a lot more rigid too
I have plans to weld on a couple of brackets inside the wheelarch below the outer edge of the rear lamp, so a small self tapping bolt and spire clip will attach the bumper along its wheelarch edge, as well as providing a solid mounting point for the mudflaps later on
Cheers Dave
It's nice to be important but it's more important to be nice !!
#348
- Group: Members
- Posts: 636
- Joined: 11-February 03
- Location:Essex, innit !
Posted 18 August 2010 - 12:03 PM
I'm enjoying this thread Dave, well done and some good work your doing there 
www.rallyesportescorts.co.uk
#349
- Group: Members
- Posts: 583
- Joined: 01-April 10
- Location:NW Scotland Highlands
Posted 18 August 2010 - 12:06 PM
Cheers Mogs,
Going to start trimming and fitting the O/S rear quarter panel in a while
Regards Dave
Going to start trimming and fitting the O/S rear quarter panel in a while
Regards Dave
It's nice to be important but it's more important to be nice !!
#350
Posted 18 August 2010 - 12:20 PM
looking good.
the kit must be pretty good quality as the fit looks good, i have seen a lot lot worse from a lot of very expensive kits.
good work though coming along well.
who are you using for roll cage tube? i looked at custom cages to buy the lengths i need to tie my cage into the rest of the car, not bad prices but there must be better places out there. are you going for T45 tube or just std?
my other toy has 470bhp
#351
- Group: Members
- Posts: 583
- Joined: 01-April 10
- Location:NW Scotland Highlands
Posted 18 August 2010 - 04:57 PM
Hi Dawesy,
I'm buying normal CDS tube from a "local" guy in Inverness. Need to add a bit of weight, or the car will end up under the minimum 1100 kgs
Today I managed to trim down the O/S Rear 1/4 panel, and tidy up all the rough cut edges, then put the 1/4 panel on and got the whole back end all lined up.
Looks like this now.....
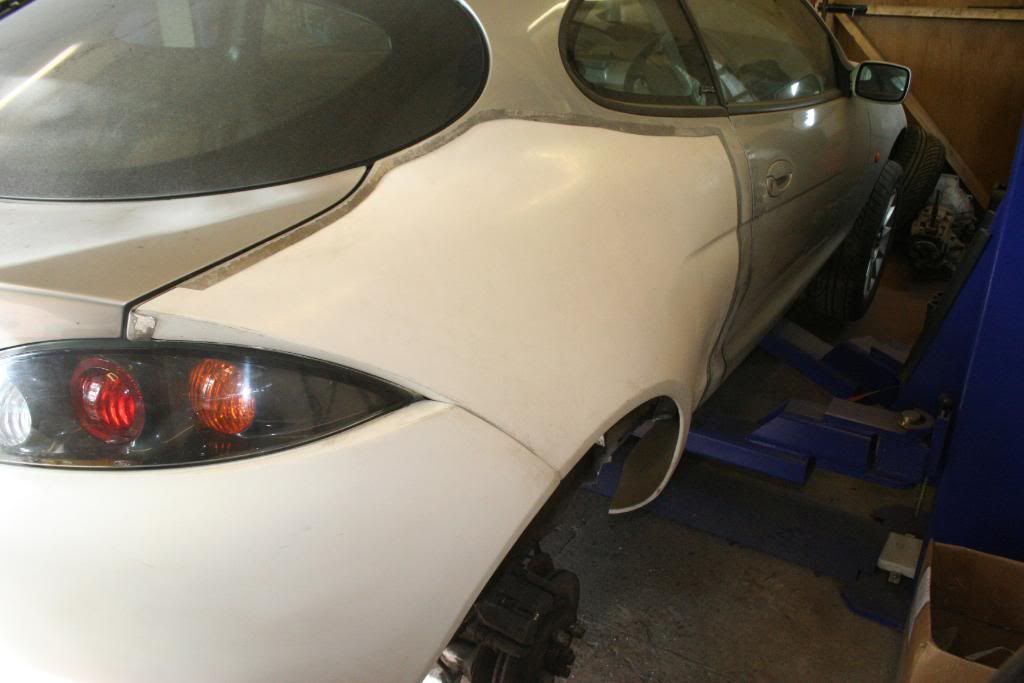
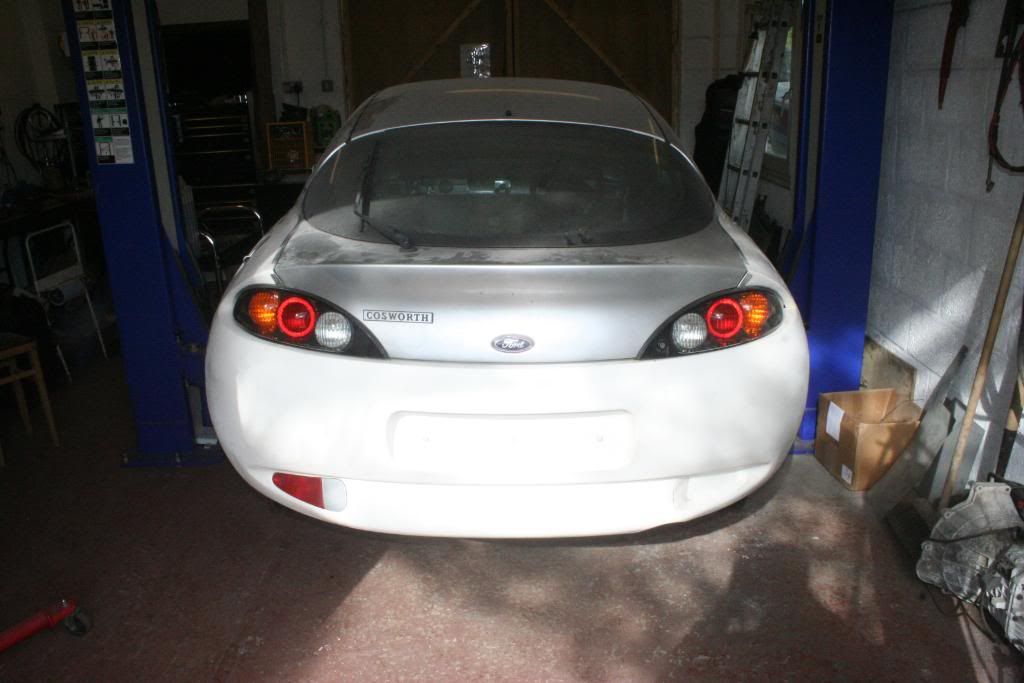
all lines up good
Will start fabricating the inner wheelarch tubs tommorrow,
Cheers Dave
I'm buying normal CDS tube from a "local" guy in Inverness. Need to add a bit of weight, or the car will end up under the minimum 1100 kgs
Today I managed to trim down the O/S Rear 1/4 panel, and tidy up all the rough cut edges, then put the 1/4 panel on and got the whole back end all lined up.
Looks like this now.....
all lines up good
Will start fabricating the inner wheelarch tubs tommorrow,
Cheers Dave
It's nice to be important but it's more important to be nice !!
#352
Posted 18 August 2010 - 05:59 PM
the speed at which you get on amazes me.
top job
top job
my other toy has 470bhp
#353
- Group: Members
- Posts: 153
- Joined: 14-February 10
- Location:Nottingham
Posted 18 August 2010 - 08:07 PM
i never thought about the wheel tubs... how are the FRP's done? because a few people have bolted this kit to a standard puma and I have never quite understood what they did with the old body... cut it out like you or just bolt the kit on...
Now being broken. Please check the for sale thread.
#354


- Group: Members
- Posts: 6825
- Joined: 11-July 04
- Location:kent
Posted 18 August 2010 - 08:21 PM
they had larger inner panels put inside the arches to fill the gap. its a good way to spot an accident damaged frp as they were thought to be unavailable for about 5 years and then they all turned up, ive got two in the loft. you notice some with standard puma ones put back in and a big gap in the rear inner arch.
looking great dave keep up the good work, i love it.
looking great dave keep up the good work, i love it.
This post has been edited by Big Boy Al: 18 August 2010 - 08:22 PM

FRP 241 RINGMEISTER -23 LAPS = 296.7 MILES COMPLETED, MORE TO COME NEXT YEAR
#355
- Group: Members
- Posts: 1252
- Joined: 08-January 07
- Location:Hereford
Posted 18 August 2010 - 08:29 PM
taking shape now, didn't know about that minimum weight, that's interesting...
All stuff puma - puma technical & all things rebuilt...
See my website for Snow School Information
#356

- Group: Members
- Posts: 4142
- Joined: 22-January 04
- Location:Stoke on Trent
Posted 18 August 2010 - 10:04 PM
dave if i were you, id carry on building it as you are and ignore the wieght limit.
The lighter the car the better and if it turns out you need to add ballast then you can add the ballast where YOU want to help optomise weight distribution in the car. Thats what a lot of works teams would do. means you can tweak the handling more later on by moving the ballast and with extra mods and roll cage additions in the cars life you will never risk being too heavy and hence less competitive than you could be.
The lighter the car the better and if it turns out you need to add ballast then you can add the ballast where YOU want to help optomise weight distribution in the car. Thats what a lot of works teams would do. means you can tweak the handling more later on by moving the ballast and with extra mods and roll cage additions in the cars life you will never risk being too heavy and hence less competitive than you could be.
#357
- Group: Members
- Posts: 583
- Joined: 01-April 10
- Location:NW Scotland Highlands
Posted 19 August 2010 - 01:48 AM
Cheers Dawesy, Cheers Al,
Ty, as was said FRP had different wheelach liners, but I'm gonna weld in steel tubs, to clear the wider track and extra suspension travel. Also steel tubs will stand up better to the constant battering they will get from flying gravel, and re inforce the composite quarter panels. I think a lot of these kits have just been fitted over standard rear 1/4 panels, but they must have needed a ton of filler to make them look right, cos if my panels are anything to go by, they aren't designed to go over the originals !!
Harry, I dont think the weight limit applies to cat 1 cars like yours, I think its only the cat 2 like mine.
Warren, hear what your saying and adding weight in the right places will definitely be a bonus, but I'm just being mindful cos I know the car is very light ATM lol !!
Cheers guys
Dave
It's nice to be important but it's more important to be nice !!
#358
- Group: Members
- Posts: 583
- Joined: 01-April 10
- Location:NW Scotland Highlands
Posted 19 August 2010 - 05:44 PM
Despite having to go out at 3 this afternoon, I managed to get a bit more done.....
Been wondering what to do with this since I cut it in half for an ash bin lolol.....

Answer of course, with a nice suage line already rolled into it, make the wheel tubs
N/S all done now apart from a couple of little "filler" plates, around the petrol flap panel....
Took ages of careful cutting to get it to fit nicely round the inside of the 1/4 panel arch, but theres about 3 - 4 mm gap all the way round, so I will bond it to the 1/4 panel here with flexible overpaintable sealer before undersealing it.....
I'm quite happy with that I'm going to make a nice plastic cover for the petrol filler pipe, out of one of the old Scorpio wheelarch liners. Will make it removeable for maintenance should the need arise
Work tommoz and Saturday, so onto the O/S on Sunday, which should be easier as there's no petrol flap etc to go round
Cheers Dave
Been wondering what to do with this since I cut it in half for an ash bin lolol.....
Answer of course, with a nice suage line already rolled into it, make the wheel tubs
N/S all done now apart from a couple of little "filler" plates, around the petrol flap panel....
Took ages of careful cutting to get it to fit nicely round the inside of the 1/4 panel arch, but theres about 3 - 4 mm gap all the way round, so I will bond it to the 1/4 panel here with flexible overpaintable sealer before undersealing it.....
I'm quite happy with that
I'm going to make a nice plastic cover for the petrol filler pipe, out of one of the old Scorpio wheelarch liners. Will make it removeable for maintenance should the need arise Work tommoz and Saturday, so onto the O/S on Sunday, which should be easier as there's no petrol flap etc to go round
Cheers Dave
This post has been edited by Dave2302: 19 August 2010 - 06:00 PM
It's nice to be important but it's more important to be nice !!
#359
- Group: Members
- Posts: 6825
- Joined: 11-July 04
- Location:kent
Posted 19 August 2010 - 06:00 PM
haha love it dave 
oh and to let you know yes the frp's still have the original puma panels underneath they were bonded on top with lets just say a kind of gripfil lol.
hence why its so hard to get dents knocked out if they occur, i think most have to be filled and sprayed.
oh and to let you know yes the frp's still have the original puma panels underneath they were bonded on top with lets just say a kind of gripfil lol.
hence why its so hard to get dents knocked out if they occur, i think most have to be filled and sprayed.
This post has been edited by Big Boy Al: 19 August 2010 - 06:01 PM
FRP 241 RINGMEISTER -23 LAPS = 296.7 MILES COMPLETED, MORE TO COME NEXT YEAR
#360
- Group: Members
- Posts: 583
- Joined: 01-April 10
- Location:NW Scotland Highlands
Posted 19 August 2010 - 06:35 PM
 Big Boy Al, on 19 August 2010 - 06:00 PM, said:
oh and to let you know yes the frp's still have the original puma panels underneath they were bonded on top with lets just say a kind of gripfil lol.
Good gawd, wot a bodge, bet it was difficult to get the doorgaps looking nice then, also wouldn't be as big inside the tubs for large wheels and long travel suspension
It's nice to be important but it's more important to be nice !!


