
 Help
Help


same was going to say arches a bit narrow!! Especially as you havent had to use spacers or wierd offsets to fill the arches with a standard width beam and front end.
24V V6 Cosworth Puma Project
Rate Topic:
 5 Votes
#381

- Group: Members
- Posts: 4142
- Joined: 22-January 04
- Location:Stoke on Trent
Posted 25 August 2010 - 11:25 PM
#382

- Group: Members
- Posts: 583
- Joined: 01-April 10
- Location:NW Scotland Highlands
Posted 26 August 2010 - 01:41 AM
Arches are filled out because its a Scorpio rear beam, wider than stock 
Can't comment too much on the kit lol
But I know there are wider ones about
Arch rage lol, nooooo, they all look nice FRP or S1600
Cheers Dave
Can't comment too much on the kit lol
But I know there are wider ones about
Arch rage lol, nooooo, they all look nice FRP or S1600
Cheers Dave
It's nice to be important but it's more important to be nice !!
#383
- Group: Members
- Posts: 583
- Joined: 01-April 10
- Location:NW Scotland Highlands
Posted 29 August 2010 - 05:52 PM
Finally got some time on the Puma today
I've been very busy all week, a few double shifts, and yesterday did a Morning and then a gig last night, (didn't get in until 4am), This meant today my head wasn't really into finishing the O/S inner wheelarch
So I decided to have a bit of a "potter" round the car and do some ofthe smaller jobs which have all got to be done before I send the shell up to Charlie for final paintwork.
It's important to me that all holes are drilled where needed, all brackets are fitted and so on, so I don't find I have forgotten something and have to drill or weld during the final fit up, whch could damage the paintwork
So I have had my thinking head on today and started fitting some of the smaller bits, which have all been arriving over the last few weeks.
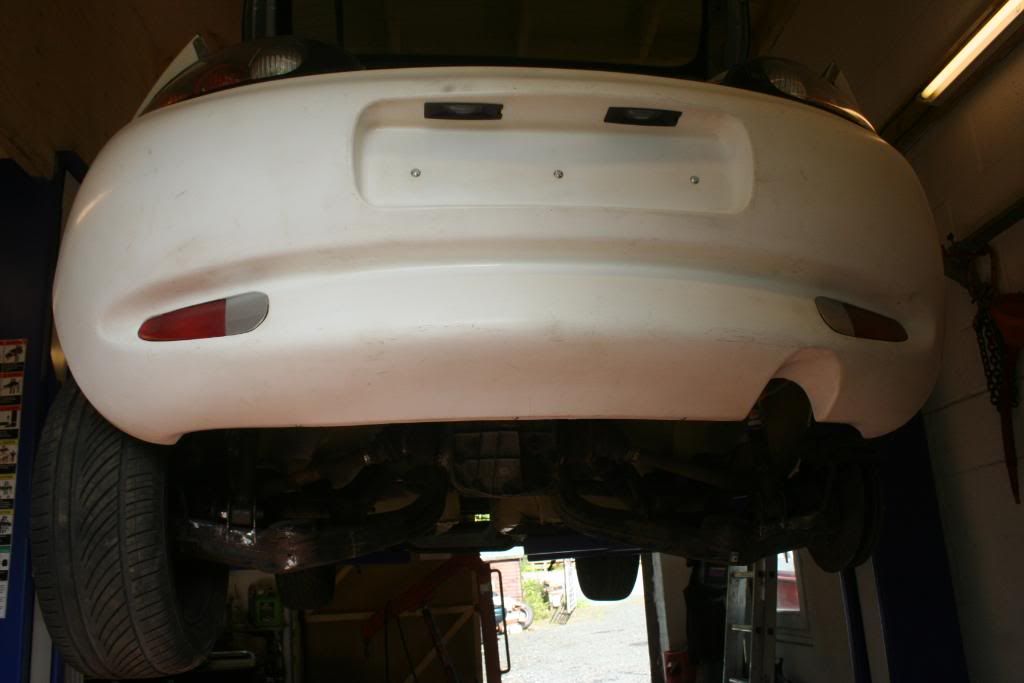
Firstly, finished the rear bumper cuting by fitting the O/S Foglamp and clip in cover, and the number plate lamps.....
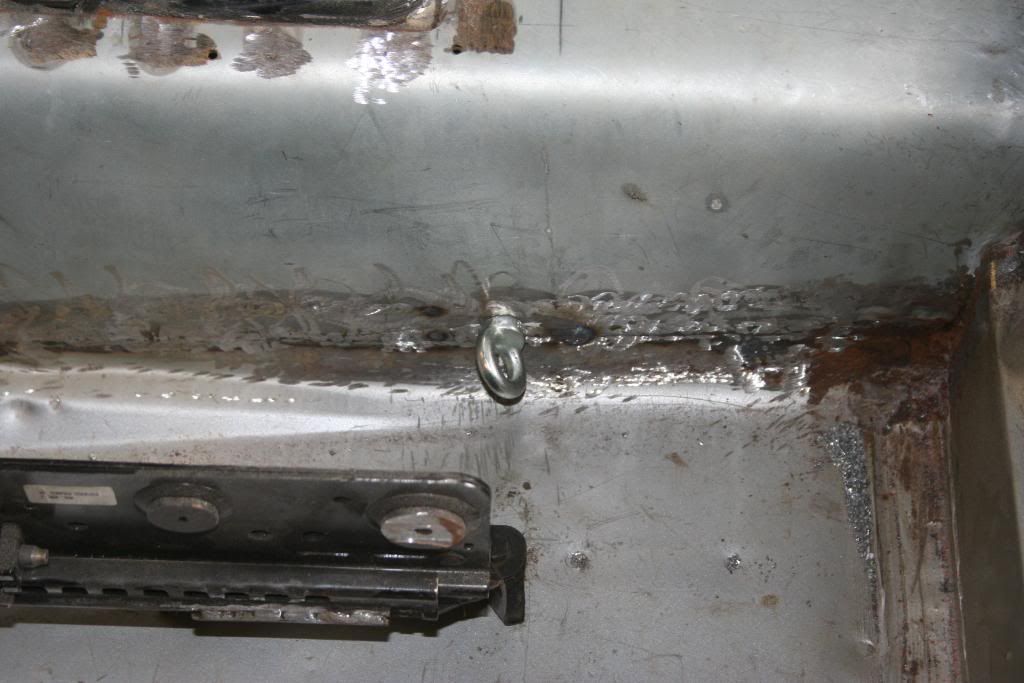
Then I drilled the tunnel and fitted the 2 inner seat belt eyes for the harnesses, welded in the threaded re-inforcing plates underneath the car.....
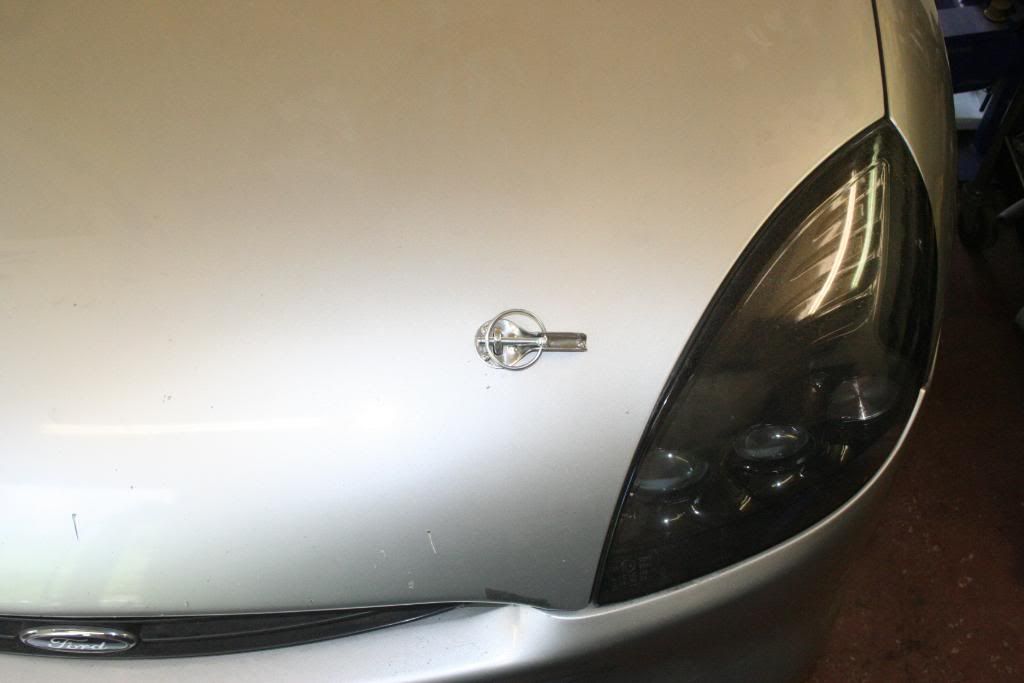
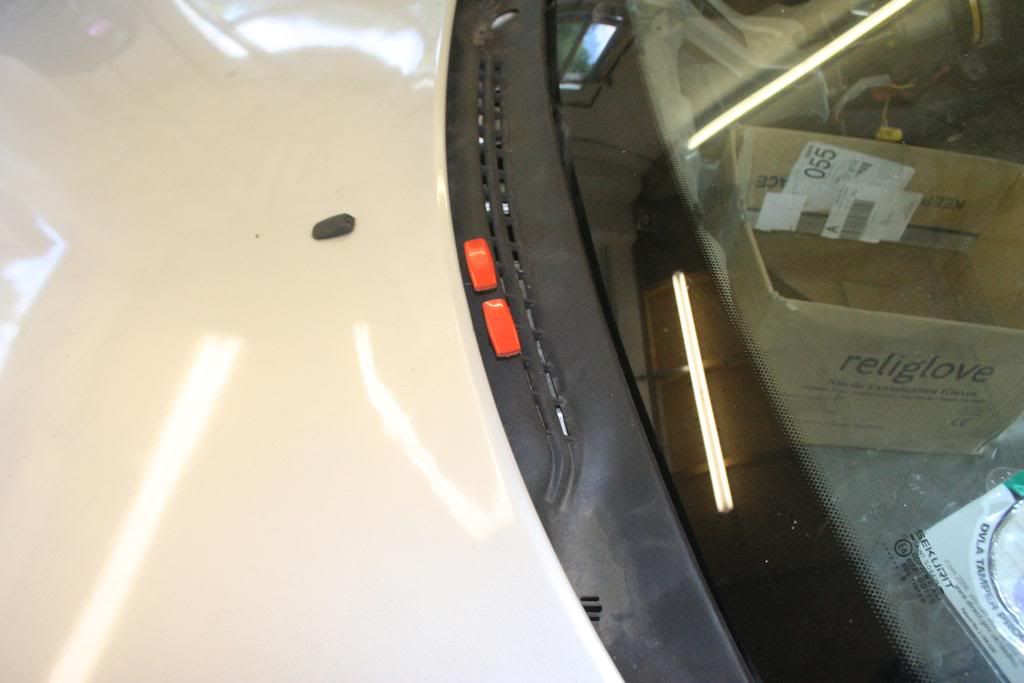
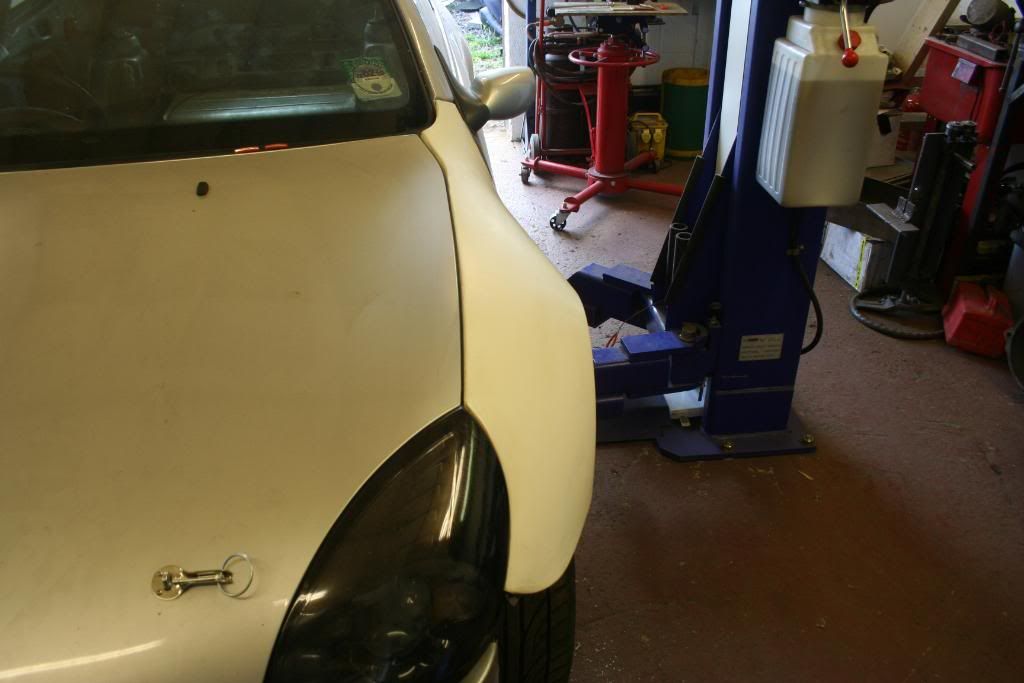
Then decided to fit the bonnet pin kit.....
I also found a bit more of that tarry sound deadening on the bulkhead under the bonet, behind where the wiper motor goes, so removed this.
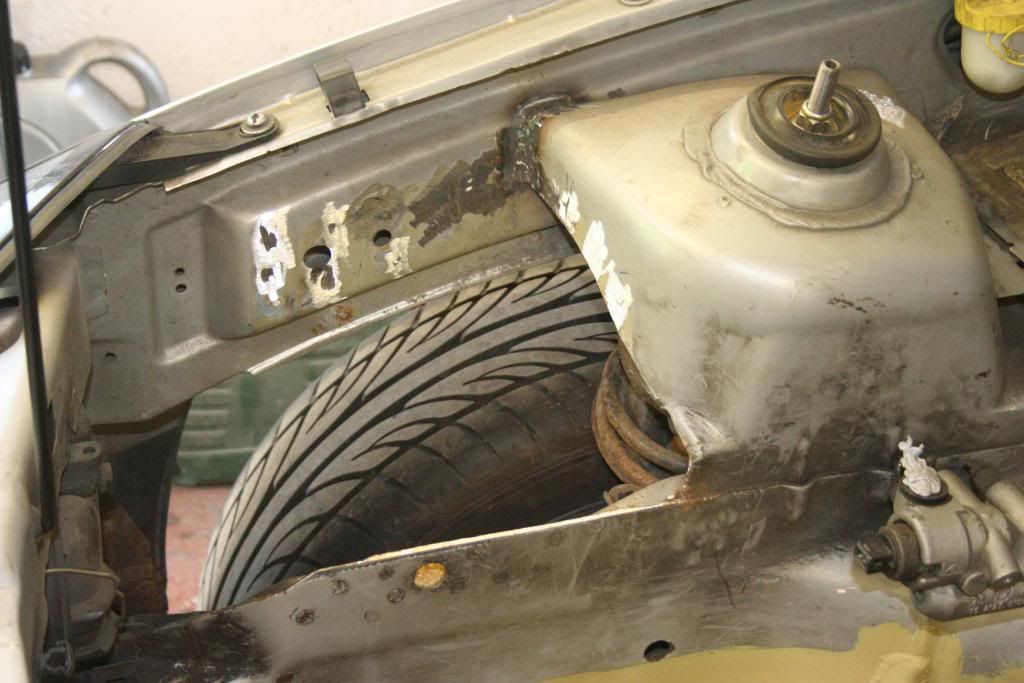
So will hopefully get on with the rear O/S inner wheelarch tommoz, and also remove the huge heavy original O/S engine mount bracket from the inner wing
More pix tommorrow,
Cheers Dave
I've been very busy all week, a few double shifts, and yesterday did a Morning and then a gig last night, (didn't get in until 4am), This meant today my head wasn't really into finishing the O/S inner wheelarch
So I decided to have a bit of a "potter" round the car and do some ofthe smaller jobs which have all got to be done before I send the shell up to Charlie for final paintwork.
It's important to me that all holes are drilled where needed, all brackets are fitted and so on, so I don't find I have forgotten something and have to drill or weld during the final fit up, whch could damage the paintwork
So I have had my thinking head on today and started fitting some of the smaller bits, which have all been arriving over the last few weeks.
Firstly, finished the rear bumper cuting by fitting the O/S Foglamp and clip in cover, and the number plate lamps.....
Then I drilled the tunnel and fitted the 2 inner seat belt eyes for the harnesses, welded in the threaded re-inforcing plates underneath the car.....
Then decided to fit the bonnet pin kit.....
I also found a bit more of that tarry sound deadening on the bulkhead under the bonet, behind where the wiper motor goes, so removed this.
So will hopefully get on with the rear O/S inner wheelarch tommoz, and also remove the huge heavy original O/S engine mount bracket from the inner wing
More pix tommorrow,
Cheers Dave
It's nice to be important but it's more important to be nice !!
#384
- Group: Members
- Posts: 583
- Joined: 01-April 10
- Location:NW Scotland Highlands
Posted 30 August 2010 - 06:38 PM
Despite a load of interruptions i got another good afternoon on the Puma today
First un-picked the spot welds and removed the now redundant original O/S engine mounting bracket from the inner wing.....
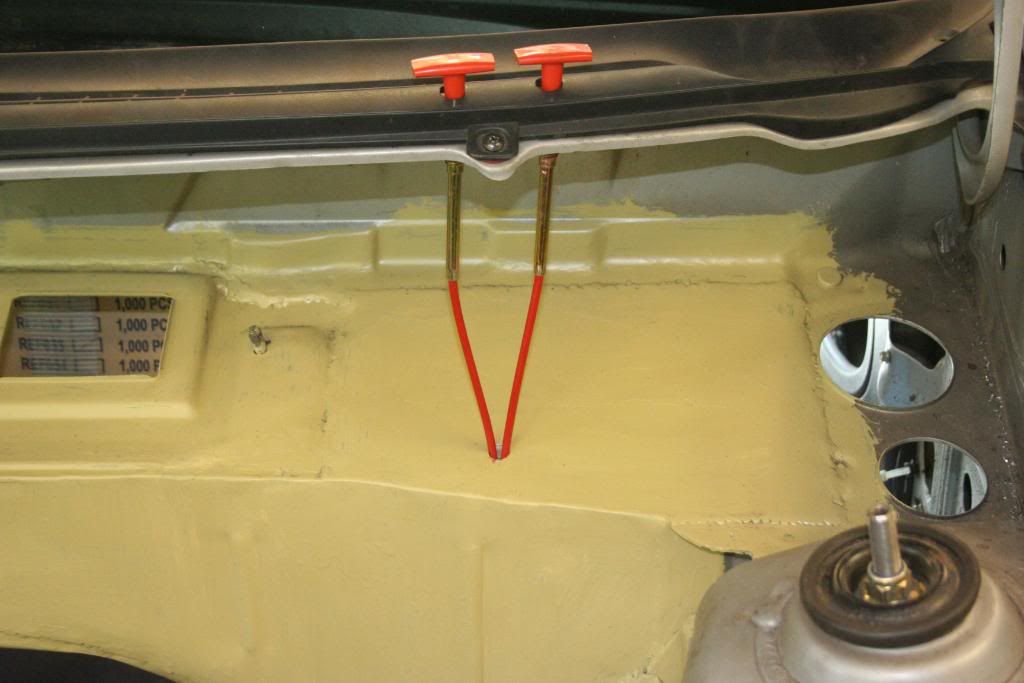
Then decied to fit the fire extinguisher pull cable and the battery master switch pull cable, these went on real neat.....
Coffee and hamlet time
Extracted the new wide arch front wings from the shed and cut the little holes for the indicator repeaters, another fiddly little job done
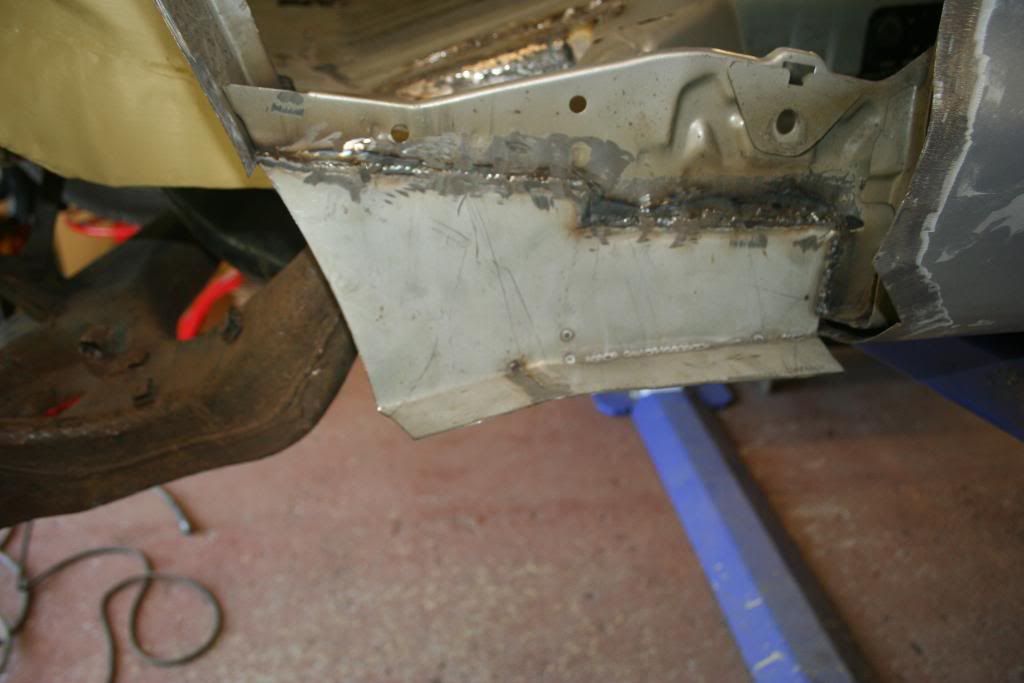
Finally, started on the welding under the O/S rear 1/4 panel, have done all the re-instatment of the inner sill and the mounting for the lower front of the rear 1/4 panel.....
So thats about it for today, will hopefully get this O/S rear wheel tub finished before the weekend lol, then on to first fit of the front wings and bumper
Cheers Dave
First un-picked the spot welds and removed the now redundant original O/S engine mounting bracket from the inner wing.....
Then decied to fit the fire extinguisher pull cable and the battery master switch pull cable, these went on real neat.....
Coffee and hamlet time
Extracted the new wide arch front wings from the shed and cut the little holes for the indicator repeaters, another fiddly little job done
Finally, started on the welding under the O/S rear 1/4 panel, have done all the re-instatment of the inner sill and the mounting for the lower front of the rear 1/4 panel.....
So thats about it for today, will hopefully get this O/S rear wheel tub finished before the weekend lol, then on to first fit of the front wings and bumper
Cheers Dave
It's nice to be important but it's more important to be nice !!
#385
Posted 30 August 2010 - 08:35 PM
Quite a lot of work there for a few days and the weather was nice today too.
Will be good to read on your panel fitting coming soon
and the weather was nice today too.Will be good to read on your panel fitting coming soon
searching is fruitful | I'm a sponge not a mechanic | please do try that if stuck with a Puma problem whilst waiting for a reply | For the Puma fan this read 'The Inside Story Book' is very nice to own sometimes still seen for sale
#386
Posted 31 August 2010 - 05:38 PM
coming along nicely. emergency pulls look very neat 
my other toy has 470bhp
#387

- Group: Members
- Posts: 153
- Joined: 14-February 10
- Location:Nottingham
Posted 31 August 2010 - 08:49 PM
love the work.
very neat job of the emergancy switches. I was thinking out installing these on mine.
where can I buy the gubbins from do you know?
I want to make the fire extinguisher system switchable from inside the cabin so that they can't be triggered while on the road and save it for track days.
very neat job of the emergancy switches. I was thinking out installing these on mine.
where can I buy the gubbins from do you know?
I want to make the fire extinguisher system switchable from inside the cabin so that they can't be triggered while on the road and save it for track days.

Now being broken. Please check the for sale thread.
#388
- Group: Members
- Posts: 583
- Joined: 01-April 10
- Location:NW Scotland Highlands
Posted 31 August 2010 - 10:34 PM
Cheers Guys,
The pull cables came off EBay, very reasonable and come in different lengths.
The trick is to use a solderless nipple in a slot on the fire bottle, that way, if you park the car up, the cable disconnects easy to stop little scrots pulling it and setting off yr fire system
Regards Dave
The pull cables came off EBay, very reasonable and come in different lengths.
The trick is to use a solderless nipple in a slot on the fire bottle, that way, if you park the car up, the cable disconnects easy to stop little scrots pulling it and setting off yr fire system
Regards Dave
It's nice to be important but it's more important to be nice !!
#389
- Group: Members
- Posts: 4142
- Joined: 22-January 04
- Location:Stoke on Trent
Posted 01 September 2010 - 08:44 PM
or cheat and go for an electronic system and isolate the outside extinguisher and battery cut off on a switch.
#390
- Group: Members
- Posts: 153
- Joined: 14-February 10
- Location:Nottingham
Posted 01 September 2010 - 11:52 PM
lol good ideas!
def need some sort of cut off system as I can GUARANTEE it will be pulled by some maggot!
where you having the fire extinguisher aimed? in the engine bay alone?
def need some sort of cut off system as I can GUARANTEE it will be pulled by some maggot!
where you having the fire extinguisher aimed? in the engine bay alone?
Now being broken. Please check the for sale thread.
#391
- Group: Members
- Posts: 583
- Joined: 01-April 10
- Location:NW Scotland Highlands
Posted 02 September 2010 - 11:02 AM
 Tyeboi, on 01 September 2010 - 11:52 PM, said:
lol good ideas!
def need some sort of cut off system as I can GUARANTEE it will be pulled by some maggot!
where you having the fire extinguisher aimed? in the engine bay alone?
def need some sort of cut off system as I can GUARANTEE it will be pulled by some maggot!
where you having the fire extinguisher aimed? in the engine bay alone?
Yes, you can get 4 jet systems, which have 2 in engine bay and 1 in each footwell, I'm just having 2 in engine bay.
Re the maggots / scrots, I will have the fire extinguisher cable on a quick disconnect cable nipple, also put the safety pin back in when not competing, and the battery master switch, again when not competing will pop the key out of it on the dashboard, leaving it still attached to the pull cable and use a spare key in the master switch..... £1.99 off EBay.
I did consider the electronic systems, but they are expensive, and I like to keep things simple and efficient
Should get the O/S inner wheel arch finished today, then onto the front body panels.
A load more "little bits" arrived yeterday, to be fitted as well, including a pair of 9" Driving Lamps. I've sussed a superbly strong and neat way to bracket these so they wont vibrate, more on this when I do the front bumper.
Would have used the 4 lamp bonnet pod, but rally regs now only allow a maximum of 2 lamps plus the 2 headlamps, i.e. 4 beams total, think my method will look nicer anyway lol.
Cheers Dave
This post has been edited by Dave2302: 02 September 2010 - 11:09 AM
It's nice to be important but it's more important to be nice !!
#392
- Group: Members
- Posts: 583
- Joined: 01-April 10
- Location:NW Scotland Highlands
Posted 05 September 2010 - 07:20 PM
Well, I shut the gate Saturday afternoon, switched off the phone and got cracking,,,,,,
Rear O/S inner wheel tub now all finished and the rear wing and tailgate spring catches fitted, panels all located to their final positions
I will be final fixing these once the stonechip and underseal paintwork is done to the framework and inner arches underneath
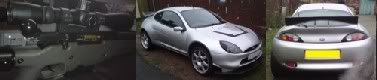
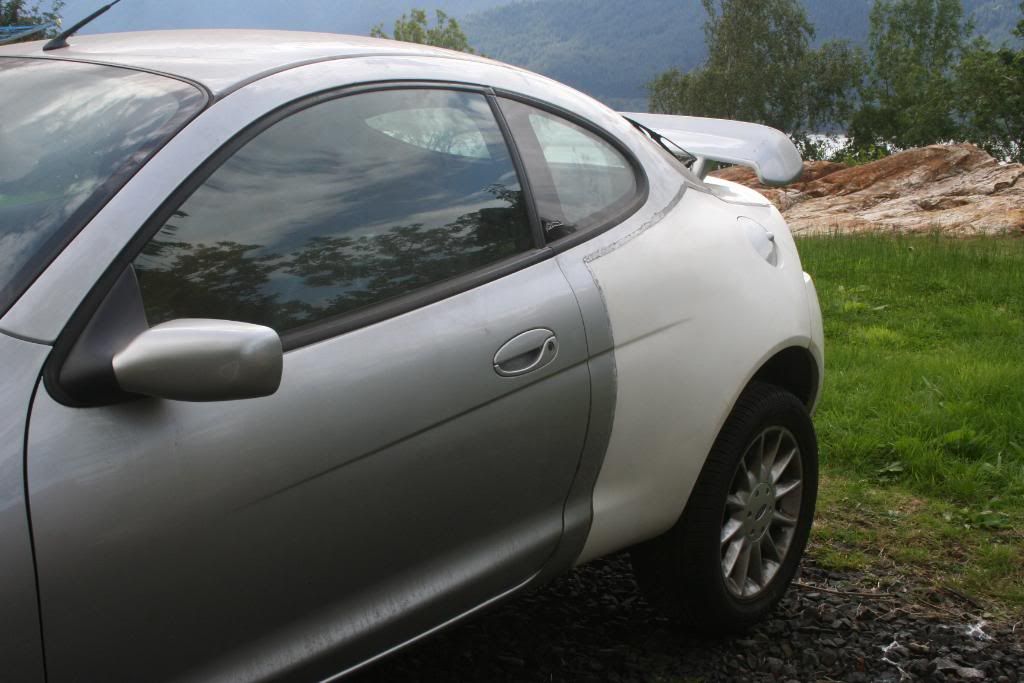
But for now it's onto the front half of the kit first, so these are the final shots of the rear "first fix" which is how it will all look when finished......
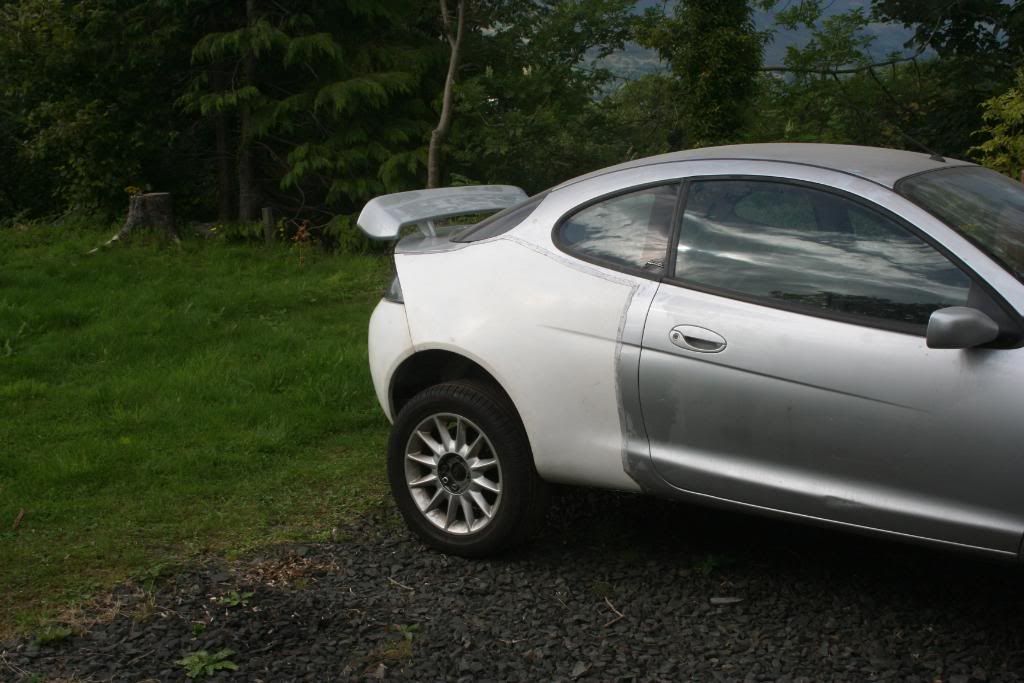
And this is my favourite, I reckon the width and rear wing make it look really evil from behind, here's the shot you'll see through your windscreen, before it dissapears towards the horizon in a cloud of acrid tyre smoke lololol .....

So that was Saturday afternoons effort, in between Coffee and Hamlets
Moving on to today, I stripped off the front bumper, lights and front wings.
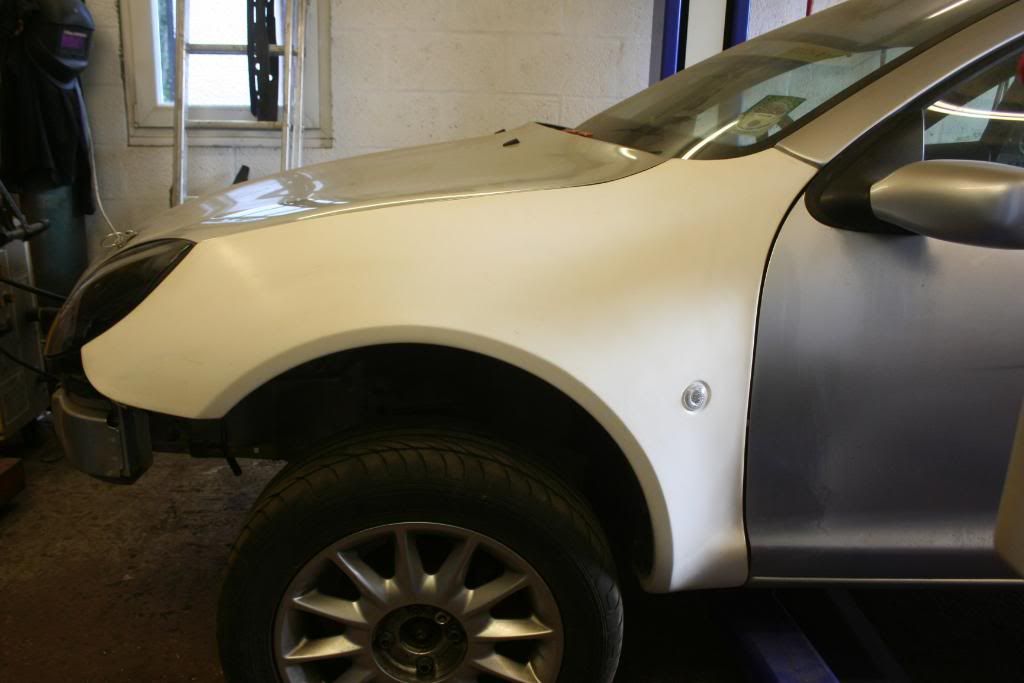
Then got both front wings bolted on, using ALL the original bolt holes, which makes them feel really solid
Then I refitted the headlamp units.....
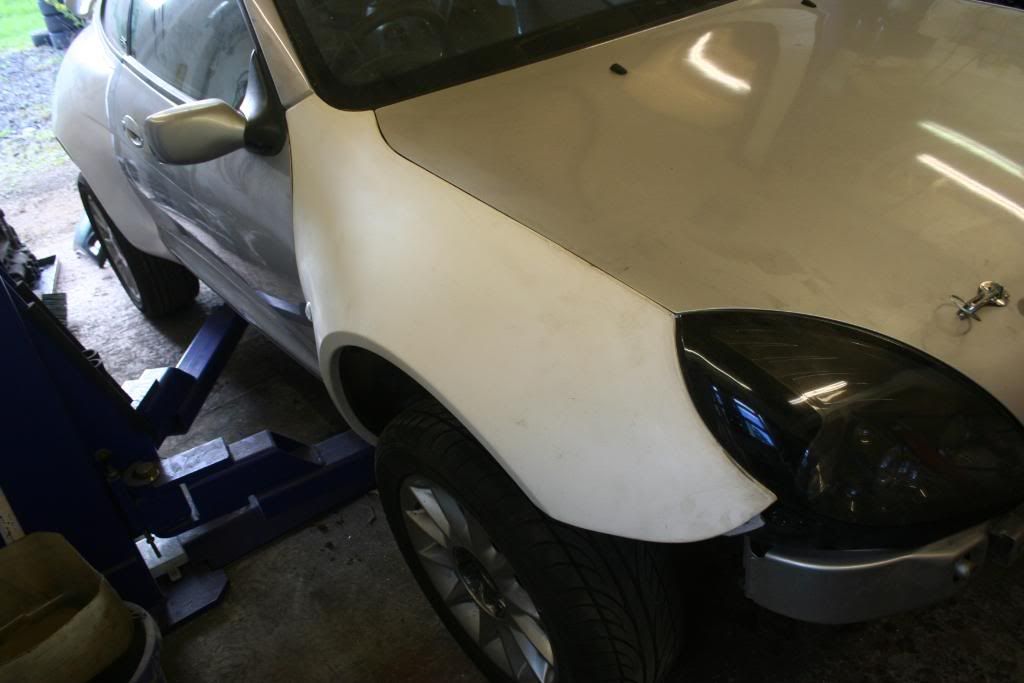
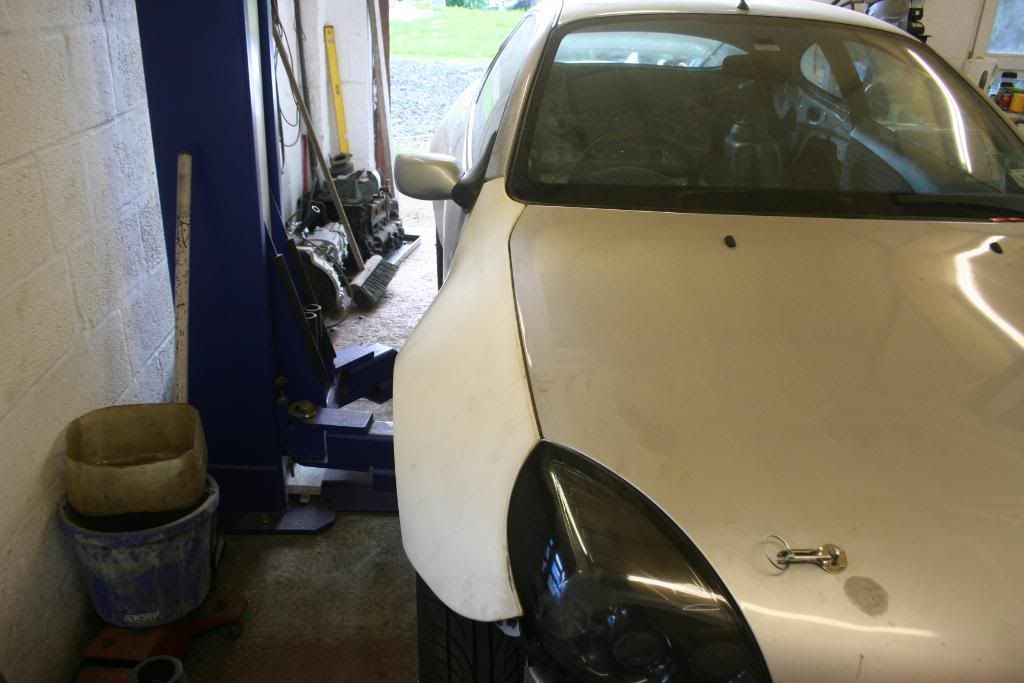
The door gaps and bonnet gaps are great, the only slight dissappointment is the alignment of the wings on the headlamps, but they are both out by exactly the same amount, so I guess the mouldings are just slightly out here. If this was a show car it would really bug me, and I'd spend hours fillering the wings here But ..... as its a Stage Rally Car, I'll live with it. LOL, by the time its had the front spanked a couple of times, I expect they'll line up fine
Before I packed up I had a look see at the front bumper, which looks like it will fit nice.
So hopefully, back to it Tuesday and get the front bumper fitted, and the Cibie brackets done
Cheers Dave
Rear O/S inner wheel tub now all finished and the rear wing and tailgate spring catches fitted, panels all located to their final positions
I will be final fixing these once the stonechip and underseal paintwork is done to the framework and inner arches underneath
But for now it's onto the front half of the kit first, so these are the final shots of the rear "first fix" which is how it will all look when finished......
And this is my favourite, I reckon the width and rear wing make it look really evil from behind, here's the shot you'll see through your windscreen, before it dissapears towards the horizon in a cloud of acrid tyre smoke lololol
.....So that was Saturday afternoons effort, in between Coffee and Hamlets
Moving on to today, I stripped off the front bumper, lights and front wings.
Then got both front wings bolted on, using ALL the original bolt holes, which makes them feel really solid
Then I refitted the headlamp units.....
The door gaps and bonnet gaps are great, the only slight dissappointment is the alignment of the wings on the headlamps, but they are both out by exactly the same amount, so I guess the mouldings are just slightly out here. If this was a show car it would really bug me, and I'd spend hours fillering the wings here
But ..... as its a Stage Rally Car, I'll live with it. LOL, by the time its had the front spanked a couple of times, I expect they'll line up fine Before I packed up I had a look see at the front bumper, which looks like it will fit nice.
So hopefully, back to it Tuesday and get the front bumper fitted, and the Cibie brackets done
Cheers Dave
It's nice to be important but it's more important to be nice !!
#393
- Group: Members
- Posts: 153
- Joined: 14-February 10
- Location:Nottingham
Posted 05 September 2010 - 08:44 PM
getting there mate! I bet you can taste success already
Now being broken. Please check the for sale thread.
#394

- Group: Members
- Posts: 1252
- Joined: 08-January 07
- Location:Hereford
Posted 05 September 2010 - 08:46 PM
getting jealous, there's a few nicer touches, ganna have to get mine in for a rebuild soon as it's working the way i want it to.

All stuff puma - puma technical & all things rebuilt...
See my website for Snow School Information
#395
- Group: Members
- Posts: 583
- Joined: 01-April 10
- Location:NW Scotland Highlands
Posted 06 September 2010 - 11:23 AM
Thanks Guys,
It's actually starting to look like a car now lol
Dave
It's actually starting to look like a car now lol
Dave
It's nice to be important but it's more important to be nice !!
#396
Posted 06 September 2010 - 03:04 PM
that looks pukka. that is a very good fitting kit, do you know who made it?
gather the rear ride hight needs adjustment
gather the rear ride hight needs adjustment
my other toy has 470bhp
#397
- Group: Members
- Posts: 583
- Joined: 01-April 10
- Location:NW Scotland Highlands
Posted 06 September 2010 - 06:45 PM
dawesy, on 06 September 2010 - 03:04 PM, said:
gather the rear ride hight needs adjustment
Lol, yeah, but it's having AVO coilovers all round and will decide what lb springs when its built and I've taken the corner weights
Regards body kityou have a PM
Cheers Dave
It's nice to be important but it's more important to be nice !!
#398

- Group: Members
- Posts: 892
- Joined: 29-May 06
- Location:Sileby
Posted 06 September 2010 - 08:16 PM
looking good! not sure on the rear spoiler tho... what wheels you planning on using?? some nice chunky comps would look awesome!
THE WORLD IS MY RACETRACK
www.charnwoodcarclub.co.uk
www.charnwoodcarclub.co.uk
#399
Posted 06 September 2010 - 08:34 PM
Jay if you read back he is going to be using the wheels that are fitted
#400
- Group: Members
- Posts: 583
- Joined: 01-April 10
- Location:NW Scotland Highlands
Posted 07 September 2010 - 10:14 AM
splice, on 06 September 2010 - 08:34 PM, said:
Jay if you read back he is going to be using the wheels that are fitted
Yep, Scorpio Cossie 16" mainly because I have 2 sets of them, the offsets are correct and I like the 12 spoke look on my Puma.
Might retain the 15" Props to put chunky Gravel tyres on, or better still find a set of 15" 12 spokes with the same offset as the 16's.
15's do still (just) fit over the brakes
Cheers Guys,
Dave
It's nice to be important but it's more important to be nice !!


