
 Help
Help


Firstly, if you’re attempting this make sure you realise what you’re in for!...
The gearbox is a damm heavy lump, and if it falls down awkwardly on you, it could be quite nasty!...
Decide whether you’re going to replace the lost gearbox oil which leaks out the driveshaft, or all of it. You’ll need around 2.6-2.8 litres of 75-90 gearbox oil if you tip the gearbox to one side and drain it all
Some of the tools needed are.
13mm spanners and sockets on 3/8 and 1/2” drives + wrench
18mm spanner
Ideally new CV Boot straps..and boot strap pliers
Medium moly CV Grease
Gearbox oil 75-90 semi or fully synth (up to 2.8ltr may be required)
Axle stands and ideally a couple of jacks
Clutch alignment tool (not expensive and worth having)
Heavy duty breaker bar with 32mm socket (3/4 “ drive works well)
Some top up brake fluid either Dot 4 or 5.1 (1/2 ltr is plenty)
Torx Key size 50
Impact gun
8mm socket with small 3/8 wrench
8mm Hex key for fill/overflow plug
---------------------------------------------------------
Firstly, before you jack up the car high, crack the driveshaft to hub bolts, just to get them moving..(good idea to have new nuts on re-fitting). I had to remove my wheels to get the center caps off, then put them back on again….use a good quality breaker bar, ideally with as little extension as possible.. With my 3/4" breaker bar and adapterI JUST managed to clear the wheel for a VERY good purchase on the nut… have the car jacked just slightly, so that the weight is taken but the tyre grips the floor enough so the wheel doesn’t spin..
Get the car as high as you feel you dare, and spend time making sure your happy with the axle stand support
Now you can begin
Remove wheels
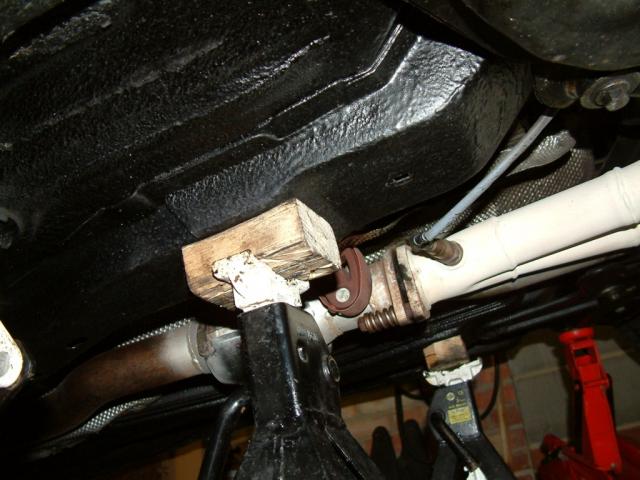
Undo Bottom ball joints; using Torx key and spanner around the pinch bolts (could be very seized!).. use jack and small block of wood to raise the brake disc by 1-2” then bash down on the suspension arm with block of wood to expose the ball joint..(without raising the arm slightly, no amount of bashing may free it!) pull the disc away, so the joint doesn’t fall back in.
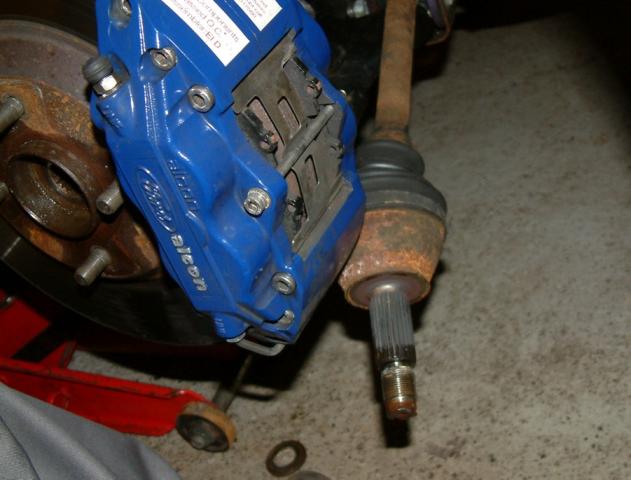
Use an impact gun and 32 mm socket to remove the large hub nut...tap the CV Joint/driveshaft through the other side of the splines and let hang...
Remove the two support bolts for the intermediate shaft(offside) then tap it away from the gearbox, making sure you can catch the gearbox oil which is about to pour out
Remove boot clip on the tripod housing, and pull the nearside shaft away completely. Cover bearing with latex glove or similar...
Undo 2 bolts and remove gearbox roll resistor
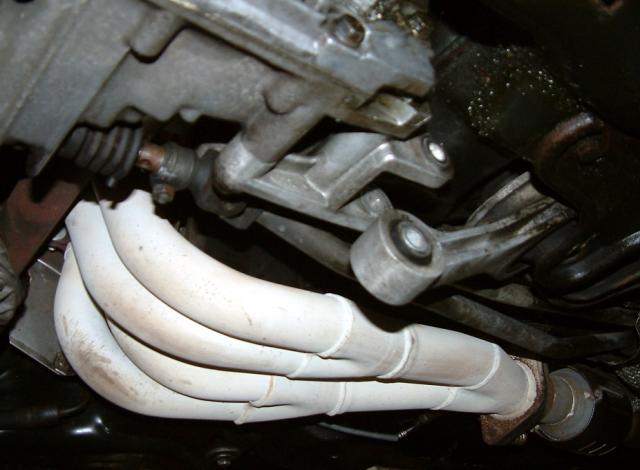
Undo and let hang the two ‘poles’ for the gearstick linkage... Mind not to round off the small nut! (Heat may be needed if seized)….ideally replace M6 nut with stainless one!
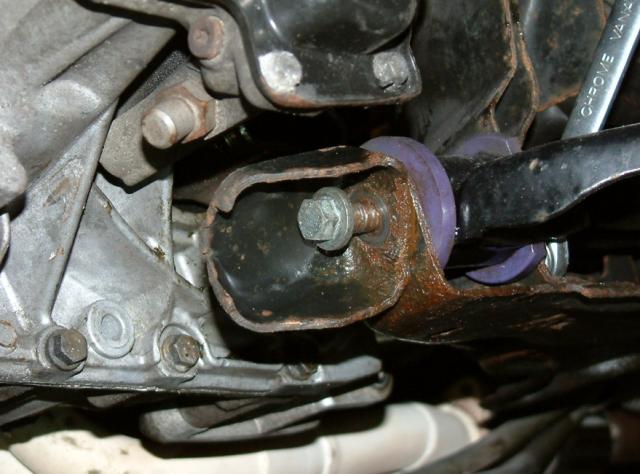
Remove driveshaft stabiliser... (This could be a SERIOUS pain in the butt if it’s been left for years!) Re-insert bolt loosely (no need to move the arm)..
Remove the Battery and tray
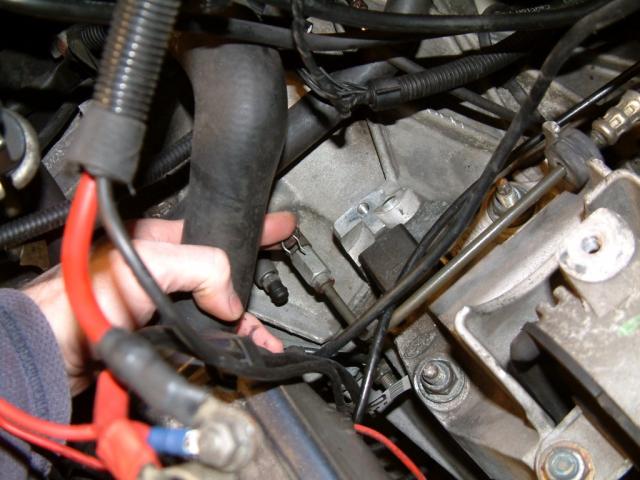
Lift the circlip up from the brake fluid feed pipeinto the gearbox and remove the pipe.... quickly tie it up out the way (slightly higher than the fluid reservoir!..)
Remove the speedo cable.. a pair of grips may be needed to get it started if it hasn’t been undone before..
Remove the earthing leads and reversing switch plug connector
For even more room, remove inlet hose and airbox assembly
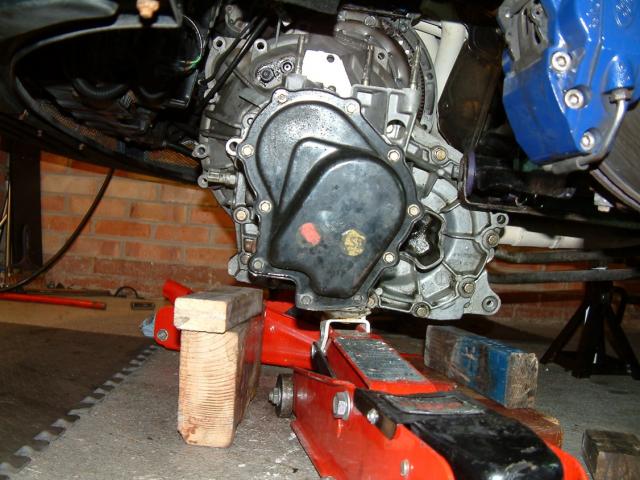
Now support the engine and gearbox....
Undo the gearbox to chassis mount...
Go round the gearbox and remove bolts... all M10 bolts with 13mm flanged head
4 x M10 x 35 round the bottom
1 x M10 x 45 just above intermediate shaft entry
2 long bolts (95 & 110) + bracket at front..
1 x M10 x 65 + coolant hose support bracket at front
2 x M10 x 35 at top + bracket (speed sensor)
1 M10 x 60 round the back near manifold…(seriously awkward bugger to get at!)
When these all undone, bobs ya uncle!.. separate the gearbox from the engine...
The engine must be tilted a few degress to help....(keep it supported tho)..
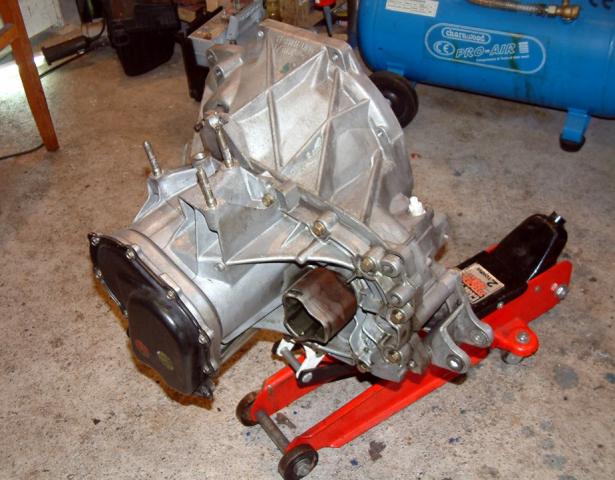
Keep the gearbox steady as you lower it to the floor...either you are feeling strong, or like me, lowering it with the aid of a jack..
Once on the floor...time for a well earned cuppa!....
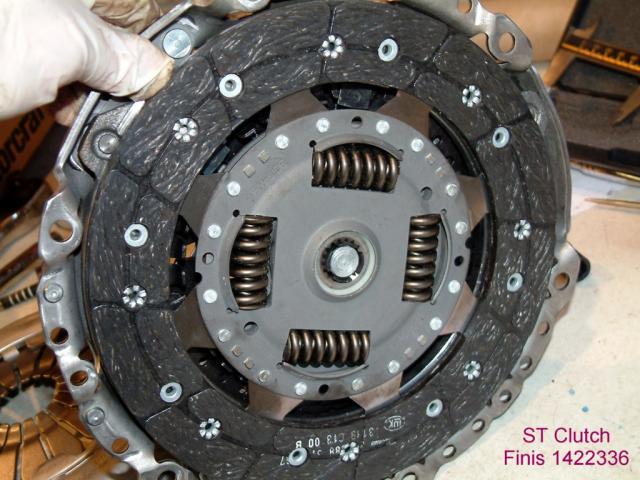
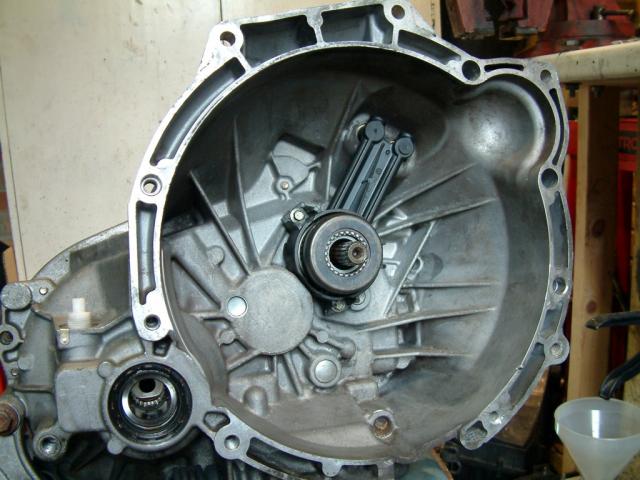
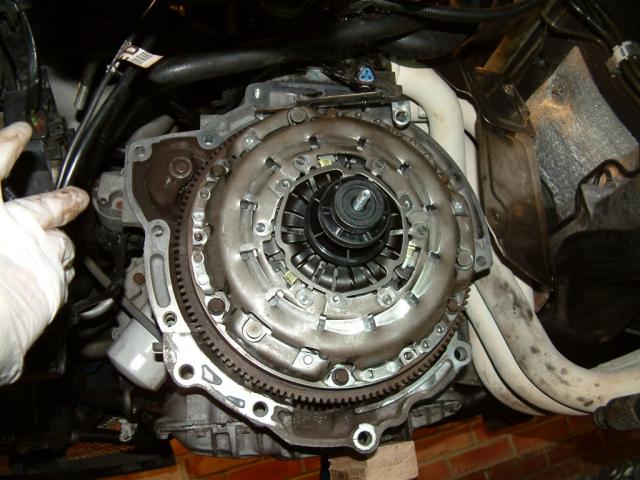
Replace the release bearing, (don’t even think about ‘just’ doing the clutch..lol).. using 8mm bolts... clean out any excess muck or debris in the bell housing..(brake cleaner works well)... apply small amount of grease to the end of the input shaft to help re-entry of the gearbox into the friction plate...
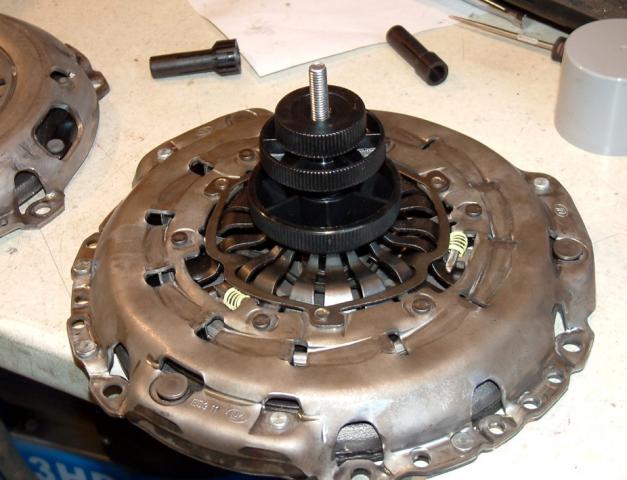
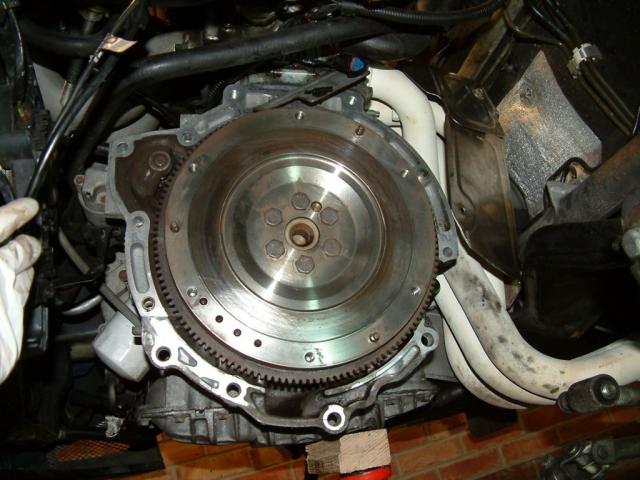
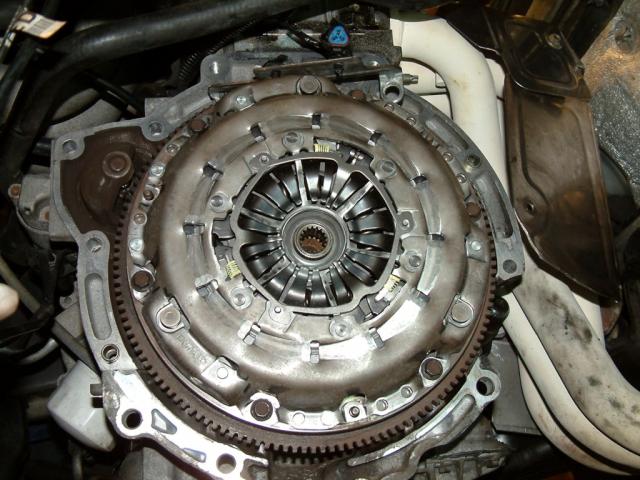
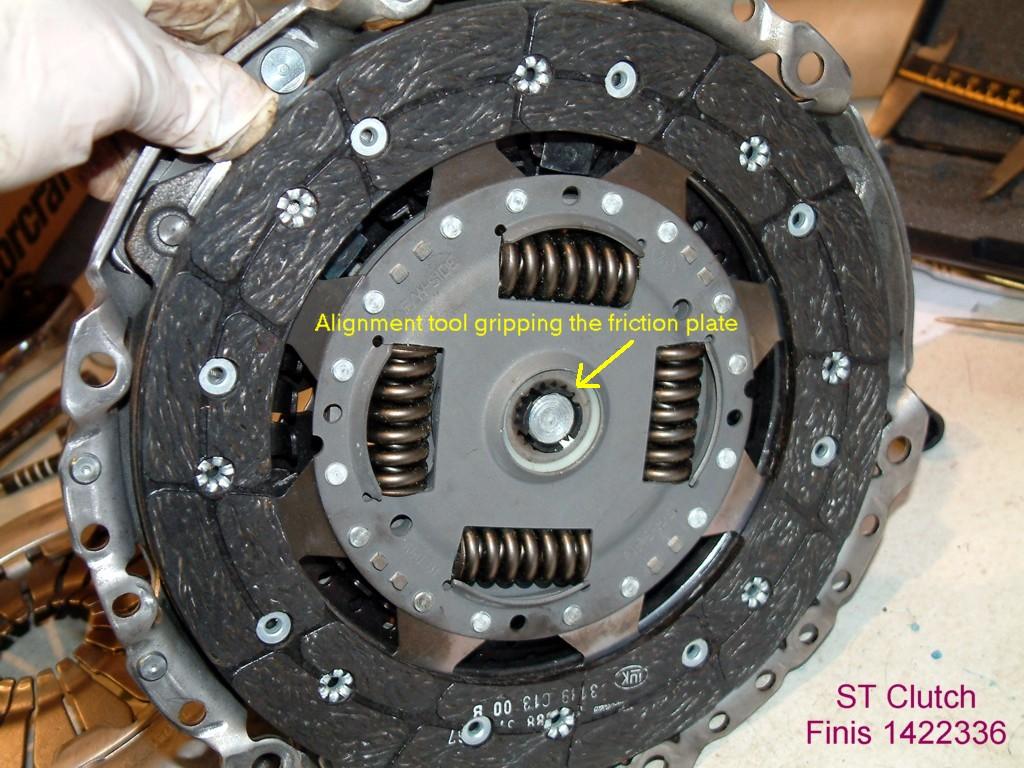
Assemble friction plate and cover plate together..(ensure friction plate is correct way round) with aid of alignment tool...this will ensure friction plate stays inline whilst cover plate is being bolted up to the flywheel....cleen off flywheel, with garnet paper and plenty of brake cleaner... Bolt clutch assembly to the flywheel, ensuring the correct locating holes are observed so there is no movement in the cover plate...undo the alignment tool which should then slip straight through the whole assembly leaving the friction plate perfectly in the middle of the cover plate...phew, hope that explains it... The alignment tool took me a while to work out as there are different collars to choose from.. notice on the picture, the tool only just pokes through the other side!...
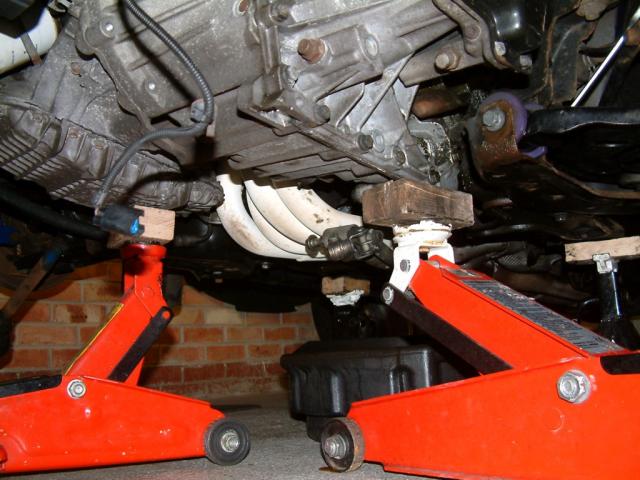
Find your gearbox’s balancing point....This can be very handy when jacking it up back to the engine... The gearbox is very side and back heavy so adjust accordingly...i used a couple of blocks of wood first, then got my jack underneath...let the jack do the hard work! Inch your way up to the engine, but keep it a good few inches away... When you think your about right..have a good look ALL ROUND the gearbox to see if you are in line..(needs to be pretty accurate)... Then shove it forward, wiggling slightly as you go trying to locate the friction wheel... This can take minutes or hours..lol once you have located the splines, quickly get a couple of easy bolts back in and begin the process of rebuilding the lot back again....
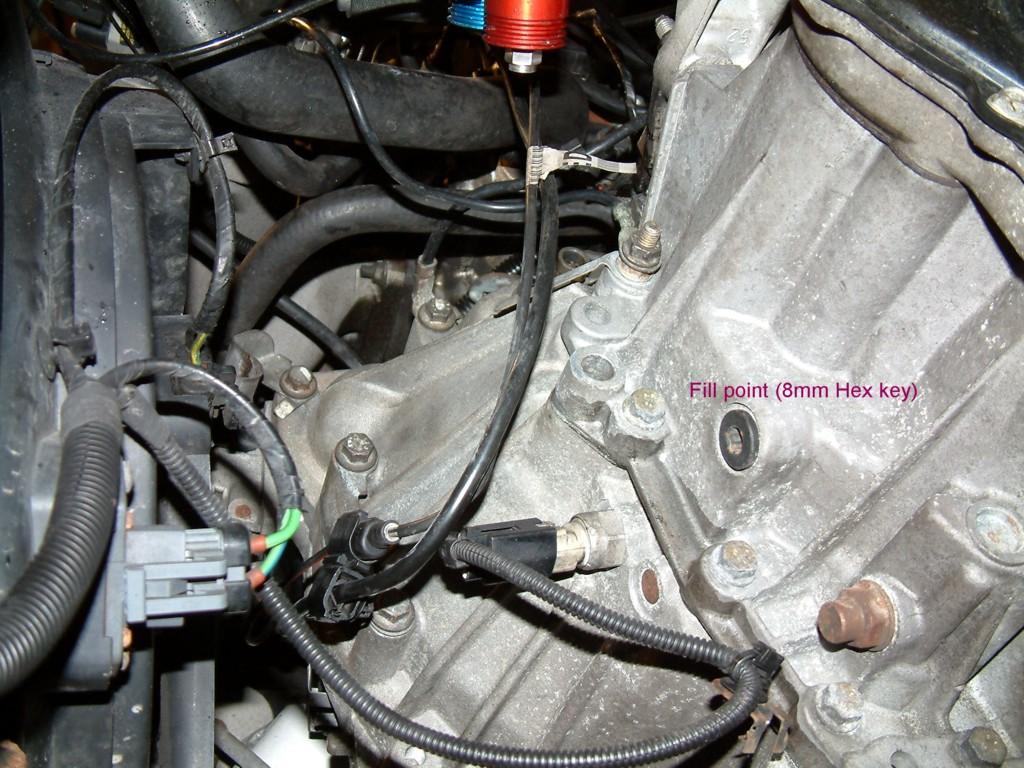
Use the hex key plug at the front to refill the gearbox...it’s supposed to be a cm or two down from the plug, but unless your superman, it’s kind of hard to tell..so just measure how much your putting in...if you’ve drained it off, your looking at around 2.5ltrs..+ a bit more.
With it all back up and running you’ll feel like you’ve conquered the world....


 the pipe i ordered fitted perfectly into the bearing but matching it up with the puma pipework was not possible...


 />
/> 


