Pumapeople: Work On #246 - Project 2010 - Pumapeople

Jump to content

  • 2 Pages +
  • 1
  • 2
  • You cannot start a new topic
  • You cannot reply to this topic

Work On #246 - Project 2010 Rate Topic: -----

#1 User is offline   eldoodarino 

  • Group: Moderators
  • Posts: 6257
  • Joined: 12-March 03
  • Location:Nottingham

Posted 20 July 2010 - 09:09 PM

Havn't got time to do the full write up tonight as i'm soooo knackered...lol

Mike brought his car to me to strip off the underside and do a 'corrosion job' and coating on the underneath...

well, it has now turned into a bit a summer mission as a few things have cropped up... :roflmao: so i thought it deserved it's own 2010 project thread... :good:

Firstly...

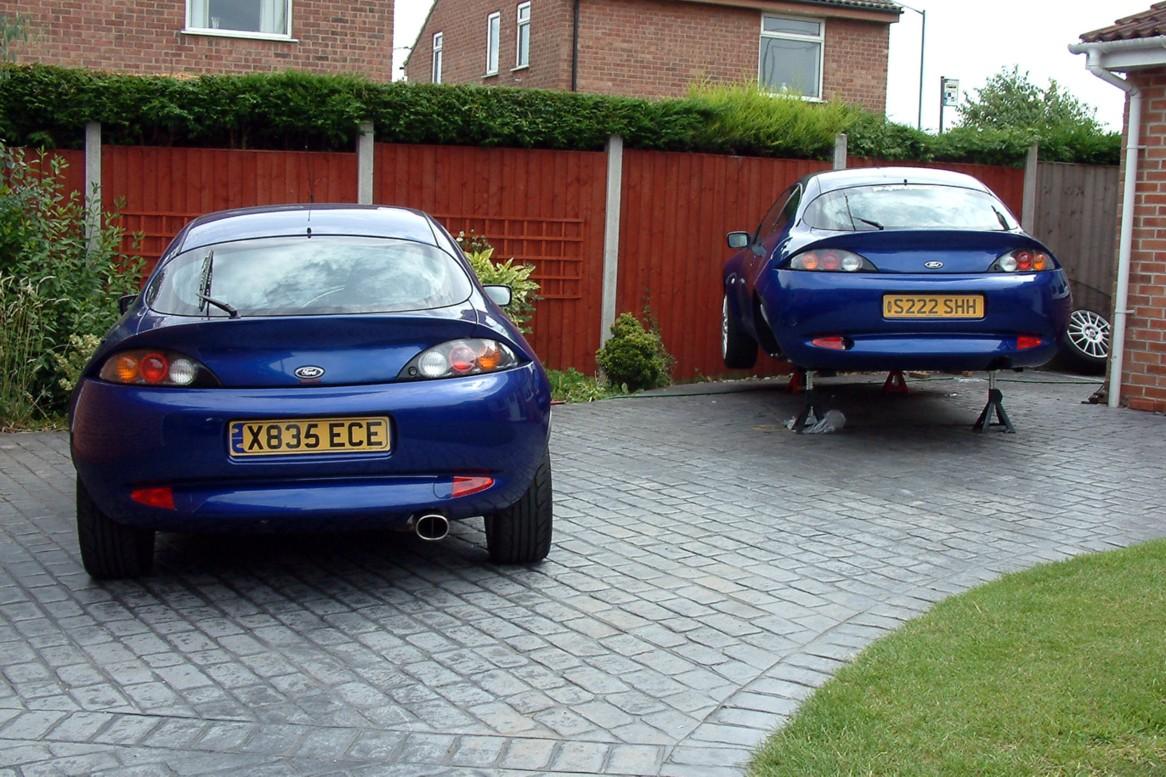
jack up the car nice and high and go and buy an extra set of axle stands..lol

not every day you see a two FRP shot like this one... :lol:

Posted Image

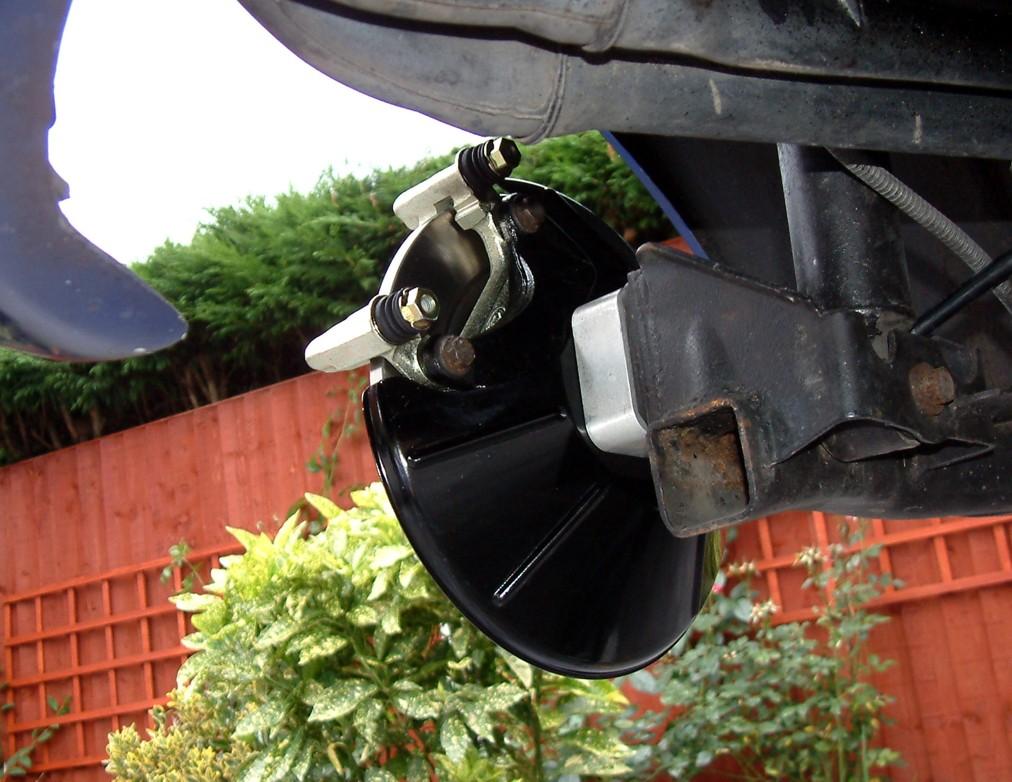
Mike did ask if i could give the rear calipers a look at too and a lick of paint... this is where the fun begain...

the discs on both sides of the rear only had half the pad on them so i suspected straight away that something was up with the mounting arm of the caliper...

as it turns out, one was completly seized on one side and the other side had LOADS of play in it... quick dash onto Ebay and wa lucky to find someone selling re-manufactured ones....save spending £150 on two new ones..eek

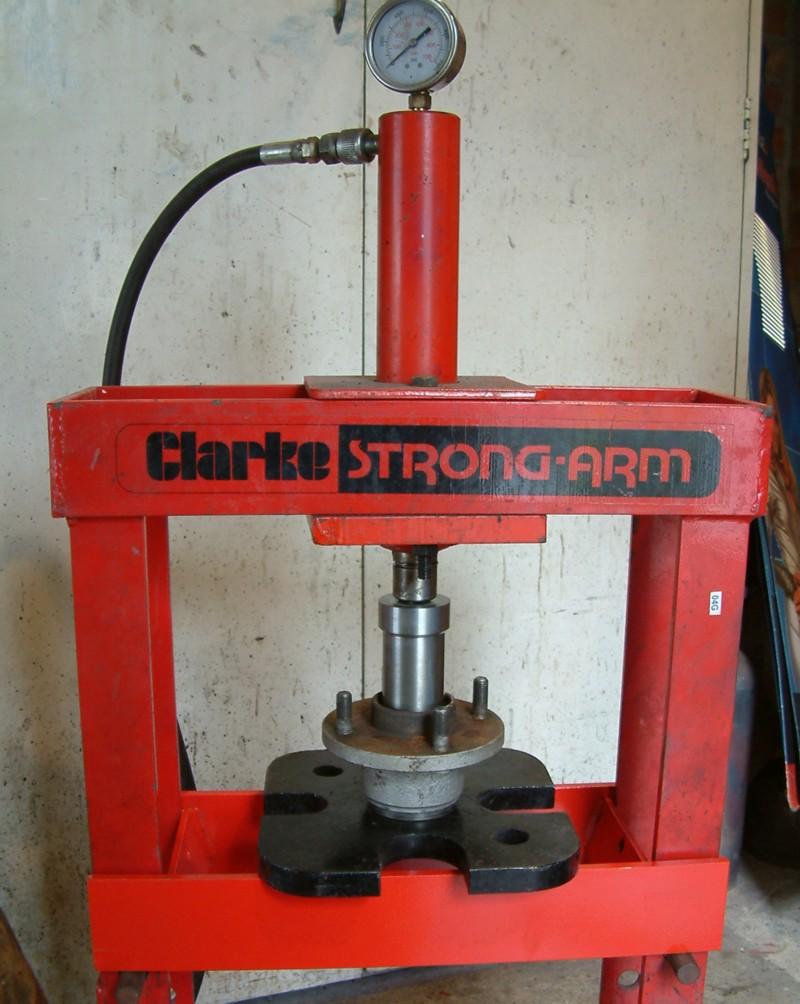
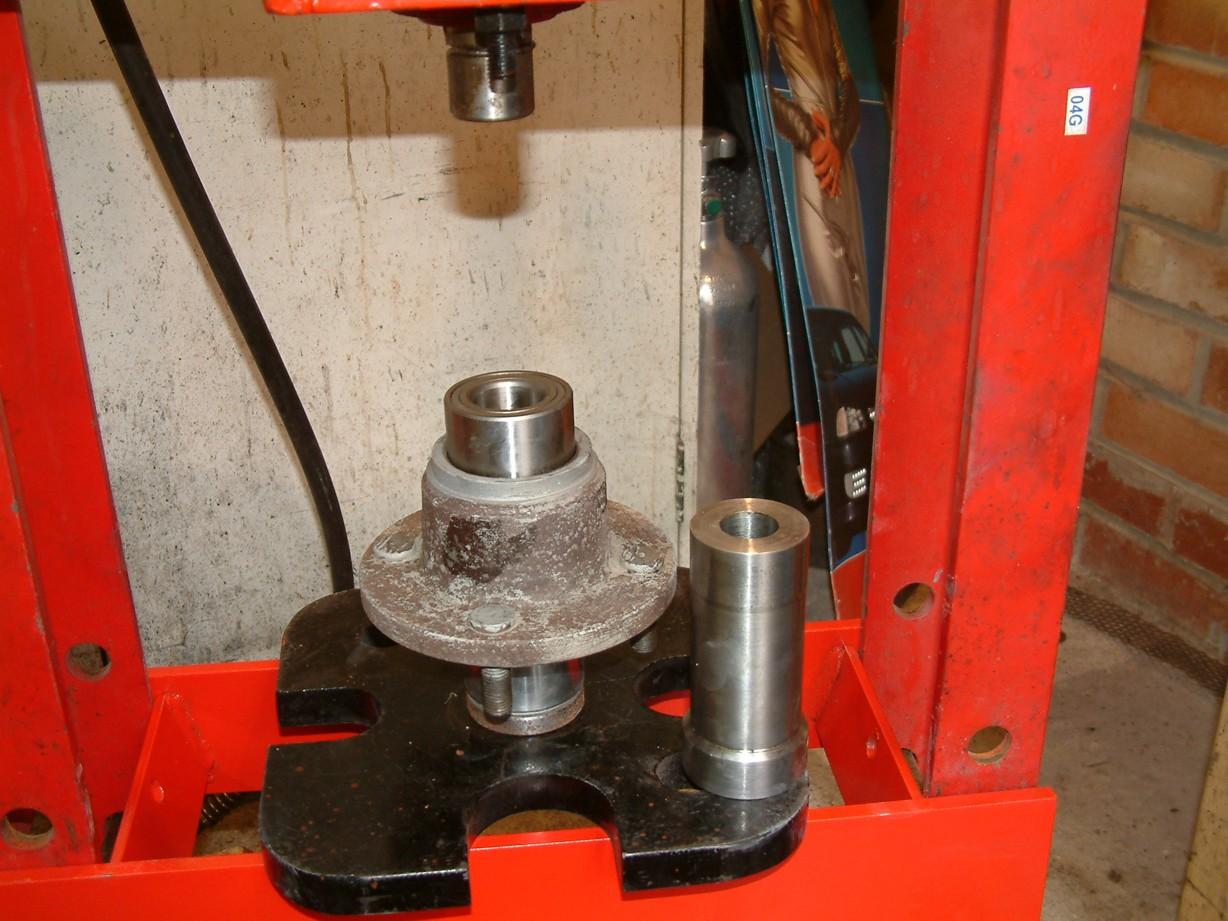
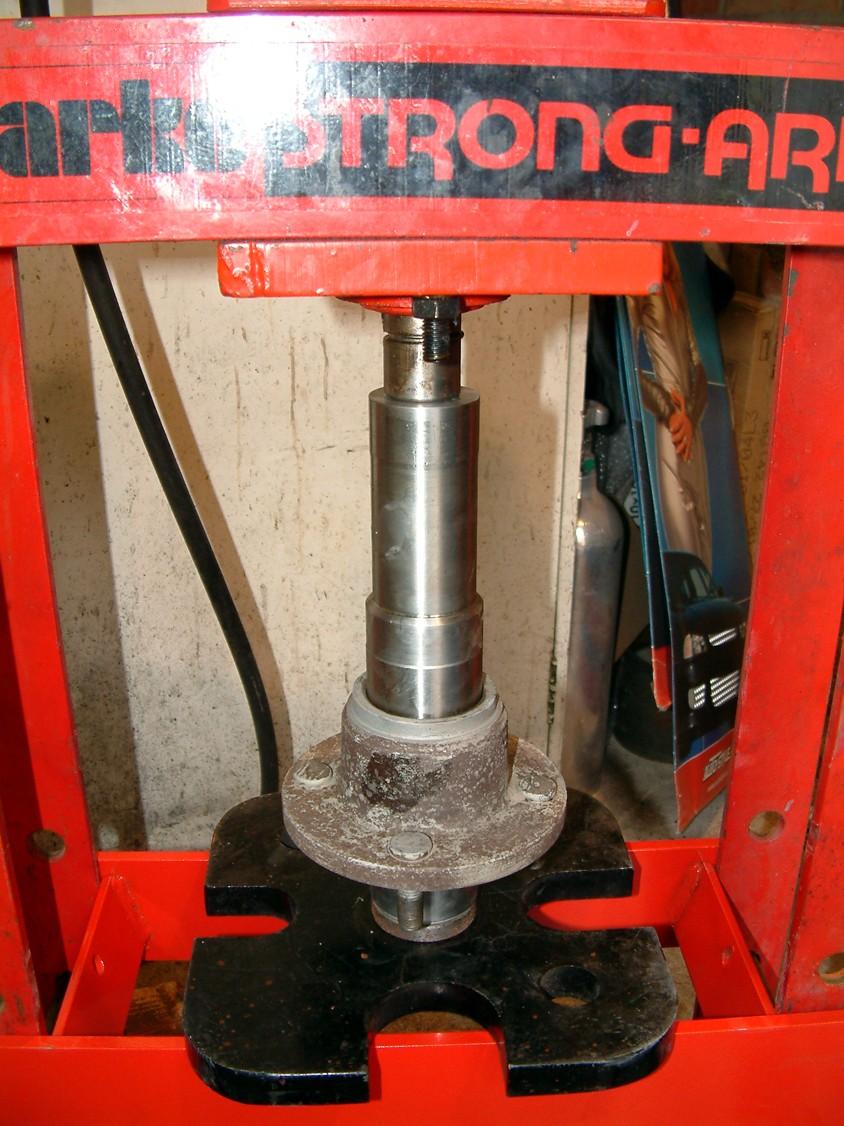
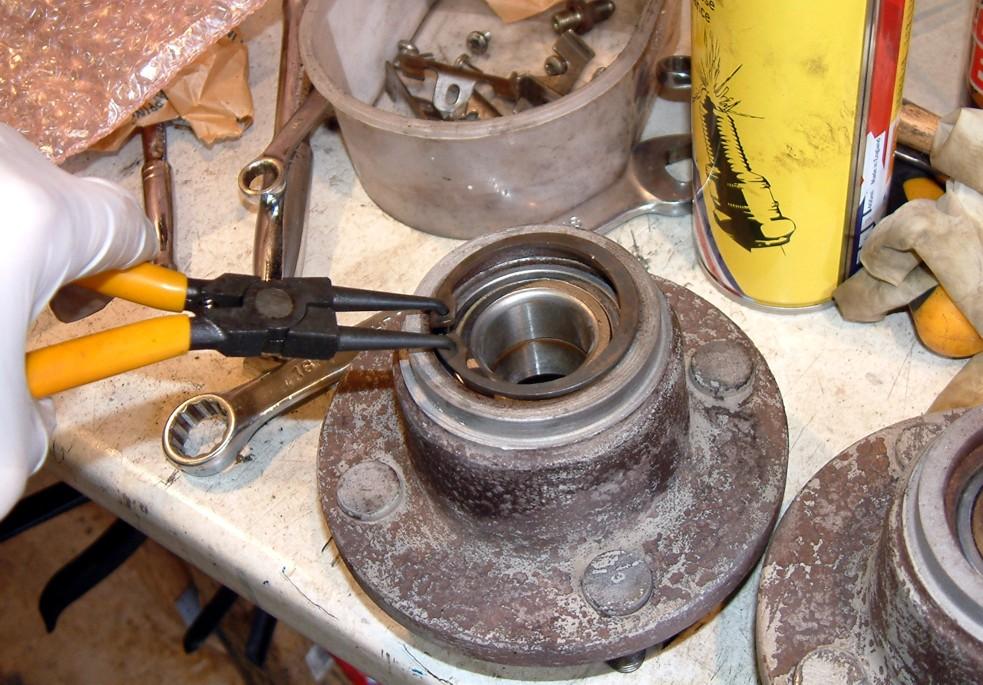
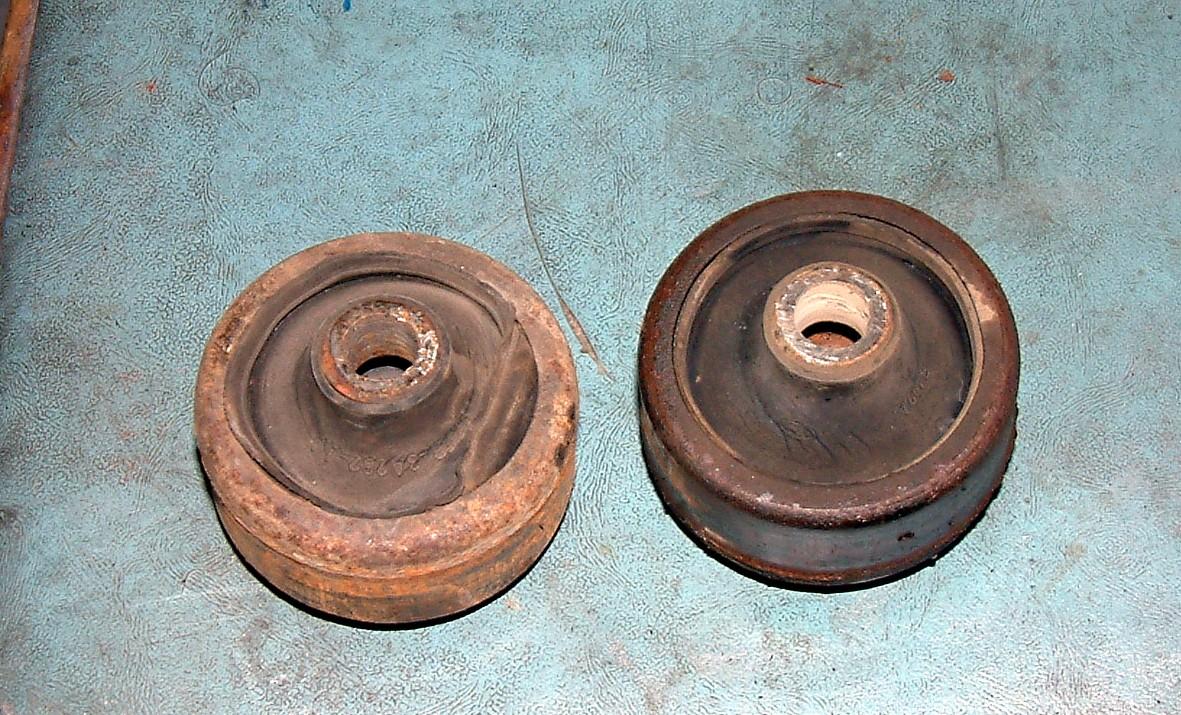
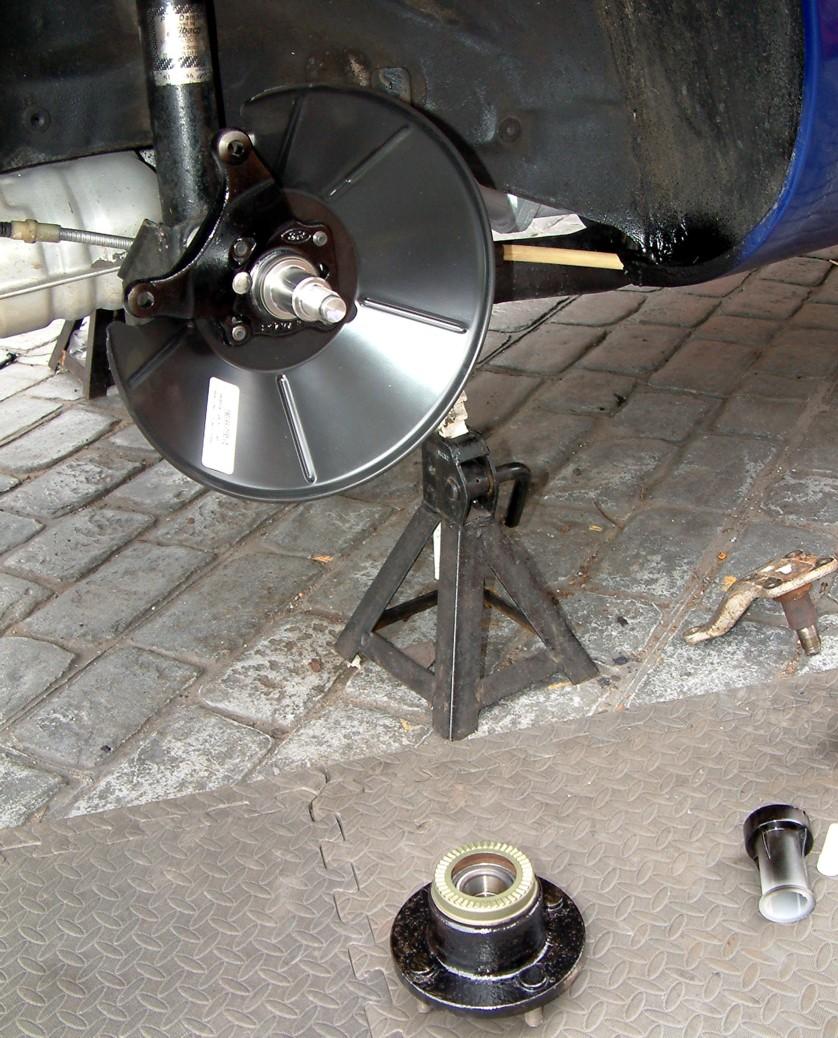
Mike had already had bigger spacers fitted to the back...unfortunatly the guy that did these slightly butchered everthing he touched as when i dug deeper and removed the hubs... it was clear there were no seals at the back of the spindle and so the bearings are heavily spoilt with muck and rust :wacko:

Posted Image

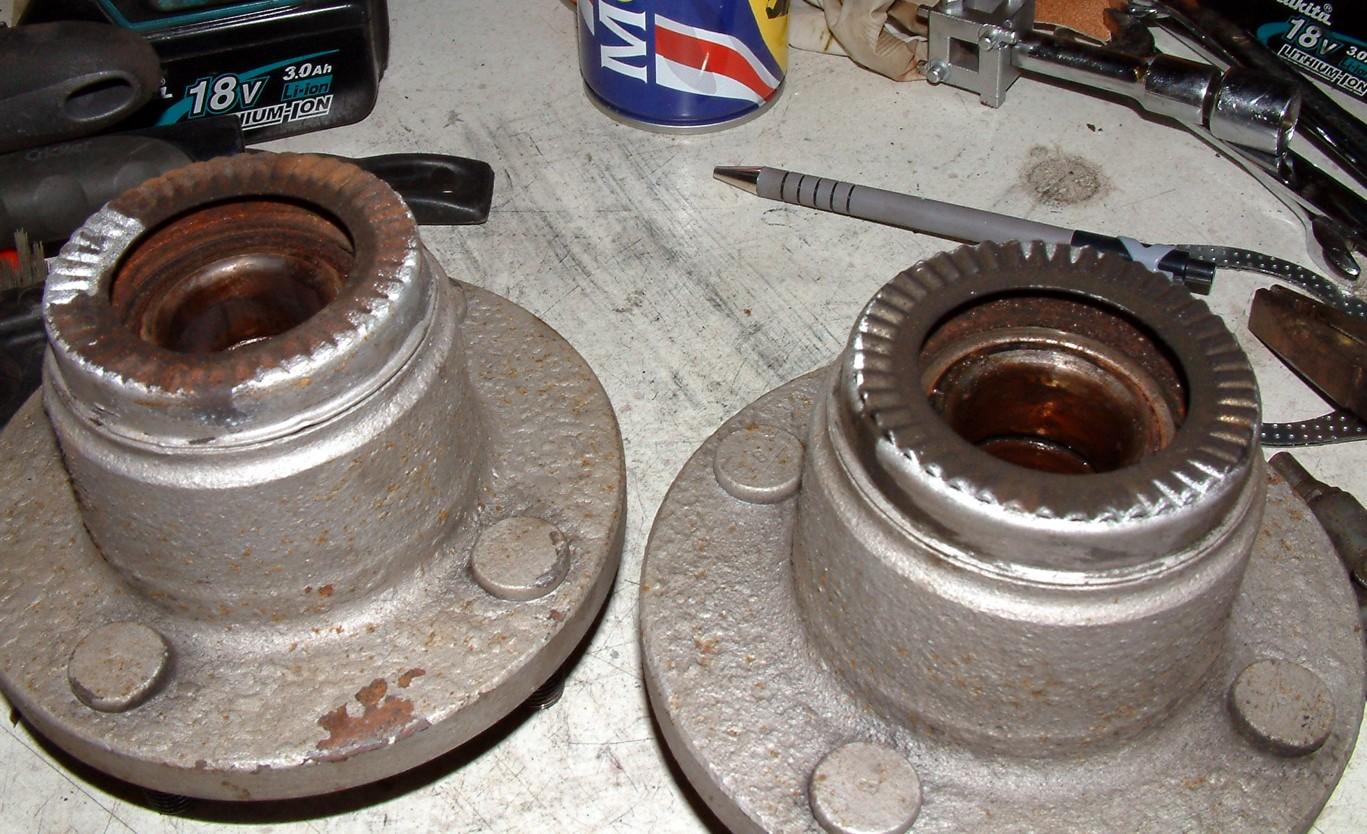
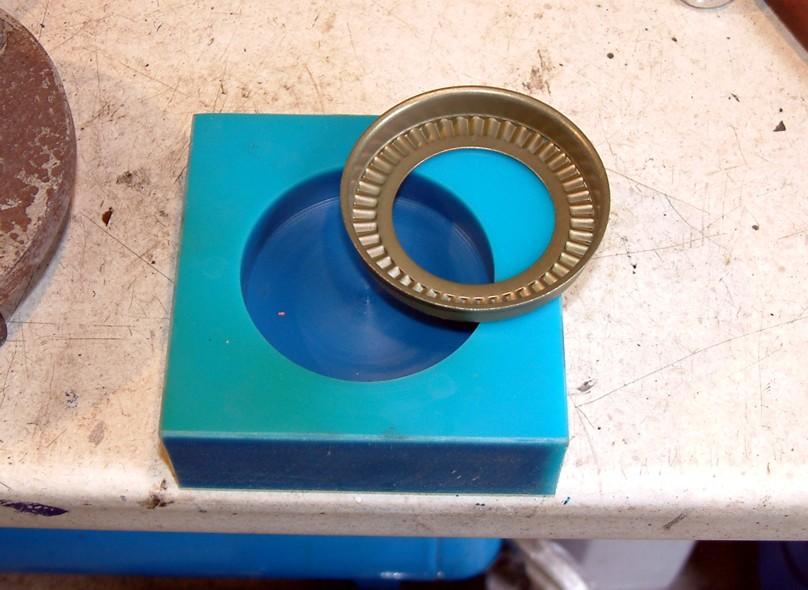
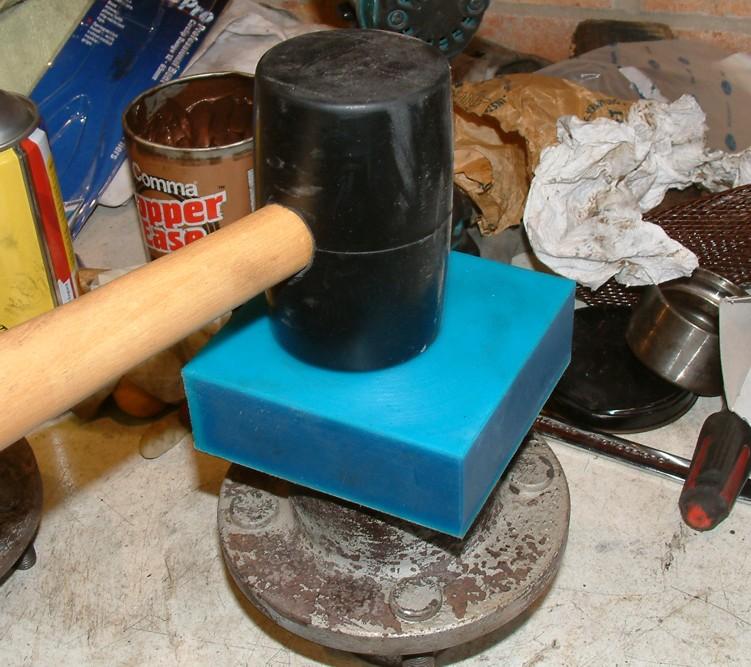
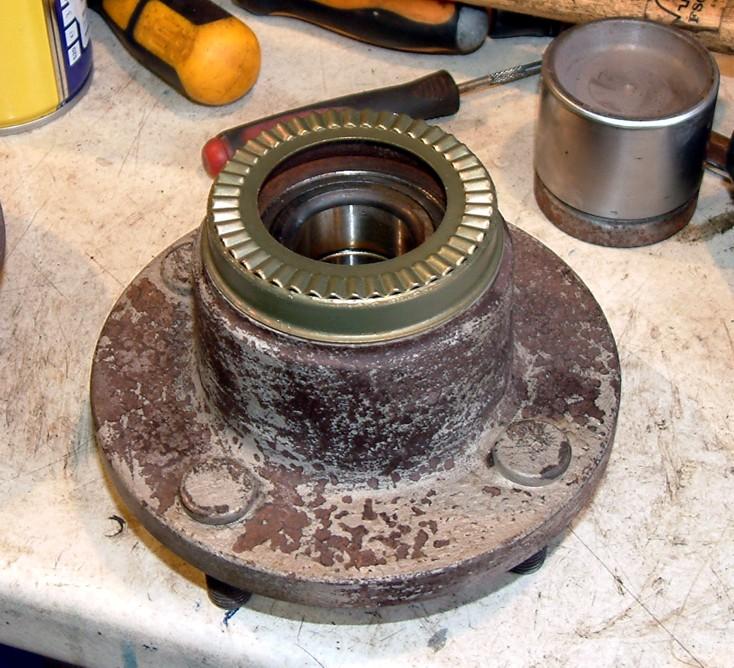
So now we're into new spindles, bearings and a couple of ABS tone washers too.... :blink:

I was going to replace the handbrake too...but after removing it, it seemed pretty free on both sides... :good:

Over to the exhaust....

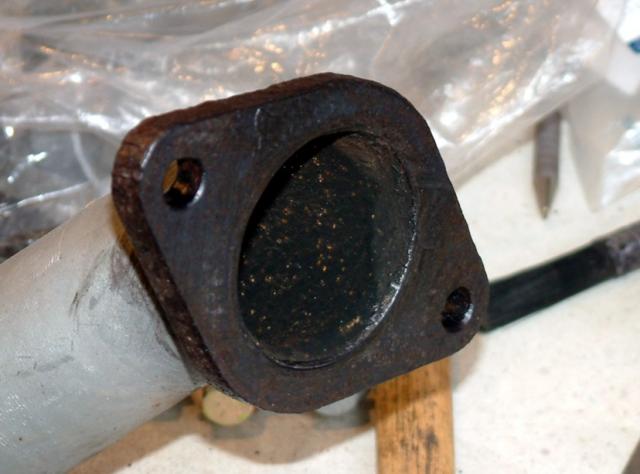
The flange on the Miltek manifold is so wonky it's untrue... makes my new Janspeed one look straight..lol so the joint on the O-ring is very cok-eyed ...god knows how it sealed.. :mellow: ...one of the bolts snapped on removal.. :angry: that was fun today.. :wacko: also, at the back box... another bolt just wouldn't make it back all the way through the thread and broke off... at least with this one, you can put the center section in a vice and get a good hand on it to drill it out....so no big deal on this one...

i tapped off the crusty collections of rust with a toffee hammer and then used some Hydrate-80 rust converter on various parts, and then touched it up with some paint.... should keep it sweet for another year or two...

Posted Image

Posted Image


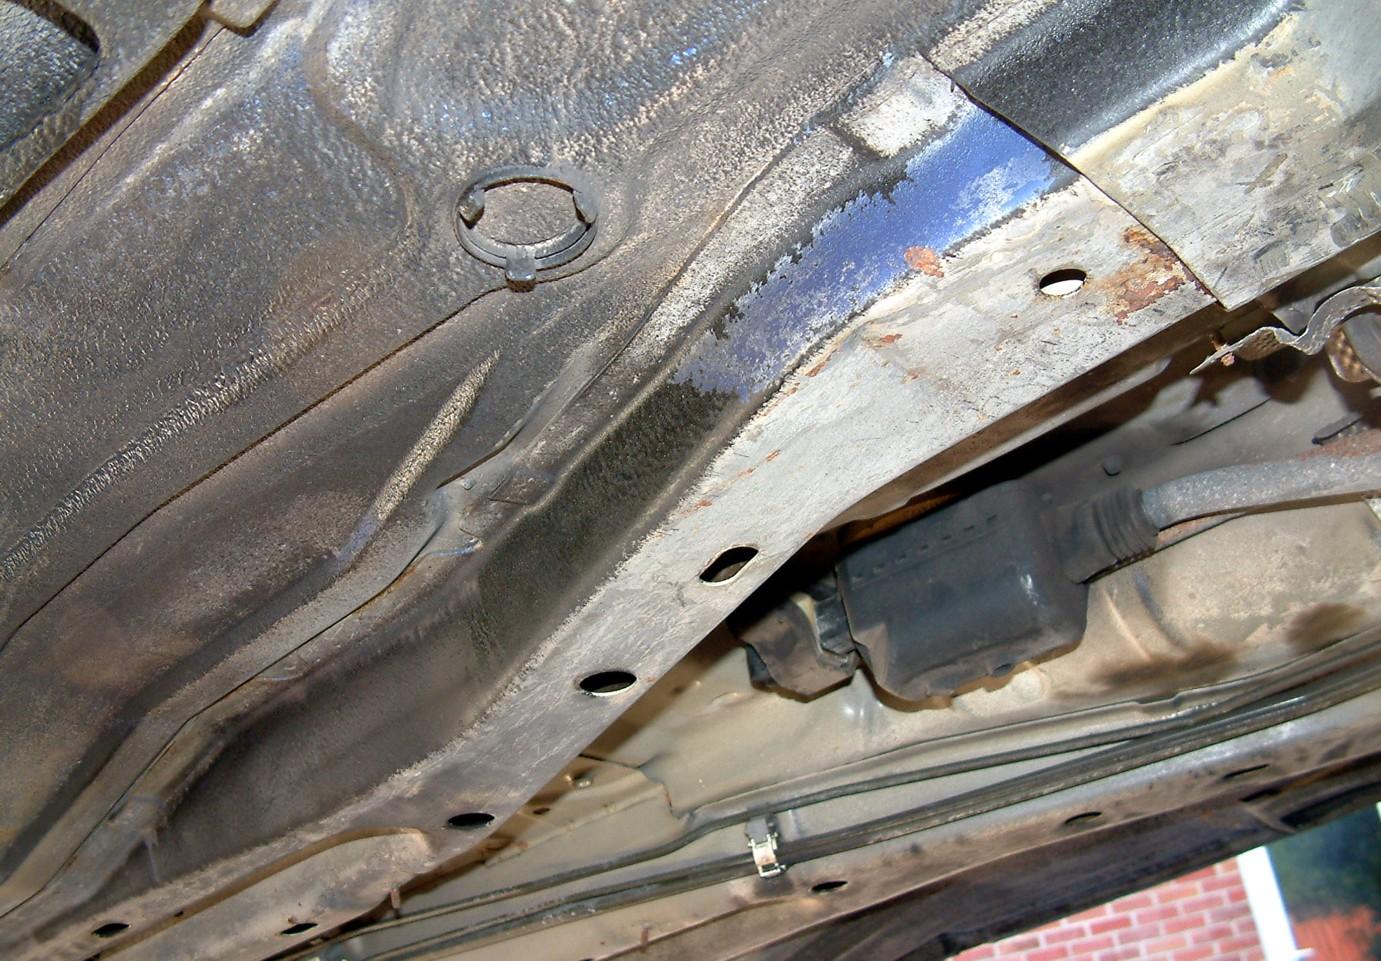
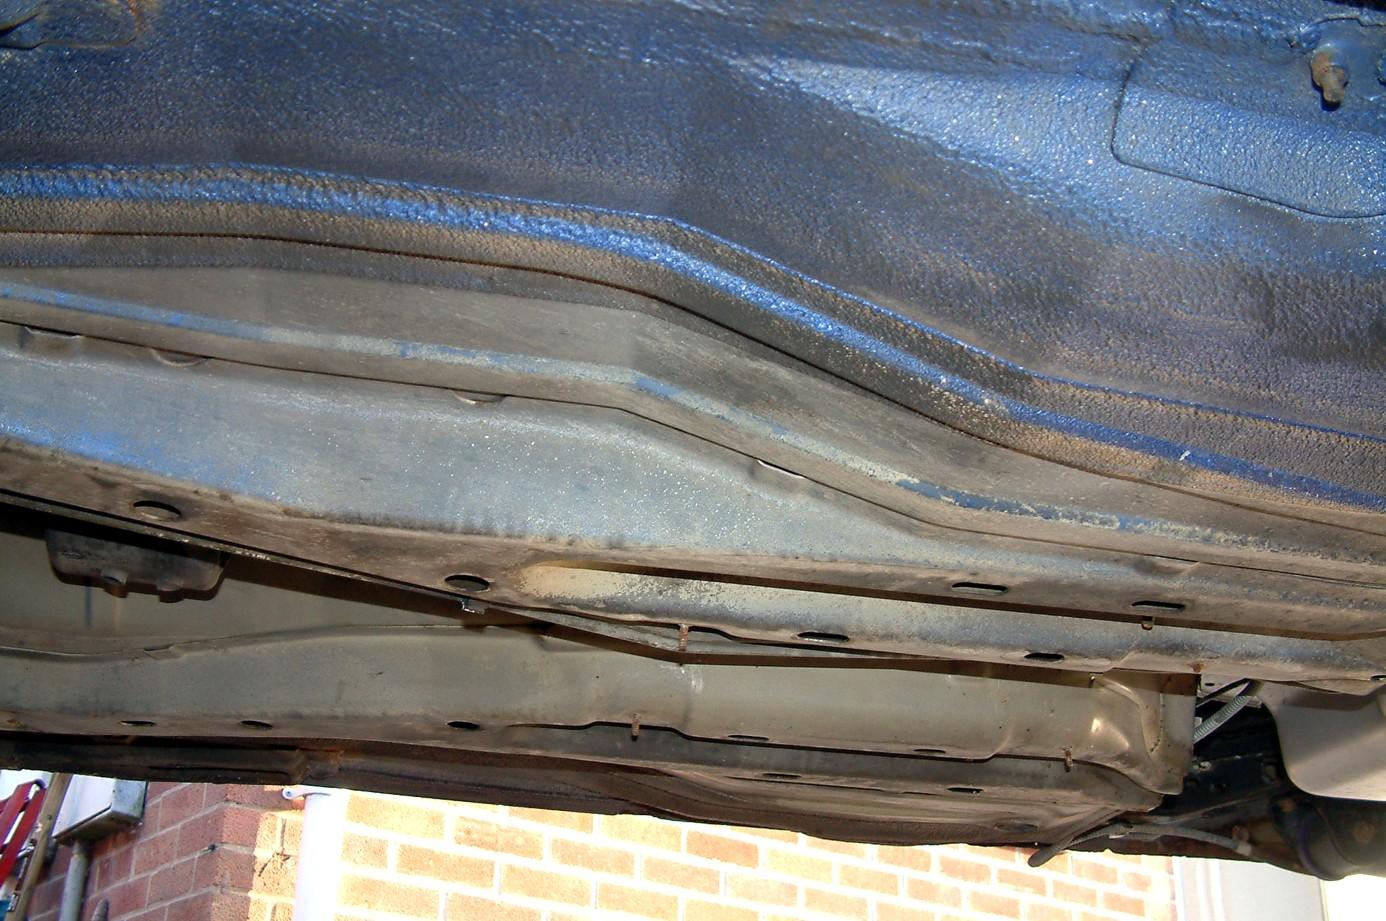
After dismantling the exhaust and heatseilds etc...

i sprayed the whole underneath in GUNK... and jet washed the hell out of the underneath... i was absolutly soaked afterwards...and stank of Gunk too...lol what a sight!... came up nice and clean tho.... :)

Posted Image

Posted Image

:cool:

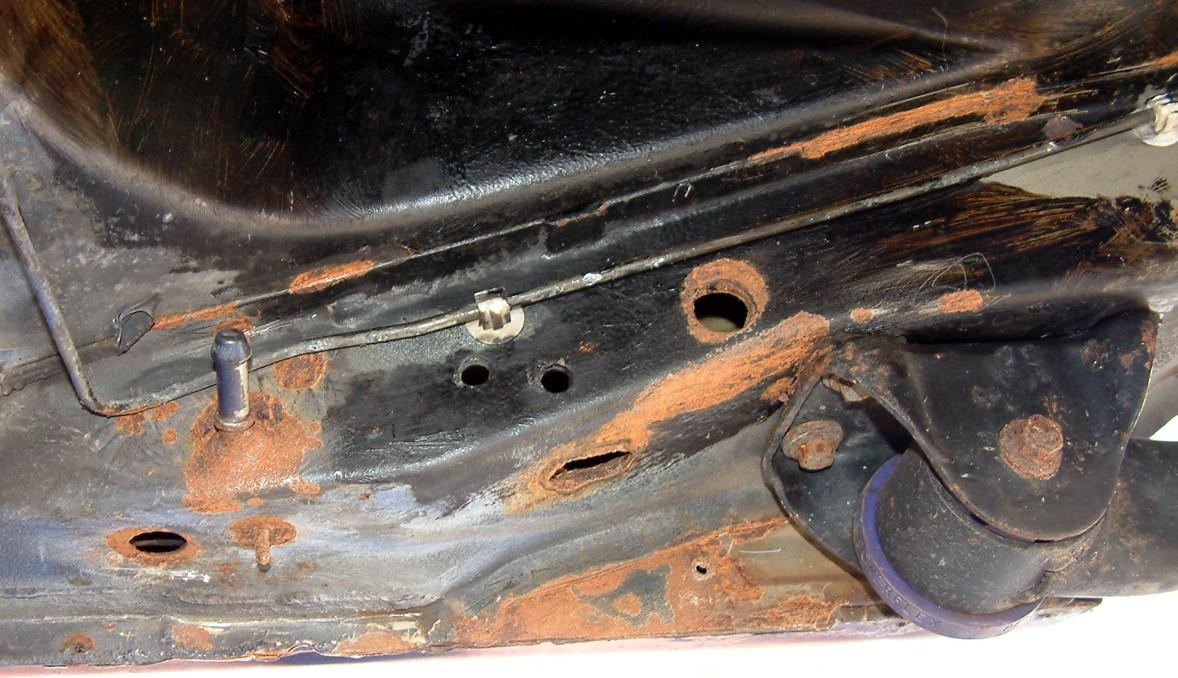
Mike had already done a coating in the spare wheel area... trying to scrape this off and expose the rust was a nightmare... got all in my hair and eyes...lol

Posted Image

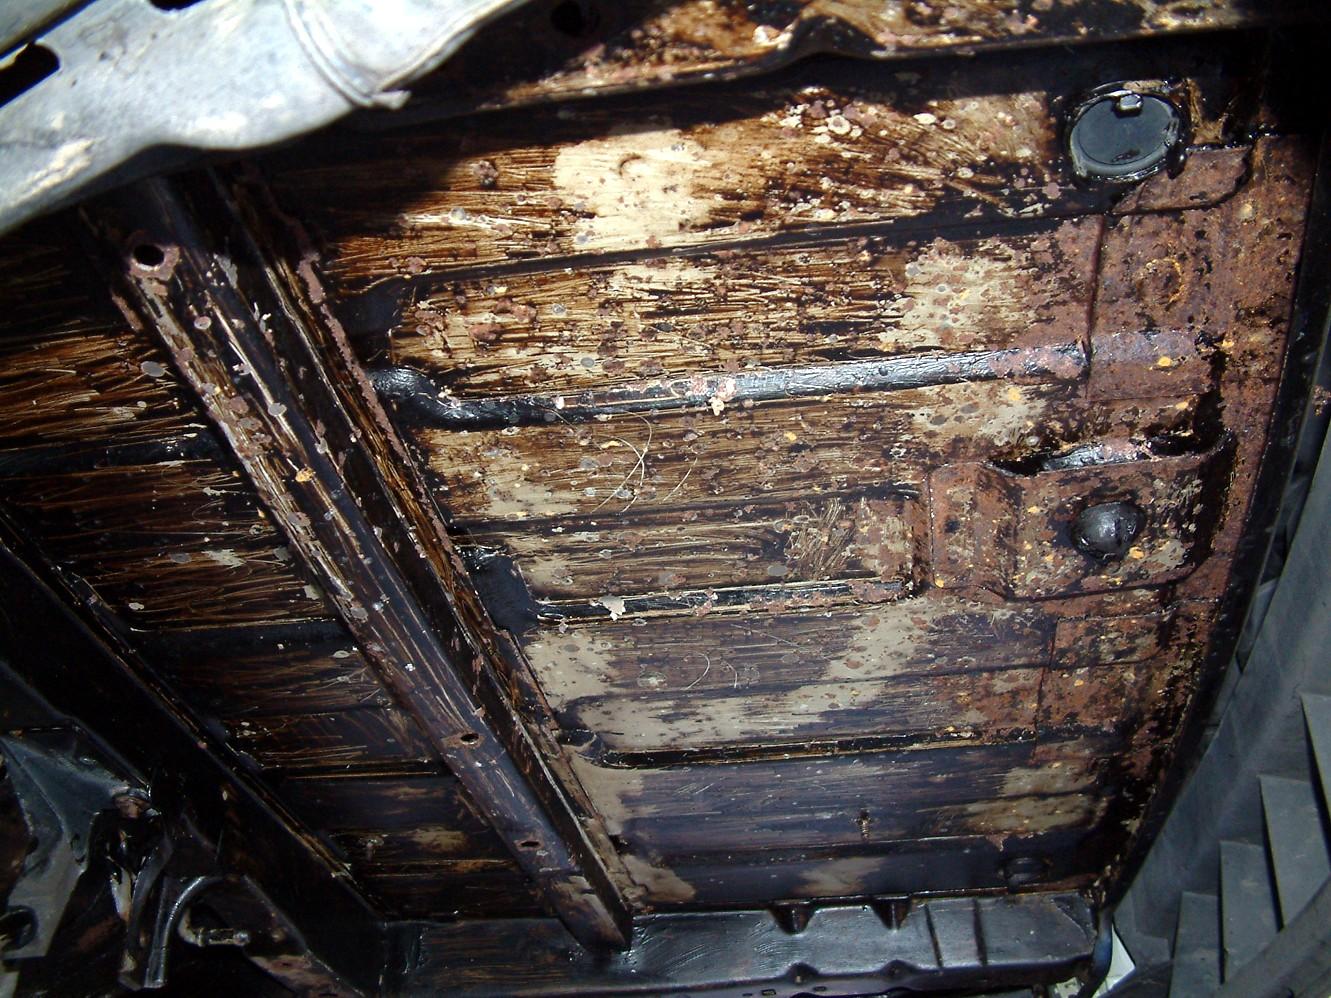
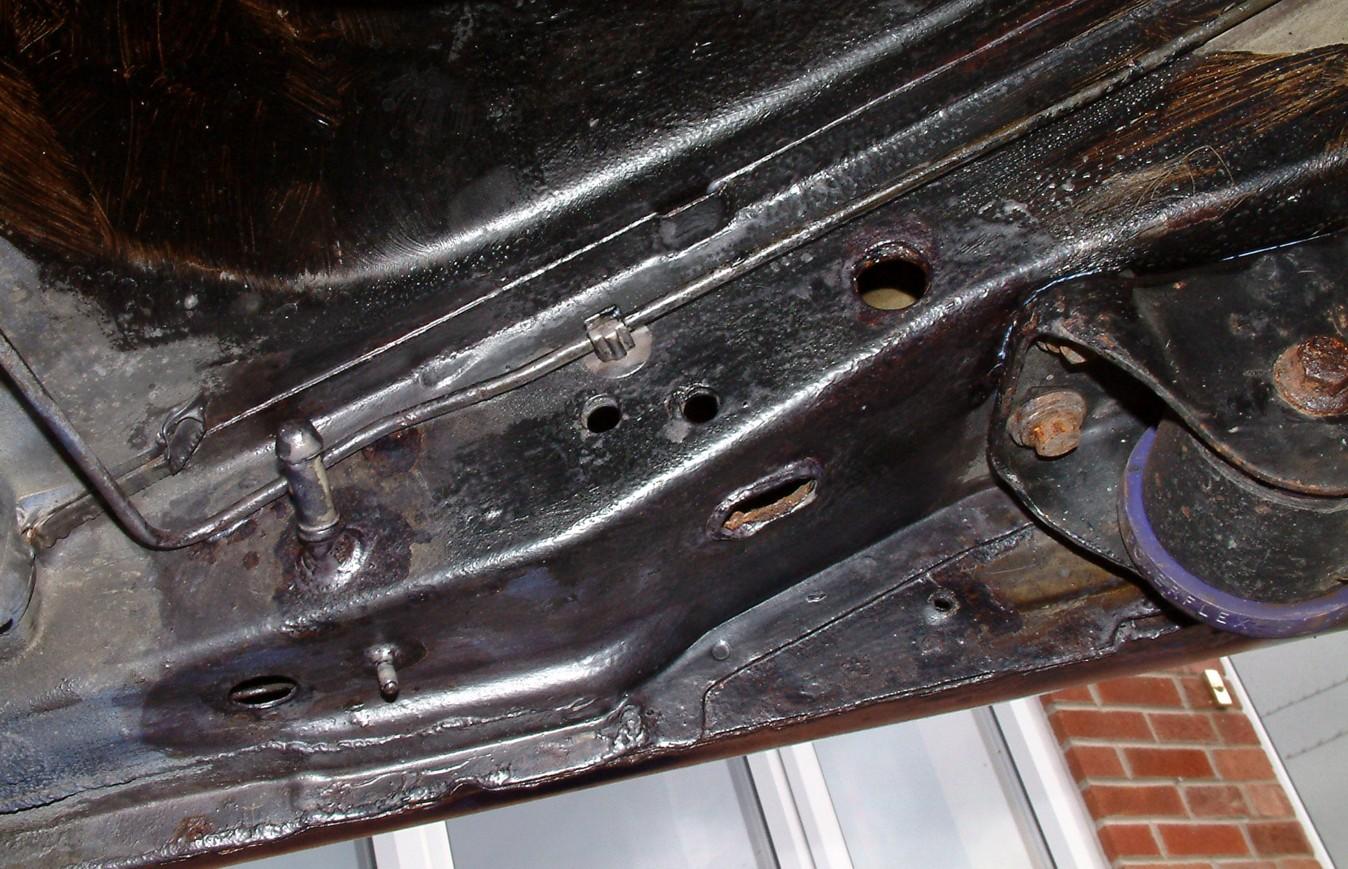
Over then to exposing the rust elsewhere.... and then applying the Hydrate-80 to it... :bleh:

Posted Image

Posted Image

Next day..

sheet the drive down with plastic.... put on my shittiest rags..fask mask on and cap...lol

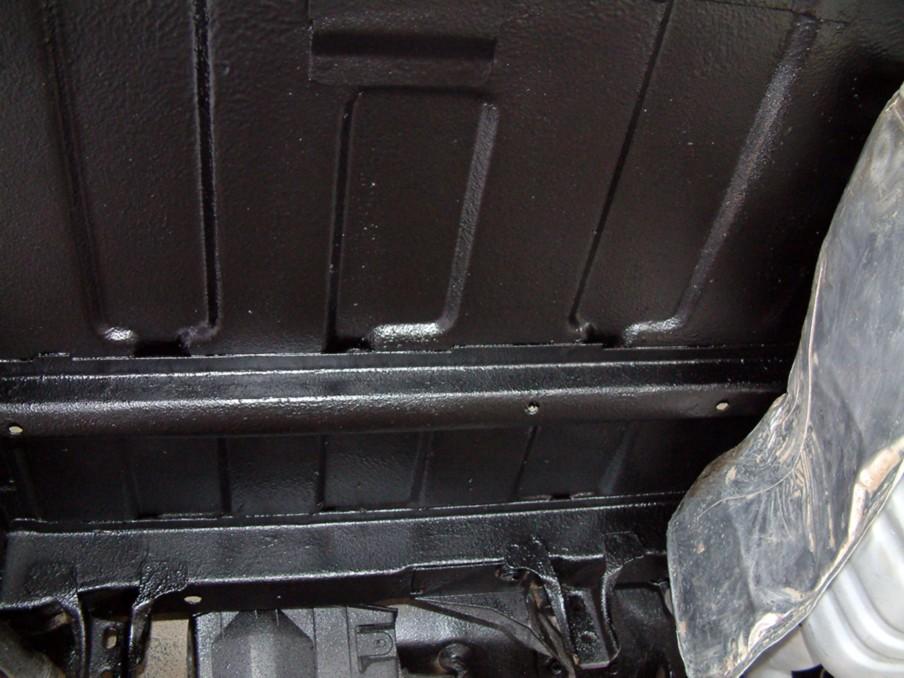
time to spray the Shultz Coating... :crazy:

Posted Image

Have managed to re-fit the exhaust today...still not happy with the joint at the manifold :head: 
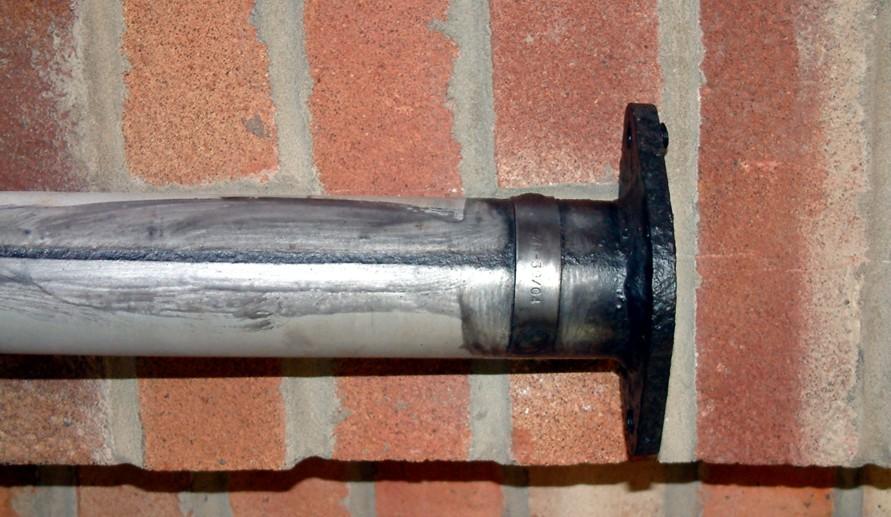
might even use a longer standard bolt with the springs and just use a nut at the back of the mani..? you can see on this picture here...iv'e put a new red rubber hanger on and it's stretched to hell because the manifold joint is just not straight enough.... i might have a go at bending the hanger tomorrow and rebolting it... why can't people copy things accuratly...grrr..

Posted Image

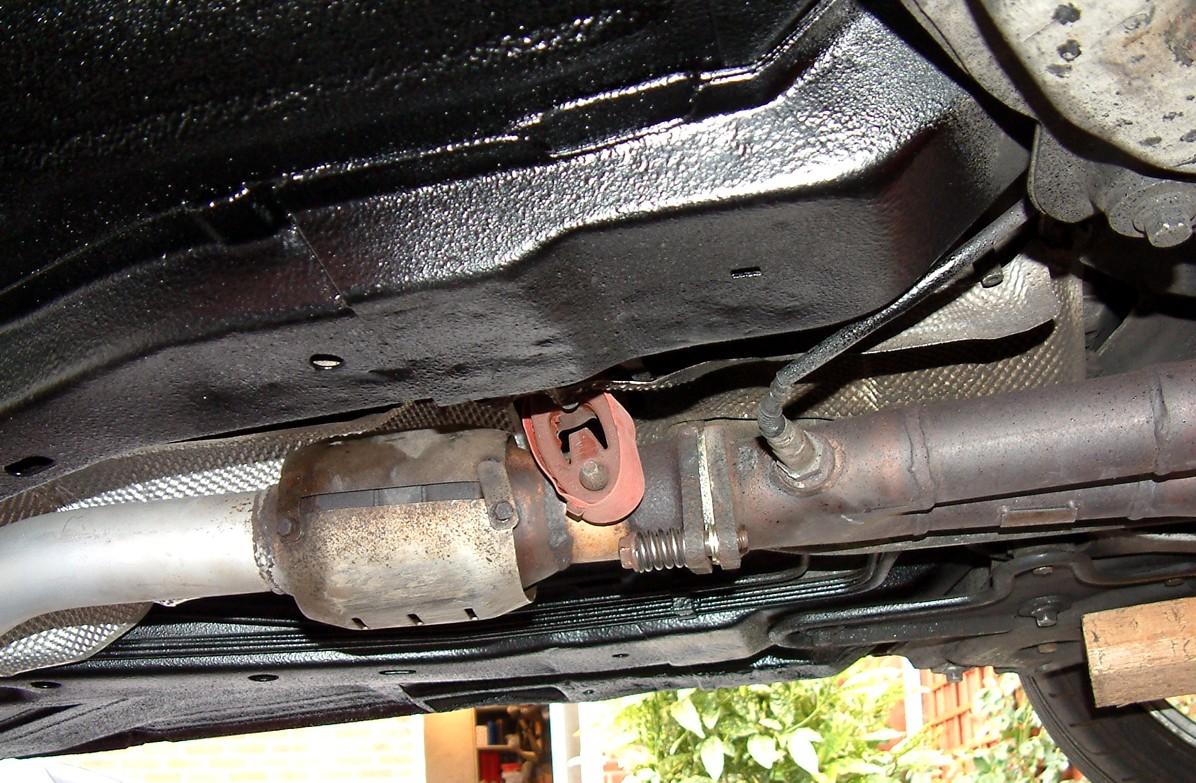
managed to center the back box nicely, as it was banging the bumper before... oh, and WTF was that tape that was glued all over the tape pipe... :head: :poke: :poke: took some serious patience to get that off....looking nice now tho...
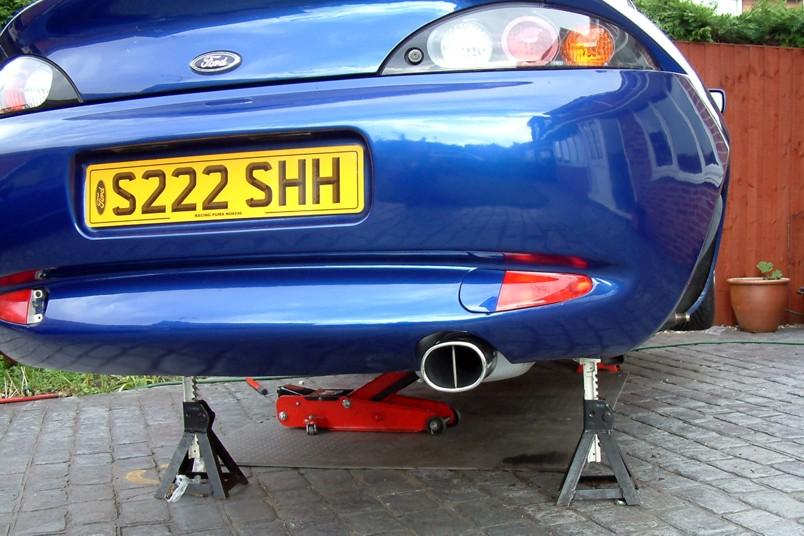
 :bleh:

Posted Image

More tomorrow.... :D :D

Chris
0453
Wizards Of Nos 60hp progressive delivery.... yeah baby yeah :-o
Denso Iridium Plugs
Helix Clutch
Mobil 1


#2 User is offline   happy-kat 

  • Group: Admin
  • Posts: 21811
  • Joined: 10-February 03

Posted 20 July 2010 - 09:30 PM

That is a lot of work :blink:

Did you spray sommit in all the holes you could poke a nozzle into from the underside?

If you have the time then the rear beam if dropped will most likely expose rust contact points too. Mine did. Hydrate 80 on mine and then Dymax UB and then the beam was refitted.
searching is fruitful | I'm a sponge not a mechanic | please do try that if stuck with a Puma problem whilst waiting for a reply | For the Puma fan this read 'The Inside Story Book' is very nice to own sometimes still seen for sale

#3 User is offline   eldoodarino 

  • Group: Moderators
  • Posts: 6257
  • Joined: 12-March 03
  • Location:Nottingham

Posted 20 July 2010 - 09:43 PM

View Posthappy-kat, on 20 July 2010 - 09:30 PM, said:

That is a lot of work :blink:


yep, pretty tierd...

oh and just to finish the day off...decided to re-seal the rocker gasget too, as this was weeping quite a bit...

:roflmao:
Wizards Of Nos 60hp progressive delivery.... yeah baby yeah :-o
Denso Iridium Plugs
Helix Clutch
Mobil 1


#4 User is offline   mikecat 

  • Group: Members
  • Posts: 514
  • Joined: 07-January 08
  • Location:Preston

Posted 21 July 2010 - 06:52 AM

speachless mate. looks unbelievable.

The tape on the exhaust is my fault, i taped up the tail pipe when i was painting the exhaust but forgot to take it off before it was fitted again! I thought i got most of it off and that the rest would just burn away or something. Obviously not!

loving the work mate, will keep checking here for updates. glad the car is finally getting sorted by someone thar really knows what they are doing and that i can trust.

cant thankyou enough mate

cheers

Mike

#5 User is offline   eldoodarino 

  • Group: Moderators
  • Posts: 6257
  • Joined: 12-March 03
  • Location:Nottingham

Posted 21 July 2010 - 07:41 AM

:cool:

I'm getting someone to turn me a steel bar to press out the bearings next....soon as that arrives (friday i hope) i can rebuild the back hubs and brakes.... Iv'e done a nice finish on the splash sheilds and spindles... also, the guy is making me up another nylon block so i can sit it on top of the ABS tone ring and kock it down without touching the teeth and spoiling the coating... at £21 a pop now don't want to spoil it... lol..

More soon..

gona have an easier day today...

Chris
Wizards Of Nos 60hp progressive delivery.... yeah baby yeah :-o
Denso Iridium Plugs
Helix Clutch
Mobil 1


#6 User is offline   mikecat 

  • Group: Members
  • Posts: 514
  • Joined: 07-January 08
  • Location:Preston

Posted 21 July 2010 - 09:36 AM

cool mate. Sounds and looks like u deserve it,lol. Are u able to give the rear calipers a lick of paint? Think that wud finish of the rear :) ps hope the front brakes dont need much work, eek! Lol

#7 User is offline   hot wheels 

  • Group: Members
  • Posts: 796
  • Joined: 29-March 06
  • Location:New York U.S.A.

Posted 21 July 2010 - 03:16 PM

Say what is the cost for that sort of work cheers.

#8 User is offline   eldoodarino 

  • Group: Moderators
  • Posts: 6257
  • Joined: 12-March 03
  • Location:Nottingham

Posted 21 July 2010 - 04:17 PM

good question actually... :roflmao: need to sit down and have a totup.. :D

Poor mike..hope he's likes Netto beans for a while... :lol:

I estimated beforehand the undersealing work incl. strip down, degrease and pressure wash...and re-fitting the exhaust and heat sheilds etc etc at around £150ish...

that gives you an idea of the basic cost of the coating...

Chris
Wizards Of Nos 60hp progressive delivery.... yeah baby yeah :-o
Denso Iridium Plugs
Helix Clutch
Mobil 1


#9 User is offline   mikecat 

  • Group: Members
  • Posts: 514
  • Joined: 07-January 08
  • Location:Preston

Posted 21 July 2010 - 10:45 PM

mine is gona end up slightly more than that,haha. Them netto beans best be tasty,lol. Still the amount of work and new parts its a bargain really. See what you mean about the bearings though. Really expensive! What coulour did you paint the front and rear calipers mate? Cheers, mike

#10 User is offline   zara014 

  • Group: Members
  • Posts: 3164
  • Joined: 21-September 08
  • Location:Mountsorrel, Loughborough - ex Northener!

Posted 22 July 2010 - 09:00 AM

Want to get mine up to you next summer mate :D ;)
Posted Image
** Zara & FRP#014 **

#11 User is offline   eldoodarino 

  • Group: Moderators
  • Posts: 6257
  • Joined: 12-March 03
  • Location:Nottingham

Posted 22 July 2010 - 05:41 PM

My bits from the engineer should be here tomorrow...awesome..altho have cost me £100.. :blink: lol... should be able to make some progress tomorrow on finishing this...

:cool:

View Postzara014, on 22 July 2010 - 09:00 AM, said:

Want to get mine up to you next summer mate :D ;)


:good: no probs...
Wizards Of Nos 60hp progressive delivery.... yeah baby yeah :-o
Denso Iridium Plugs
Helix Clutch
Mobil 1


#12 User is offline   eldoodarino 

  • Group: Moderators
  • Posts: 6257
  • Joined: 12-March 03
  • Location:Nottingham

Posted 23 July 2010 - 09:10 PM

Next update on Mikes Car...

Finally got the rear wheel bearings in today..god what a faf!...

The bits i ordered from the engineer came nice and early...took the custom made bar to the press... but it was pretty obvious my 'DIY wooden bed' in the press just wasn't going to take the pressure to get these out... (the press was bought 2nd hand a while back now)...

so down to Machine mart to buy the proper steel bed the press has been missing...got back, all eager to crack on..only to then discover it was the wrong part..in fact completly the wrong part..lol...was so eager to get back didn't scrutinise the measurments whilst i was there... :wacko: ... so back a second time, and the parts guy (with a little help) managed to find the right bit of kit for me... :woot2:

Back to the garage again... put the custom made steel bar in the hub and started pumping...and pumping... :blink: and a bit more...lol the bearing didn't budge till i hit like 9ton of pressure... :phew:: :unsure:

here you can see it all ready to go with bar inserted... notice the bar is nicely made so iv'e got loads of length to press deep into the hub to pop them out... then a thicker section made 0.2mm thinner than the outer casing of the bearing so that pushing the nw one in is nice and controlled... :good:

Posted Image

After a quick shotblast of the hub and clean down, so that all the machined areas are nice and clean....here is the new bearing ready to go in....

Posted Image

here's how precisly the bar fits over the bearing... :bleh:

Posted Image

now to re-install the circlip... damm these are strong circlips.. :mellow:

Posted Image

Now over to the ABS tone washer.... i had a Nylon block made up to make a very precise fit over the outside of the ring so that when pressed down on to the hub..no damage to the bumps or coating would happen...

Posted Image

I think when i discussed this over the phone we must have had slight crossed wires as the guy has made them .5mm smaller than i asked... so the tone wheel is quite a tight fit into the Nylon block... but actually when used with the press and some grease applied inside the nylon, the block is easily enough tapped off the ring....and makes a pukka job.... here's a piccy of me knocking it down with a mallet....which proved tricky actually....

I just don't see you putting this tone ring on accuratly without damaging it by any other way...? how have other people done it... smack it with a block of wood..lol

Posted Image

Perfect.. :bleh: :bleh:

Posted Image
Wizards Of Nos 60hp progressive delivery.... yeah baby yeah :-o
Denso Iridium Plugs
Helix Clutch
Mobil 1


#13 User is offline   YOG 

  • Group: Members
  • Posts: 2929
  • Joined: 30-August 07
  • Location:West Sussex

Posted 23 July 2010 - 09:37 PM

View Posteldoodarino, on 23 July 2010 - 09:10 PM, said:


I just don't see you putting this tone ring on accuratly without damaging it by any other way...? how have other people done it... smack it with a block of wood..lol


Mine went on fine with a flat piece of softwood and a mallet. ;)

Why didn't you use your press on the nylon block, rather than a mallet?
Rick

The Haynes Fiesta Manual (3397) can answer a lot of your questions.
Posted Image

#14 User is offline   mikecat 

  • Group: Members
  • Posts: 514
  • Joined: 07-January 08
  • Location:Preston

Posted 23 July 2010 - 09:45 PM

excellent mate, loving the work. As i said via text, cant believe how much pressure them things take to get out!

What happened to my lovely coating of paint on them? Only joking it was only a crappy coat of hamerite to get them looking abit cleaner, lol

keep up the good work

hope your not too sick of my car yet!

#15 User is offline   eldoodarino 

  • Group: Moderators
  • Posts: 6257
  • Joined: 12-March 03
  • Location:Nottingham

Posted 24 July 2010 - 05:24 PM

View PostYOG, on 23 July 2010 - 09:37 PM, said:


Why didn't you use your press on the nylon block, rather than a mallet?


i did...

hammering down tended to knock down one side at a time....lob-sided slightly....

much smoother all round with the press.... :good:

also, much nicer to grip the tone ring round the sides rather than 'wack down' on top.... keeps the coating and shape perfect.. :good:

as i said, at £21 a pop now...you don't want be binning any.. :D

Chris

View Postmikecat, on 23 July 2010 - 09:45 PM, said:

What happened to my lovely coating of paint on them?


they don't look like that now... :bleh:
Wizards Of Nos 60hp progressive delivery.... yeah baby yeah :-o
Denso Iridium Plugs
Helix Clutch
Mobil 1


#16 User is offline   mikecat 

  • Group: Members
  • Posts: 514
  • Joined: 07-January 08
  • Location:Preston

Posted 24 July 2010 - 08:37 PM

looking forward to seeing them matey? :) wat u think of them front bushes? Best to fit them ones ive got? Cheers

#17 User is offline   eldoodarino 

  • Group: Moderators
  • Posts: 6257
  • Joined: 12-March 03
  • Location:Nottingham

Posted 25 July 2010 - 08:48 PM

Front bushes were pretty tierd... :blink: one of them the worst i'd seen...lol

All sorted now... ;)

Posted Image

next little update...

Hubs, splash guards and spindles on today...oh, and the stupid ABS ... :wacko: :wacko:

Posted Image

wasted so much time faffing around with the ABS it was crazy... you would think with BRAND NEW parts everything would just bolt up and job done!..WRONG!..

The drivers side hub, when bolted up collided with the sensor and put a little nick in it, and wouldn't spind round properly...

so then had to find somthing to place in front of the sensor mount to space it back slightly... not the easiest of things to do. as it need to be around 1mm,small and non corroding... :wacko: won't divulge what i shoved in there...we'll see if it works tomorrow maybe.... :lol:

Painted up the splash sheilds in a nice 2k satin finish on the back...

Posted Image

was surprised also how tricky the hubs were to pull on and off.. The bearing seems to be in halfs in the hub and it seems to 'catch'.... a

The bolts behind the spacers are an absolute pain...because the damper was in the way, it seem like i was using a different size bar and ratchet for every nut... :head:

all good in the end... fingers are crossed the ABS works tomorrow... :D :D

Chris
Wizards Of Nos 60hp progressive delivery.... yeah baby yeah :-o
Denso Iridium Plugs
Helix Clutch
Mobil 1


#18 User is offline   zara014 

  • Group: Members
  • Posts: 3164
  • Joined: 21-September 08
  • Location:Mountsorrel, Loughborough - ex Northener!

Posted 26 July 2010 - 09:35 AM

looks awesome there Chris :cool:

Bet Mike can't wait to get it back!!
Posted Image
** Zara & FRP#014 **

#19 User is offline   Badger 

  • Group: Members
  • Posts: 172
  • Joined: 28-June 05
  • Location:Essex

Posted 26 July 2010 - 02:30 PM

Wow, I may have to save some pennies and talk nicely to you :)

#20 User is offline   vaspetrol 

  • Group: Members
  • Posts: 2316
  • Joined: 20-September 03
  • Location:Mansfield

Posted 26 July 2010 - 02:42 PM

Amazing work Dr.Bush,

I must find some more work for you to do on mine, hehe! :)

You are a Bush Daddy, and a Tone Daddy!! :)

Top Banana! hehe
Vas
FRP #385 / FORD FIESTA ZETEC-S
Looked after by GK!!-In GK Ford I trust
BRAKES LOOKED AFTER BY DR.ALCON @ ELDUDE-BUILD!

PERFORMANCE FORD SHOW 2006-BEST PUMA WINNER
FORD FAIR CONCOURS CLASS WINNER 2006
WONDERLAND SPORTSCAR SHOW 2007-CONCOURS 2ND PLACE
BEST PARADE LAP FRP WINNER-CASTLE COMBE 2007
PUMAPEOPLE CALENDAR CAR 2009

Racing Puma Owners Club Membership Administrator

Share this topic:


  • 2 Pages +
  • 1
  • 2
  • You cannot start a new topic
  • You cannot reply to this topic