24V V6 Cosworth Puma Project
#121
Posted 13 May 2010 - 08:31 AM
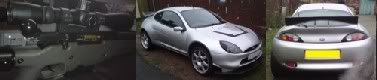
I would love a RWD FRP, so much more fun to drive, controlled over steer
I use "Pub Gas" and have to speak to a friendly land lord when I run out.
Always happens at the worst possible moment....
Mk3 XR3i
R Reg 1.7 Puma
T Reg 1.7 Lux Puma
Now its Racing Puma 072
Graham
#122
Posted 13 May 2010 - 09:33 AM
Oh and not forgetting depending on offset of your wheels and the hubs will determine how they sit in the arches. on mine with F2 arches, 4x4 subframe and TCA's 1cm longer each side than standard cossie ones, I could fit 20mm spacers if i wanted to fill the arch. but im on 18" x8" in ET33 so depends what wheels your using too.
#123
Posted 13 May 2010 - 10:17 AM
All stuff puma - puma technical & all things rebuilt...
See my website for Snow School Information
#124
Posted 13 May 2010 - 10:32 AM
#125
Posted 13 May 2010 - 11:04 AM
Cheers for the input, you're a wee bitty ahead of me here but I hear what you're both saying and some consideration has been given to all this
ATM I know the strut centre to centre of top mounts is identical on the Puma and the Cossie Scorpio. I know the bottom swivels all fit / are the same size clinch arrangement. I know the track width with the 12 Spoke Ford alloys I'm using with Scorpio bottom swivel centres.
If the Scorpio carriers work with Puma hubs, I won't need to buy 4x4 ones, if not I will get the 4x4 ones, also at that time I'll know if the speed sensitive power strg rack will or will not fit the 4x4 Subframe.
With the parts I already have the geometry will all be bang on and the wide arches filled nicely. FWIW the Scorpio Cosworth handled impeccably for a big estate car and could be driven sideways very controllably lmao
I just don't want to buy in a load of bits I dont need that will then need reselling / junking, and give me geometry headaches, if for example all I need to do is have a mm or so machined off a hub face / diameter etc etc.
If I need to it will be easy to use concentric / adjustable type top mounts.
ATM though this is as much as I have delved into it as I'm concentrating on getting the rear end finished, but yeah, I've given it all a bit of thought.
The front will be a lot less welding and fabbing, and a bit more measuring / bolting up / unbolting various hubs / carriers / strg racks etc then i'll know exactly what suits my needs and works best
FWIW the rear end has now been checked and its pos to neg camber changes, suspension travel and track / wheelbase is all spot on with the stock Scorpio rear end and stock type Puma rear struts.
Obviously once it's at the rolling shell stage with rollcage and seat mounts in, and geometry all in the right ball park, it will be coming apart to go on a spit for seam welding and painting the underneath.
At this stage when I build it back up, decent springs / adjustable shocks / new bushes / bearings / discs and pads etc and coats of paint will all be applied to the running gear set up.
Then I'll move on to steering column, brake and fuel plumbing, and finally body kit, paintwork, wiring and fitting up. A way off yet tho
Cheers Guys
Dave
#126
Posted 14 May 2010 - 05:53 PM
Running out of welding gas in the NW Highlands was not a good idea
I've got it sorted now, bottle arrived about 5 0'clock today, but I've got all the bits cut out now and some tacked in place, had the car off the ramp and sat on it's wheels.
Now the gas is here I can get stuck in and finish off the welding on the back end over the next week.
I suppose I should point out now that although the car is now sat on it's wheels with a load of tatty rusty old bits of suspension, stock Puma struts and springs etc, this is only to get the shell mods and dimensions correct. Once it's a fully rolling shell, with all welding and mods done, then it will all be coming apart for stone chip and paint underneath and then built up with new / re furbished components adjustable shox, uprated springs, bushes etc etc.
So, here's where I'm at.....
Stock style rear Puma struts and springs
The reshaped chassis to clear subframe and outer radius arms
Diff and antirollbar mounts
Right result this, on full bump this is all the notching required to clear the driveshafts
Lots of coffee and cigar smoking inbetween this little lot
And finally, the car sat on its wheels with stock struts and springs
All in all I'm quite pleased with the results so far, just a shame about the lack of gas or it would all be finished at the back by now
Once I get all the rear welding finished, it's onto the front end, more soon,
Cheers for looking,
Dave
#128
Posted 15 May 2010 - 09:48 AM
C.
1. Mk1 Fiesta 1300S | 2. Mk1 Fiesta XR2 | 3. Puma 1.7 in Melina Blue | 4. Mk2 Toyota MR2 GT | 5. Mk3 Cortina 1600L | 6. Honda CRX ESi | 7. Ford Sportka | 8. Honda Civic VTi -S | 9. Toyota Yaris 1.8 SR | 10. Honda Civic 1.8 SE i-vTEC | 11. Puma 1.7 in Moondust Silver
#129
Posted 15 May 2010 - 12:08 PM
Puma2010, on 15 May 2010 - 09:48 AM, said:
C.
I'm not exactly sure I will either use "Schutz", like a spray on flexible underseal, or more likely "stonechip" paint which gives a rough stipple effect and can be painted over in body colour. Will also use this on the inside floor, it helps with sound deadening too.
Thanks for yr interest and the kind words,
Just got in from work, I'm off to get cracking welding up the rest of the rear end now.
Cheers Dave
This post has been edited by Dave2302: 15 May 2010 - 12:10 PM
#130
Posted 15 May 2010 - 06:36 PM
Dropped the rear subframe back out and finished welding all the previously "tacked" in bits of chassis.
Lowered the car down and got started inside the boot area prepping ready for welding in the rear Diff support / rear Anti Rollbar beam to the upper chassis, inside the boot area. Will then re instate the boot floor.
I had forgotten what a pleasure it is, (not!!) lol, scraping off all that thick black tarry stuff Ford stick on the floors etc inside their cars
Why the hell don't they cover the underneath with this stuff, they'd never rust then !! Doh yeah lol, thats why they don't put it underneath 
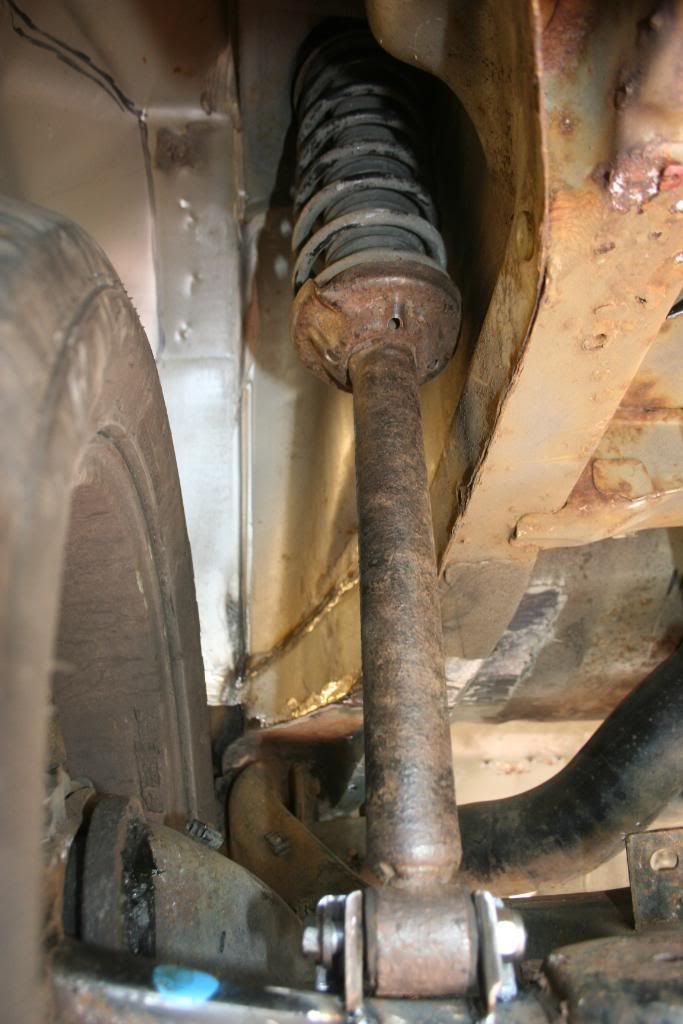
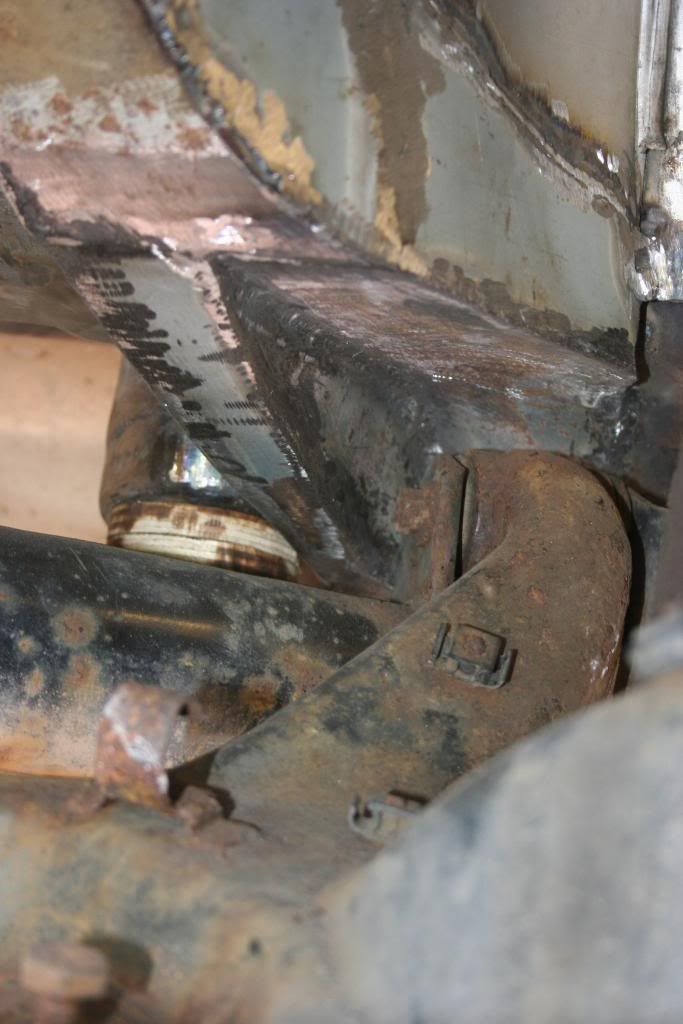
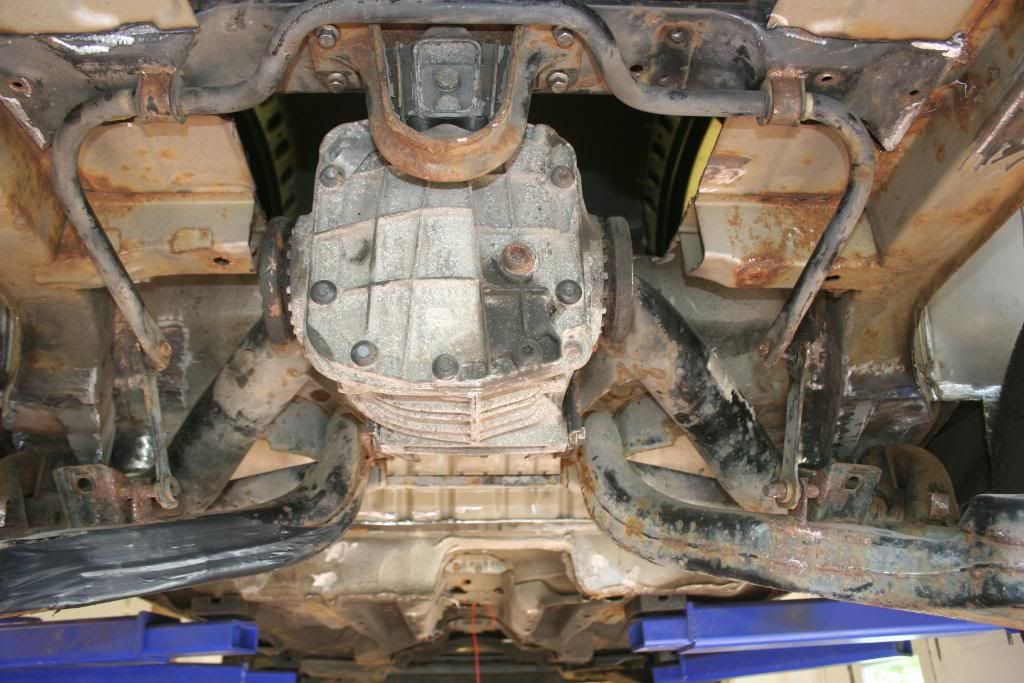
cos they want 'em to rust away so you gotta buy a new one
Anyway time I finished scraping all this sh1t off twas time to knock off, so more welding / fabbing in the boot tommorra.
Cheers for looking,
C ya tommoz
Dave
#131
Posted 15 May 2010 - 07:04 PM
got a nice stance from the rear as well.
coming along nicely cant wait for the next instalment
#132
Posted 15 May 2010 - 07:43 PM
Fanks for the kind words.
Thats exactly what I'm going for, once the welding's finished and its in primer I want it to look as if it was originally built that way
Wait until the boot floor is done lol, wot I've got planned here is a new section, bead rolled and welded from the top of the diff beam down to the original floor where it curves under the original back seat !! Will all blend in nicely, and between the diff beam and back panel there'll be a recessed space for the fuel tank.
Watch this space lol,
Cheers Dave
#133
Posted 17 May 2010 - 07:21 PM
Well the diff beam is completely welded in now, and the boot floor behind the beam, where the fuel tank is going is now all reinstated.
Have spent a lot of time grinding out spot welds and un picking all the brackets from underneath that are no longer required. This is very time consuming and not much to show for it either
Forward section of boot floor is now all cut out and ready for welding in the new panel. A few "holes" left by wiring grommets, spare wheel carrier etc now have neat little plates welded over them. Tommorrow will see the last few open "box sections" closed up and hopefully all the unwanted brackets inside the boot area unpicked and spot welds ground down.
That will be about it for the back for now. I'm waiting on a mate coming down in a week or so, and the loan of his bead roller to make the new forward boot floor panel, before I can weld that in, so should be starting on the front suspension by the end of this week.
Will put up some more pics in a few days once all the "boring" jobs are done
Cheers Dave
#135
Posted 17 May 2010 - 08:36 PM
bouncy, on 17 May 2010 - 08:11 PM, said:
Awesome looking Puma, love it, not seen yours b4.
Yeah I'm happy with how mines sitting, would love to do the Scarborough Rally lol, but I doubt it'll be done by then.
I'm just bored atm with all the unpicking spotwelds lol, will be glad when I get onto the front end, cos that's more nuts and bolts than welding
Hopefully I'll be doing next years "Snowman Rally" up here, in Jan. Hoping to be driving the car November time if all goes to plan and some spare dosh frees up for the bodykit lol
That way I can shake it down a bit and fiddle with shocks rollbar settings etc before using it in anger
Cheers for ya input,
Dave
#137
Posted 17 May 2010 - 09:05 PM
Remind me nearer the date, I'll come down, probably in a Ford Explorer tho
Cheers Dave
#138
Posted 17 May 2010 - 09:13 PM
You could relocate the anti roll bar to inside the boot floor if you need to if the boot floor isn't strong enough. We were looking at doing it, and will in the near future.
I love how the driveshafts clear so well LOL. That's a complete result that LOL
I'm gana just resin on some kevlar sheeting under the body. Cos the shultz / stone chip won't last 5 minutes i don't reckon. If you want me to do it i'm happy to come and do it. It is quite straight forward though. Just clean it up, and paste it on, like wallpaper LOL.
Technically the big rally teams then vacuum the resin out, but tbh i have found it stronger with the resin left in. It wont last than about 6 rallies, but it does protect the floor from looking like the underside of a warship LOL
All stuff puma - puma technical & all things rebuilt...
See my website for Snow School Information
#139
Posted 18 May 2010 - 02:25 AM
Surely you meant the bottom of a submarine??
#140
Posted 18 May 2010 - 08:49 AM
My rear anti rollbar mounts up high on the diff support beam, just gonna make some rose jointed "adjustable" links for it.....
Thanks for the offer, will give that consideration when the time comes
Cheers Dave