
 Help
Help

I am looking to buy a set of replacement arches for the rear. I have seen some threads about people ordering replacement ones from Germany, I was wondering what website they used and if they're any good.
Sarah
Page 1 of 1
Arch Replacements
#1

- Group: Members
- Posts: 50
- Joined: 03-November 07
- Location:Muff, Donegal Ireland
Posted 02 May 2012 - 01:33 PM
#2

- Group: Members
- Posts: 2929
- Joined: 30-August 07
- Location:West Sussex
Posted 02 May 2012 - 03:30 PM
Rick
The Haynes Fiesta Manual (3397) can answer a lot of your questions.

The Haynes Fiesta Manual (3397) can answer a lot of your questions.
#3
- Group: Members
- Posts: 796
- Joined: 29-March 06
- Location:New York U.S.A.
Posted 03 May 2012 - 07:37 PM
 YOG, on 02 May 2012 - 03:30 PM, said:
Can you translate the topic into English cheers.
#4
Posted 05 May 2012 - 12:32 PM
hot wheels, on 03 May 2012 - 07:37 PM, said:
Can you translate the topic into English cheers.
google translation websites, there are some that you just put in the website address you want to translate, and bingo the page comes up in required language
USER UNDER INVESTIGATION - DO NOT TRADE WITH THIS USER - THIS USER IS A KNOWN SCAMMER
#5
- Group: Members
- Posts: 50
- Joined: 03-November 07
- Location:Muff, Donegal Ireland
Posted 03 January 2013 - 05:46 PM
Still haven't had my arches repaired but as from today on, I'm doing a bit of a makeover on the car, starting with the arches and then a full respray as someone got at it with a knife on every panel  I'm wondering which is better, getting these arches from Germany or 206 arches? I already have a car restoration man to fit them just need to source them for him.
I'm wondering which is better, getting these arches from Germany or 206 arches? I already have a car restoration man to fit them just need to source them for him.
#6
Posted 03 January 2013 - 05:54 PM
Are the arches from Germany steel, if they are not does your repair guy have a preference.
Bummer about the scratches.
Bummer about the scratches.
searching is fruitful | I'm a sponge not a mechanic | please do try that if stuck with a Puma problem whilst waiting for a reply | For the Puma fan this read 'The Inside Story Book' is very nice to own sometimes still seen for sale
#7
Posted 08 January 2013 - 02:52 PM
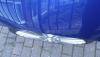
i have one of the german ones (brought for our puma but surprisingly they were fine bar a small hole about 8" up from the bottom.
they are flat so i imagine would need some work to fit but look nicely formed on the lip and seem to have a good profile that matches the arc of the original arch.
if you wanted it id let it go for £35 posted in the UK
they are flat so i imagine would need some work to fit but look nicely formed on the lip and seem to have a good profile that matches the arc of the original arch.
if you wanted it id let it go for £35 posted in the UK
my other toy has 470bhp
#8

- Group: Members
- Posts: 80
- Joined: 06-April 05
- Location:Essex
Posted 08 January 2013 - 09:36 PM
id be interested if your not mate
Mike
#9
- Group: Members
- Posts: 50
- Joined: 03-November 07
- Location:Muff, Donegal Ireland
Posted 14 January 2013 - 10:06 PM
dawesy, on 08 January 2013 - 02:52 PM, said:
i have one of the german ones (brought for our puma but surprisingly they were fine bar a small hole about 8" up from the bottom.
they are flat so i imagine would need some work to fit but look nicely formed on the lip and seem to have a good profile that matches the arc of the original arch.
if you wanted it id let it go for £35 posted in the UK
they are flat so i imagine would need some work to fit but look nicely formed on the lip and seem to have a good profile that matches the arc of the original arch.
if you wanted it id let it go for £35 posted in the UK
You still have them?
#10
Posted 22 January 2013 - 08:16 PM
sorry for the late replies to the messages guys, will double check for you thursday, i had a move round before christmas and just go to dig it out and check its ok still.
will let you know thursday. AFAIK they are not handed so the one i have will fit either side.
will let you know thursday. AFAIK they are not handed so the one i have will fit either side.
my other toy has 470bhp
#11
Posted 25 January 2013 - 07:19 PM
My puma has recently succumbed to the arch rust of doom. I will be ordering some german replacements - if anyone else is planning on doing theirs soon, let me know over here:
http://www.projectpu...hp?f=65&t=19805
I'm trying to get a group buy together as for one set the shipping is 30EUR!! Hopefully if there are a few of us we can negotiate a discount, even if just on the shipping.
http://www.projectpu...hp?f=65&t=19805
I'm trying to get a group buy together as for one set the shipping is 30EUR!! Hopefully if there are a few of us we can negotiate a discount, even if just on the shipping.
#12
- Group: Members
- Posts: 50
- Joined: 03-November 07
- Location:Muff, Donegal Ireland
Posted 26 January 2013 - 01:45 AM
dawesy, on 22 January 2013 - 08:16 PM, said:
sorry for the late replies to the messages guys, will double check for you thursday, i had a move round before christmas and just go to dig it out and check its ok still.
will let you know thursday. AFAIK they are not handed so the one i have will fit either side.
will let you know thursday. AFAIK they are not handed so the one i have will fit either side.
Great, please do, I'm anxious to get work underway asap

#13
- Group: Members
- Posts: 50
- Joined: 03-November 07
- Location:Muff, Donegal Ireland
Posted 26 January 2013 - 01:47 AM
evilrob, on 25 January 2013 - 07:19 PM, said:
My puma has recently succumbed to the arch rust of doom. I will be ordering some german replacements - if anyone else is planning on doing theirs soon, let me know over here:
http://www.projectpu...hp?f=65&t=19805
I'm trying to get a group buy together as for one set the shipping is 30EUR!! Hopefully if there are a few of us we can negotiate a discount, even if just on the shipping.
http://www.projectpu...hp?f=65&t=19805
I'm trying to get a group buy together as for one set the shipping is 30EUR!! Hopefully if there are a few of us we can negotiate a discount, even if just on the shipping.
Just seen this after replying to the previous post, if I can't get these other ones I would be interested in a group buy although I have no idea how these work, I live in Northern Ireland, that might make it a whole handling?
#14
Posted 26 January 2013 - 02:05 AM
sasa, on 26 January 2013 - 01:47 AM, said:
Just seen this after replying to the previous post, if I can't get these other ones I would be interested in a group buy although I have no idea how these work, I live in Northern Ireland, that might make it a whole handling?
Essentially, a bunch of folks get together and pledge to buy a certain number of something, usually results in a discount and everyone saves money. In this instance, I would get the items delivered to me (so we only pay one set of shipping between us - although until I know how many I'm ordering I don't know what the total shipping will be) and then ship them off from the UK.
Most if not all of the people who have signed up already live relatively local to me or regularly attend events so I'd probably drop them off in person. I have no idea what these things would cost to ship to NI, but it'll be significantly less than the 30EUR the supplier will sting you for on a single unit I'd have thought!
I wouldn't be in any hurry to get the work done until it's drier - the moisture in the air will do your bare metal work no favours at this time of year. May onwards is usually a good bet.
This post has been edited by evilrob: 26 January 2013 - 02:11 AM
#15
Posted 13 June 2014 - 01:31 PM
hot wheels, on 03 May 2012 - 07:37 PM, said:
Can you translate the topic into English cheers.
The piece starts of with general thanks for buying them and then says no guarantee is given as the manufacturers can't control the repair process. After that, there follows the instructions that are roughly related to the pictures on the site. The instructions are:
1: Remove the complete boot trim. Take out the rear seat completely.
2 Dismantle the rear side panels and the speakers.
3 Remove the rear bumper and the inner wheel arch protector
4 Raise the car on a jack at the prescribed Ford Points.
5 Remove the insulation pads (see the picture) with a Spatula. (Tip: For easy removal, heat the sheet from the underside with a heat gun or a normal hair-dryer.)
6 Open up the arch seam with a pair of pliers from top to bottom.
7 Mark the cutting height on the wing itself. Marking it at about 50mm is recommend but if the rust is higher you'll need somewhat more.
8 With an angle grinder, cut out the old sheet metal back past the rust and then clean up the location into which the new piece will be welded .
9 Remove the rust with a wire brush or with a steel brush attachment for the angle grinder TIP: Remove the rust in the wheel well at the same time as later it will be obscured by rear bumper and wheel arch trim.
[This section refers to anti-rust treatment with "Fertan". If you don't use Fertan, adapt the instructions to your chosen anti-rust treatment
10 Spray the areas affected by rust generously with Fertan and leave the treatment to dry for 24 to 48 hours depending on the ambient temperature Observe the manufacturer's instructi
11 After 24 to 48 hours of treatment remove the remaining adhesive layer of Fertan thoroughly with water. The black layer is normal and should not be disturbed. Then dry
12 Now everything should be coated with three coats of anti-rust primer, inside and outside. Do this for the other places that have been treated with Fertan. But be careful not to use all of the spray as some will be needed later: see the manufacturer's instructions]
13 Now we move onto the new arches and cut them to size. Since we are not butt-welding edge to edge, you must have an overlap into wheel arch of 10-15mm: so, in the example, then new arch is cut down to 60-65mm
14. Da wir den Radlauf überlappen, müssen wir diesen mit Hilfe einer Absetzzange (joggling tool) ca. 1mm absetzten das in einer Höhe in diesem Fall von 45mm. Da das Raus getrennte blech eine Hohe von 50mm hat. [I have left the German as it is not very clear as to whether the new arch is off-set with the joggler, or the bodywork is offset. In my translation, I have assumed that the new arch will be offset and go below the bodywork. If you have a better translation, please post it.]
14. Since the wheel arch will overlap the new piece by about 5mm, you will need to off-set the edge of the new arch with a joggler/joggling tool by about a depth of 1mm and in a line following the bodywork.
15 Clean the wheel arches of oil and grease. Coat the inside and the seam edge well with zinc plate and allow to dry. Note the manufacturer's instructions.
16 Now, you can put the wheel arches on. It's best to start at the bottom near the sill. With a little force, the wheel arches will go into place.
17. Align them carefully and attach them on top and bottom. They are then tacked from the centre outwards alternately, left then right, at intervals of 5cm. when you have done this, tack in between those tacks so that the arch is tacked every 5mm. The ends of the joints above and below must be continuously welded.
18 Now, with an angle grinder grind the welds flat and at the same time abrade the wheel arch.
19 Apply an even thickness of body sealing compound on the new seam formed by the inner wheel arch and the new metal. See the drawing.
20 Now close up the seam with a pair of pliers. Spread excess sealant that squeezes out so that it provides a smooth flat surface so that no water can penetrate from the outside into the edge.
21 After the sealant has dried paint the wheel well with the rest of the rust protection primer inside and outside.
22 After applying the filler and paint, spray the cavity protection generously into the interior of the new wheel arches and into any small angles. You can use the remainder in the wheel arch
23 Now put back the rear bumper and interior trim.
This post has been edited by Greybeard: 13 June 2014 - 01:37 PM
#16
Posted 14 June 2014 - 10:27 PM
im making and selling rear arch replacement panels on ebay for £55. however i am selling them on the forums for £40. anybody interested please inbox me.
if you want pictures look on ebay its alot of hassle uploading then to post on here.
cheers Kieran (FibreBuild)
if you want pictures look on ebay its alot of hassle uploading then to post on here.
cheers Kieran (FibreBuild)
Share this topic:


Page 1 of 1