Pumapeople: Frp #401 - Pumapeople

Jump to content

  • 4 Pages +
  • 1
  • 2
  • 3
  • 4
  • You cannot start a new topic
  • You cannot reply to this topic

Frp #401 Rate Topic: -----

#21 User is offline   Fatttty 

  • Group: Members
  • Posts: 71
  • Joined: 07-October 11

Posted 13 November 2012 - 02:41 PM

View PostRayy, on 12 November 2012 - 09:44 PM, said:

Fantastic!


Thank you :)

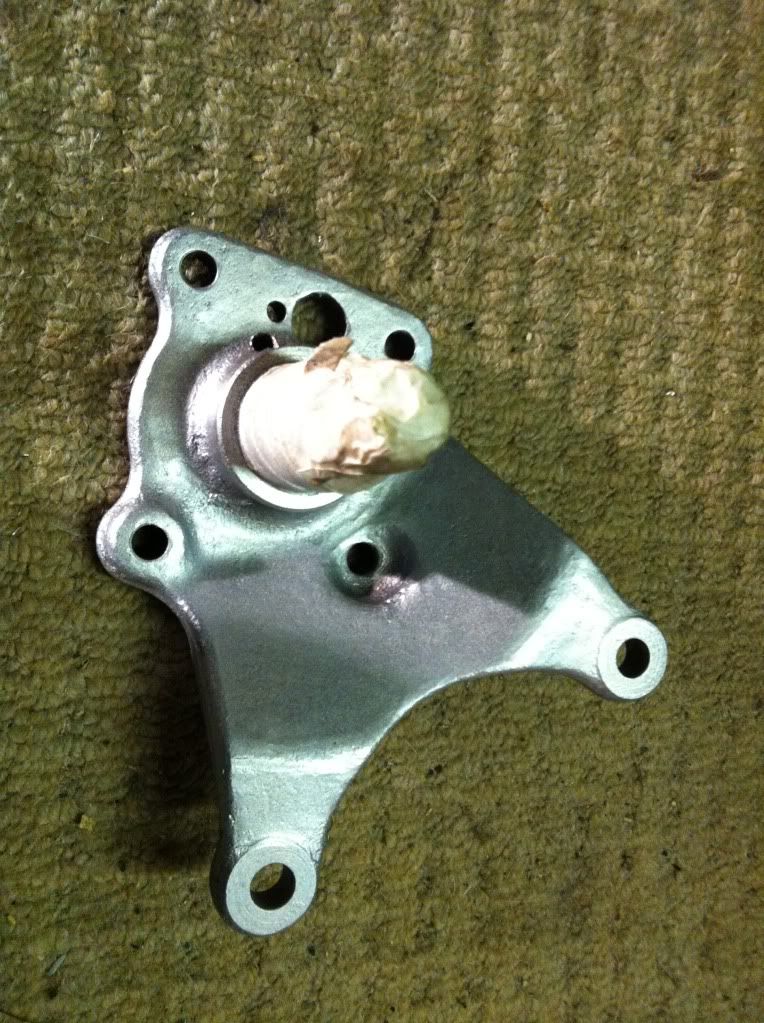
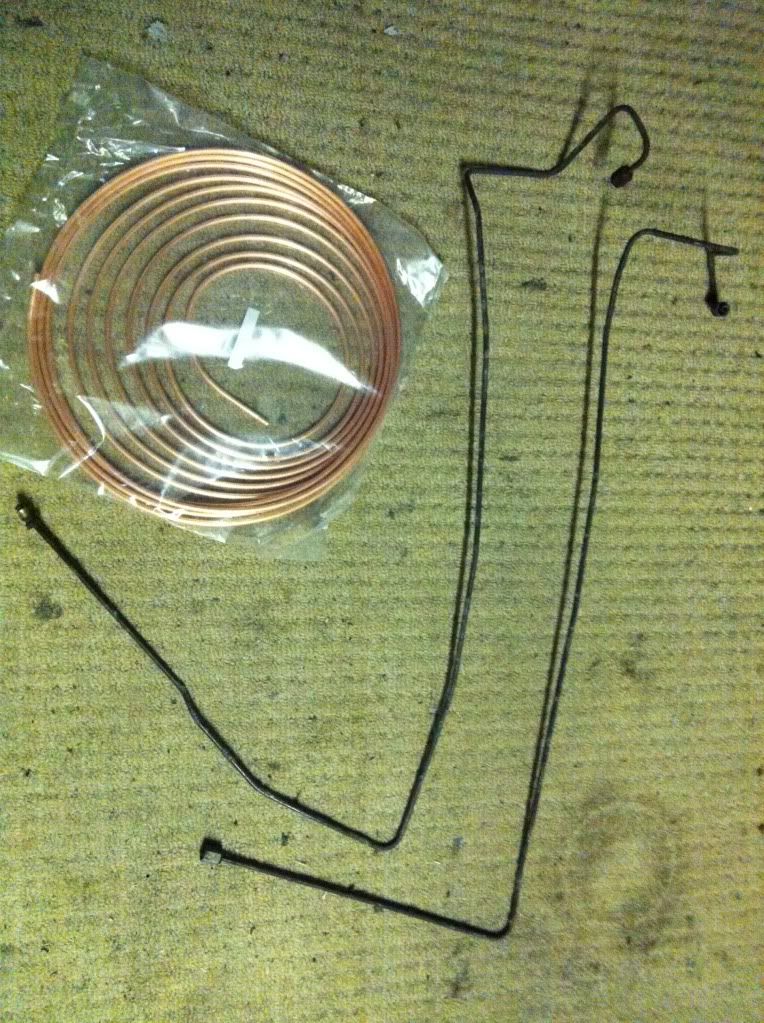
Just been to Ford to order my new brake line, fuel line and handbrake cable clips. Can safely say the parts man was not amused after searching for them all lol!

Alex

#22 User is offline   happy-kat 

  • Group: Admin
  • Posts: 21811
  • Joined: 10-February 03

Posted 13 November 2012 - 07:21 PM

My underbody is dark but I like the ones done the original light colour like on FMC 04.
I got new petrol neck filler pipes to ensure a good seal on refitting.
You might like to take a look at my post as I found several hidden rust spots.
searching is fruitful | I'm a sponge not a mechanic | please do try that if stuck with a Puma problem whilst waiting for a reply | For the Puma fan this read 'The Inside Story Book' is very nice to own sometimes still seen for sale

#23 User is offline   Fatttty 

  • Group: Members
  • Posts: 71
  • Joined: 07-October 11

Posted 13 November 2012 - 07:48 PM

View Posthappy-kat, on 13 November 2012 - 07:21 PM, said:

My underbody is dark but I like the ones done the original light colour like on FMC 04.
I got new petrol neck filler pipes to ensure a good seal on refitting.
You might like to take a look at my post as I found several hidden rust spots.


I will take a look at your thread kat, I quite like the light grey colour under where the fuel tank was. Still undecided on what colour to do.

Same with the rear arches, not sure whether to leave them Matt black or do them a different colour.

Ordered new fuel line, brake line and handbrake cable clips and a few other parts today. Also picked up a reel of copper to make new brake lines.

Alex

#24 User is offline   happy-kat 

  • Group: Admin
  • Posts: 21811
  • Joined: 10-February 03

Posted 13 November 2012 - 08:01 PM

Light belly :)
http://www.pumapeopl...=1
searching is fruitful | I'm a sponge not a mechanic | please do try that if stuck with a Puma problem whilst waiting for a reply | For the Puma fan this read 'The Inside Story Book' is very nice to own sometimes still seen for sale

#25 User is offline   Fatttty 

  • Group: Members
  • Posts: 71
  • Joined: 07-October 11

Posted 14 November 2012 - 08:53 AM

View Posthappy-kat, on 13 November 2012 - 08:01 PM, said:


Thanks Kat, I have a nice anthracite coloured epoxy mastic paint that will be going on the underside to give the best possible sealant and rust protection. I had planned on painting over this with an alternative colour but may well leave it if it looks nice.

#26 User is offline   Bentleya 

  • Group: Members
  • Posts: 517
  • Joined: 12-September 10
  • Location:Chelmsford

Posted 14 November 2012 - 01:28 PM

I'm liking the sound of all of this Alax, do you think you could post all the Finnis numbers when you are done? As I need to start collecting parts to re do all of mine.

#27 User is offline   Fatttty 

  • Group: Members
  • Posts: 71
  • Joined: 07-October 11

Posted 14 November 2012 - 02:58 PM

Of course mate, I've just picked up my bits from Ford so will check them against the originals and let you know the P/N I ordered. It was a bit tricky as the brake line clips are from the Focus MK1 and some interchange with the Puma.

Priced up the rear axle bolts and they are over £4.00 each so will be having my stripped and zinc plated instead.

Alex

#28 User is offline   Fatttty 

  • Group: Members
  • Posts: 71
  • Joined: 07-October 11

Posted 15 November 2012 - 08:51 AM

Aaron here are the part numbers I ordered-

6703047 - Handbrake cable clip x 6
1009475 - Fuel and brake line holder x 1
1011345 - Fuel and brake line holder x 1
1556070 - Screw and washer for handbrake cable x 2
6187705 - Clip for fuel and brake lines (runs down exhaust tunnel) x 2
7052131 - Fuel line clip x 2
7021463 - Brake line clip x 2
1453069 - Ring lock for brake line where it meets the arch nearest calliper x 2
7006852 - Brake line clip (nearest calliper / flexi pipe) x 2

Thats pretty much all parts for the rear end. I've just ordered some other bits like the screw and insert for holding the fuel neck pipe in place and some other bits and pieces but the above it 95% of what you will need :)

Hope that helps mate.

Alex

#29 User is offline   Bentleya 

  • Group: Members
  • Posts: 517
  • Joined: 12-September 10
  • Location:Chelmsford

Posted 15 November 2012 - 09:10 AM

That's fantastic Alex, thank you.

#30 User is offline   Fatttty 

  • Group: Members
  • Posts: 71
  • Joined: 07-October 11

Posted 15 November 2012 - 11:19 AM

No problem at all mate, I'm picking some other parts up today so will find the P/N for those too.

This post has been edited by Fatttty: 15 November 2012 - 11:41 AM


#31 User is offline   Fatttty 

  • Group: Members
  • Posts: 71
  • Joined: 07-October 11

Posted 19 November 2012 - 02:38 PM

UPDATE: Got the day to myself on Sunday so thought I'd get some hours in on the car. I'd ground all the surface rust down to just pitted metal as advised by the guys from Rustbusters. Just needed to mask up the fuel and brake lines and the outerside of the sills ready for painting.

Posted Image

Posted Image

The paint I used was Epoxy Mastic 121, I've only ever read good things about this paint and I've seen a few restoration threads that have used it. Its a 2 part mixture of 2 pac paint and an epoxy hardener. I rollered the majority of the boot floor and where the fuel tank sits.

Posted Image

Posted Image

Quite pleased with the reults though the boot floor will be redone in a few areas as I had missed some of the old underseal in a few areas. The paint has shown this up so want to get rid and redo those parts, you can see the lumpy parts in the corners in the pic below-

Posted Image

The epoxy paint is athrecite in colour buts its difficult to tell in the light under the car. I will be most likely be zinc priming and spraying a different colour. The spray should get in all the little gaps and give better coverage.

While the epoxy paint was curing I attacked the fuel tank, stripped all the old paint off the underside-

Posted Image

And made a good start on the top half of the tank (also removed the fuel sender unit and rubber seals etc)

Posted Image

More to come soon.

Alex

#32 User is offline   happy-kat 

  • Group: Admin
  • Posts: 21811
  • Joined: 10-February 03

Posted 19 November 2012 - 09:11 PM

You have been very busy, that paint system sounded like it would have been very smelly, that would put me off using a 2pak system.
searching is fruitful | I'm a sponge not a mechanic | please do try that if stuck with a Puma problem whilst waiting for a reply | For the Puma fan this read 'The Inside Story Book' is very nice to own sometimes still seen for sale

#33 User is offline   Fatttty 

  • Group: Members
  • Posts: 71
  • Joined: 07-October 11

Posted 19 November 2012 - 09:38 PM

View Posthappy-kat, on 19 November 2012 - 09:11 PM, said:

You have been very busy, that paint system sounded like it would have been very smelly, that would put me off using a 2pak system.


It was pretty smelly kat I soon got used to it but my folks said it stunk the house out lol! The epoxy paint will seal itself to the metal and will hopefully slow / stop the rust.

I've got to redo part of the boot floor as I'm unhappy with the finish. Then will be doing a coat of stonechip and final finish coat, which I think will be dove grey :)

Waiting for my rear callipers to come back from Bigg Red and got to drop my rear beam at the powdercoaters.

So much to do lol! Alex

#34 User is offline   Fatttty 

  • Group: Members
  • Posts: 71
  • Joined: 07-October 11

Posted 26 November 2012 - 01:56 PM

UPDATE: Got a good few hours of work done on the FRP this weekend. Last week hadn't gone well and I was a little disheartened with the whole thing. But feeling much happier now with how things are moving along :)

Progress with the fuel tank, I stripped the remaining old paint from the tank so it was just bare metal. There were a few bits of pitted surface rust on the top of the tank but this part is up against the boot floor so you can never see it. The underside is lovely and smooth so should look great when painted and fitted.

Etch primed-

Posted Image

Dusted-

Posted Image

Coat of grey hammerite stone guard for some protection-

Posted Image

Just got to give it the final coat of silver :)

The boot floor and underside was treated to two coats of etch primer (forgot to take photos) then two coats of stone guard-

Posted Image

Posted Image

Th final finish colour will be Ford Dove Grey, as far as I can tell this is a pretty close colour to the one used at the factory, plus its nice and light so should highlight the exhaust, axle and heatshields better.

Started work on the spindles for the hubs, only done one so far. Stripped the old paint off ready for painting-

Posted Image

Quick coat of hammerite smooth silver, this needs touching up a little but ran out of paint grrr :(

Posted Image

And finally, got my copper pipe for my new brake lines. All I need are the new connectors which I'll pick up in the week.

Posted Image

Thanks for looking, Alex

#35 User is offline   Fatttty 

  • Group: Members
  • Posts: 71
  • Joined: 07-October 11

Posted 05 December 2012 - 04:39 PM

Quick update; had my rear calipers back from being refurbished. Sent them off to Big Redd Brakes in Worcester. Really impressed with them, had the full works.

Fully stripped
Electro plated in Ford OEM gold
New pistons
New seals
New bleed nipples etc

Also had the carriers and slider pins done to match...

Posted Image

Posted Image

Finished the fuel tank, finished in OEM flat silver. Replaced the rubber seals and the plastic fuel line clip. Refitted the fuel send pump so its all ready to bolt back under the car once the underside is fully painted.

Top side; few bubbles from the old surface rust but ground it down to pitted metal so as good as it could be-

Posted Image

Underside; pleased with this, should look nice and clean for shows-

Posted Image

Made my copper brake lines too, will upload pics when I get chance. Loads more to come guys and gals :D

Alex

#36 User is offline   happy-kat 

  • Group: Admin
  • Posts: 21811
  • Joined: 10-February 03

Posted 05 December 2012 - 08:50 PM

Your tank looks good, pity I got mine slapped with product as does not look as smart
searching is fruitful | I'm a sponge not a mechanic | please do try that if stuck with a Puma problem whilst waiting for a reply | For the Puma fan this read 'The Inside Story Book' is very nice to own sometimes still seen for sale

#37 User is offline   Fatttty 

  • Group: Members
  • Posts: 71
  • Joined: 07-October 11

Posted 06 December 2012 - 11:41 AM

View Posthappy-kat, on 05 December 2012 - 08:50 PM, said:

Your tank looks good, pity I got mine slapped with product as does not look as smart


Thanks Kat, god knows what was previously on it but it was very lumpy and rough looking. I stripped everything back to bare metal before etch priming, stone chipping and paint. I'm really pleased with the results :)

Things are moving forward nicely, dropped my rear beam in at the powdercoaters this morning. It need stripping to ensure a good finish so I'm having it acid dipped, sandblasted, zinc primed and coated in satin black.

Will update when it comes back.

Alex

#38 User is offline   happy-kat 

  • Group: Admin
  • Posts: 21811
  • Joined: 10-February 03

Posted 06 December 2012 - 08:54 PM

Lucky to find an acid bath thought they were thing of the past. That will really help with it lasting.
I had the powder coat ground off the mating surface to ensure a flat to car fit.
searching is fruitful | I'm a sponge not a mechanic | please do try that if stuck with a Puma problem whilst waiting for a reply | For the Puma fan this read 'The Inside Story Book' is very nice to own sometimes still seen for sale

#39 User is offline   Fatttty 

  • Group: Members
  • Posts: 71
  • Joined: 07-October 11

Posted 07 December 2012 - 08:48 AM

View Posthappy-kat, on 06 December 2012 - 08:54 PM, said:

Lucky to find an acid bath thought they were thing of the past. That will really help with it lasting.
I had the powder coat ground off the mating surface to ensure a flat to car fit.


I was pleased when he said he was dipping it, wasn't actually expecting that (just expected sand blasting) I will be grinding the tops of the mating plates where they bolt to the boot floor. Just waiting to see what it comes back like :woot2:/>

#40 User is offline   Bentleya 

  • Group: Members
  • Posts: 517
  • Joined: 12-September 10
  • Location:Chelmsford

Posted 07 December 2012 - 11:18 AM

I'm not sure if there are acid bath as such, my local powder coaters use a water based cleaning solution instead now.

Share this topic:


  • 4 Pages +
  • 1
  • 2
  • 3
  • 4
  • You cannot start a new topic
  • You cannot reply to this topic