
 Help
Help


1.7 Project, Slow But Steady
Rate Topic:

#81

Posted 31 May 2012 - 08:56 PM
It looks like a scap yard at home mate is that where you got the seats from
#82
Posted 31 May 2012 - 09:10 PM
hahaha it does yeah but i tidyed it all back into the cellor once i had found what i needed, i got the seats from near warrington. ive got shelfs and boxes full of bits now. i should have a clearout and put aload of it on ebay.
#83
Posted 05 June 2012 - 09:41 PM
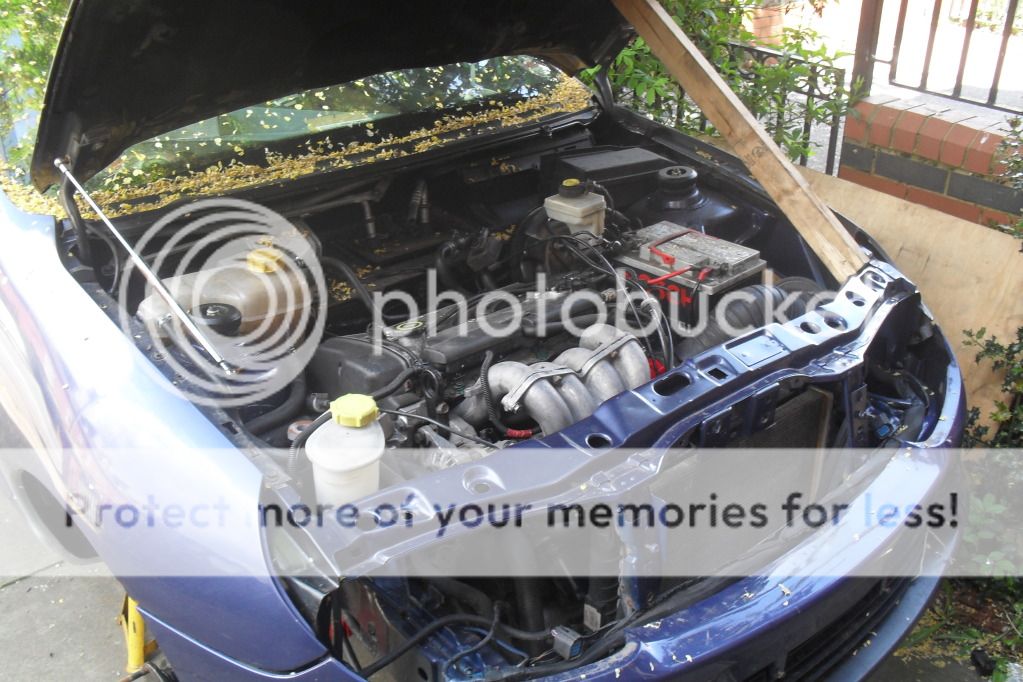
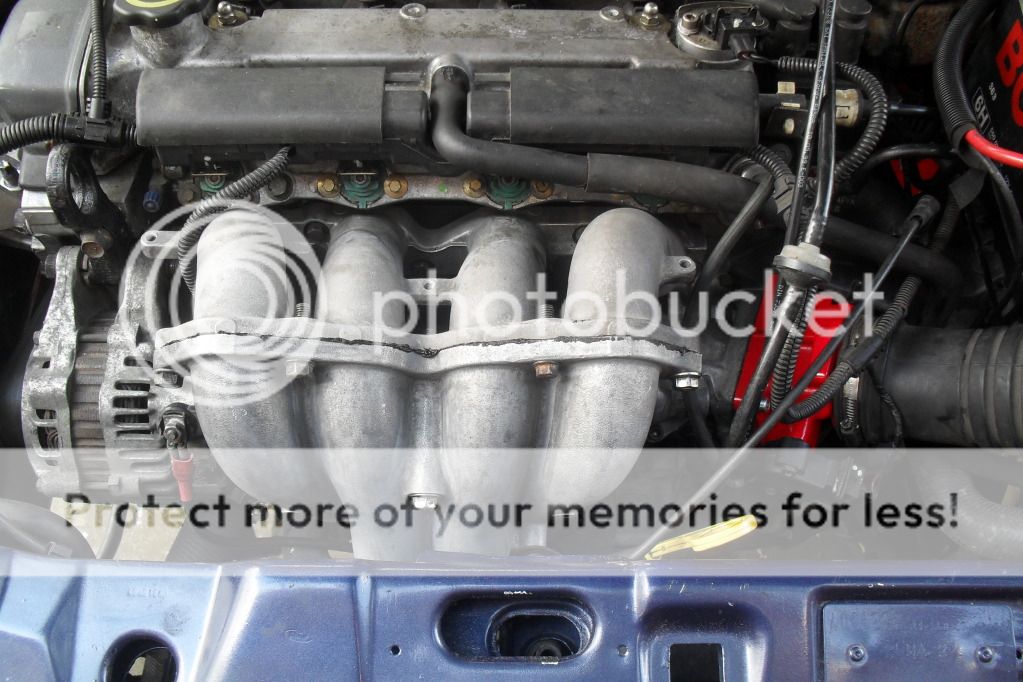
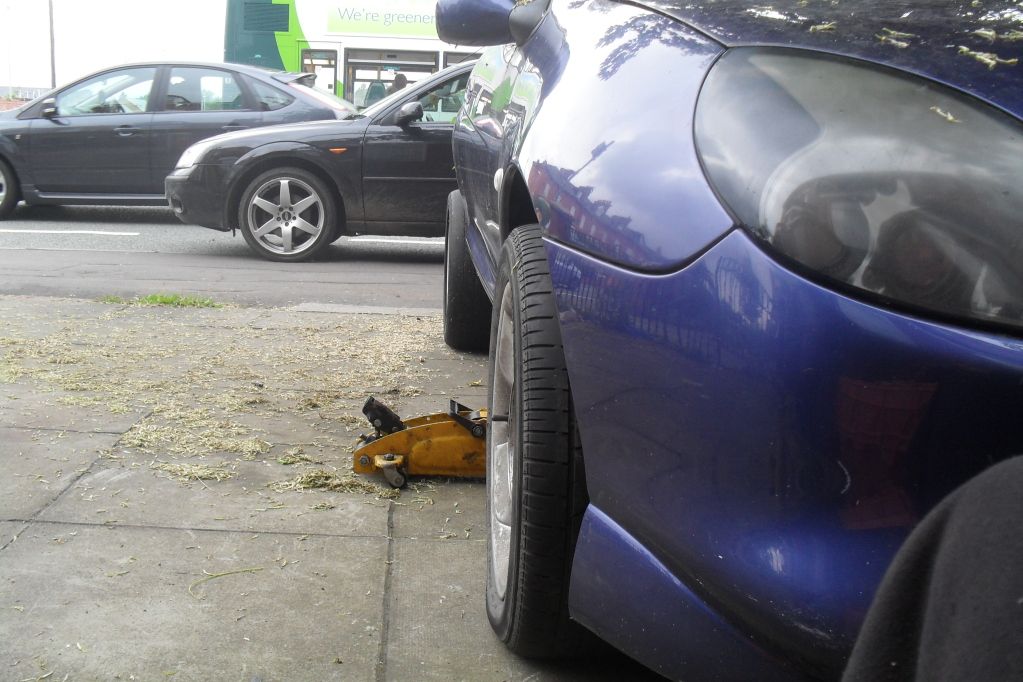
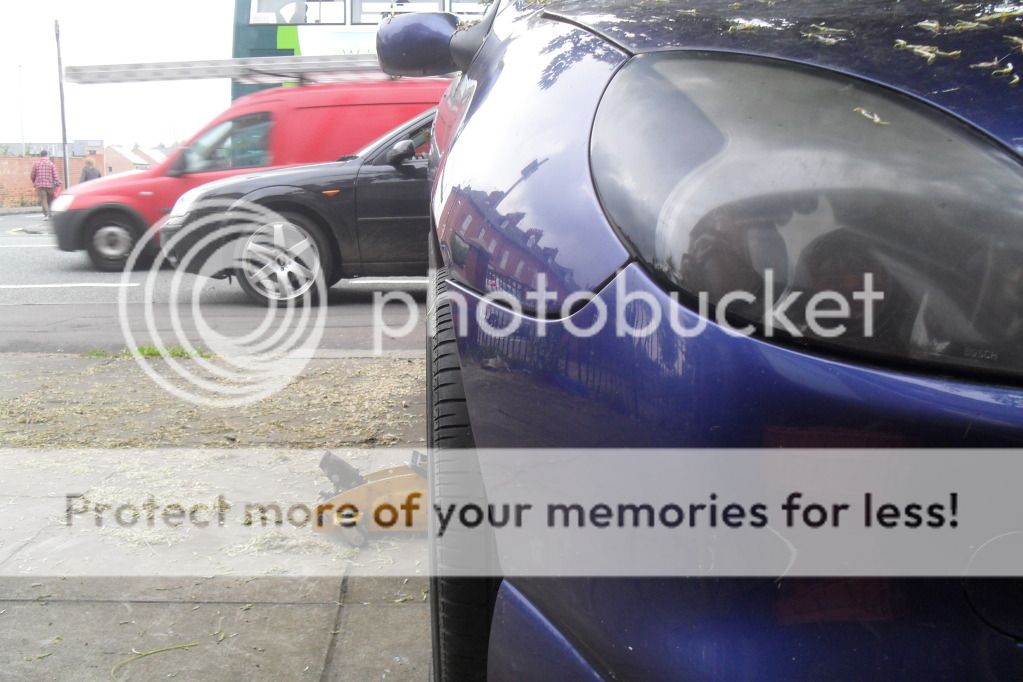
hi all, ive got a massive update here ive got plenty done.
for starters ive fully built up the engine now and got her running, i havent got any video's so the pic of the rev counter will have to do for now.
pics of it all built up
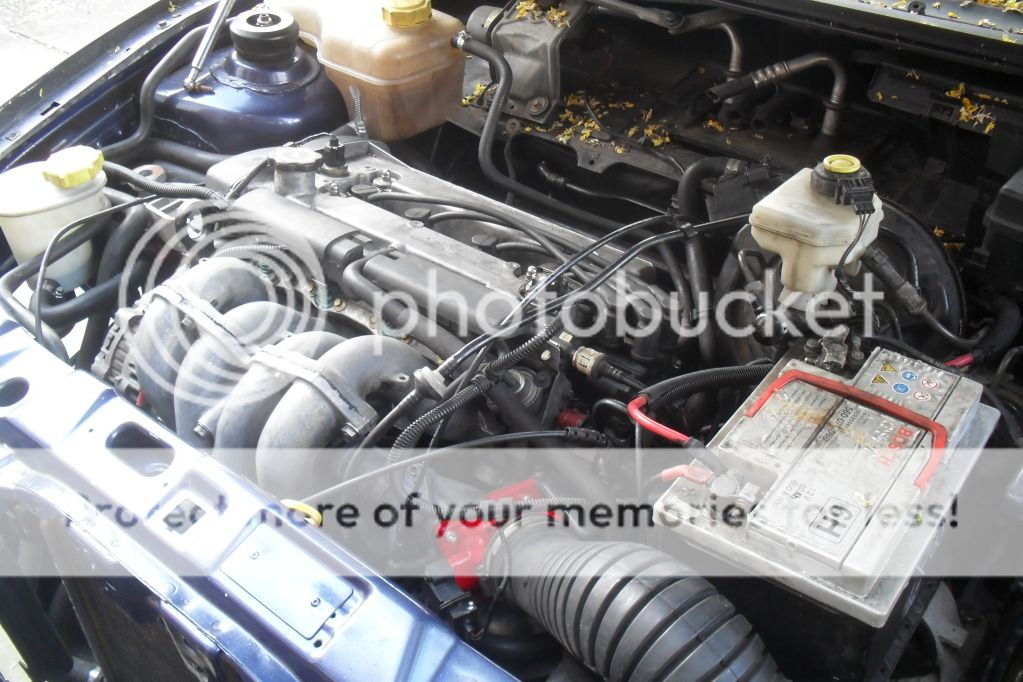


its very loud as it stands due to no middle section and no back box, they will be fitted when i rebuilt the back end.
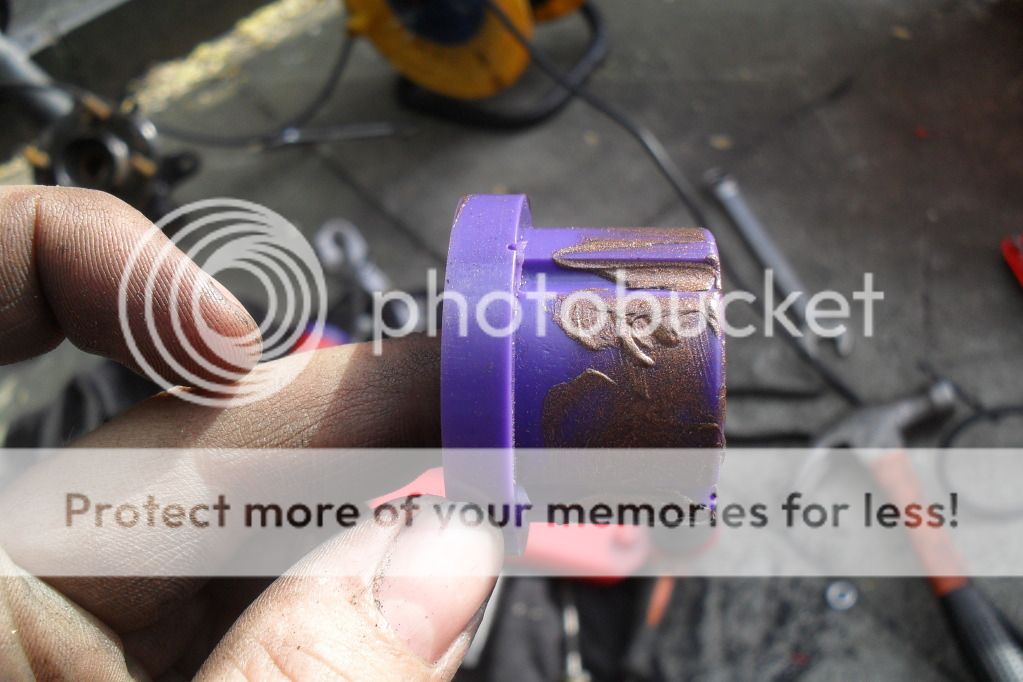
after getting her running at the first turn of the key (after i added some fresh fuel) i started work on rplacing the bushes at the front end
with the new anti roll bush inplace
i tryed pushing out the wishbone bush with a bolt and a socket but i couldnt get the space i needed bue to the way the wishbone is shaped

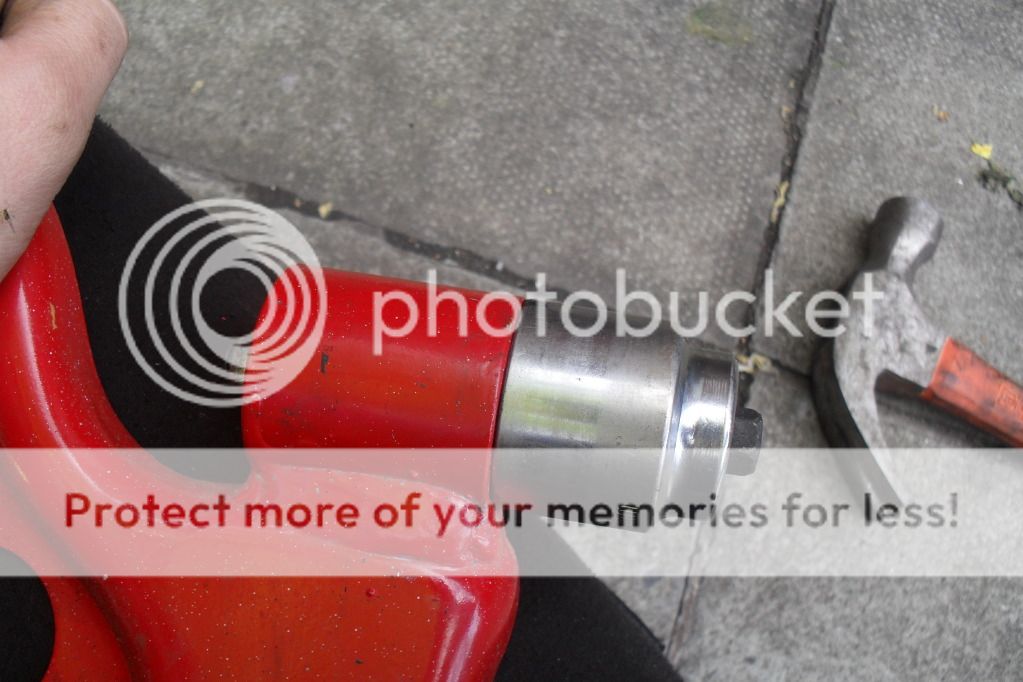
so i just got my trusty old drill out and got it out that way
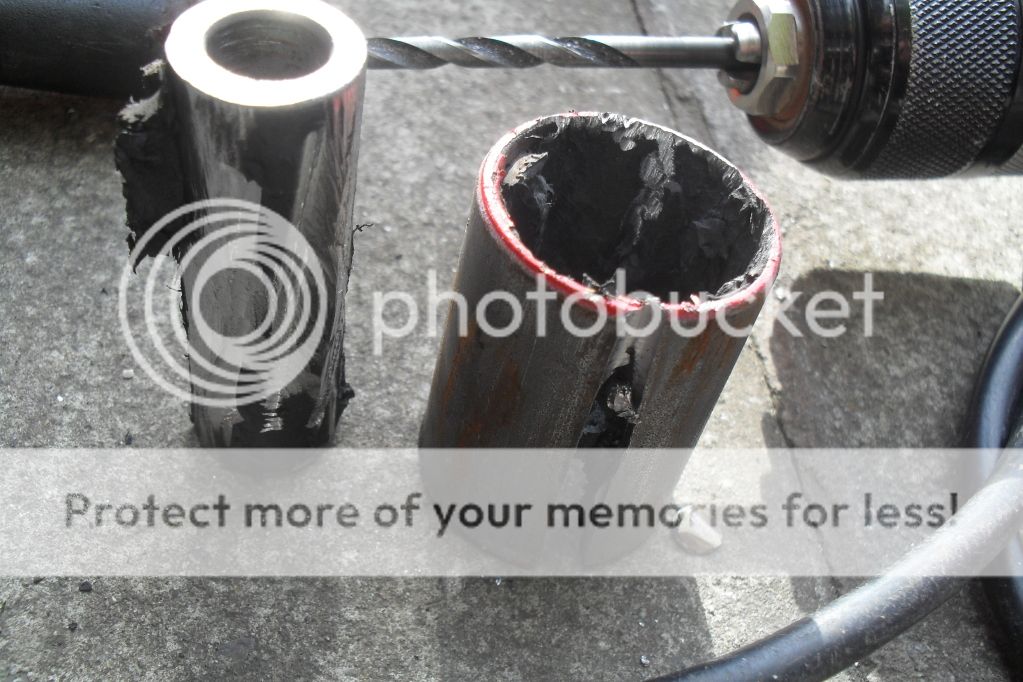
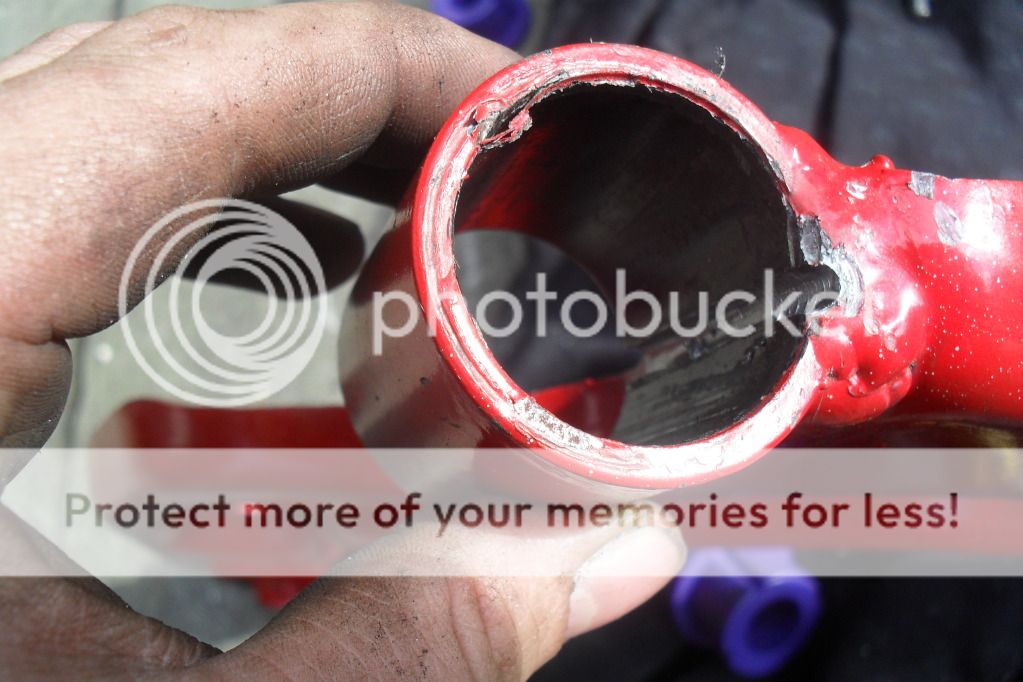
with that out of the way i lubed up the replacements and pushed them into place.
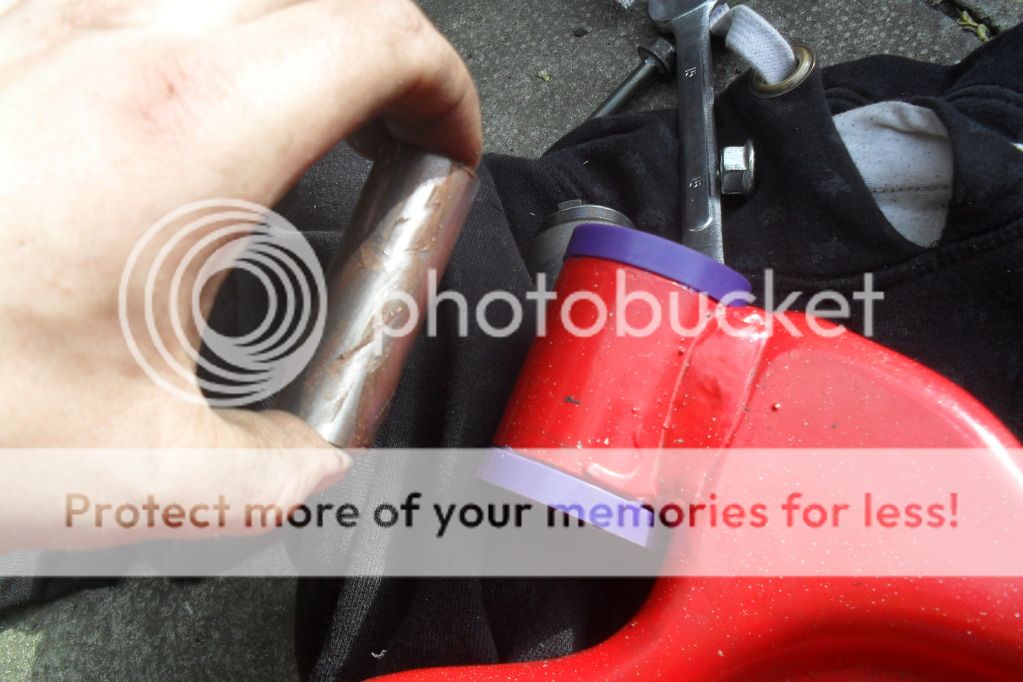
and how it now looks inplace.
and after i finished this side i started and finished the other side, i only took me half as long thought
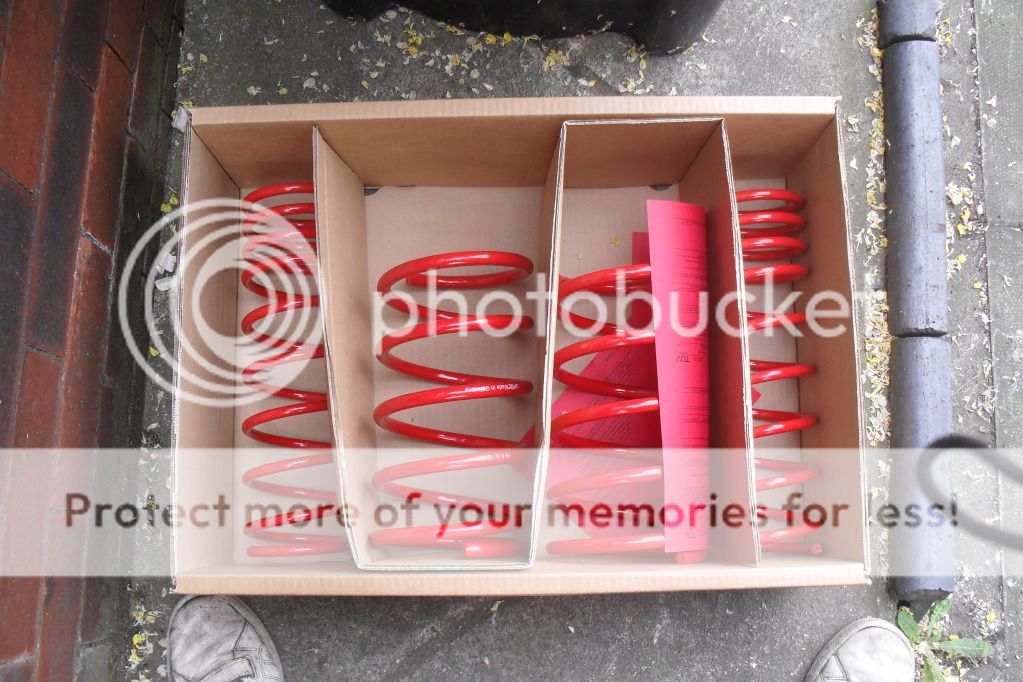
earlyer today my new springs arrived

but i set about fitting my bonnet pins.


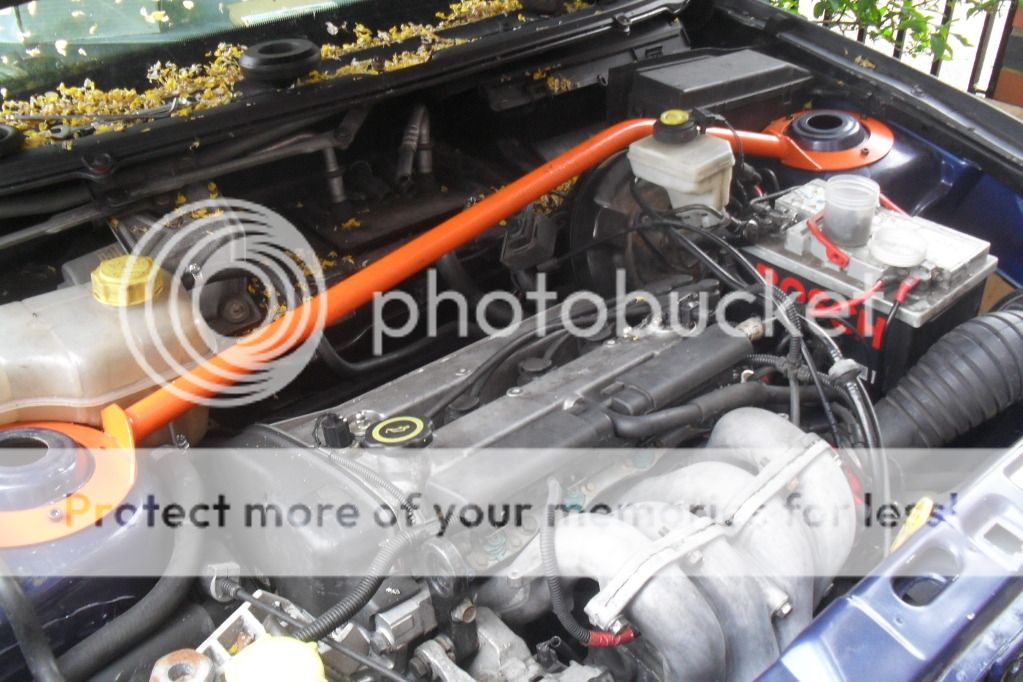
another thing ticked off the list, i fitted the front strut brace and bolted it down
after i had done all that in rain stopped play. the list of things i need to do now is:
replace front wheel bearings and replace the front shockers them the running gear and engine wil be all together and performing like it should.
what do you all think? ive worked hard to get all that done.
for starters ive fully built up the engine now and got her running, i havent got any video's so the pic of the rev counter will have to do for now.
pics of it all built up
its very loud as it stands due to no middle section and no back box, they will be fitted when i rebuilt the back end.
after getting her running at the first turn of the key (after i added some fresh fuel) i started work on rplacing the bushes at the front end
with the new anti roll bush inplace
i tryed pushing out the wishbone bush with a bolt and a socket but i couldnt get the space i needed bue to the way the wishbone is shaped
so i just got my trusty old drill out and got it out that way
with that out of the way i lubed up the replacements and pushed them into place.
and how it now looks inplace.
and after i finished this side i started and finished the other side, i only took me half as long thought
earlyer today my new springs arrived
but i set about fitting my bonnet pins.
another thing ticked off the list, i fitted the front strut brace and bolted it down
after i had done all that in rain stopped play. the list of things i need to do now is:
replace front wheel bearings and replace the front shockers them the running gear and engine wil be all together and performing like it should.
what do you all think? ive worked hard to get all that done.
#84
Posted 07 June 2012 - 11:37 AM
im goin to paint my wheels and strut braces in ford st orange electric orange 7/6FSE
#85
Posted 07 June 2012 - 08:01 PM
does these mods get the 0-60 time down from 2 minutes to 1.5 minutes now???? 
#87
Posted 11 June 2012 - 11:44 PM
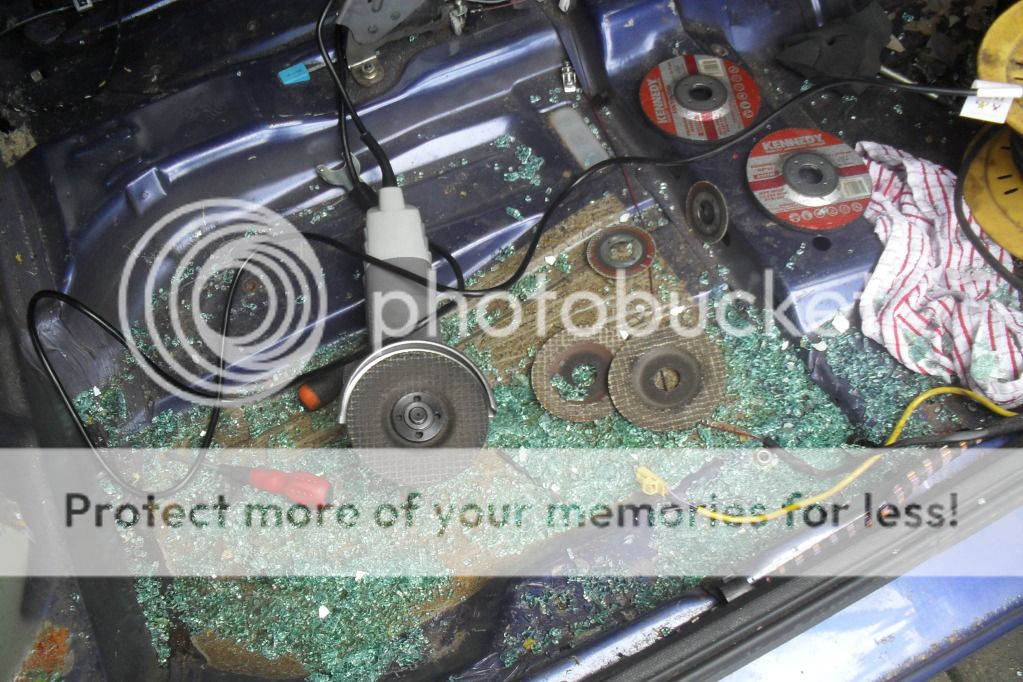
another little update after a couple of days of hours work on the car over the weekend.
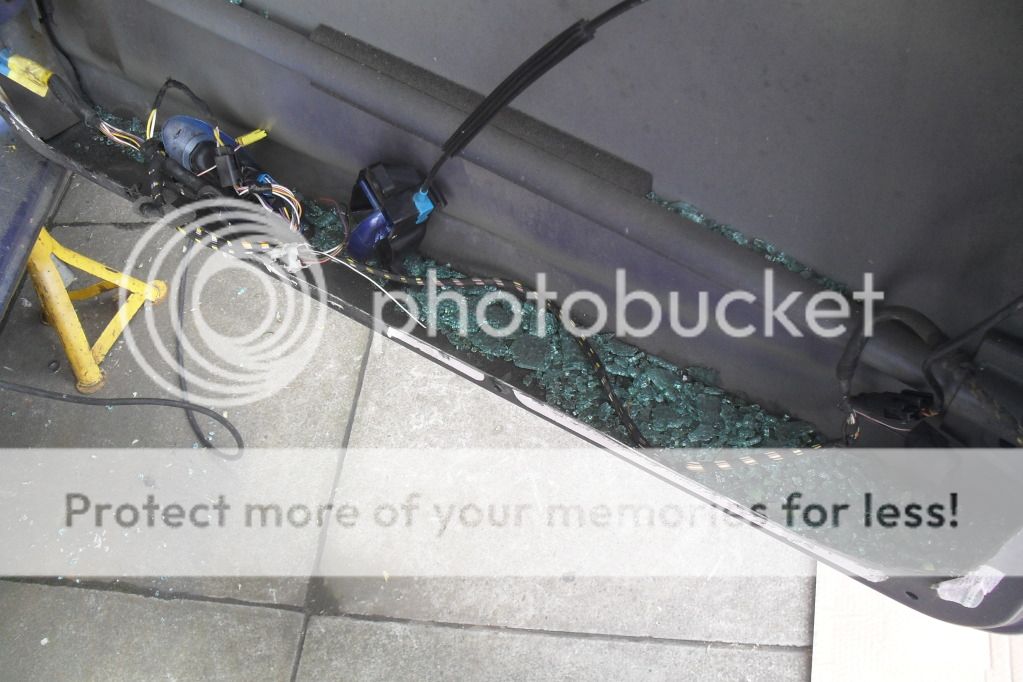
on saturday I started cutting out the internals of the drivers door, then 10 mins into the cutting the grinder pops and dies, i changed the fuse but still nothing so i took it back to b&q and expressed my disspleasure in the fact it had broken after only having it 9 weeks and they gave me an upgrade for free go got back and carryed on with the door. 30 seconds after i started cutting again the glass shatterd
  i didnt look like i was going a good day so i finished off the door put a bin bag over the window and swept up the glass.
picssss
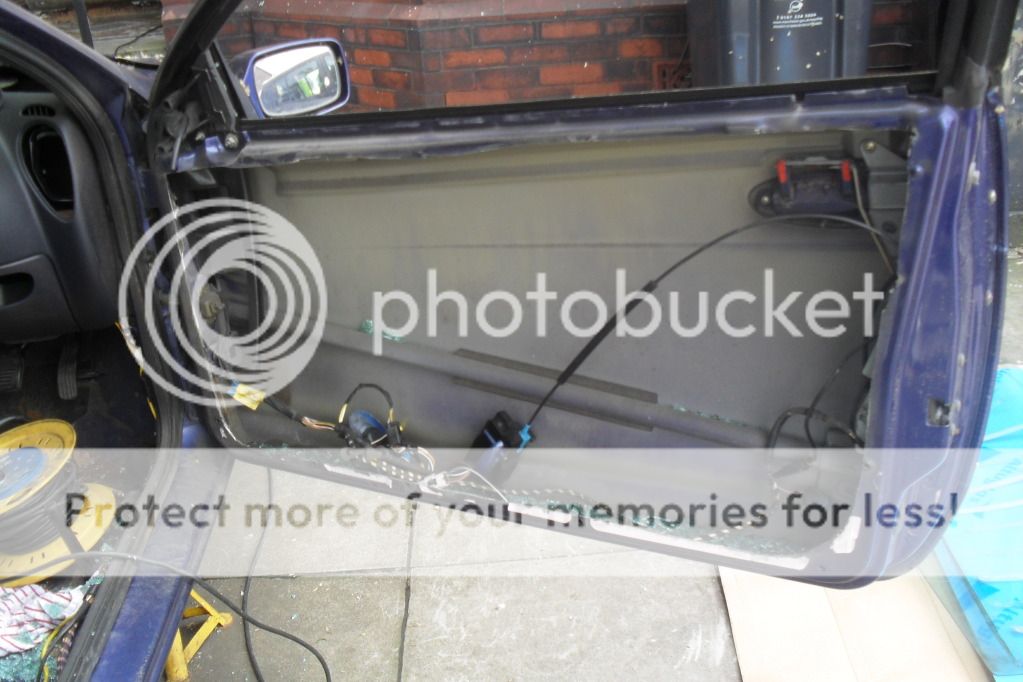
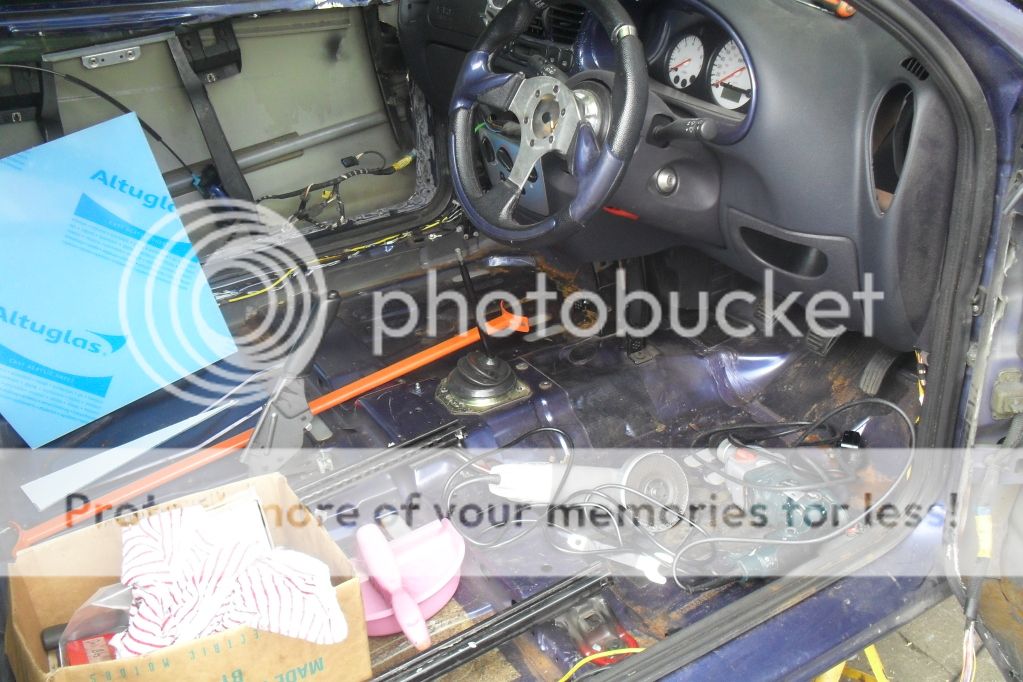
on sunday i replaced the glass with perspex that i had orderd to replace the windows. after i had replaced the window i gave the puma a clean out and i good hover to get rid of all the glass. ive also ordered some steel for the base of the seats so ive fitted the botton runners for the drivers seat ready for a little welding
i used the passengers window as a template
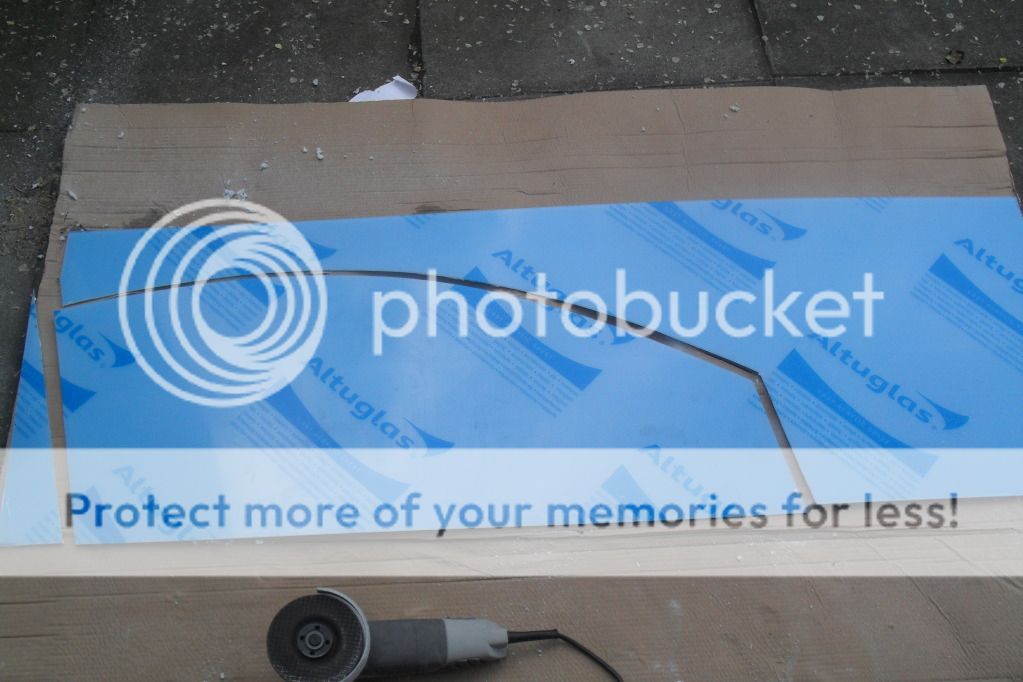
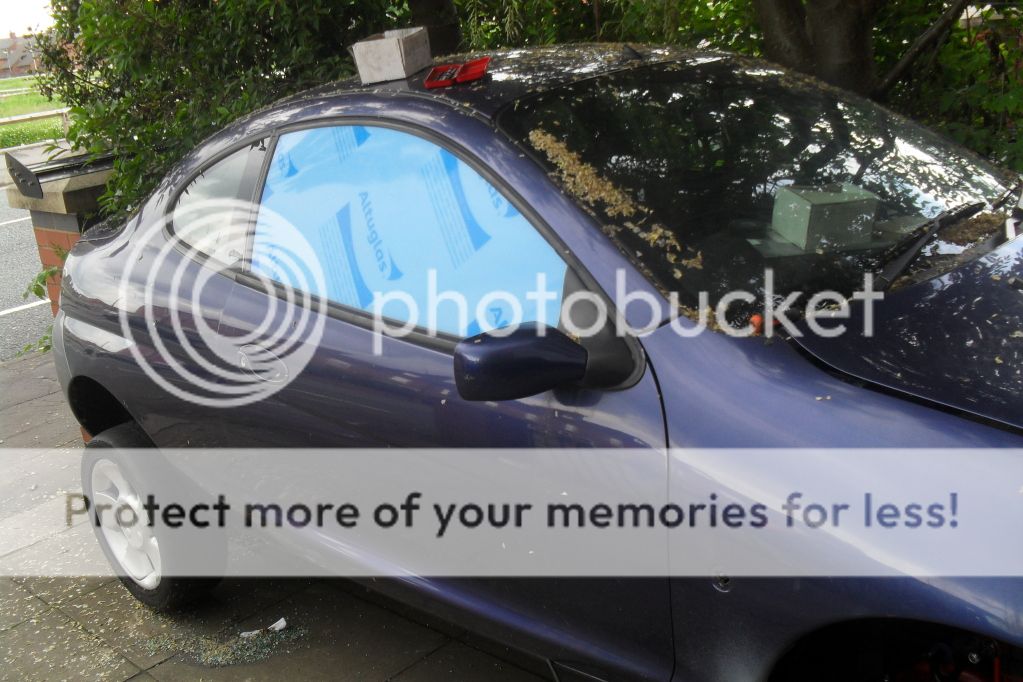
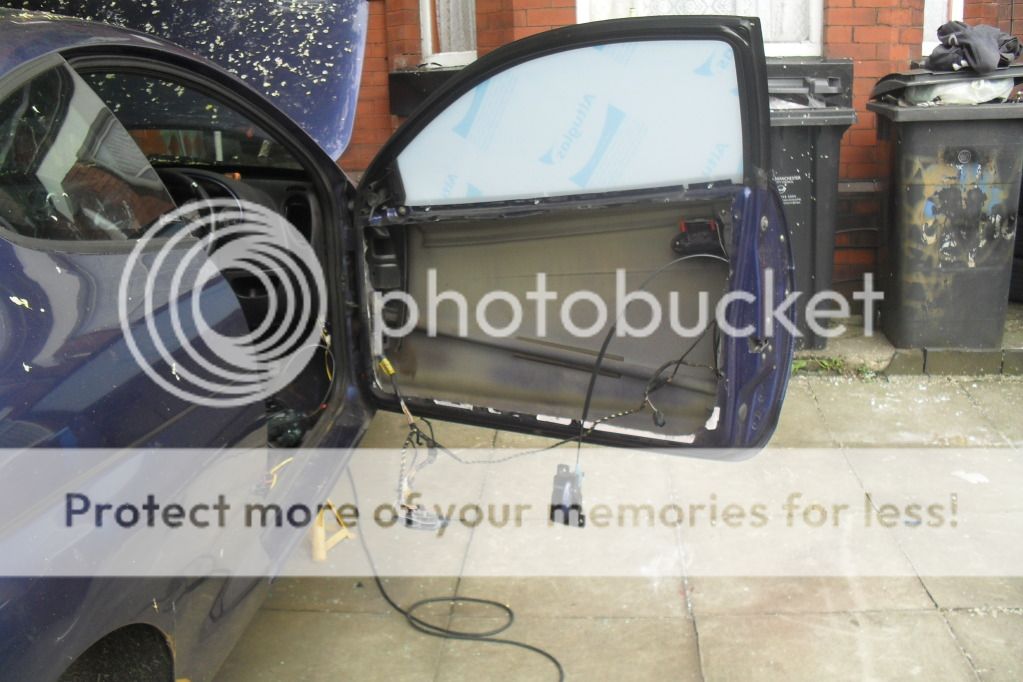
that is only the pretective cover, it is clear underneath
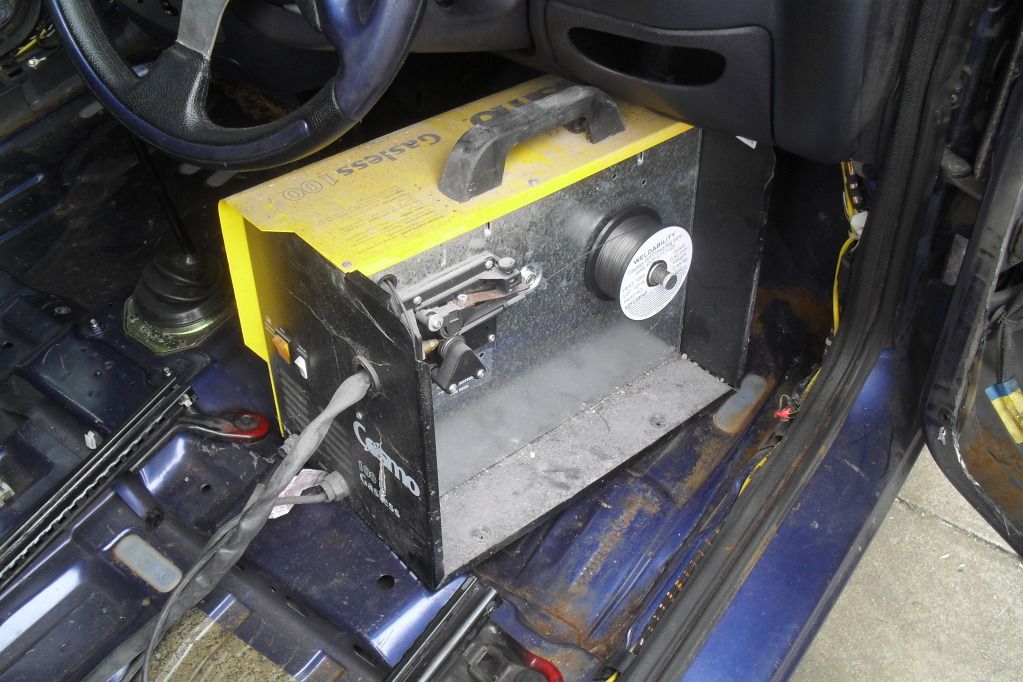
then monday i welded up the rear holes that i cut for the strut brace. not the best welder in the world ( thats me and the welding set hahahahahaha) but tbh for 30 quid i cant complain
well thats the work so far, i am changing the front wheel bearings at work as we speak there in bits waiting for the bearings to arrive and also got a suspension kin on the way so as soon as they both arrive the car can have the drive shafts back together and the brakes hooked up and the wheels back on then its on with the back of the car. ive got everthing i need to rebuild the back minus the suspension legs (there in the post) and the new hand brake cables. there is still loads to do but not alot of money left to spend to get her road wearthy, mybe only about250-300 quid and thats it and most of that is for 4 new tyres.
let me know what you think guys, i cant wait to get it to trax in sepenber i should have alot of fun 
on saturday I started cutting out the internals of the drivers door, then 10 mins into the cutting the grinder pops and dies, i changed the fuse but still nothing so i took it back to b&q and expressed my
disspleasure in the fact it had broken after only having it 9 weeks and they gave me an upgrade for free go got back and carryed on with the door. 30 seconds after i started cutting again the glass shatterd i didnt look like i was going a good day so i finished off the door put a bin bag over the window and swept up the glass.picssss
on sunday i replaced the glass with perspex that i had orderd to replace the windows. after i had replaced the window i gave the puma a clean out and i good hover to get rid of all the glass. ive also ordered some steel for the base of the seats so ive fitted the botton runners for the drivers seat ready for a little welding
i used the passengers window as a template
that is only the pretective cover, it is clear underneath
then monday i welded up the rear holes that i cut for the strut brace. not the best welder in the world ( thats me and the welding set hahahahahaha) but tbh for 30 quid i cant complain
well thats the work so far, i am changing the front wheel bearings at work as we speak there in bits waiting for the bearings to arrive
and also got a suspension kin on the way so as soon as they both arrive the car can have the drive shafts back together and the brakes hooked up and the wheels back on then its on with the back of the car. ive got everthing i need to rebuild the back minus the suspension legs (there in the post) and the new hand brake cables. there is still loads to do but not alot of money left to spend to get her road wearthy, mybe only about250-300 quid and thats it and most of that is for 4 new tyres.let me know what you think guys, i cant wait to get it to trax in sepenber
i should have alot of fun
#88
Posted 12 June 2012 - 09:40 PM
tiny update of the little progress made today.
ive tacked in the drivers seat now and will be welding it up fully once ive removed it. will post pics when its done
tomorow i will be fitting and welding in the passengers seat and putting rust killer on all the bear metal inside the car and primering it so it doesnt rust. not looking at making the car perfect straight off i want to get everything working and useable before i start making everthing look pritty lol
cheers kieran
#89
Posted 14 June 2012 - 12:03 AM
small update of what was done today,
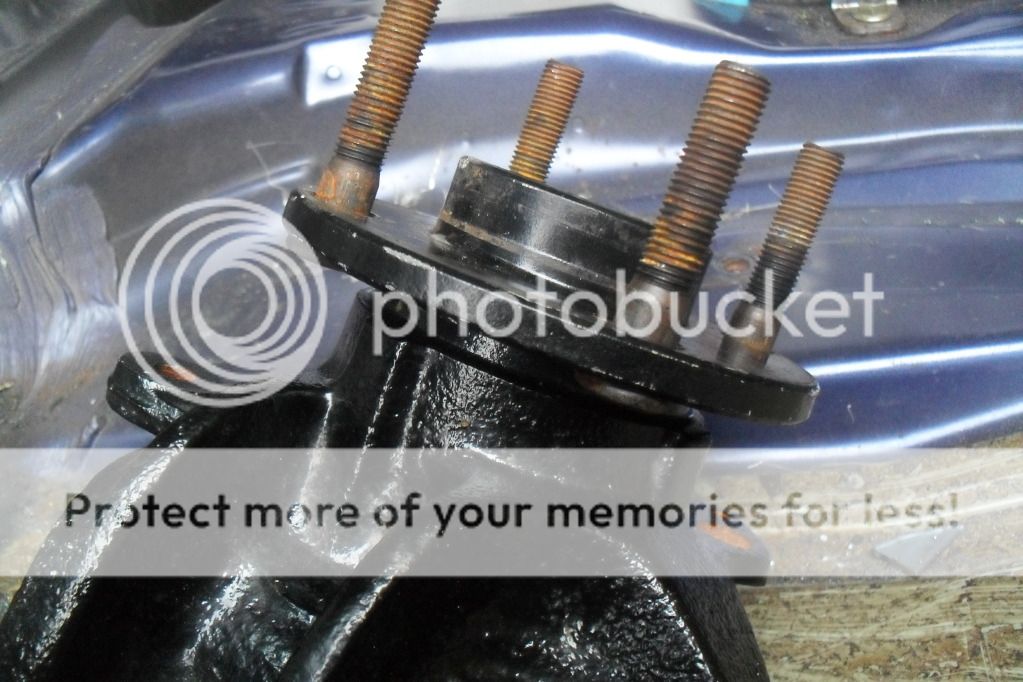
ive fitted one of the wheel bearings but im still waiting for the other to arrive.
picsss
ive also finished the drivers seat mounting.
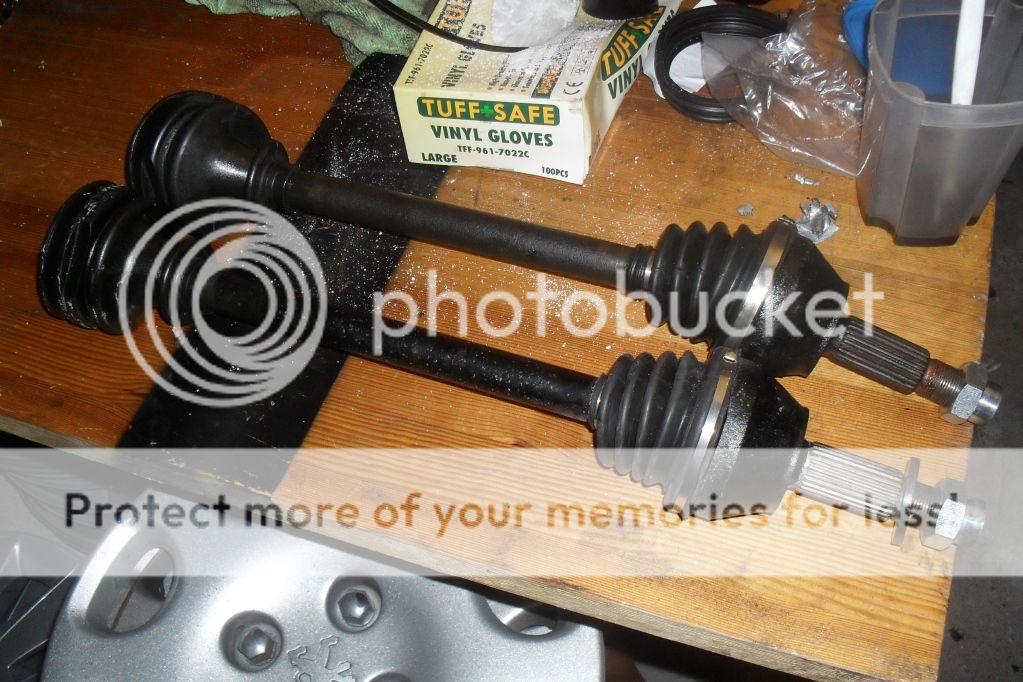
also finished the drive shafts ready to fit.
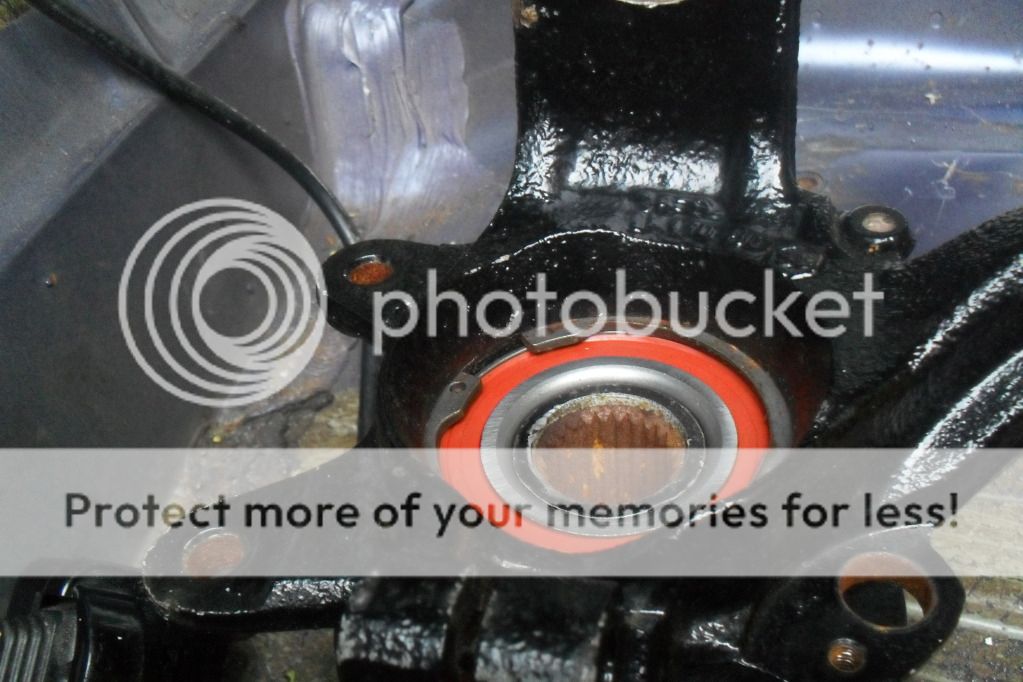
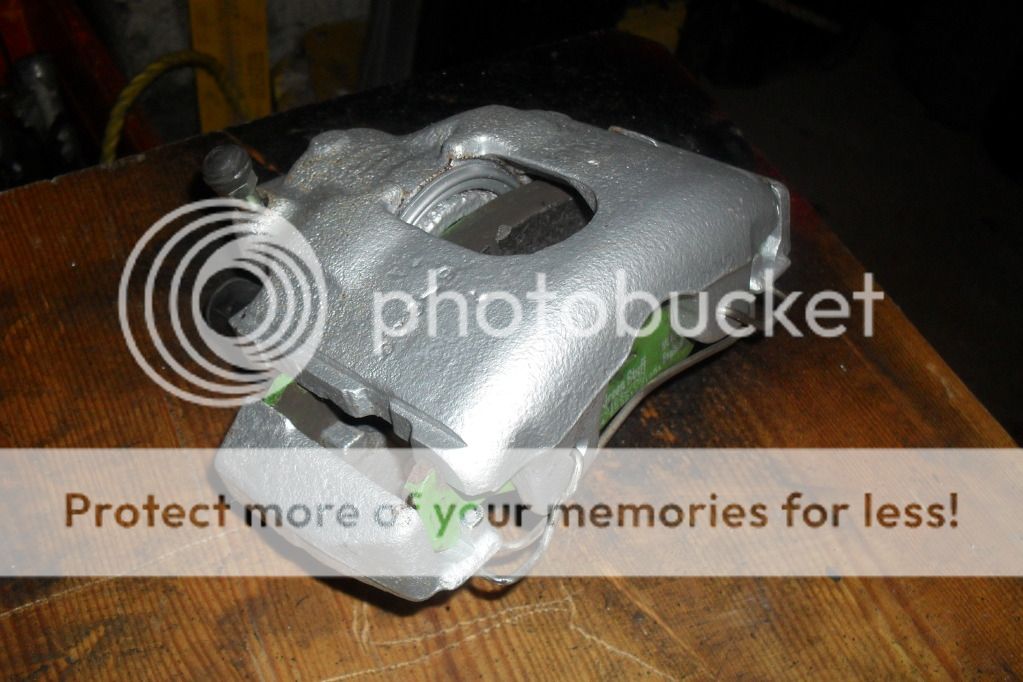
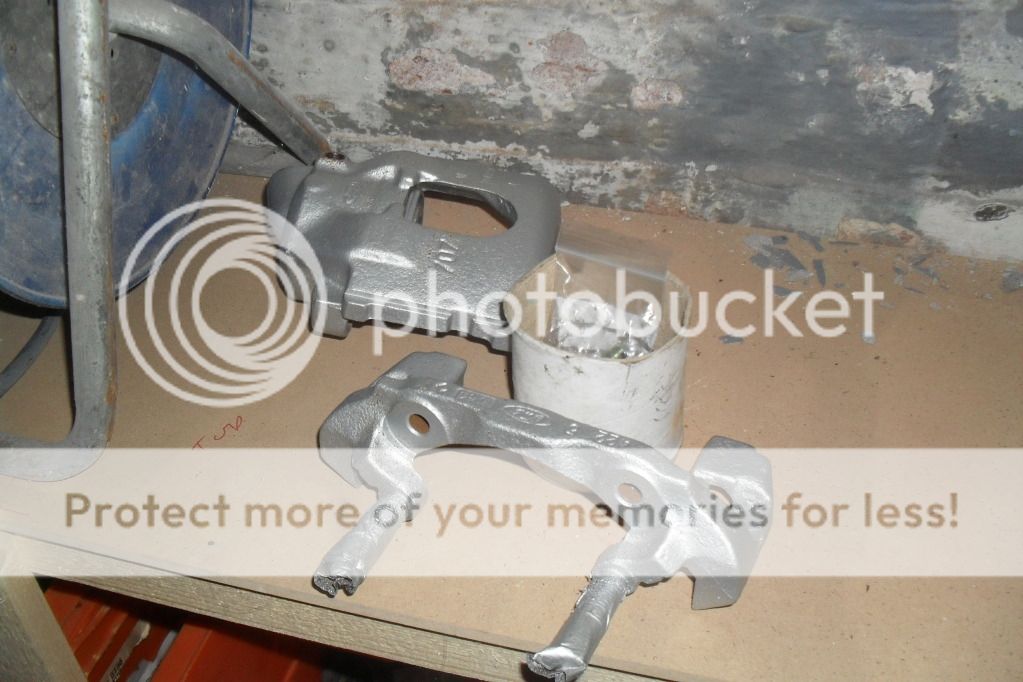
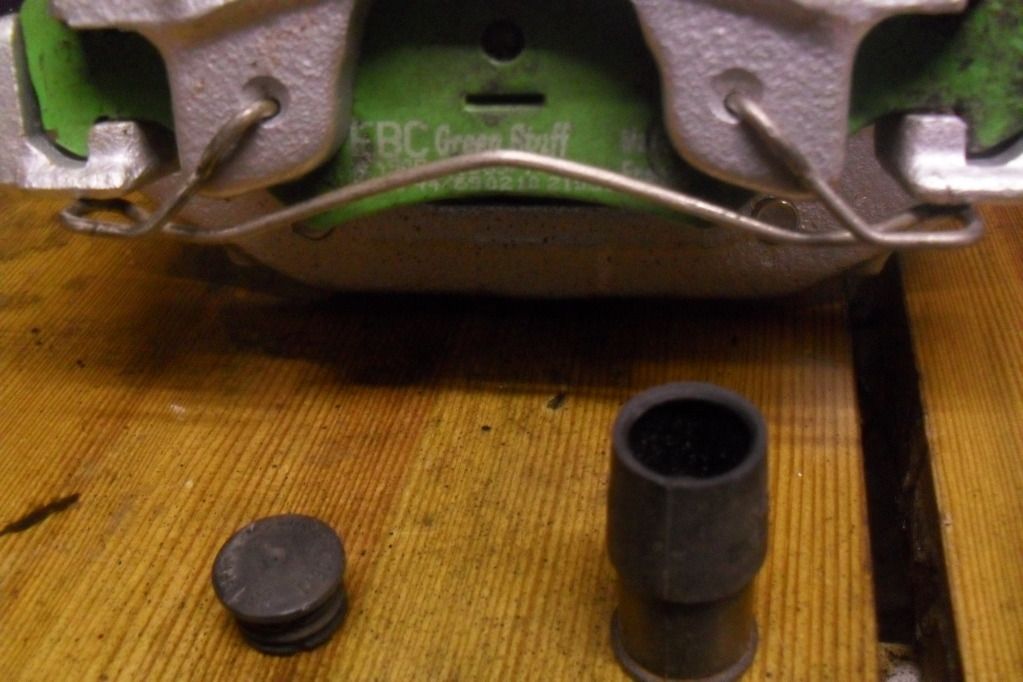
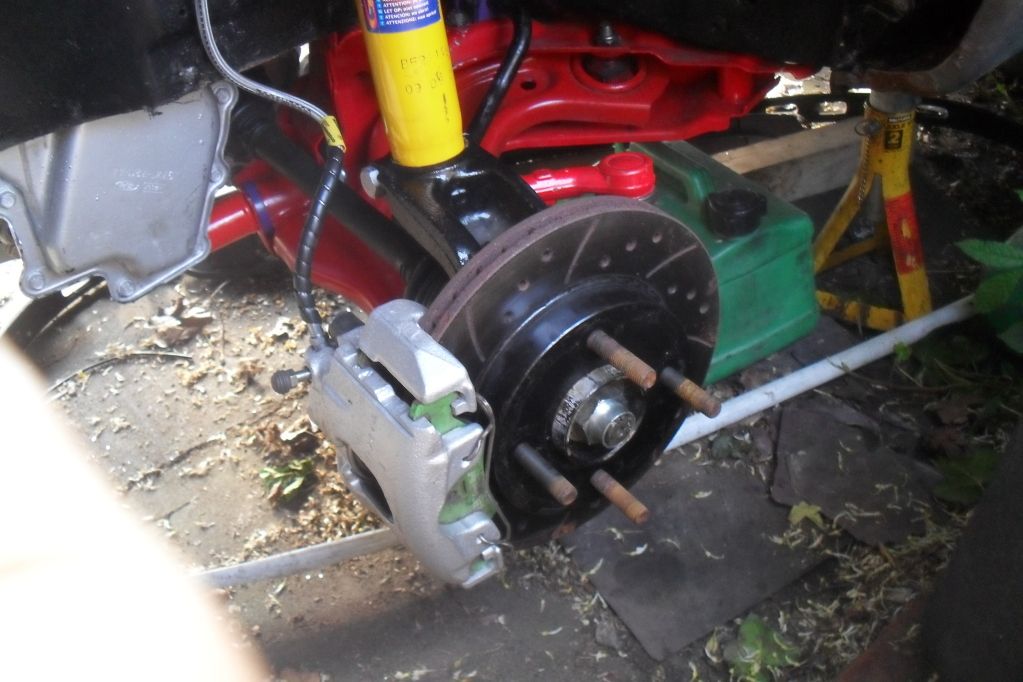
ive started to asseble the front brakes
im missing a few things though so i could only get one side build up
then i fitted the drive shafts and also the brake hoses for the front.
i always end up cutting myself hahaha
cant wait to have the front end finished, that will be a real mile stone in the build when its done
ive fitted one of the wheel bearings but im still waiting for the other to arrive.
picsss
ive also finished the drivers seat mounting.
also finished the drive shafts ready to fit.
ive started to asseble the front brakes
im missing a few things though so i could only get one side build up
then i fitted the drive shafts and also the brake hoses for the front.
i always end up cutting myself hahaha
cant wait to have the front end finished, that will be a real mile stone in the build when its done

#91
Posted 17 June 2012 - 12:00 AM
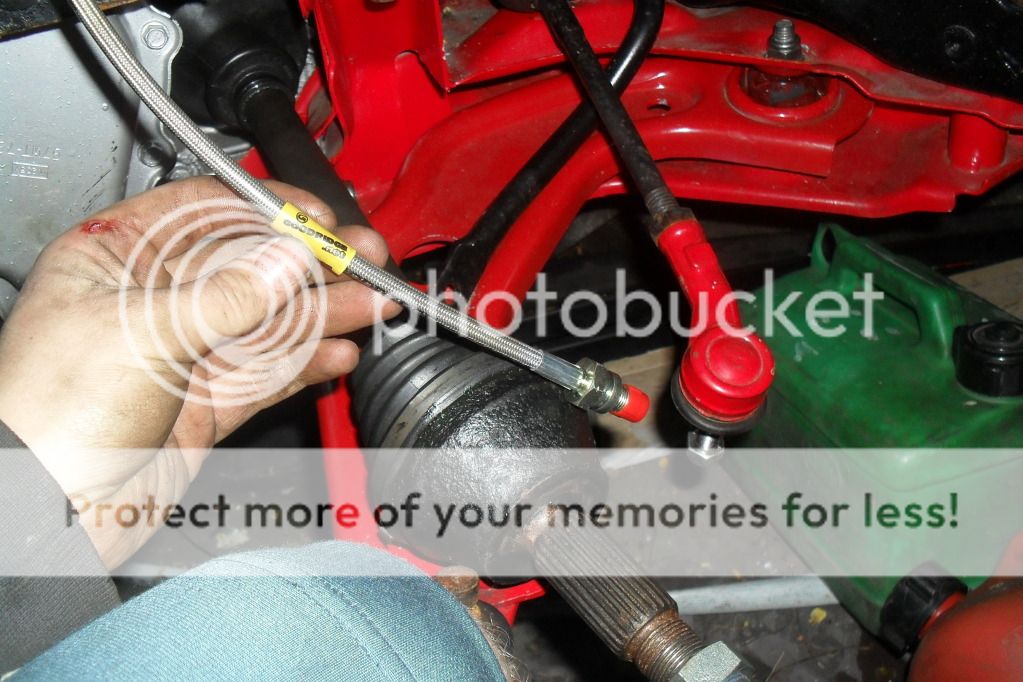
ive had leak after leak with my powersteering, so ive decided after seeing a fellow user replace ther steering rack with a manuel one to do the same. dont want to seem like im copying them  ive already spent money on a new power steering rack but now that up for sale again ahahahah.it should cover some of the costs of the new manuel rack.
ive also given the puma a real good clean inside with some strong thinners and ive got rid of all the leftovers of when i scraped up the insulation.
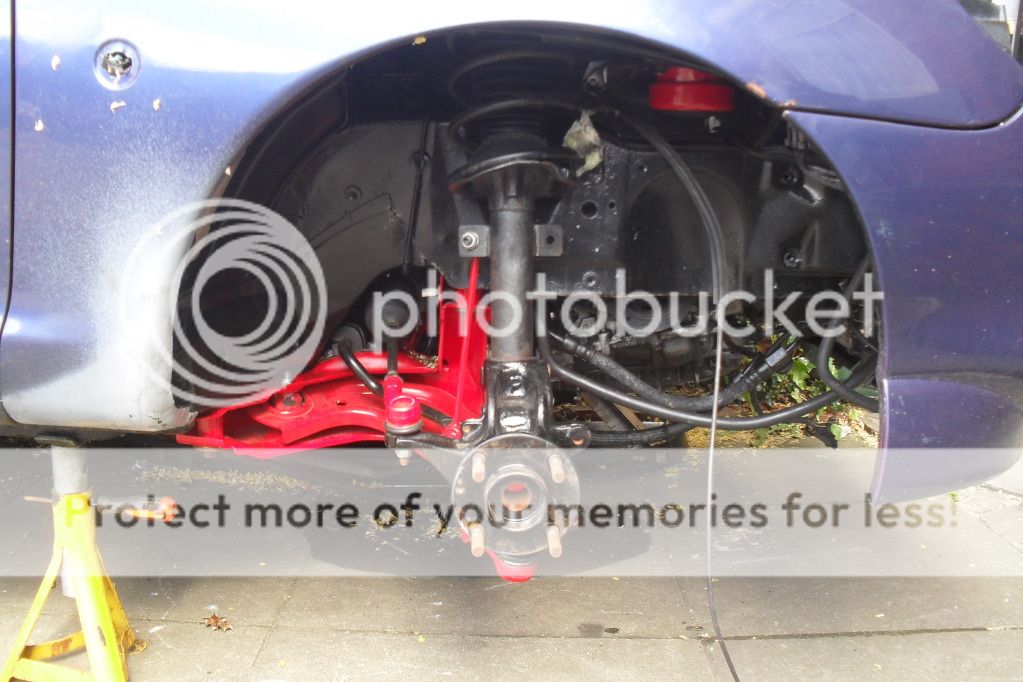
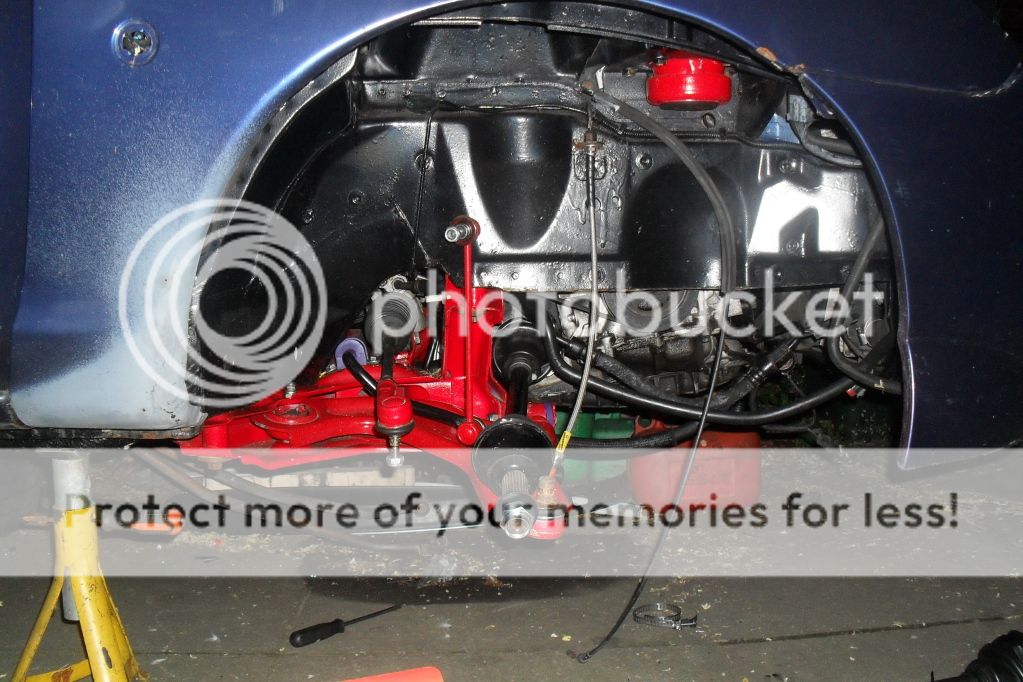
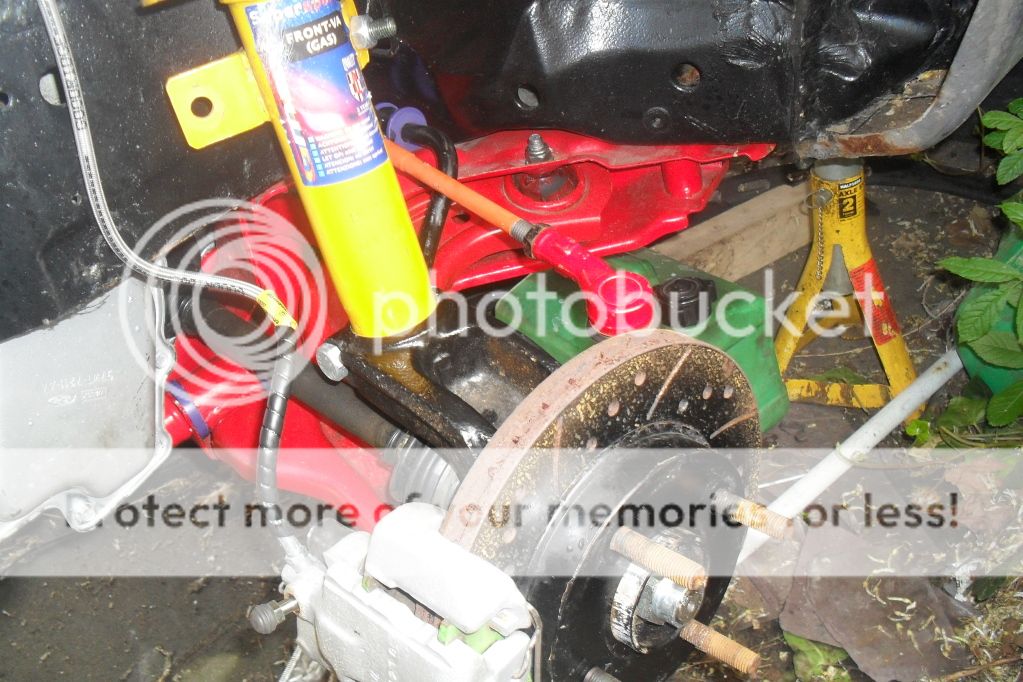
ive also competed one side of the front end, thats everything new or refurbished from the puly bushed new wishbones and new droplinks to the new wheel bearings and wheel spacers.
i will post pics soon of what ive done/ competed to date soon.
cheers kieran
ive already spent money on a new power steering rack but now that up for sale again ahahahah.it should cover some of the costs of the new manuel rack.ive also given the puma a real good clean inside with some strong thinners and ive got rid of all the leftovers of when i scraped up the insulation.
ive also competed one side of the front end, thats everything new or refurbished from the puly bushed new wishbones and new droplinks to the new wheel bearings and wheel spacers.
i will post pics soon of what ive done/ competed to date soon.
cheers kieran
#92
Posted 19 June 2012 - 09:56 PM
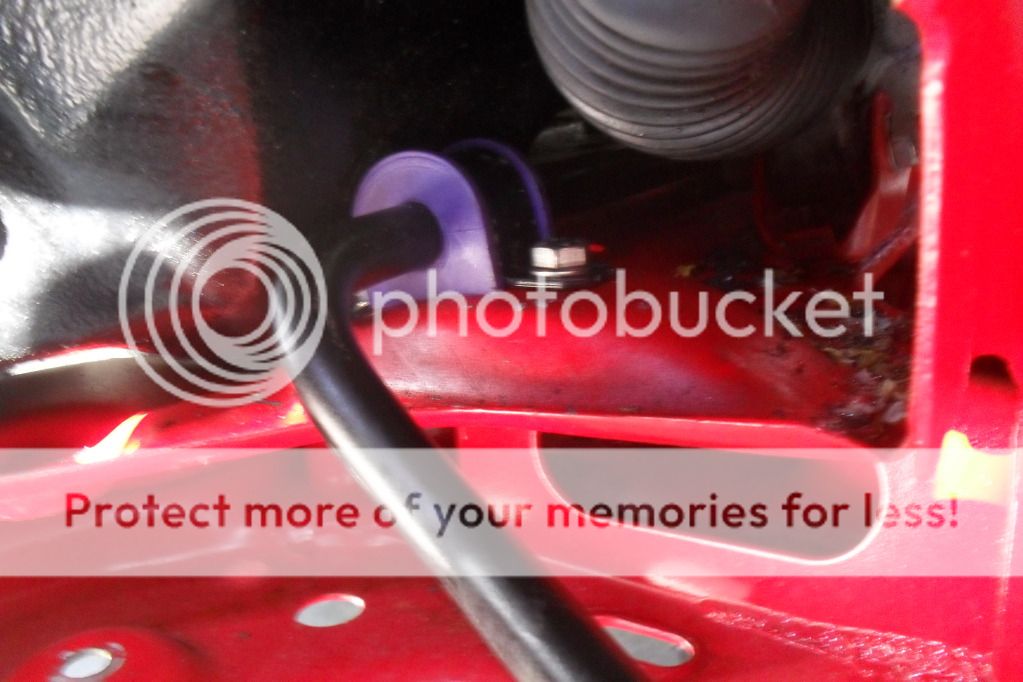
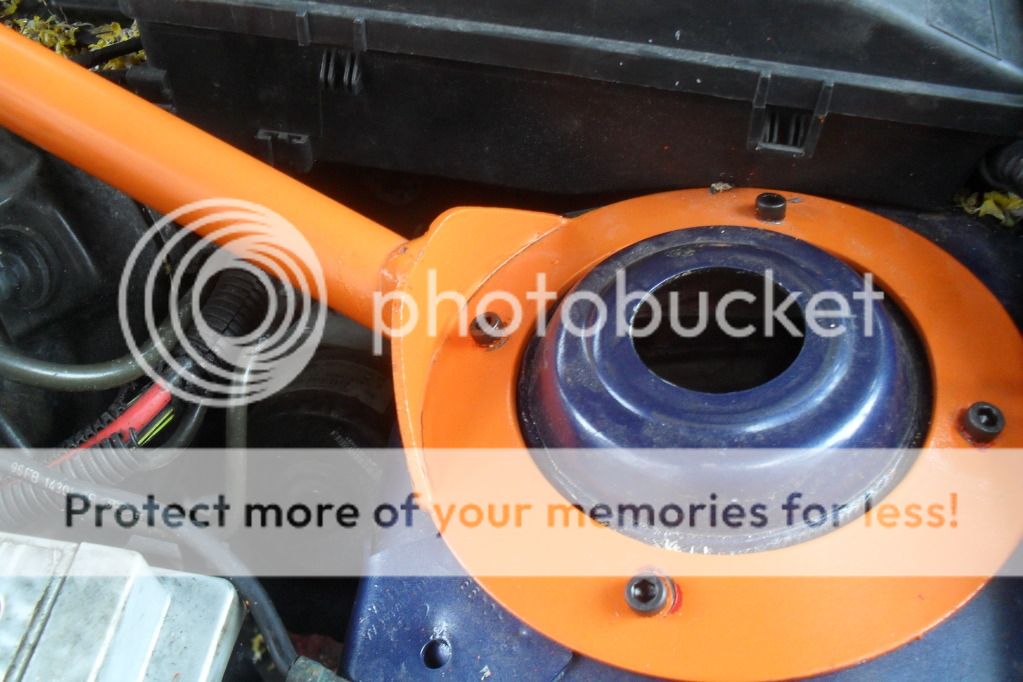
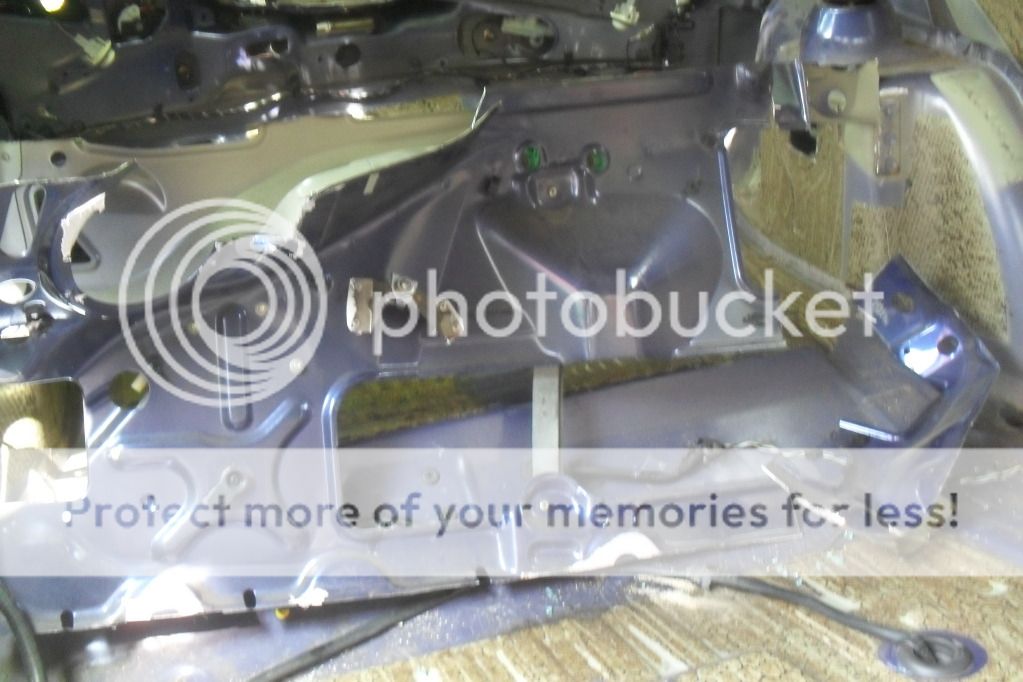
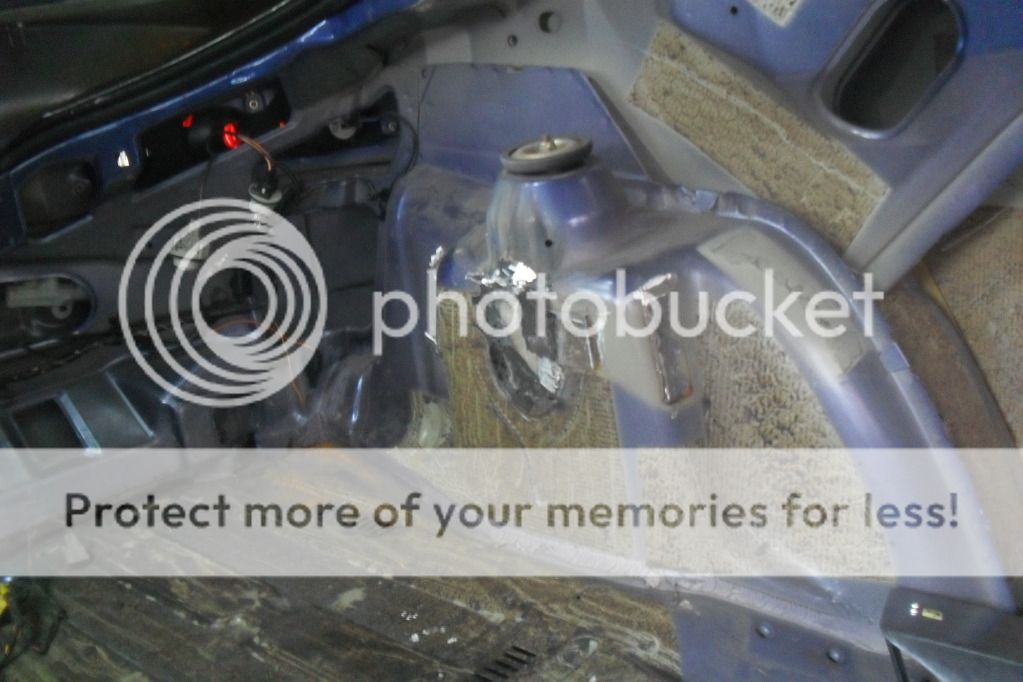
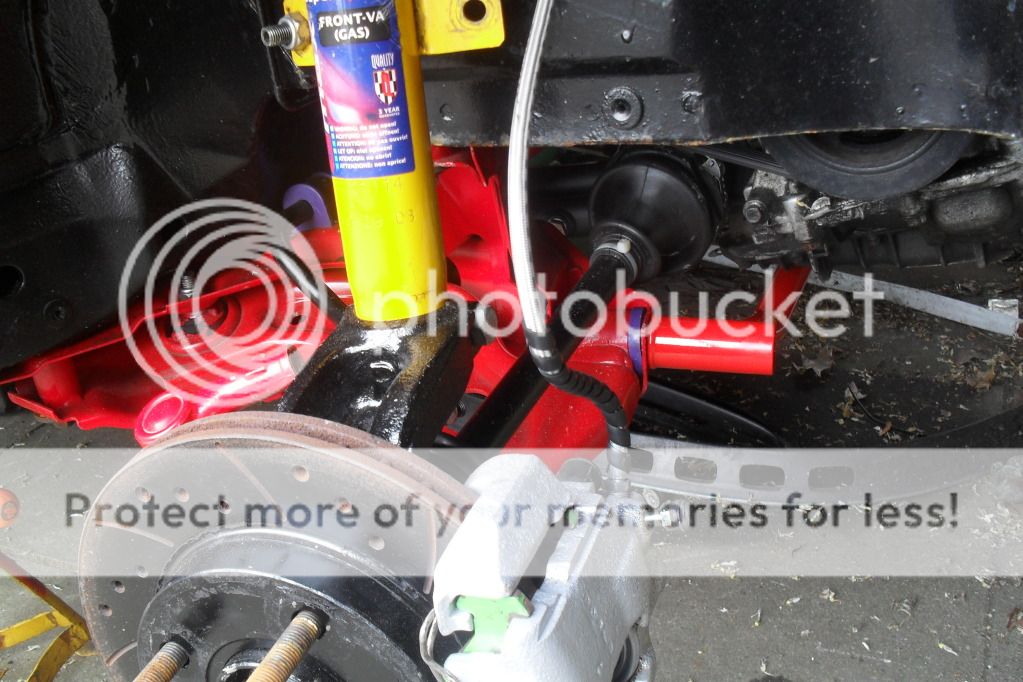
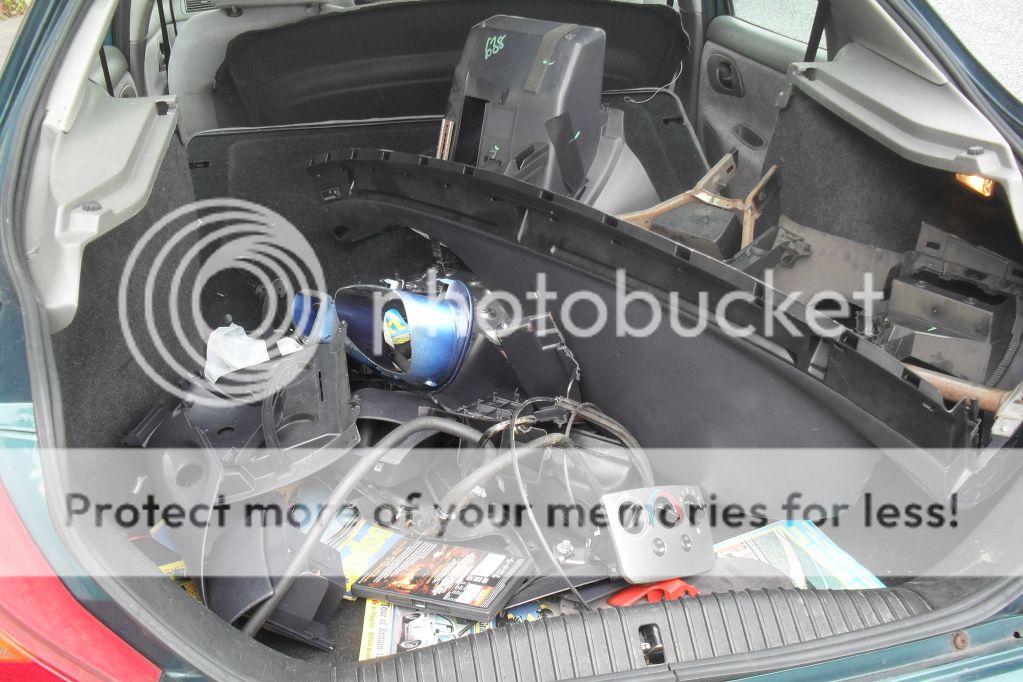
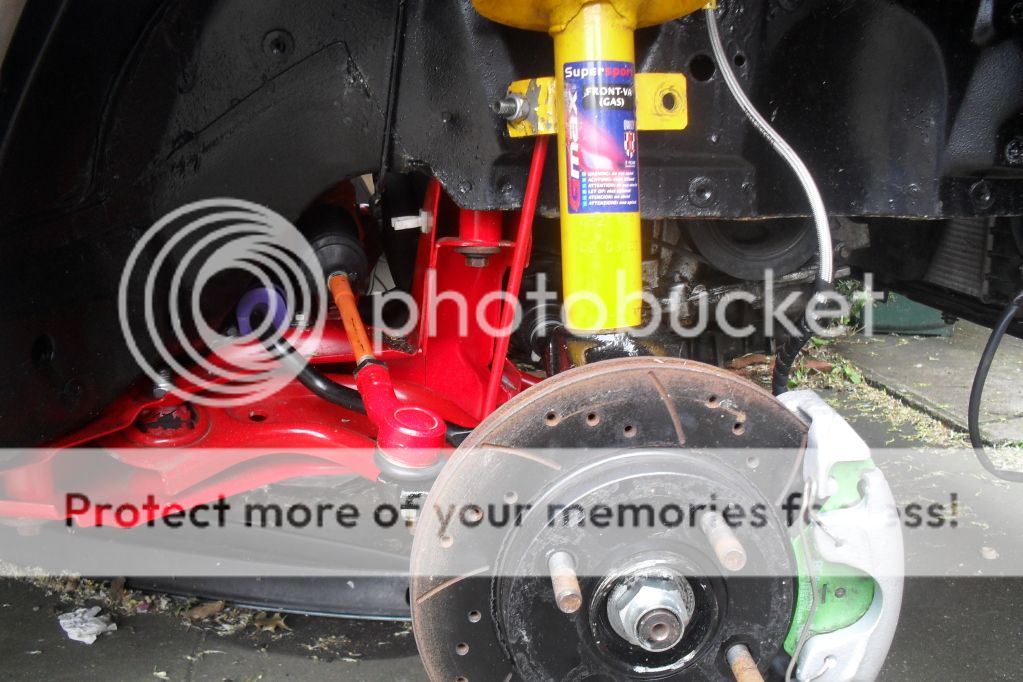
its been a day or 2 since my last update but here we go, ive removed the power steering rack and all the pipework (not the pump yet i need to get another pully setup from somewere) ive also got a new none power steering rack on order that should be here soon, ive got my suspension kit now and even though i had a problem with one of the rear shocks that all sorted now and a new one will be ordered as soon as some things on ebay sell im still waiting for a few brake parts and the inner covers for one of the front shock but ive still managed to assemble up one side and i think it looks good  . ive cleaned up most of the inside of the car now and removed the dash and all the heater system (ive now got alot of wireing to sort out) i dont want to leave dead cables in the car so il have to split the hole of the loom
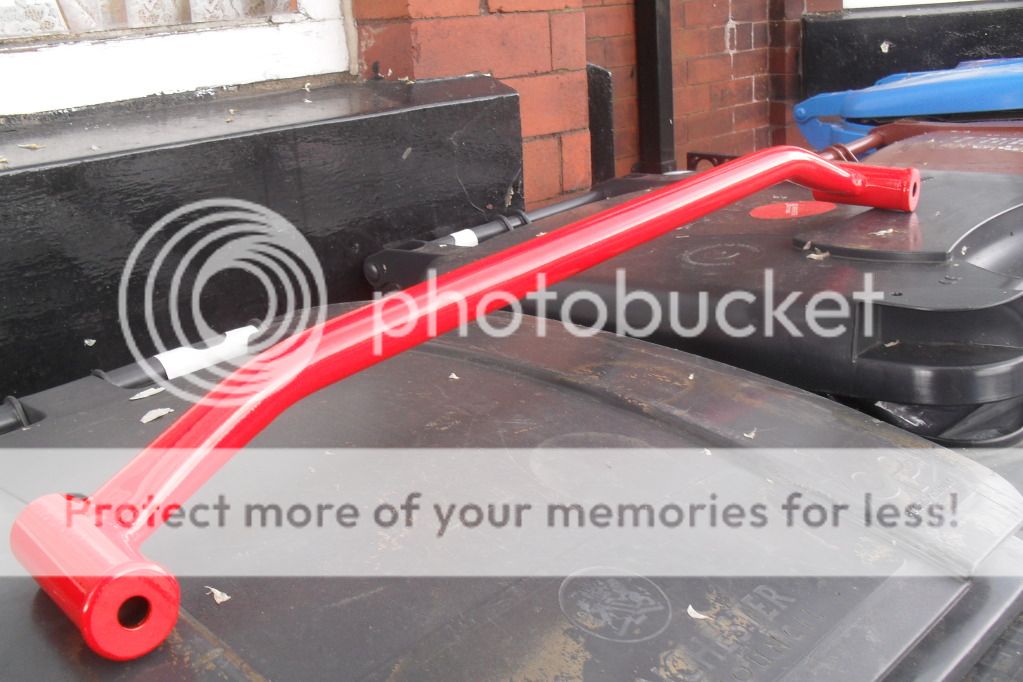
  . earlyer today me lower strut brace arrived and im glad to say it fits perfectly and apart from some distruction its all been a good few steps forward.
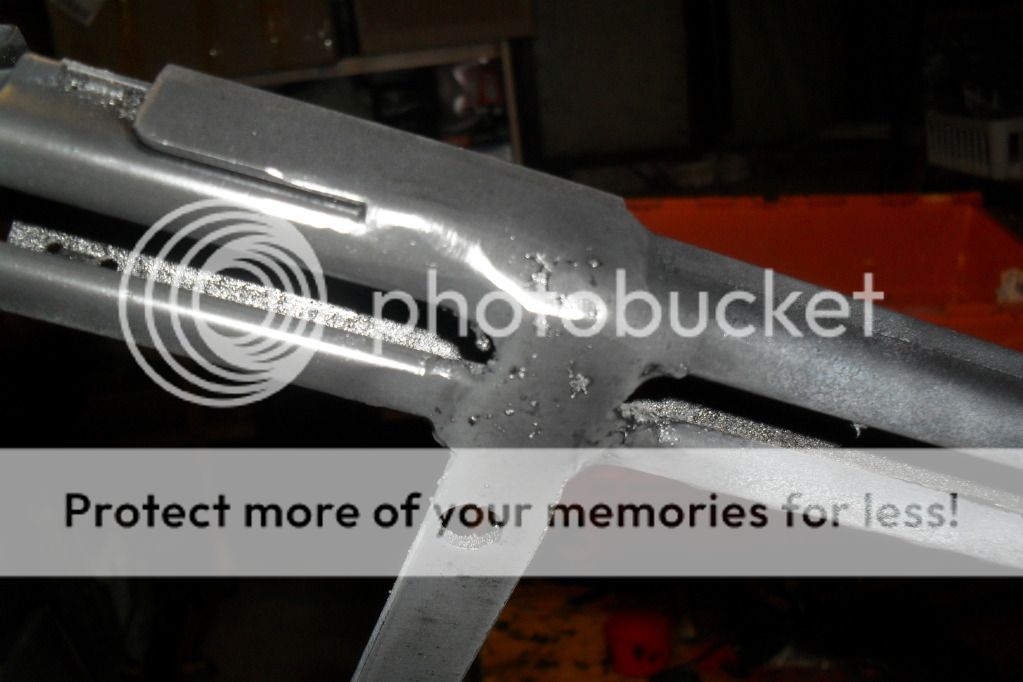
picssss
driver side set up
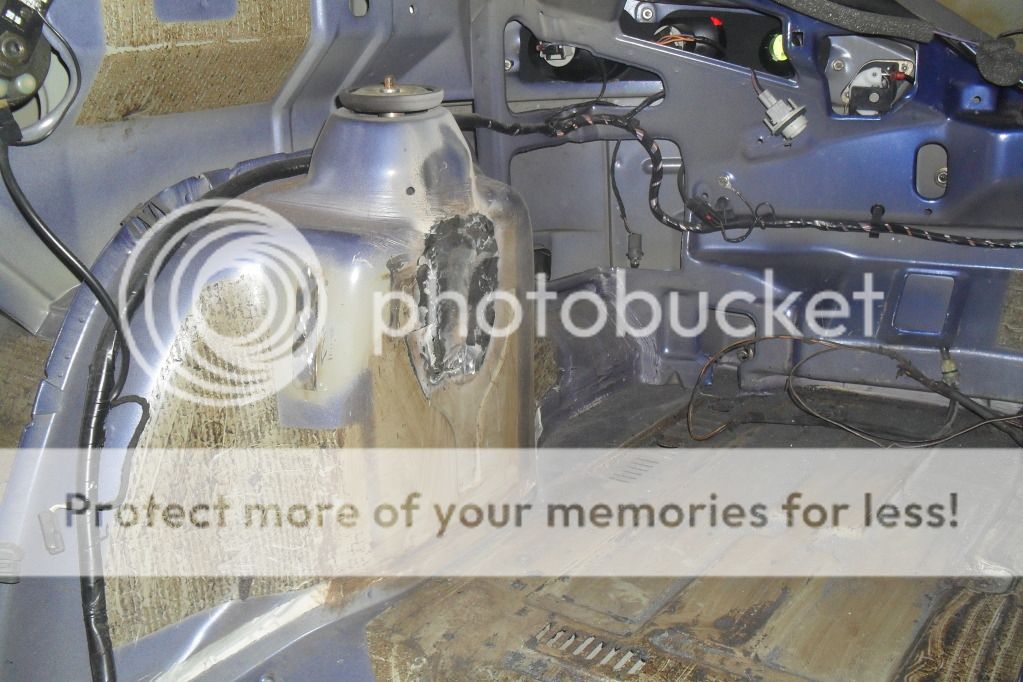
as the inside stands now goin to do as much as i can when i can
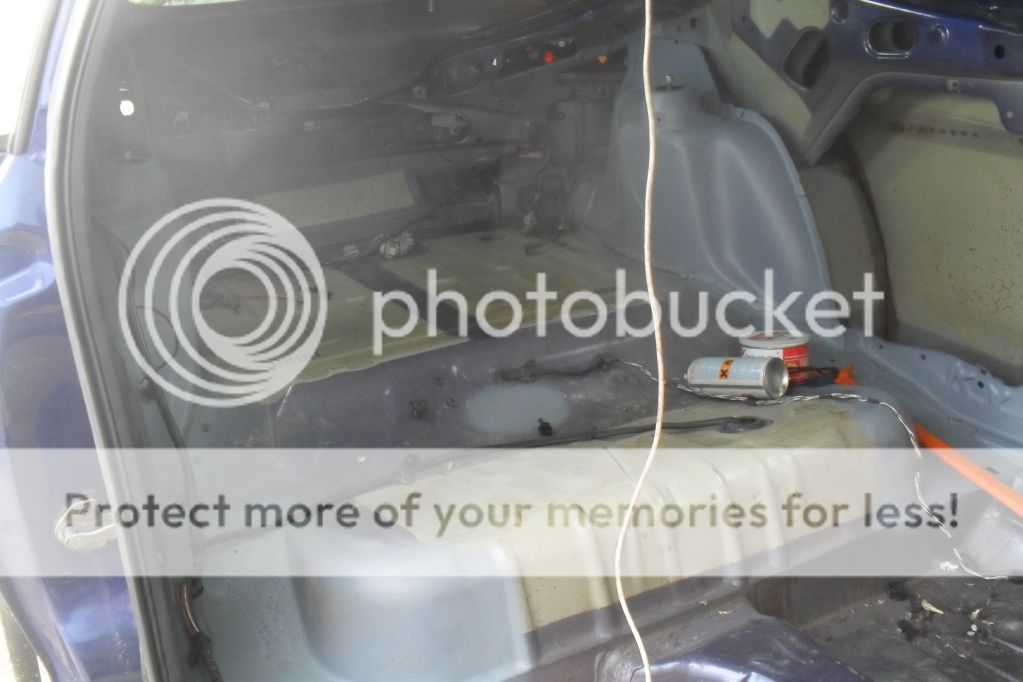
looking a bit of a mess agian now
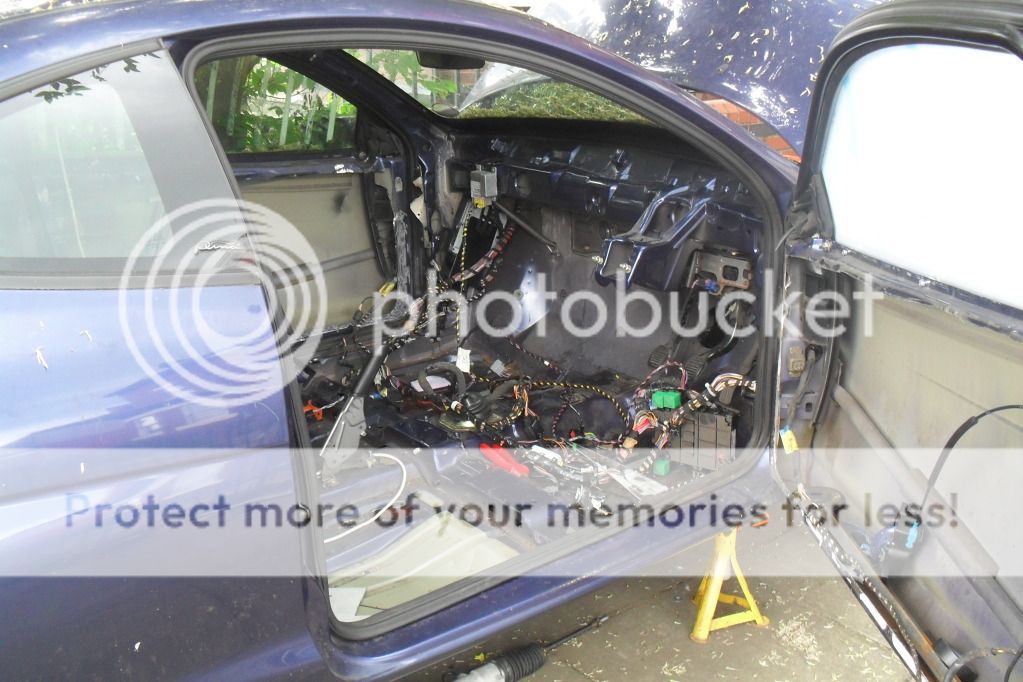
no heater box so will need to block up this hole
and here is the lower stut brace all fitted, yet another thing i can tick off the list
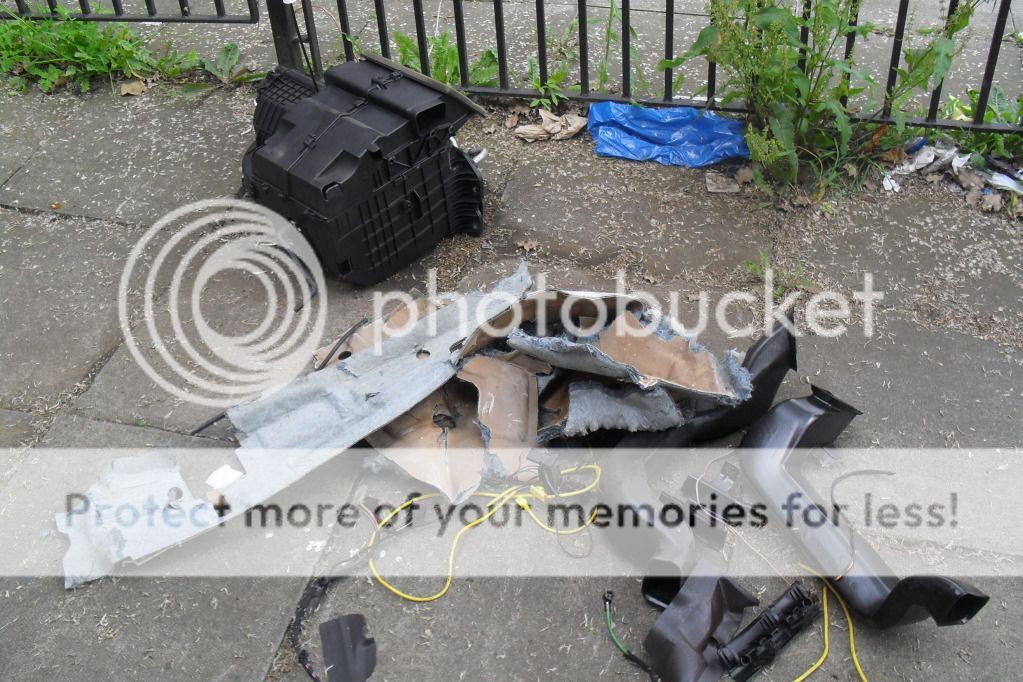
and another car full of bits on the way to the dump/tip hahahahaha hope the car doesnt blow away in a strong wind lmao.
a few more hours on the interior and i think it will be ready for a fresh coust of melina blue then when the interior and front of the car are done il crack on with the back end and completly dismantle, clean and rebuild with all the new or refurbished parts that i have 
much love people kieran
. ive cleaned up most of the inside of the car now and removed the dash and all the heater system (ive now got alot of wireing to sort out) i dont want to leave dead cables in the car so il have to split the hole of the loom . earlyer today me lower strut brace arrived and im glad to say it fits perfectly and apart from some distruction its all been a good few steps forward.picssss
driver side set up
as the inside stands now goin to do as much as i can when i can
looking a bit of a mess agian now
no heater box so will need to block up this hole
and here is the lower stut brace all fitted, yet another thing i can tick off the list
and another car full of bits on the way to the dump/tip hahahahaha hope the car doesnt blow away in a strong wind lmao.
a few more hours on the interior and i think it will be ready for a fresh coust of melina blue
then when the interior and front of the car are done il crack on with the back end and completly dismantle, clean and rebuild with all the new or refurbished parts that i have much love people kieran
#93
Posted 20 June 2012 - 10:21 PM
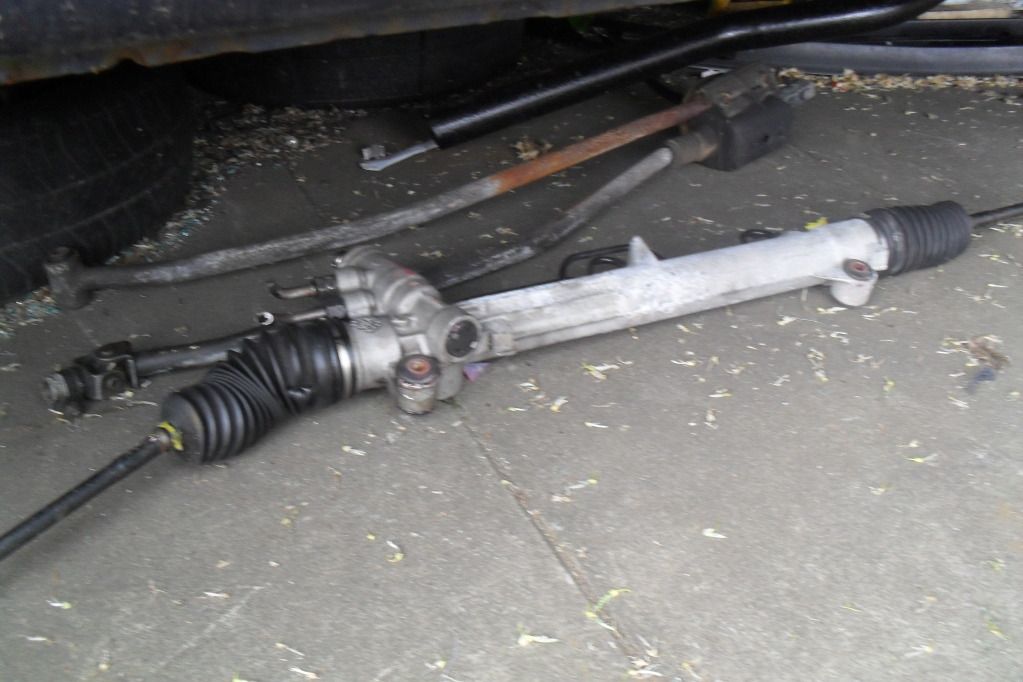
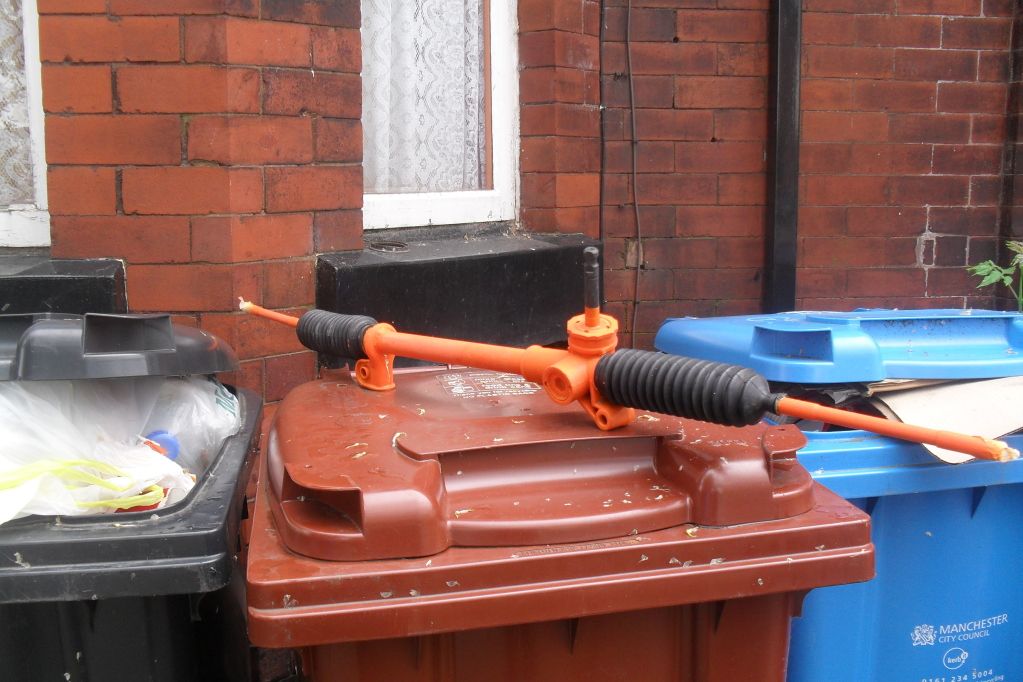
today i had 2 packages arrive one with all the missing parts for my brakes and suspension off Ian G so cheers ian  top lot of bits, ive now managed to completly build up the passengers side of the car now, the other package was the steering rack. its now in primer ready for a coat of paint
pics of today
and of the rack.
nothing else to show yet but i get a little bit more done everyday
one with all the missing parts for my brakes and suspension off Ian G so cheers ian top lot of bits, ive now managed to completly build up the passengers side of the car now, the other package was the steering rack. its now in primer ready for a coat of paint pics of today
and of the rack.
nothing else to show yet but i get a little bit more done everyday
#94
Posted 21 June 2012 - 10:34 PM
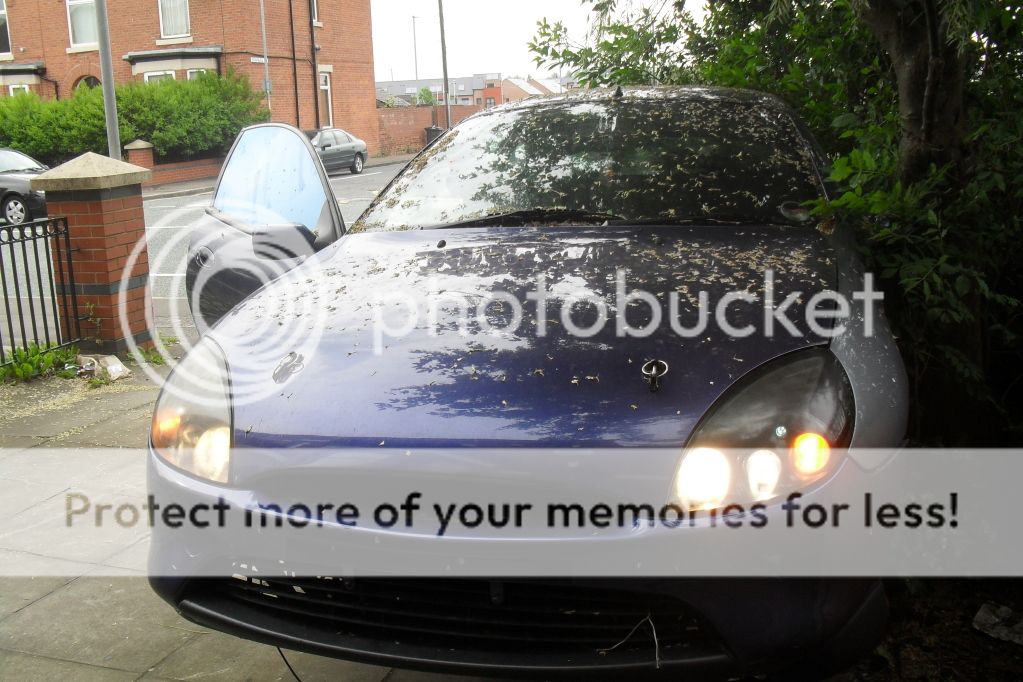
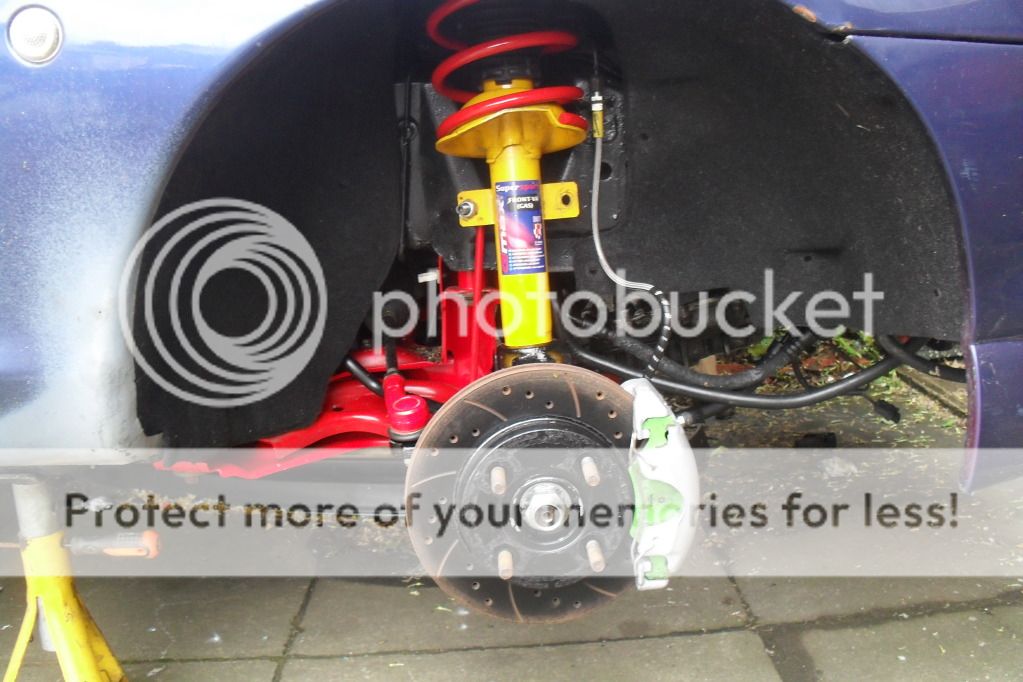
got more done today an now its on its wheels again  here are some pics of the rack and the car on the ground.
i found it much easyer to put the rack through the top of the engine bay instead or through the small hole eather side of the rack.
pics of car on all 4 wheels again. sorry but i didnt have time to give her a little clean before hand but once again rain stopped play.
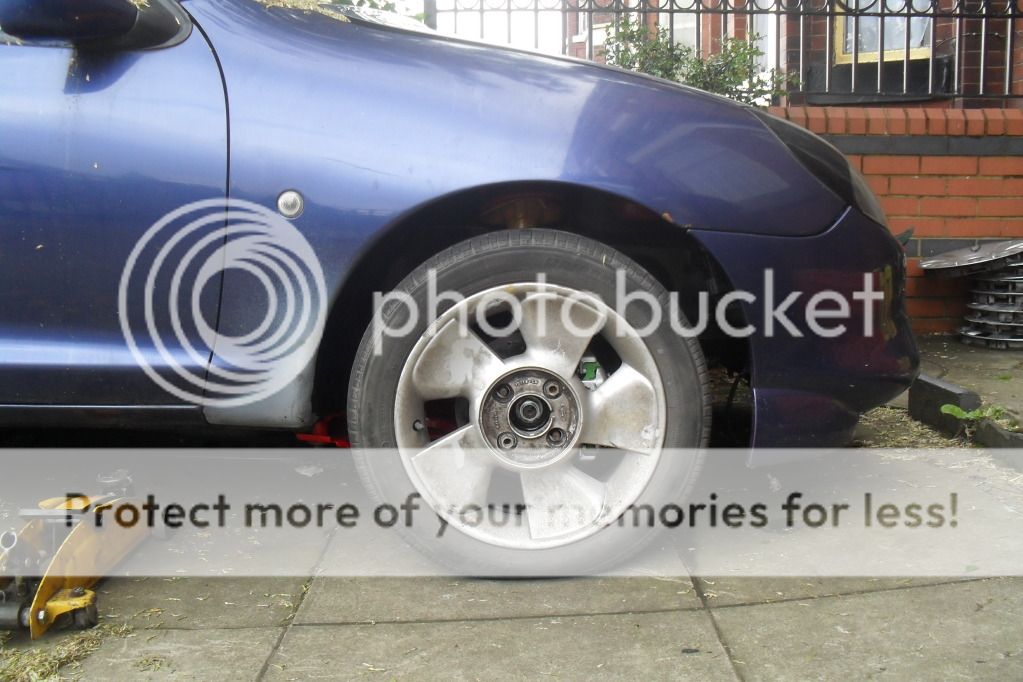
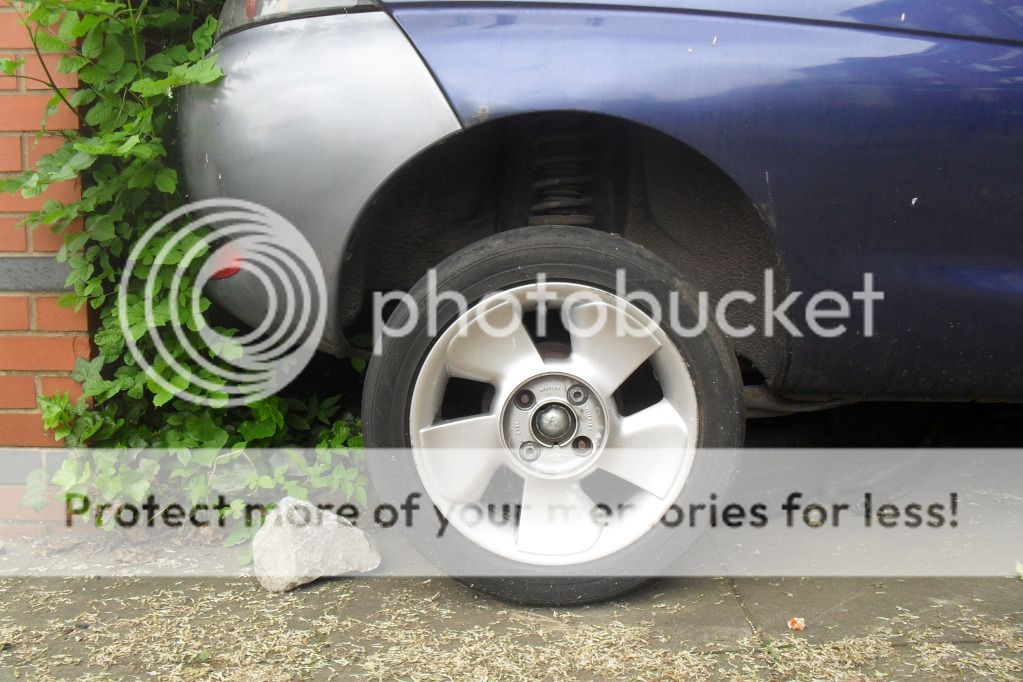
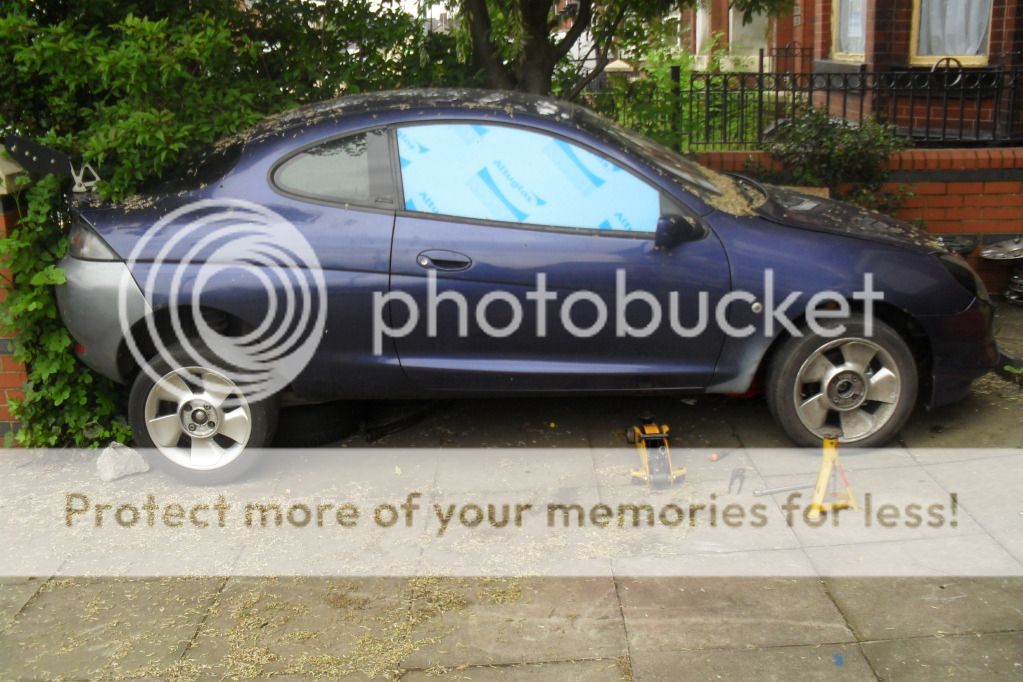

wide!!! just the way i like it
here are some pics of the rack and the car on the ground.i found it much easyer to put the rack through the top of the engine bay instead or through the small hole eather side of the rack.
pics of car on all 4 wheels again. sorry but i didnt have time to give her a little clean before hand but once again rain stopped play.
wide!!! just the way i like it
#95
Posted 22 June 2012 - 07:41 AM
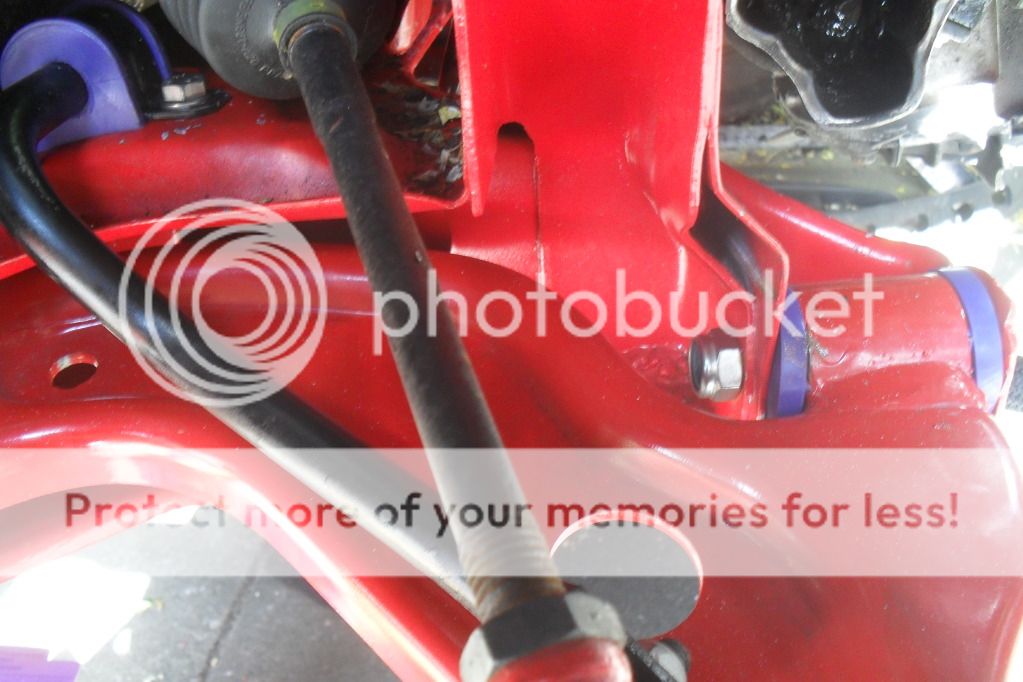
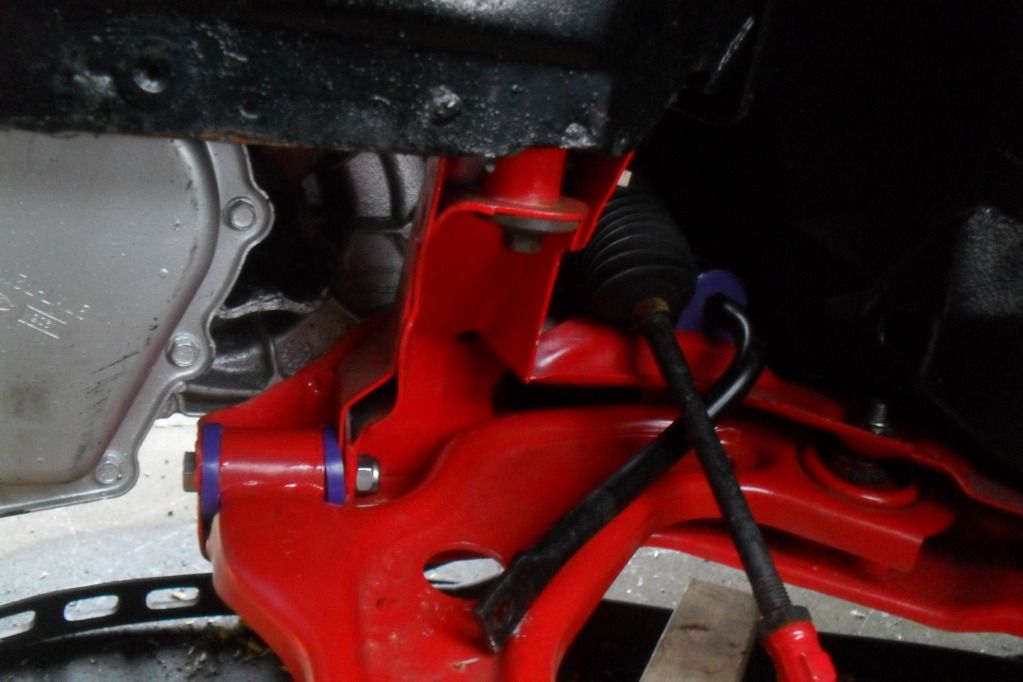
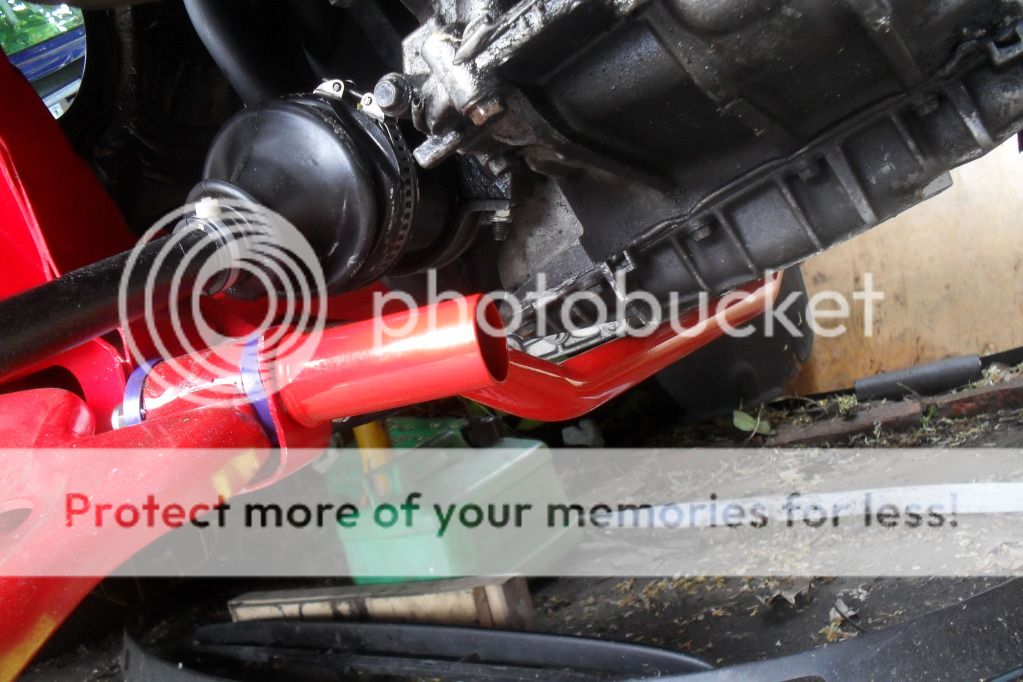
Been very busy
Your lower strut brace looks very close to fouling the gear box, is there much of a gap?
Is it a new OMP one?
Your lower strut brace looks very close to fouling the gear box, is there much of a gap?
Is it a new OMP one?
searching is fruitful | I'm a sponge not a mechanic | please do try that if stuck with a Puma problem whilst waiting for a reply | For the Puma fan this read 'The Inside Story Book' is very nice to own sometimes still seen for sale
#96
Posted 22 June 2012 - 06:32 PM
thanks for noticing 
and yeah it is a bit close near the gearbox bit it clears. dont think it till bang while im driving along and if it does il have to mod it abit. yeah its a new omp one, i bought it from ebay was here the next day.
and yeah it is a bit close near the gearbox bit it clears. dont think it till bang while im driving along and if it does il have to mod it abit. yeah its a new omp one, i bought it from ebay was here the next day.
#97
Posted 22 June 2012 - 09:09 PM
I wonder if they have changed the design as previously they have not been overly reliable at just 'fitting' on the Puma from reading posts due to fouling.
searching is fruitful | I'm a sponge not a mechanic | please do try that if stuck with a Puma problem whilst waiting for a reply | For the Puma fan this read 'The Inside Story Book' is very nice to own sometimes still seen for sale
#98
Posted 22 June 2012 - 09:46 PM
tbh it seems to fit fine so if they had problems before they must of sorted them i supose, in the pics of it fitted the rear mount isnt on because i was removing the steering rack so the engine is a bit further forward and down than it should be. il upload some pics of the clearance against the gearbox and engine tomorow, it only took a few mins to fit i just need to get some longer bolts now.
#99
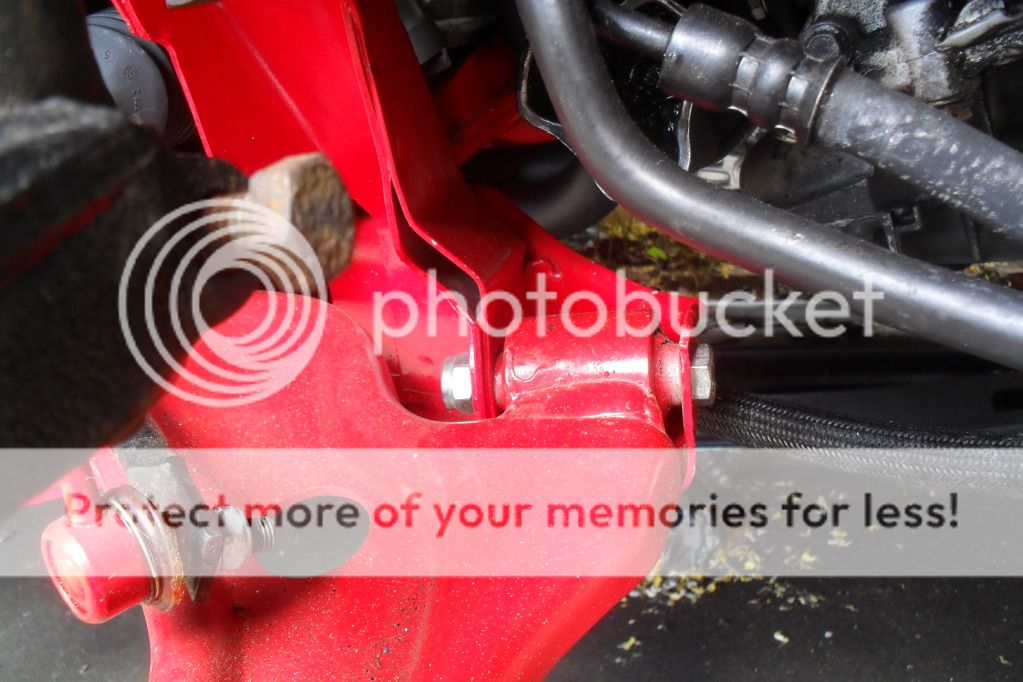
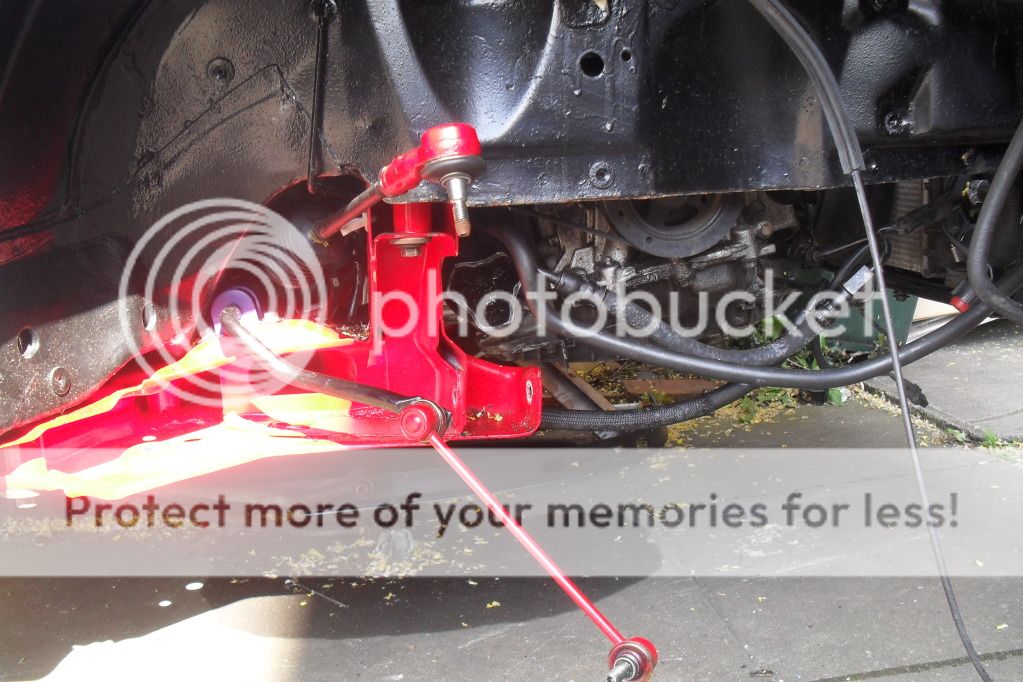
Posted 23 June 2012 - 07:49 PM
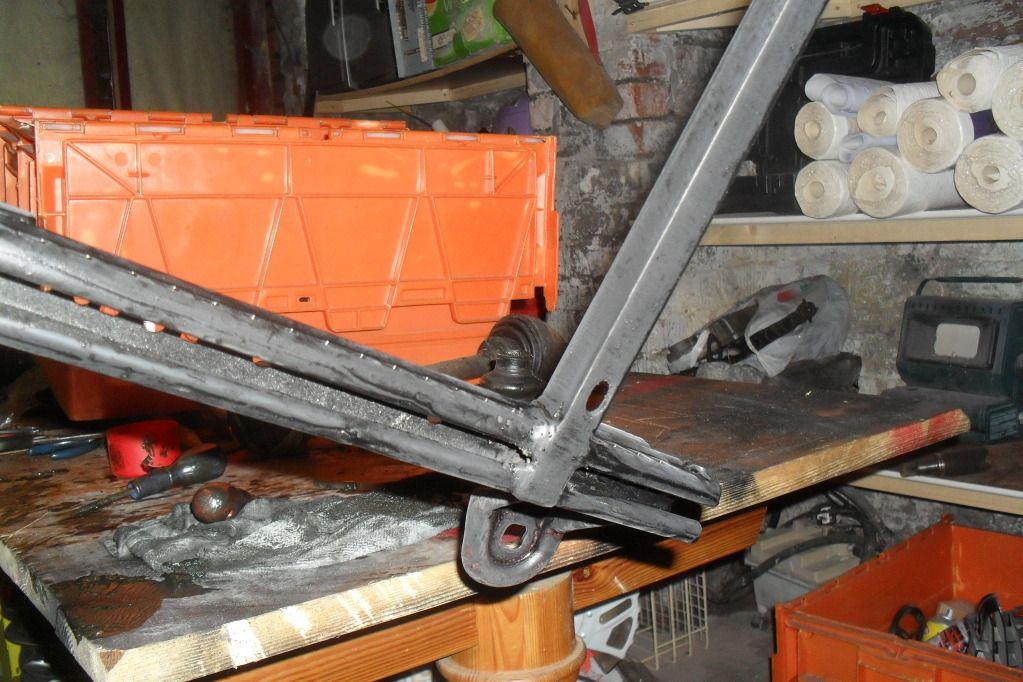
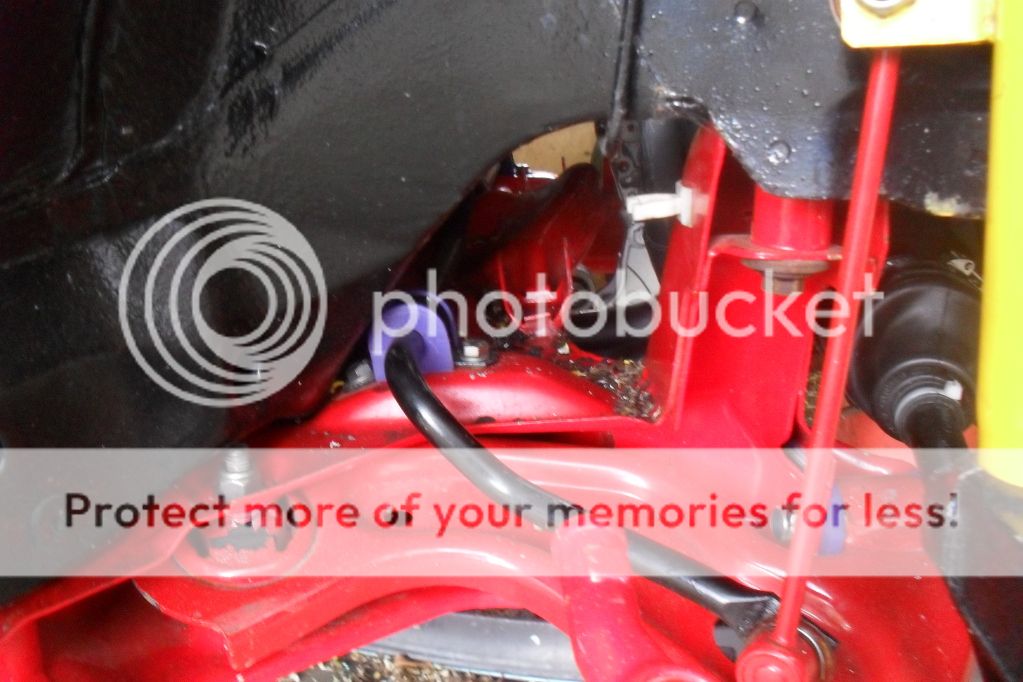
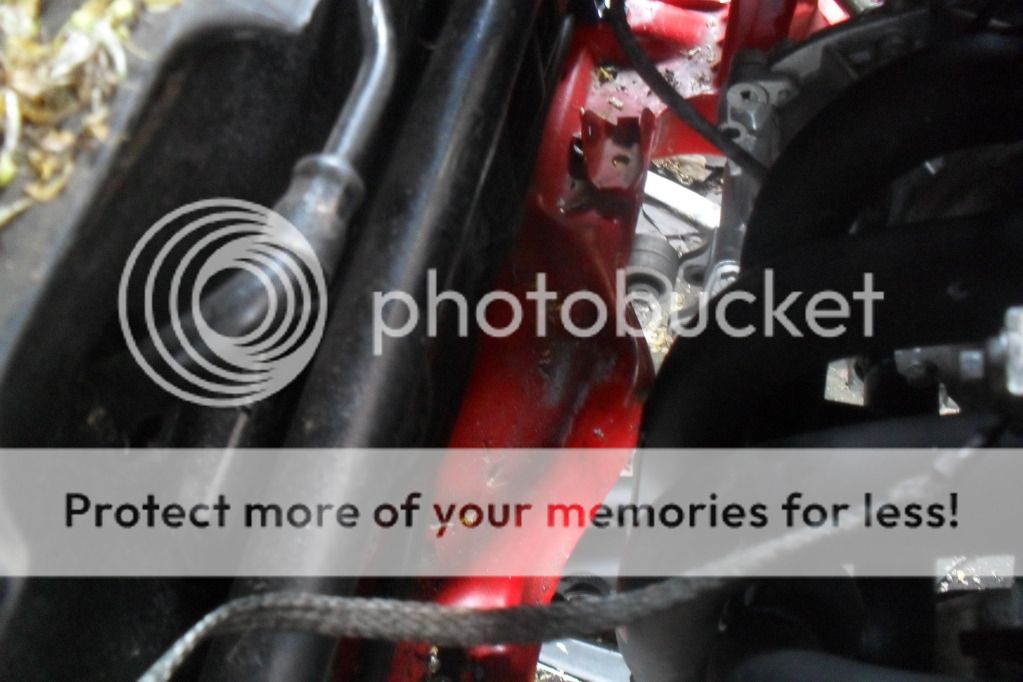
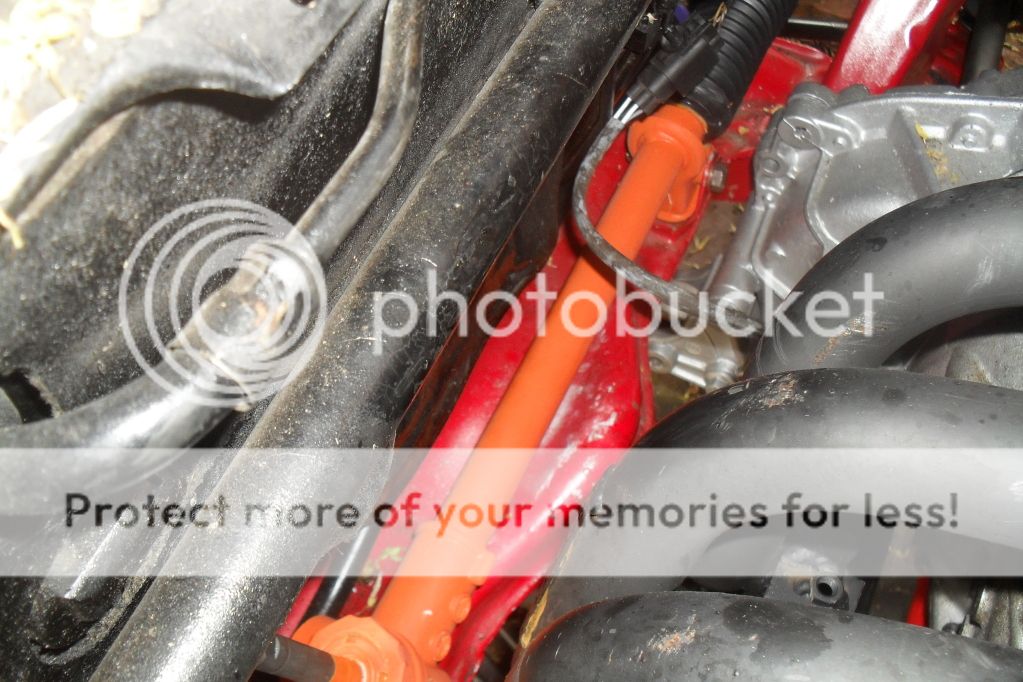
here are a few more pics of the lower strut brace to show the clearance.
theres plenty of room on the engine side.
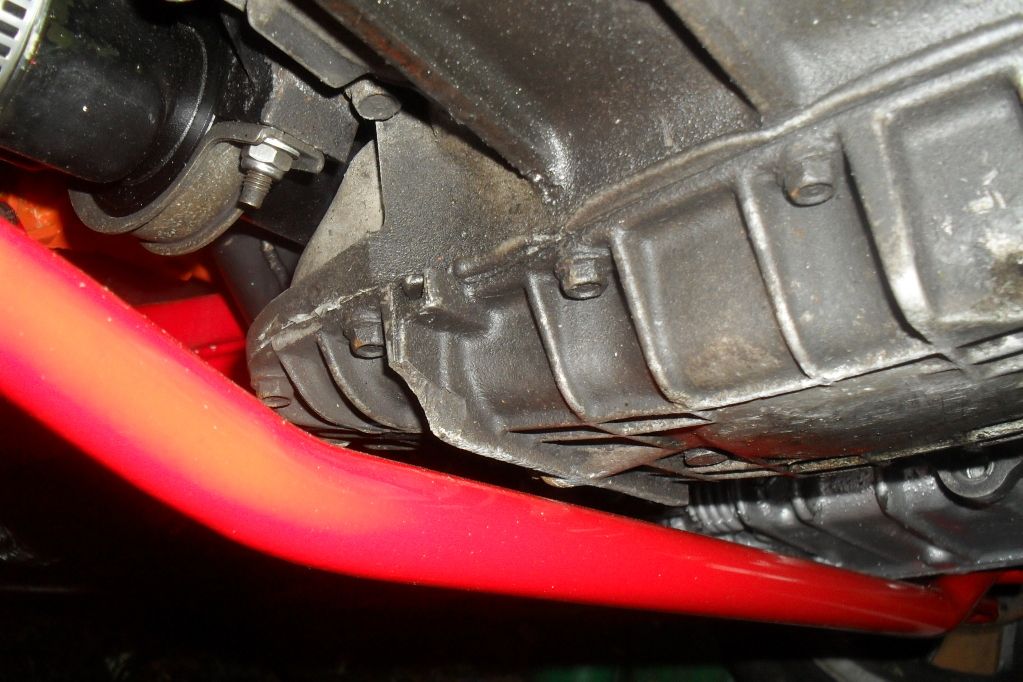
but even though it clears by 3-4mm on the gearbox side there isnt much of a gap. best pics i can get with the car on the floor.
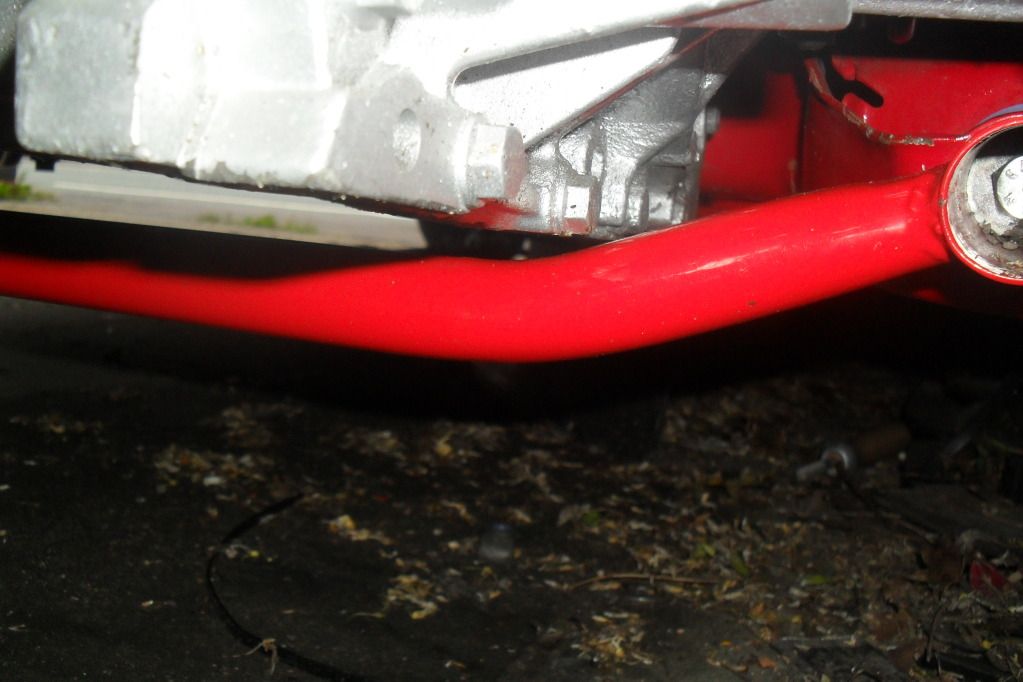
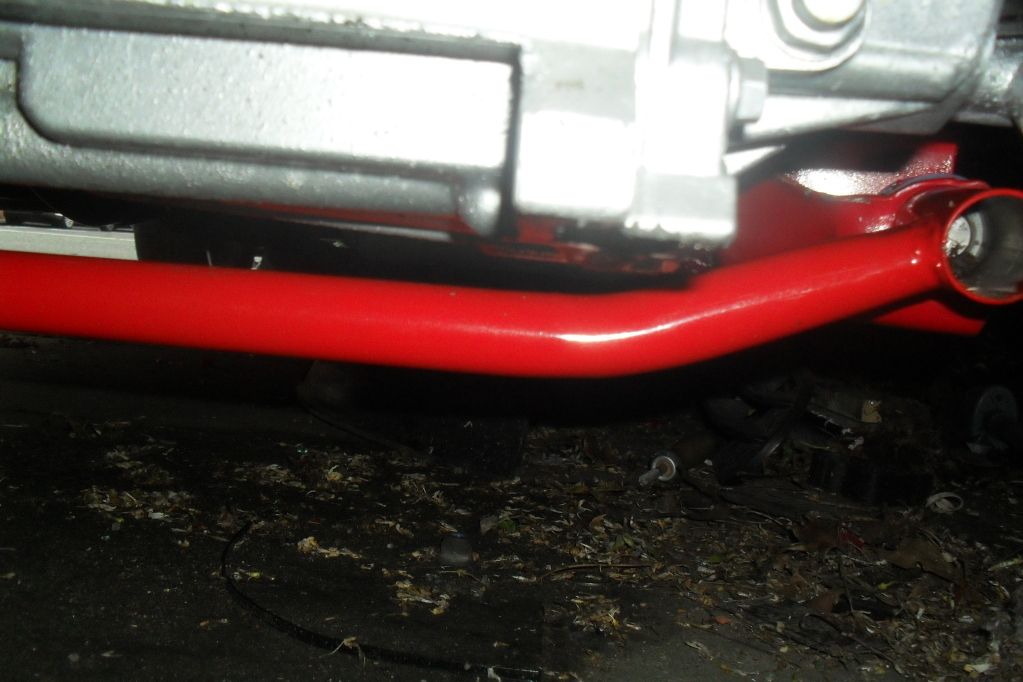
thoughts???
theres plenty of room on the engine side.
but even though it clears by 3-4mm on the gearbox side there isnt much of a gap. best pics i can get with the car on the floor.
thoughts???
#100
Posted 23 June 2012 - 09:19 PM
searching is fruitful | I'm a sponge not a mechanic | please do try that if stuck with a Puma problem whilst waiting for a reply | For the Puma fan this read 'The Inside Story Book' is very nice to own sometimes still seen for sale


