Pumapeople: Frp To Rally Car - Pumapeople

Jump to content

  • 13 Pages +
  • 1
  • 2
  • 3
  • 4
  • 5
  • Last »
  • You cannot start a new topic
  • You cannot reply to this topic

Frp To Rally Car Rate Topic: ***** 1 Votes

#41 User is offline   Pat_T 

  • Group: Members
  • Posts: 472
  • Joined: 08-May 06
  • Location:Leicestershire

Posted 13 April 2010 - 07:28 AM

this looks phenomenal already! great work on the cage :good:

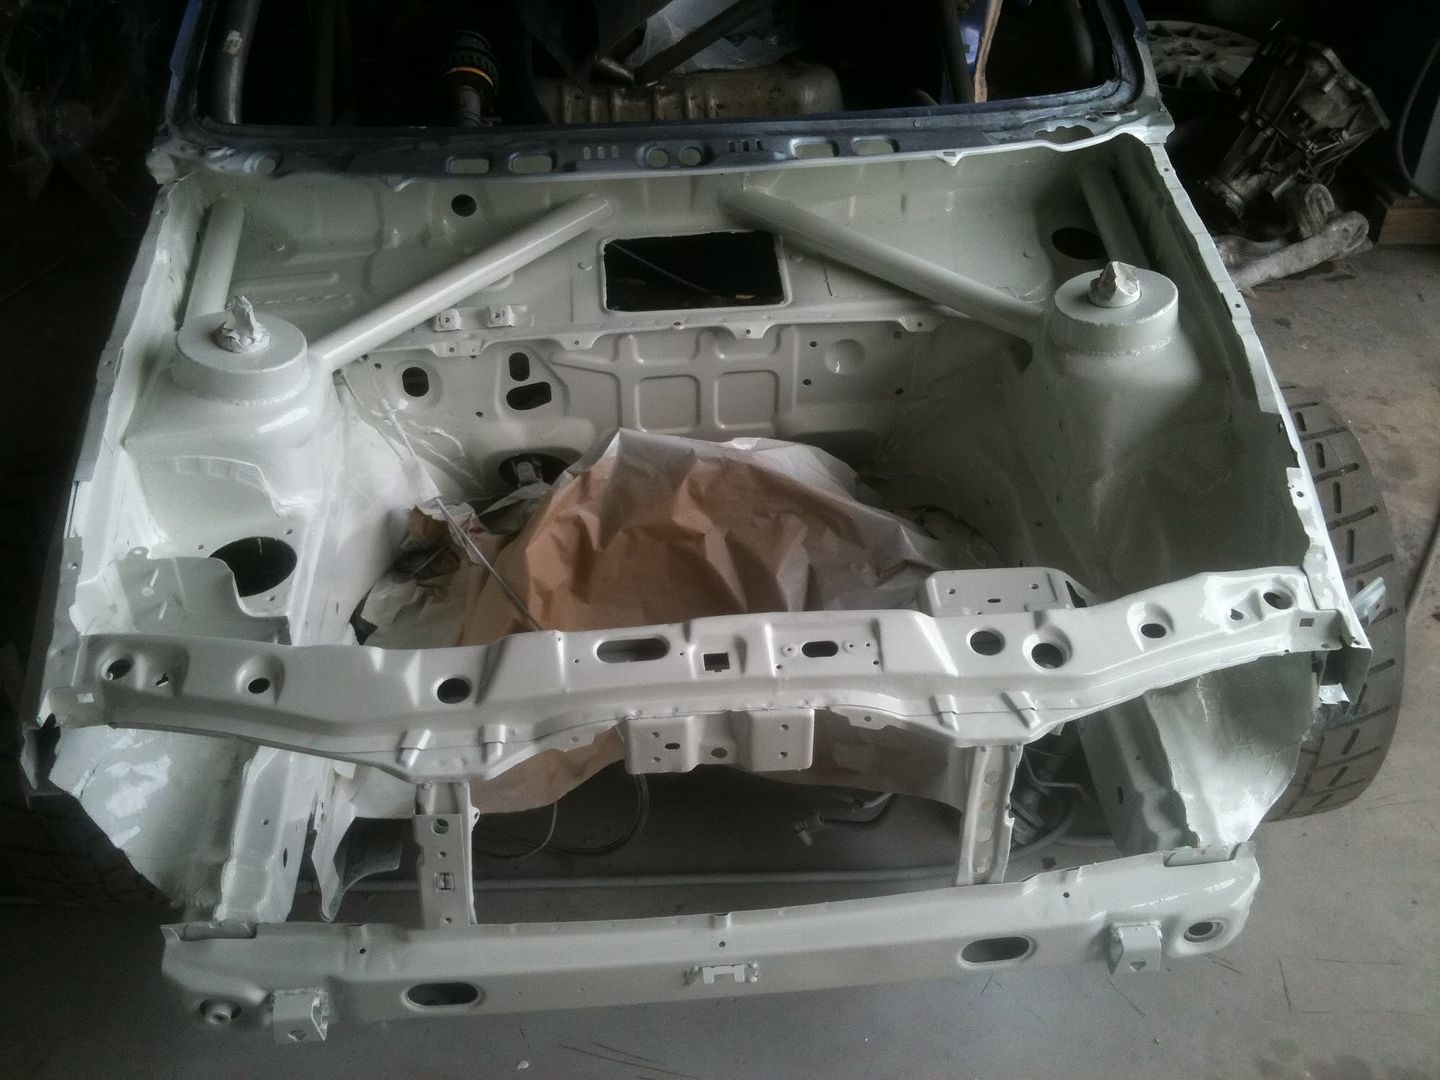
I have an important question: ...what colour is it going to be? :)
1.7L. ST150 clutch. Shawspeed lightened flywheel. Miltek exhaust manifold & full decat system. Pipercross foam cone filter. Speedline white 17" wheels. Toyo R888s. Weitec coilovers.
Powerflex rear beam bushes. Willwood 4-pots, 280mm dics & HEL braided hoses. Kenwood headunit. OMP: rear strut brace. Oddessy Racing 40 battery.
Corbeau Clubman seats. LUKE harnesses. FRP rear seats. Carbon fibre interior. FRP splitter.
Ultimate green. ~990kg...PROJECT THREAD

#42 User is offline   m_kitty 

  • Group: Members
  • Posts: 371
  • Joined: 18-August 04
  • Location:south Norfolk

Posted 13 April 2010 - 08:05 AM

getting in is the easy bit

getting out in a hurry with a helmet on is a real challenge

#43 User is offline   volcomstone411 

  • Group: Members
  • Posts: 1252
  • Joined: 08-January 07
  • Location:Hereford

Posted 13 April 2010 - 09:57 AM

Gana be painted blue on back and orange on the front. Gunmetal grey inside
Posted Image
All stuff puma - puma technical & all things rebuilt...
See my website for Snow School Information

#44 User is offline   Shilly 

  • Group: Members
  • Posts: 505
  • Joined: 20-August 08
  • Location:Liverpool

Posted 13 April 2010 - 10:14 AM

you could also loose the tensioner if you use a focus 1.6 2002 water pump pulley and the flex belt off the same car like this

Posted Image

#45 User is offline   volcomstone411 

  • Group: Members
  • Posts: 1252
  • Joined: 08-January 07
  • Location:Hereford

Posted 13 April 2010 - 12:01 PM

Thats a good find. Ill look into that
Posted Image
All stuff puma - puma technical & all things rebuilt...
See my website for Snow School Information

#46 User is offline   Shilly 

  • Group: Members
  • Posts: 505
  • Joined: 20-August 08
  • Location:Liverpool

Posted 13 April 2010 - 12:57 PM

i do it to my race engines

#47 User is offline   volcomstone411 

  • Group: Members
  • Posts: 1252
  • Joined: 08-January 07
  • Location:Hereford

Posted 13 April 2010 - 08:33 PM

so do i just need a focus water pump pulley, or the whole water pump?

ah yea, but my power assistance pump is at the rear
Posted Image
All stuff puma - puma technical & all things rebuilt...
See my website for Snow School Information

#48 User is offline   Shilly 

  • Group: Members
  • Posts: 505
  • Joined: 20-August 08
  • Location:Liverpool

Posted 13 April 2010 - 10:20 PM

View Postvolcomstone411, on 13 April 2010 - 08:33 PM, said:

so do i just need a focus water pump pulley, or the whole water pump?

ah yea, but my power assistance pump is at the rear


focus pulley only and most used on the early ones with the power steering at the front

#49 User is offline   darrin 

  • Group: Members
  • Posts: 167
  • Joined: 18-September 08

Posted 14 April 2010 - 04:11 PM

Power steering is only at the back if you have air con. if you remove aircon, the pump relocates to the front and uses a different tensioner.


#50 User is offline   volcomstone411 

  • Group: Members
  • Posts: 1252
  • Joined: 08-January 07
  • Location:Hereford

Posted 14 April 2010 - 04:54 PM

i don't need to buy a different mount to move the pump?
Posted Image
All stuff puma - puma technical & all things rebuilt...
See my website for Snow School Information

#51 User is offline   darrin 

  • Group: Members
  • Posts: 167
  • Joined: 18-September 08

Posted 14 April 2010 - 04:57 PM

You need a bracket yes. I did have one lying around but took it to the dump not too long ago, or else you could of had it.

Shilly might have one in stock!

#52 User is offline   volcomstone411 

  • Group: Members
  • Posts: 1252
  • Joined: 08-January 07
  • Location:Hereford

Posted 14 April 2010 - 05:09 PM

been getting the inside ready for some welding. There is quite afew little holes in the floor need addressing. and the seam welding needs to be done. I've also aquired a new damper to replace a blown one. I know they are GAZ and they arn't very good, but they will do to see what sort of settings are required before i order a reiger damper thats all wrong.

Posted Image
Posted Image
Posted Image
Posted Image

baught a few extra spring platforms as you can see....i will counter tighten them as those grub screws i am not happy about supporting my spring lol
Posted Image
All stuff puma - puma technical & all things rebuilt...
See my website for Snow School Information

#53 User is offline   Shilly 

  • Group: Members
  • Posts: 505
  • Joined: 20-August 08
  • Location:Liverpool

Posted 14 April 2010 - 05:55 PM

im out of stock at the mo :(

#54 User is offline   volcomstone411 

  • Group: Members
  • Posts: 1252
  • Joined: 08-January 07
  • Location:Hereford

Posted 22 April 2010 - 05:14 PM

Started taking the qtr panels off. Pains me to see the bodge that tickford used. There is so much weight to be saved by using only a single skin. We are going to widen the rear arches as much as possible too to get some more suspension travel. There are also some hidden panels behind that can be taken out as the roll cage now takes the strength. We are going to take the front chassis legs up, so the front has more travel, and the car can be lowered a lot more.


Posted Image
Posted Image
Posted Image
Posted Image
Posted Image
Posted Image
All stuff puma - puma technical & all things rebuilt...
See my website for Snow School Information

#55 User is offline   Dave2302 

  • Group: Members
  • Posts: 583
  • Joined: 01-April 10
  • Location:NW Scotland Highlands

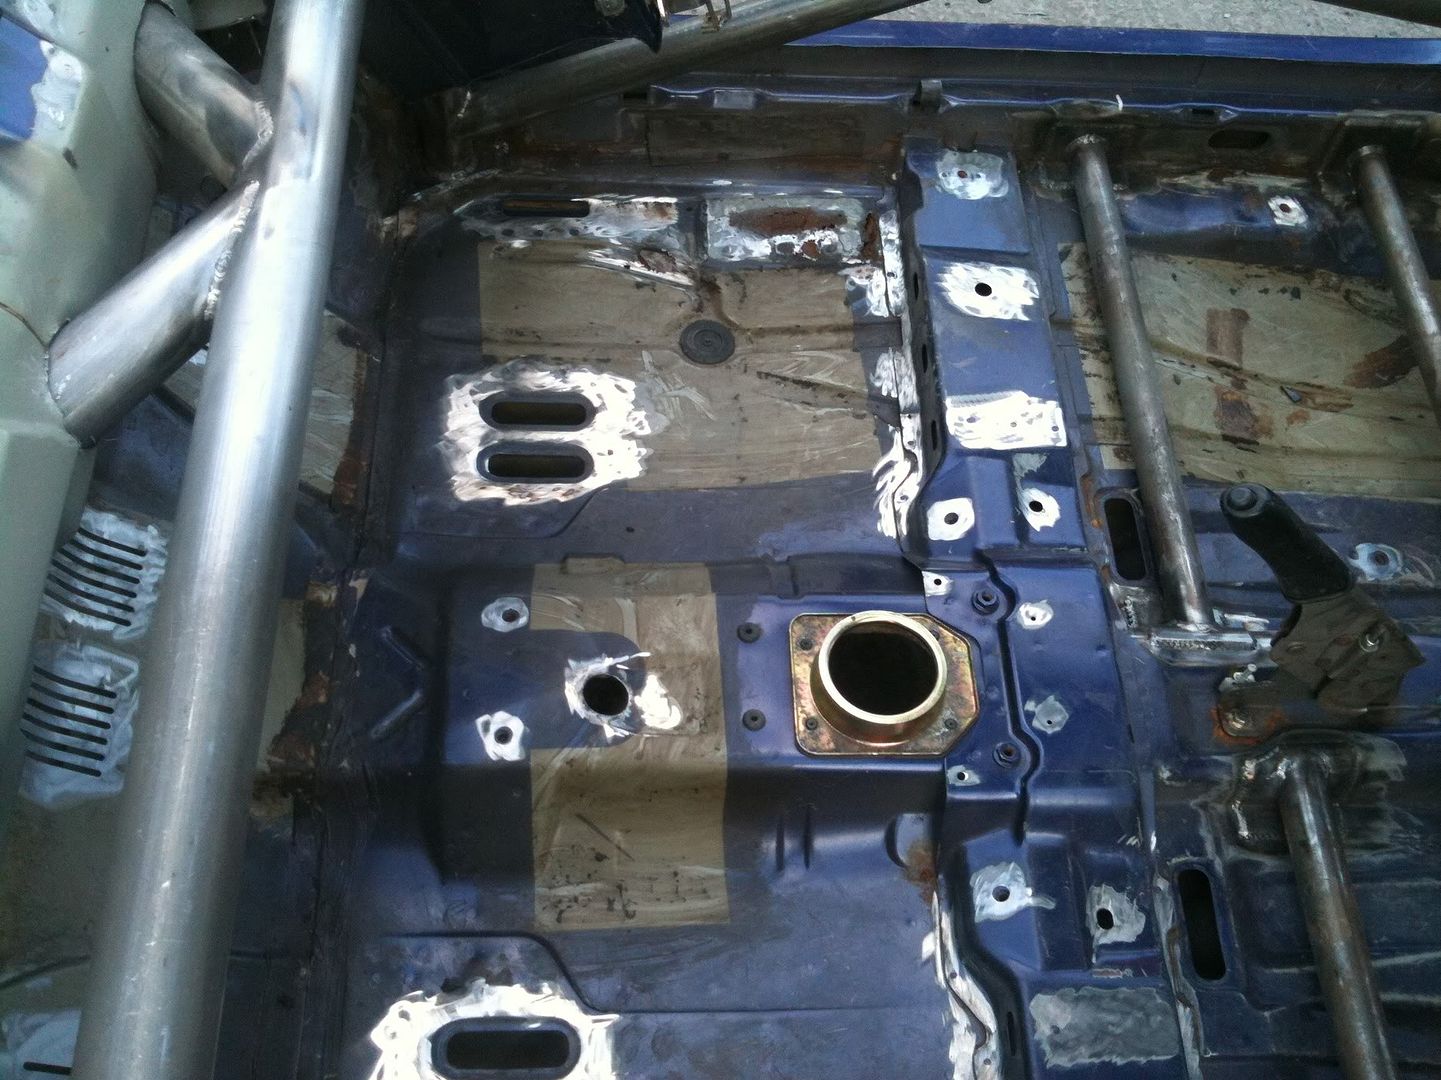
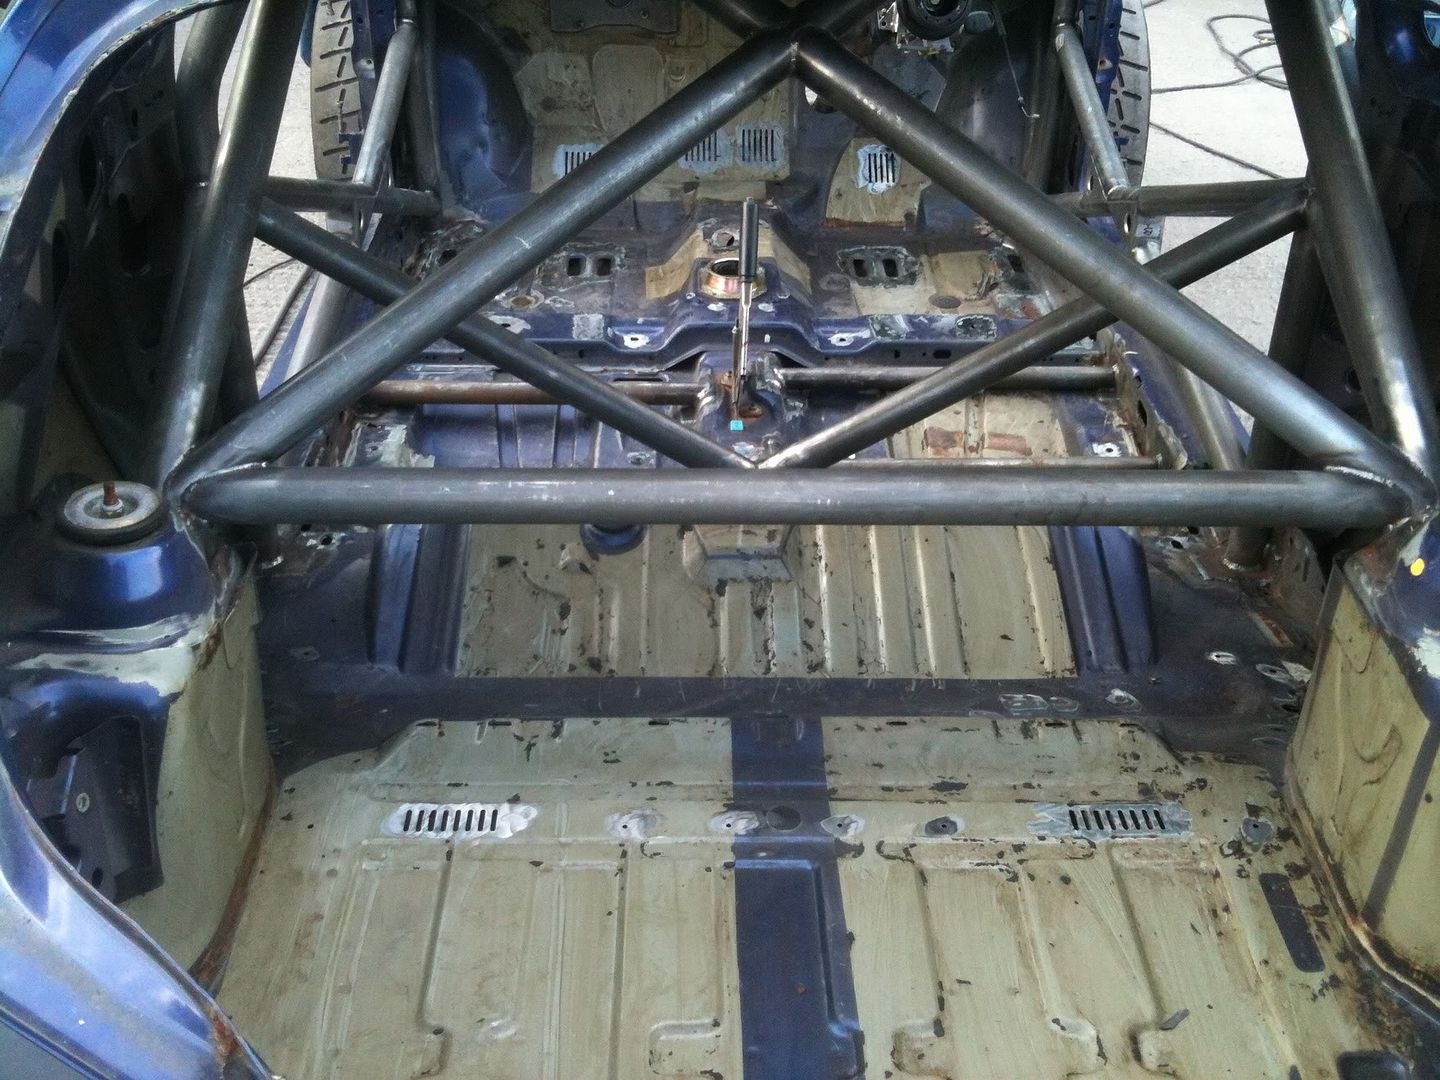
Posted 23 April 2010 - 10:42 AM

Hi,

Some great work going on here!!

It is a pain to see bodges like that from supposed proffessional firms, but thats why we build cars ourselves isn't it, so we can be sure and happy with the end product.

The old adage "If you want it doing properly do it yourself" springs to mind.

Look forward to seeing yours finished, but not half as much as finishing mine lolol !! I'm picking it up Tuesday, then the big strip will ensue !!

Cheers

Dave

This post has been edited by Dave2302: 23 April 2010 - 10:43 AM

It's nice to be important but it's more important to be nice !!

#56 User is offline   volcomstone411 

  • Group: Members
  • Posts: 1252
  • Joined: 08-January 07
  • Location:Hereford

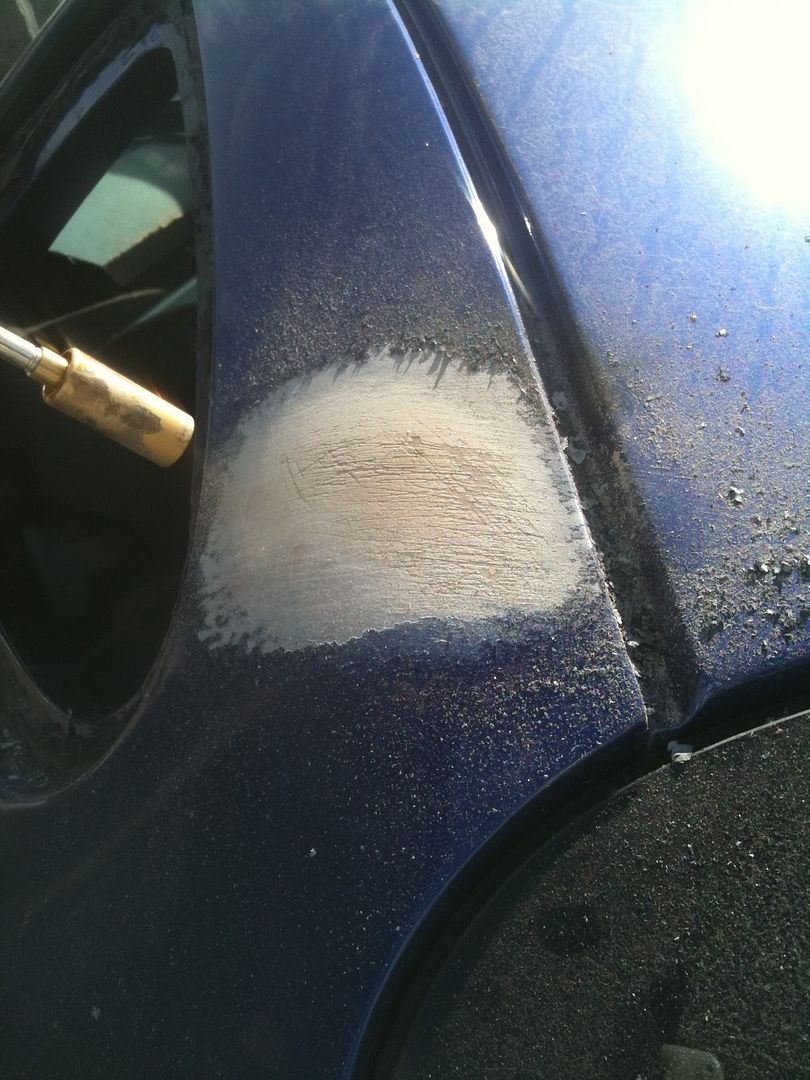
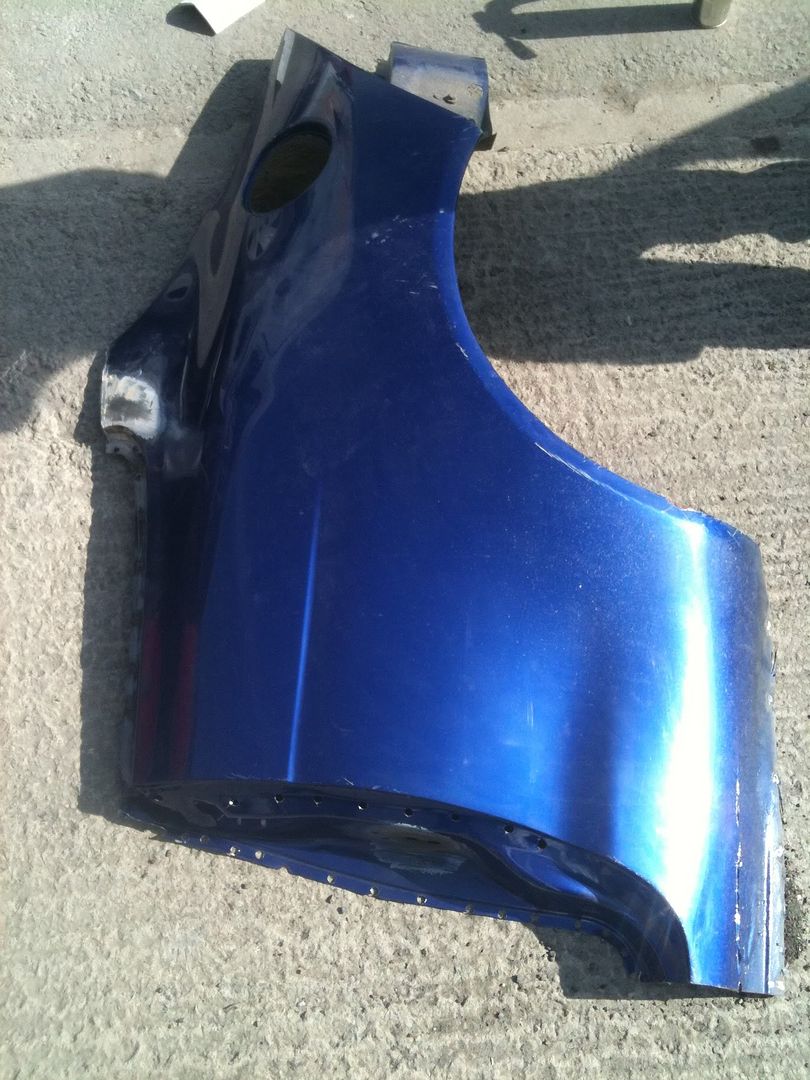
Posted 03 May 2010 - 03:56 PM

started making some more mess today. I cut rear arches out and reattached single skin qtr. Had to make a new inner arch so could pull frp arches even further out to get some more travel in the wheel arches so i can have plenty of damper travel. I made a single skin plate just to hold everything in place, then double skinned two nice layers of fibre glass over the top. Same with the front chassis legs, i put 2 layers of high quality fibreglass cloth to stop all the dust and stones flying everywhere.

I had to move the fuel filler neck to the boot most likely and cover over the fuel filler hole due to the fact that they will be running dangerously close to flying rocks.

I also seam welded the engine bay and then sealed over the top so there is no where for the dust to go. I've sat in some cars before and the dust just gets everywhere in the car, so i have gone mad making sure everything is sealed.

Also delivered the engine back so after a few tight skims of filer on some dented bits in the bay, it can get a nice coat of white so the engine can go back in.

Also tested the rear travel on the suspension. The pics show the most likely lowest position.

Also put a new beam on, cos the old one was bent. Lesson : don't jack on the rear beam :)

I could do with someone sponsoring me two front headlights too :D

Posted Image
Posted Image
Posted Image
Posted Image
Posted Image
Posted Image
Posted Image
Posted Image
Posted Image
Posted Image
Posted Image
Posted Image


Posted Image
All stuff puma - puma technical & all things rebuilt...
See my website for Snow School Information

#57 User is offline   Dave2302 

  • Group: Members
  • Posts: 583
  • Joined: 01-April 10
  • Location:NW Scotland Highlands

Posted 03 May 2010 - 07:14 PM

Some good progress there, s'lookin good,

Dave
It's nice to be important but it's more important to be nice !!

#58 User is offline   volcomstone411 

  • Group: Members
  • Posts: 1252
  • Joined: 08-January 07
  • Location:Hereford

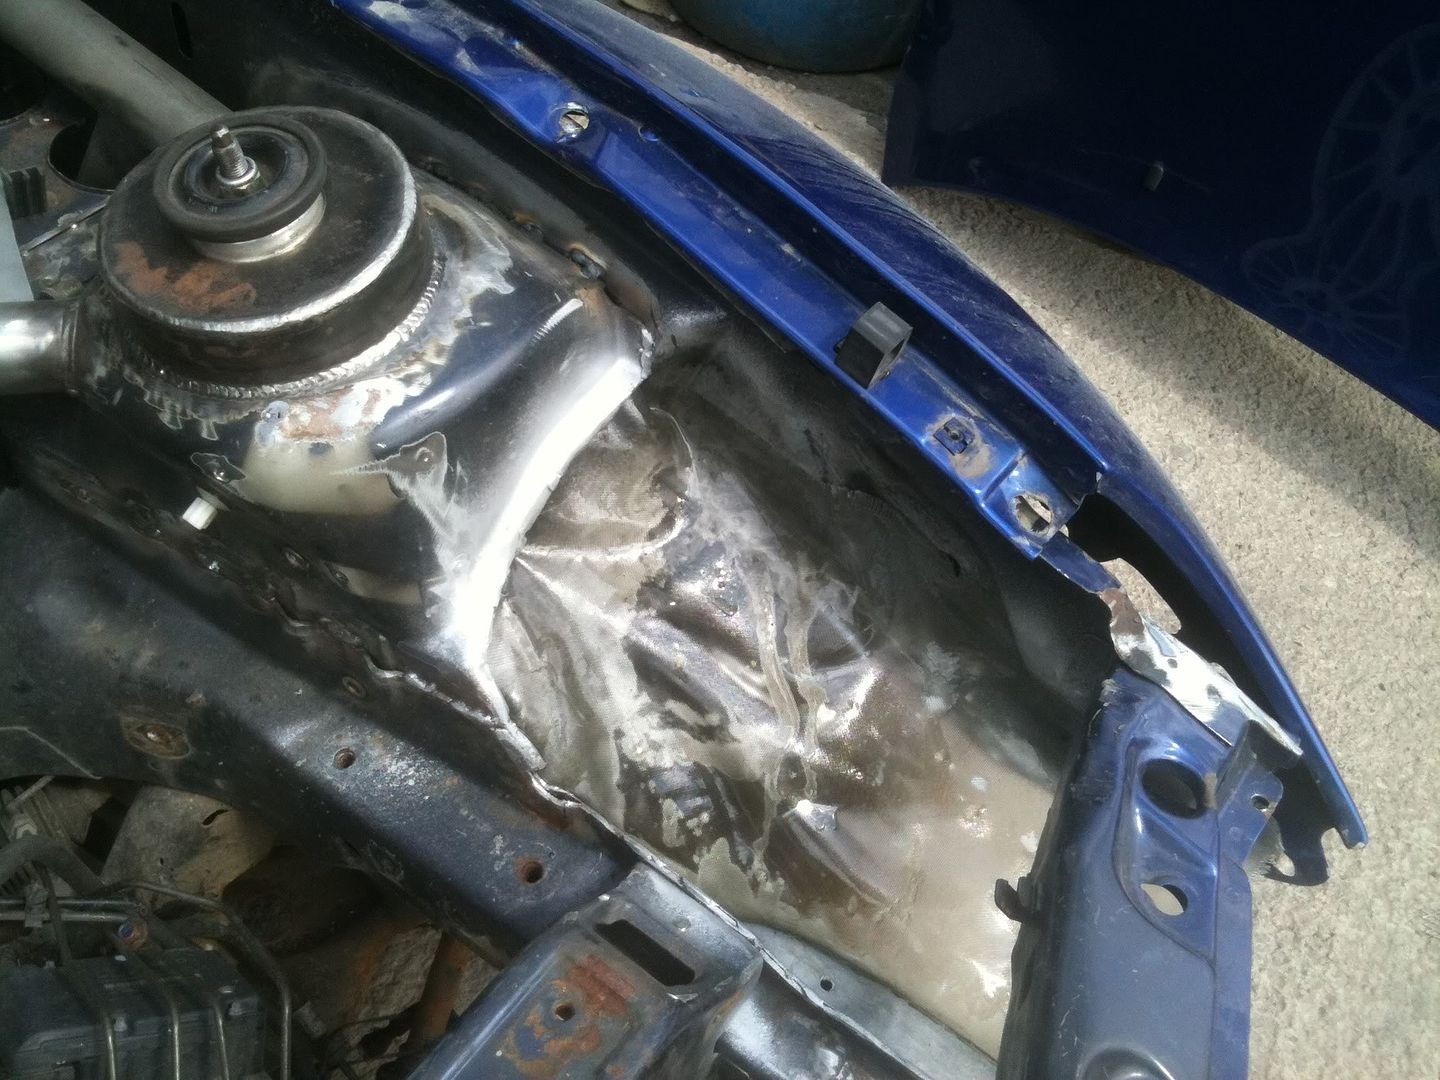
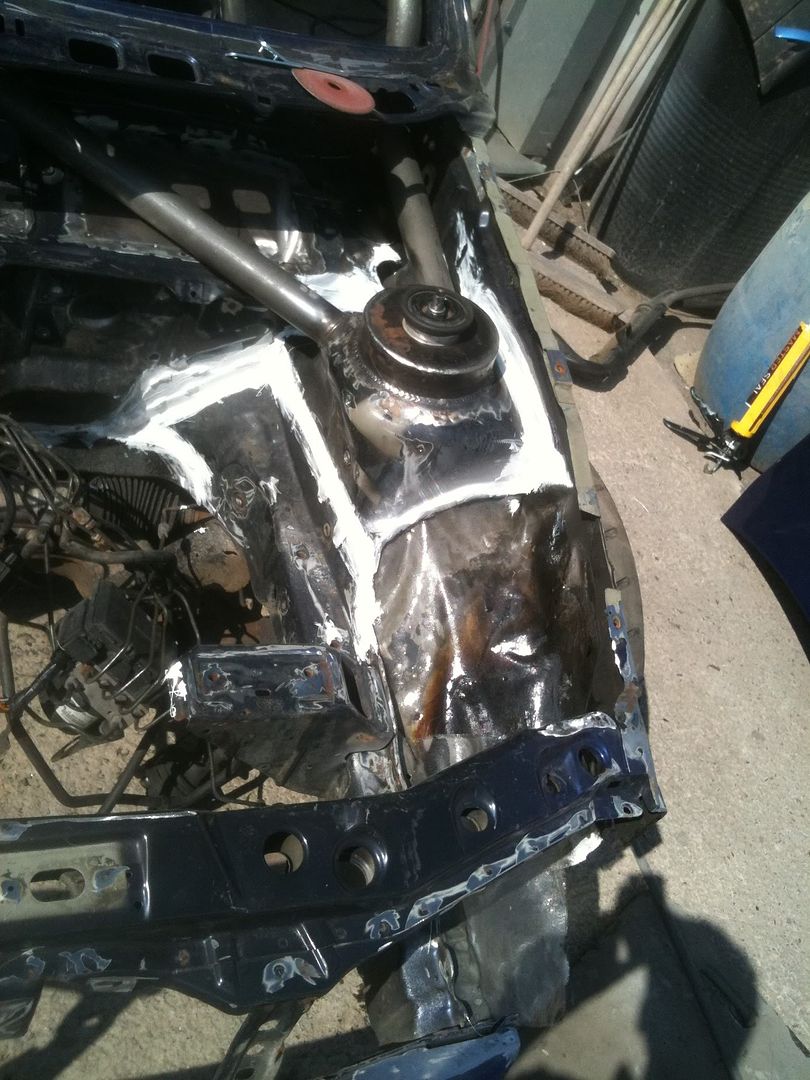
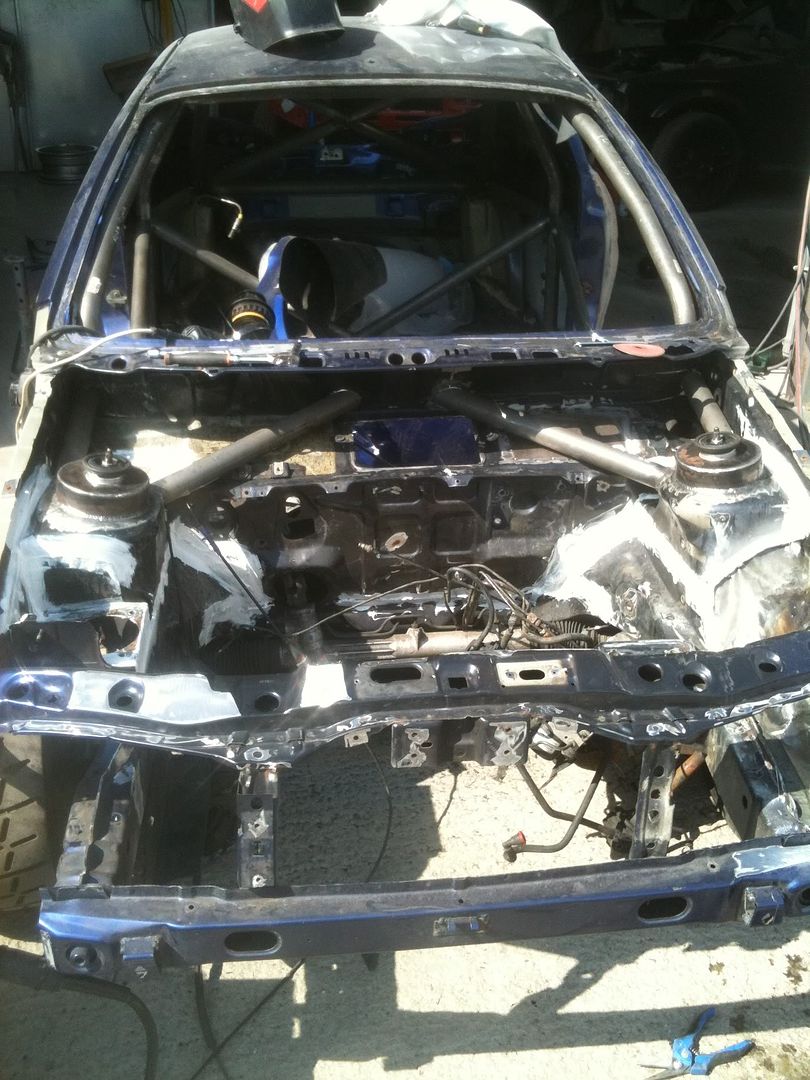
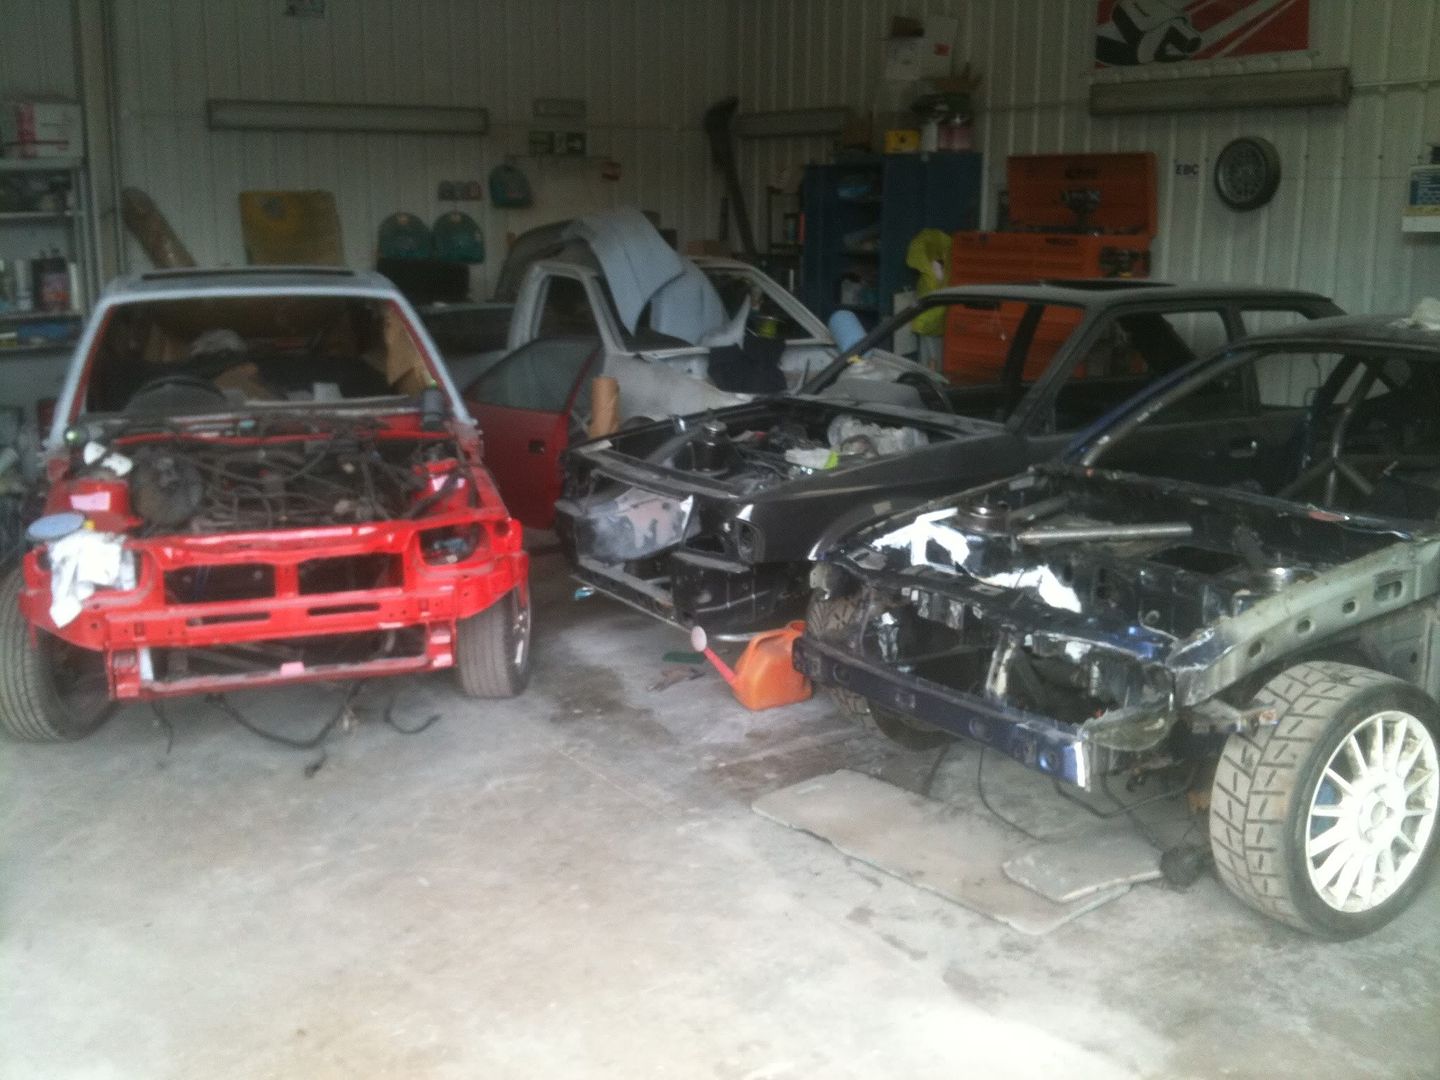
Posted 05 May 2010 - 04:20 PM

i painted the engine bay today. A lot of it isnt seen to be fair, but it's nice to have a fresh coat of paint.

I also had the welder come over and put the seat brackets in so they fit in. I sit very nicely now, best seating location i've been in for a rally car to be honest. But i've had to lower the steering column.

Posted Image
Posted Image
Posted Image
Posted Image
Posted Image
All stuff puma - puma technical & all things rebuilt...
See my website for Snow School Information

#59 User is offline   Tyeboi 

  • Group: Members
  • Posts: 153
  • Joined: 14-February 10
  • Location:Nottingham

Posted 05 May 2010 - 05:08 PM

truely amazing! love the work you are doing!
Posted Image
Now being broken. Please check the for sale thread.

#60 User is offline   warrenpenalver 

  • Group: Members
  • Posts: 4142
  • Joined: 22-January 04
  • Location:Stoke on Trent

Posted 05 May 2010 - 11:58 PM

looking good there!!
Posted Image


Share this topic:


  • 13 Pages +
  • 1
  • 2
  • 3
  • 4
  • 5
  • Last »
  • You cannot start a new topic
  • You cannot reply to this topic