
 Help
Help


warren mate you crease me up :-).
My Puma Cossie - Few Bits And Bobs. (very Picture Heavy!)
A running diary
Rate Topic:

#221

- Group: Members
- Posts: 6825
- Joined: 11-July 04
- Location:kent
Posted 03 May 2011 - 08:17 PM

FRP 241 RINGMEISTER -23 LAPS = 296.7 MILES COMPLETED, MORE TO COME NEXT YEAR
#222

- Group: Members
- Posts: 4142
- Joined: 22-January 04
- Location:Stoke on Trent
Posted 05 May 2011 - 02:15 AM
hey dont underrate lightwieght and unbreakable dinner plates!
#223
- Group: Members
- Posts: 6825
- Joined: 11-July 04
- Location:kent
Posted 05 May 2011 - 03:11 PM
im not i want one 
FRP 241 RINGMEISTER -23 LAPS = 296.7 MILES COMPLETED, MORE TO COME NEXT YEAR
#224
- Group: Members
- Posts: 4142
- Joined: 22-January 04
- Location:Stoke on Trent
Posted 10 May 2011 - 01:43 AM
been doing a bit more work on bits lately!
First of all got a mate to take a photo of me standing on the carbon brake resevoir upper half i made:
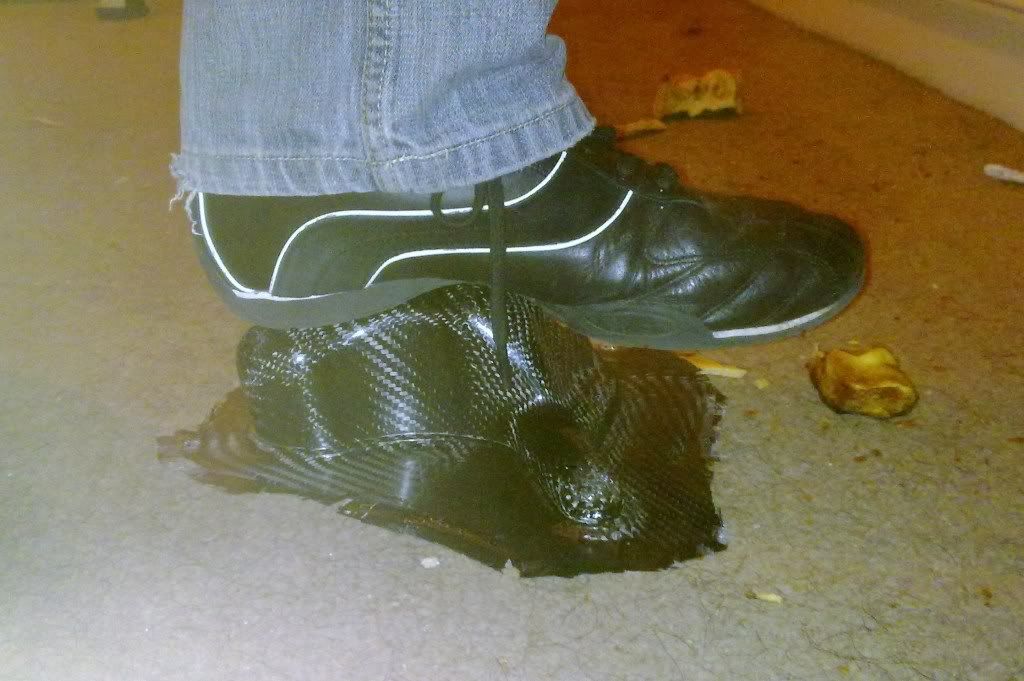
no cracks or anything!! not bad for only 2 layers of carbon and 1 of kevlar!!
In preparation for making some body panels, i have been experimenting with using different core materials to stiffen the panels up. The main material i am choosing to use is closed cell foam as its much lighter than the equivilent thickness of carbon and when made as a sandwich panel makes the final panel very very strong yet still nice and light.
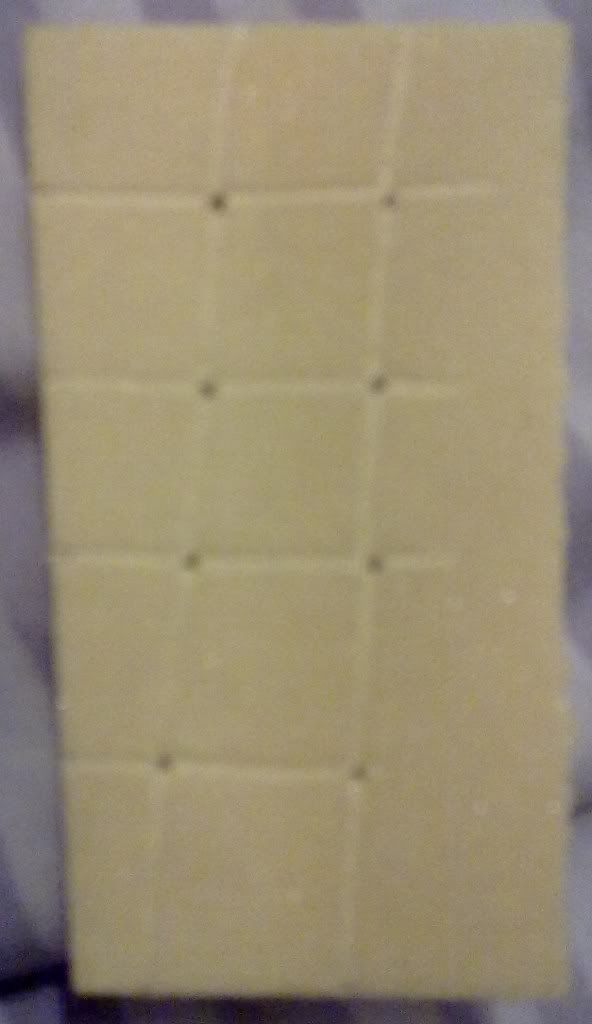
that is a small sample of the foam core. Because i am using resin infusion, you need to make small holes and score lines on it so that the resin can flow freely otherwise you risk the odd pin hole on the panels as the resin will be slowed down infusing under the foam. Obviously i dont want surface defects so prior preparation and all that!! the edges will also be sanded down to a shallow chamfer so the edge of the foam cannot be seen on the visible side of the panel.
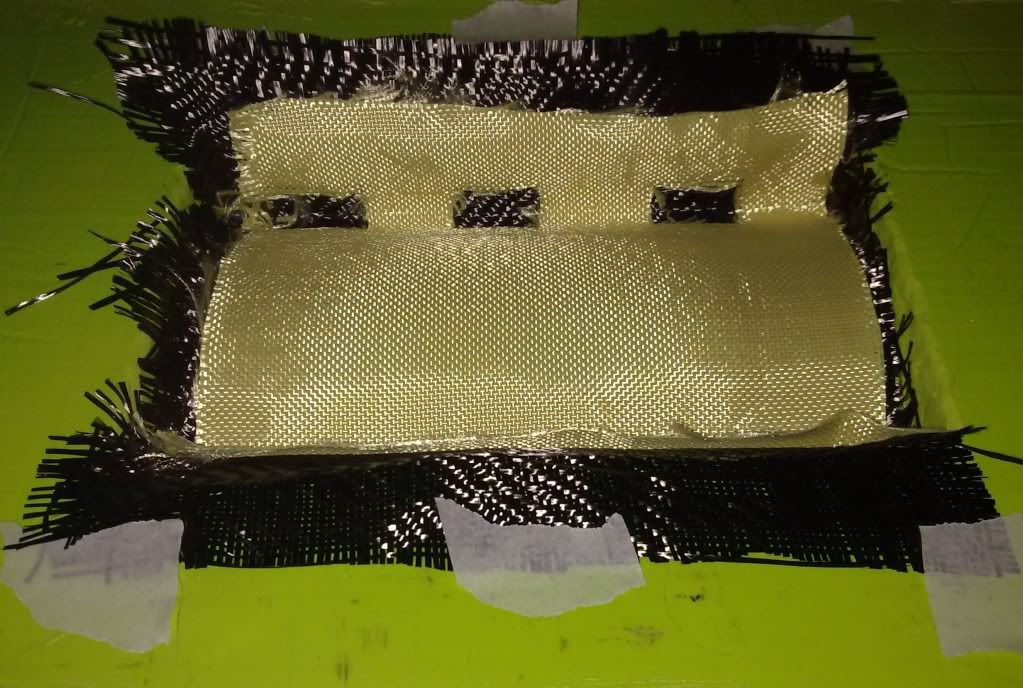
To make my composite panels i need to decide on how many layers of material i want It is a fine balance between a stiff enough panel and lightness, so i have made some small trial panels.
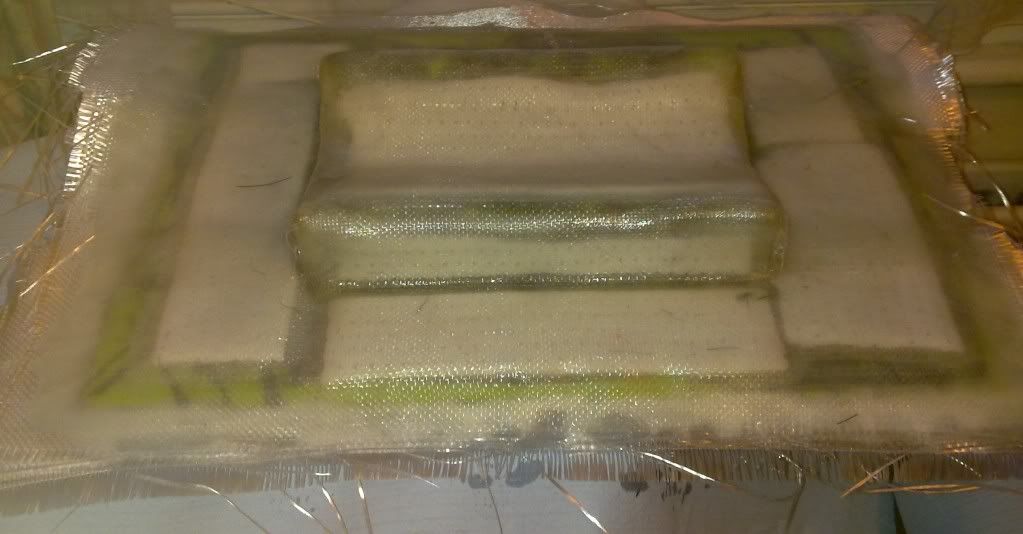
Firstly laid up the two panels in a resin infusion on a base board:
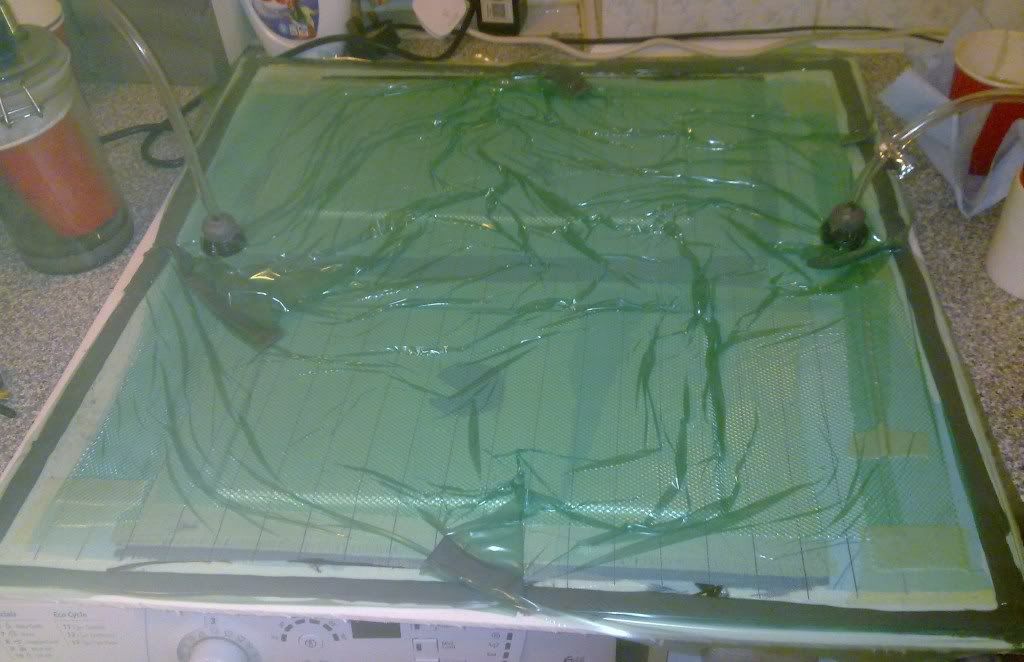
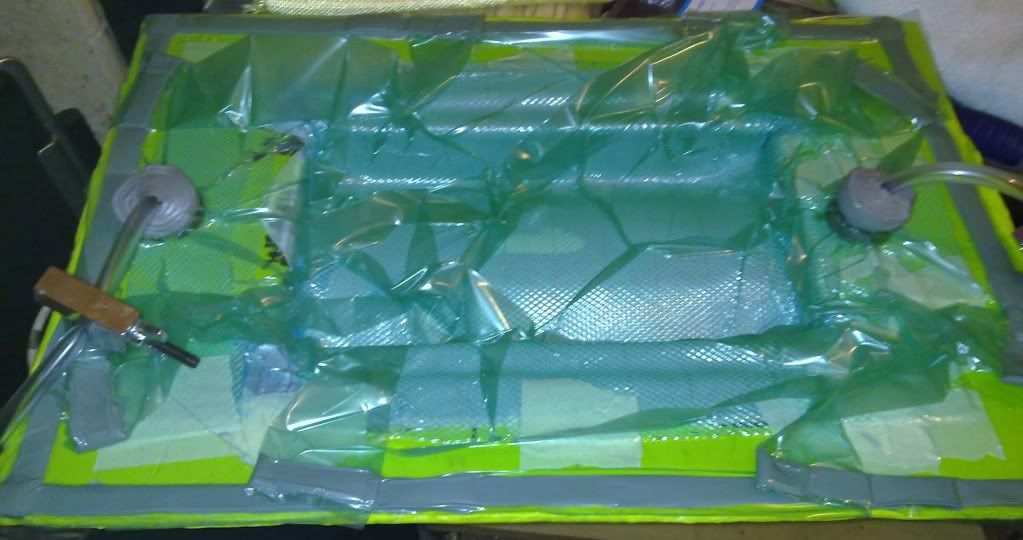
then carried out the infusion:
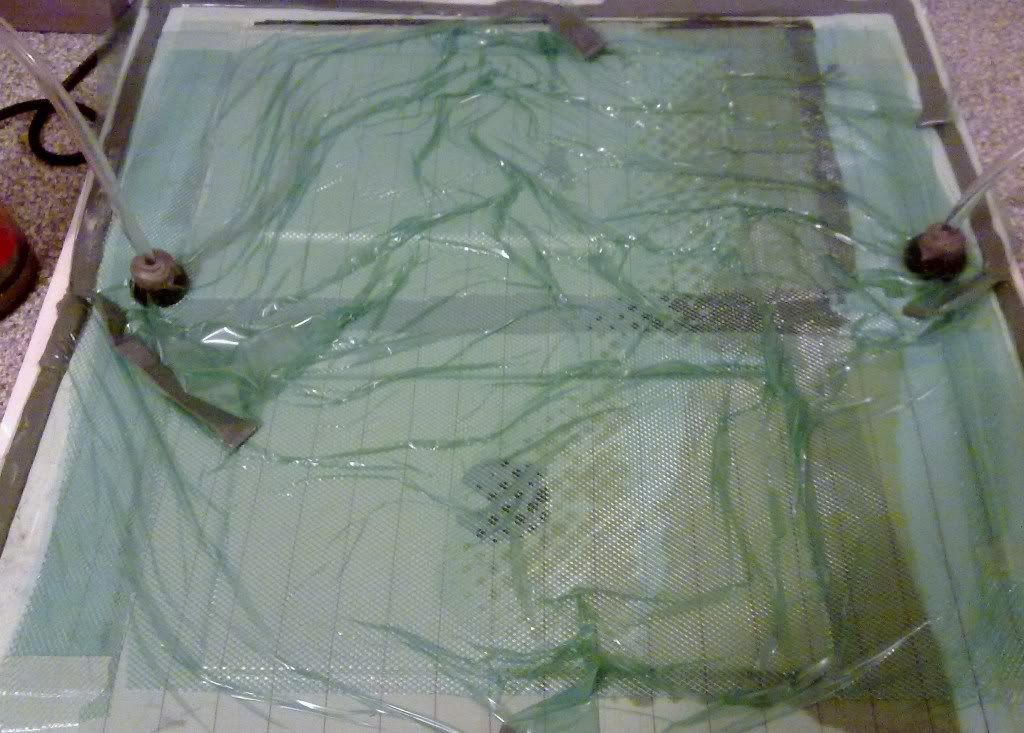
there is no longer a neat line of resin flowing across the material as i used to have because i now use a perforated release film between the peel ply and the infusion mesh. Makes demoulding the part a piece of cake.
Once left to cure, i then cut out each panel.
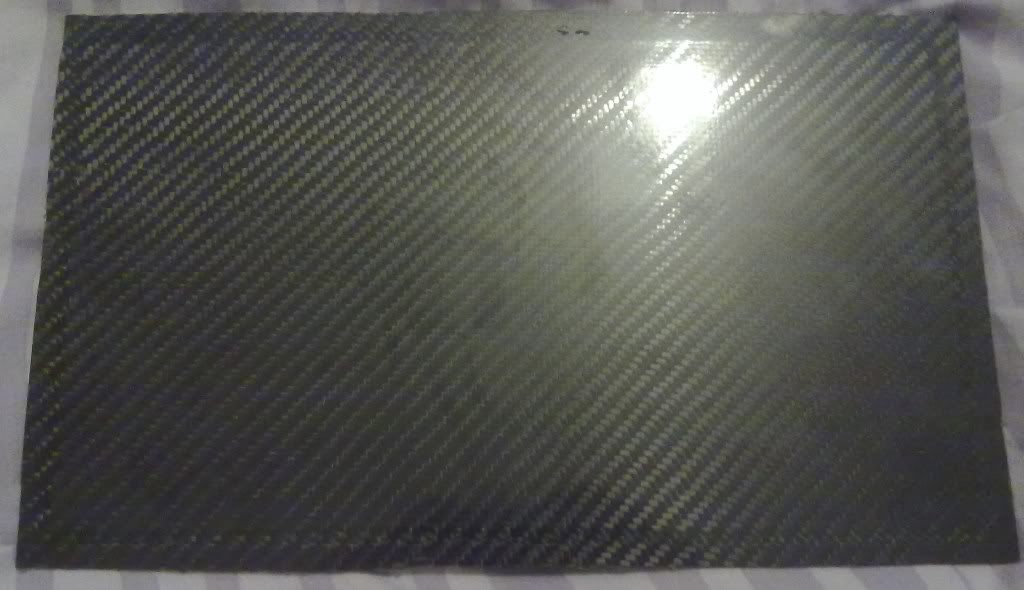
As you can see i am now getting an almost flawless surface finish on my parts which is good as im mastering the technique nicely!!
Now on the reverse:
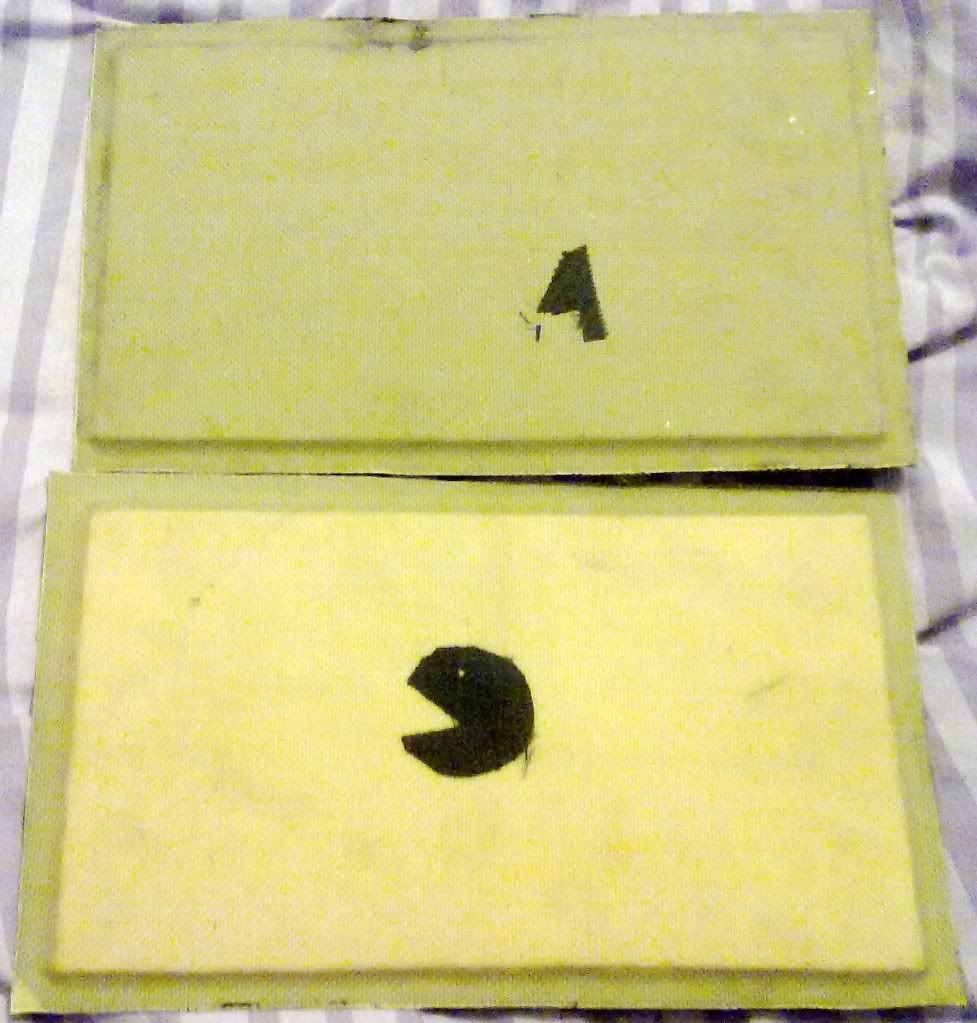
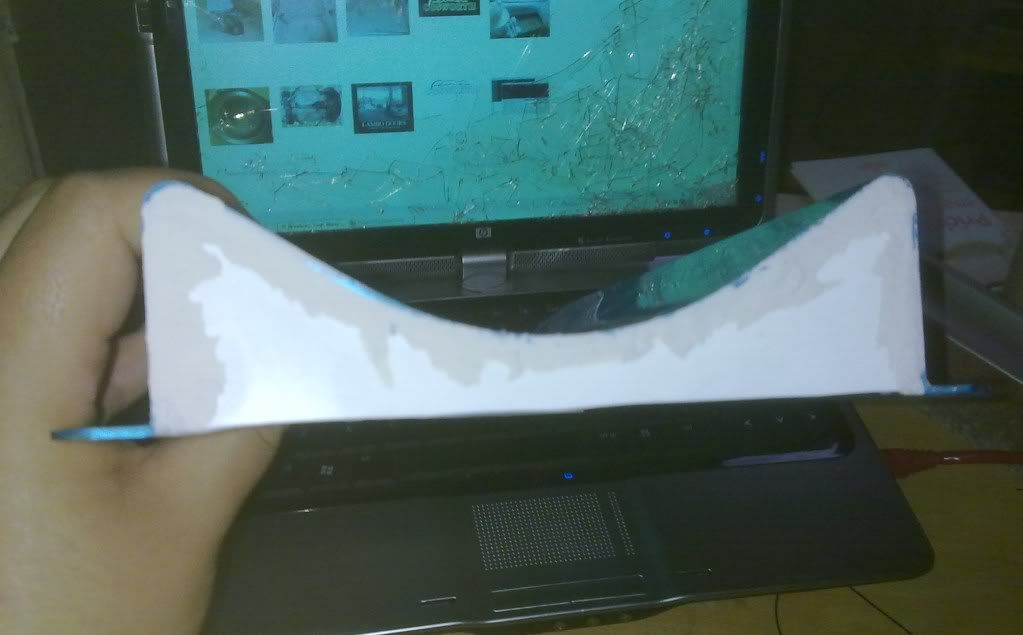
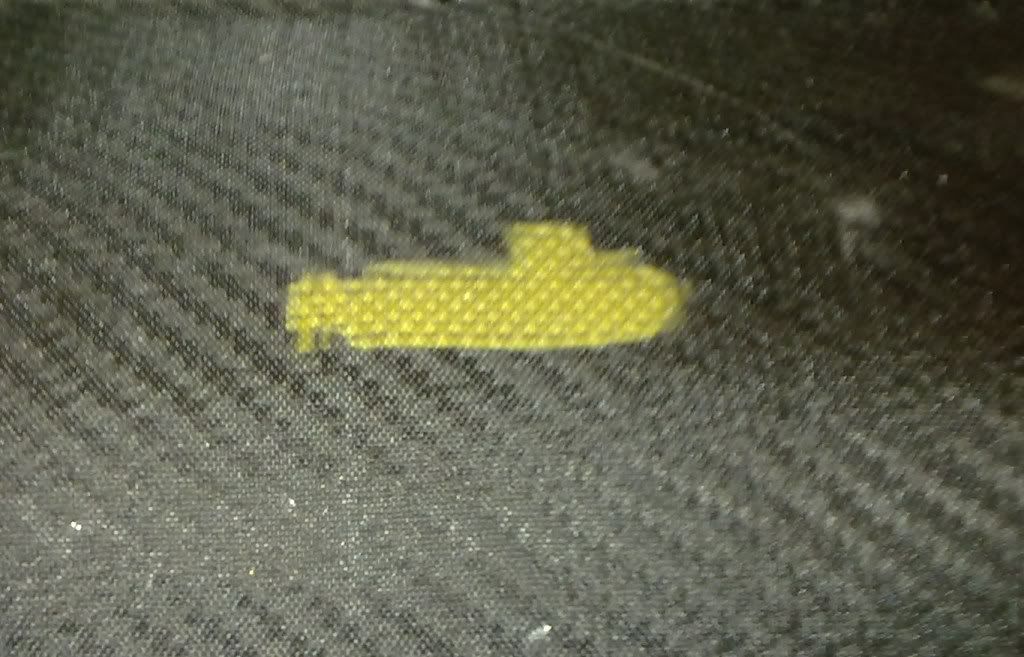
firstly its yellow as i used kevlar as the last layer. The top panel with the cut out carbon 4 on it is 4 layers of fabric, 3 carbon - 1 kevlar. The bottom one with the pacman is 3 layers, 2 carbon - 1kevlar. Used a pacman as its easier to cut than a 3 out of dry unwoven carbon LOL!!
just need to do some experimenting with the panels now. Already it looks like i may be forced to use 4 layers as with uneven layers either side of the foam, you get very slight warping of the panel. Obviously i want to avoid my panels being warped even slightly so i might have to use 4 layers, or move the kevlar layer to balance out the stack. 3 layers seems plenty stiff enough for my needs though. I reckon i can make a bonnet with no full inner frame except perhaps around hinges and an area for bonnet latch.
First of all got a mate to take a photo of me standing on the carbon brake resevoir upper half i made:
no cracks or anything!! not bad for only 2 layers of carbon and 1 of kevlar!!
In preparation for making some body panels, i have been experimenting with using different core materials to stiffen the panels up. The main material i am choosing to use is closed cell foam as its much lighter than the equivilent thickness of carbon and when made as a sandwich panel makes the final panel very very strong yet still nice and light.
that is a small sample of the foam core. Because i am using resin infusion, you need to make small holes and score lines on it so that the resin can flow freely otherwise you risk the odd pin hole on the panels as the resin will be slowed down infusing under the foam. Obviously i dont want surface defects so prior preparation and all that!! the edges will also be sanded down to a shallow chamfer so the edge of the foam cannot be seen on the visible side of the panel.
To make my composite panels i need to decide on how many layers of material i want It is a fine balance between a stiff enough panel and lightness, so i have made some small trial panels.
Firstly laid up the two panels in a resin infusion on a base board:
then carried out the infusion:
there is no longer a neat line of resin flowing across the material as i used to have because i now use a perforated release film between the peel ply and the infusion mesh. Makes demoulding the part a piece of cake.
Once left to cure, i then cut out each panel.
As you can see i am now getting an almost flawless surface finish on my parts which is good as im mastering the technique nicely!!
Now on the reverse:
firstly its yellow as i used kevlar as the last layer. The top panel with the cut out carbon 4 on it is 4 layers of fabric, 3 carbon - 1 kevlar. The bottom one with the pacman is 3 layers, 2 carbon - 1kevlar. Used a pacman as its easier to cut than a 3 out of dry unwoven carbon LOL!!
just need to do some experimenting with the panels now. Already it looks like i may be forced to use 4 layers as with uneven layers either side of the foam, you get very slight warping of the panel. Obviously i want to avoid my panels being warped even slightly so i might have to use 4 layers, or move the kevlar layer to balance out the stack. 3 layers seems plenty stiff enough for my needs though. I reckon i can make a bonnet with no full inner frame except perhaps around hinges and an area for bonnet latch.
#225
Posted 17 May 2011 - 08:03 PM
That is a really smooth surface you got showing in your picture Warren  looks leaps on from your first finish
looks leaps on from your first finish
searching is fruitful | I'm a sponge not a mechanic | please do try that if stuck with a Puma problem whilst waiting for a reply | For the Puma fan this read 'The Inside Story Book' is very nice to own sometimes still seen for sale
#226
- Group: Members
- Posts: 4142
- Joined: 22-January 04
- Location:Stoke on Trent
Posted 17 May 2011 - 09:02 PM
cheers kate. Its just perfecting my technique. Also flatish panels are soooo much easier than complicated shaped parts. The more complicated the part the harder it is to get the resin to flow where you want it. Ideally you want even flow across the panel as if you get massively uneven flow then the resin starts getting sucked into the catch pot too soon before the rest of the part is infused and it means you end up sucking out loads of resin and end up with a good chance of the part having defects and air voids.
#227

- Group: Members
- Posts: 1252
- Joined: 08-January 07
- Location:Hereford
Posted 23 May 2011 - 05:27 PM
if i want some bits made cud you do it?? Can't get big companies to stop what their doing to make little bits.

All stuff puma - puma technical & all things rebuilt...
See my website for Snow School Information
#228
- Group: Members
- Posts: 4142
- Joined: 22-January 04
- Location:Stoke on Trent
Posted 25 May 2011 - 11:43 PM
Been making a mould for a lifeline fire extinguisher.
This post will show the whole mould making.
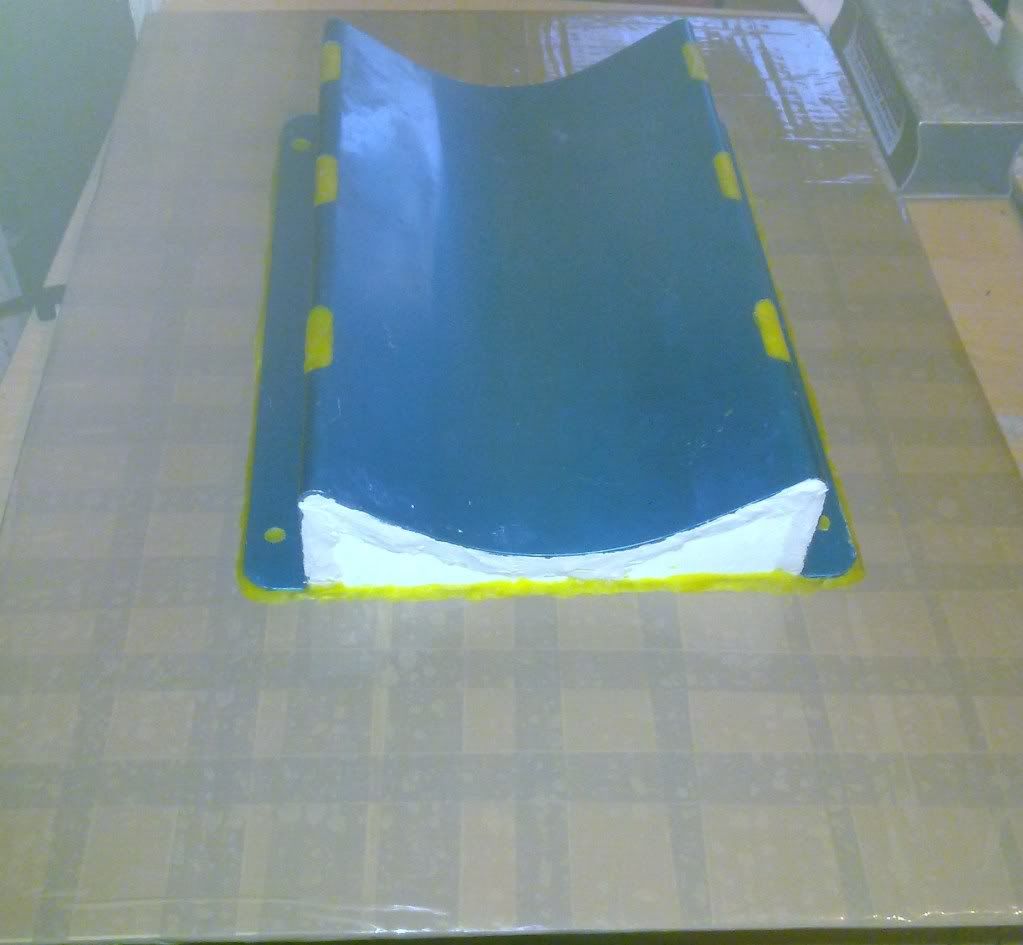
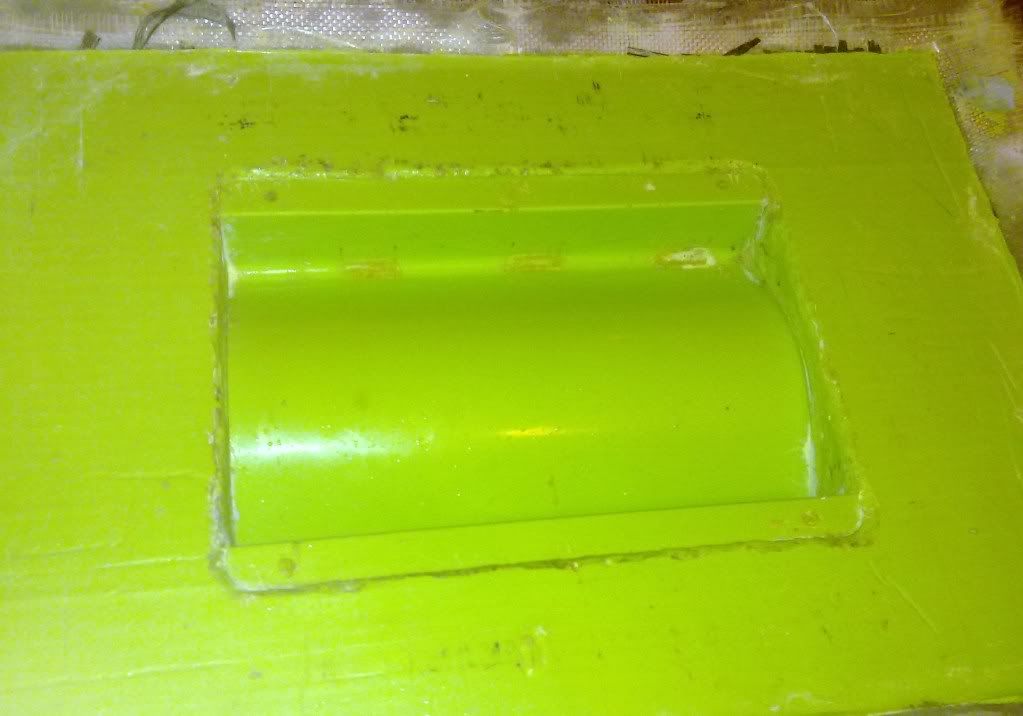
Ok first of all this is the part i am making:
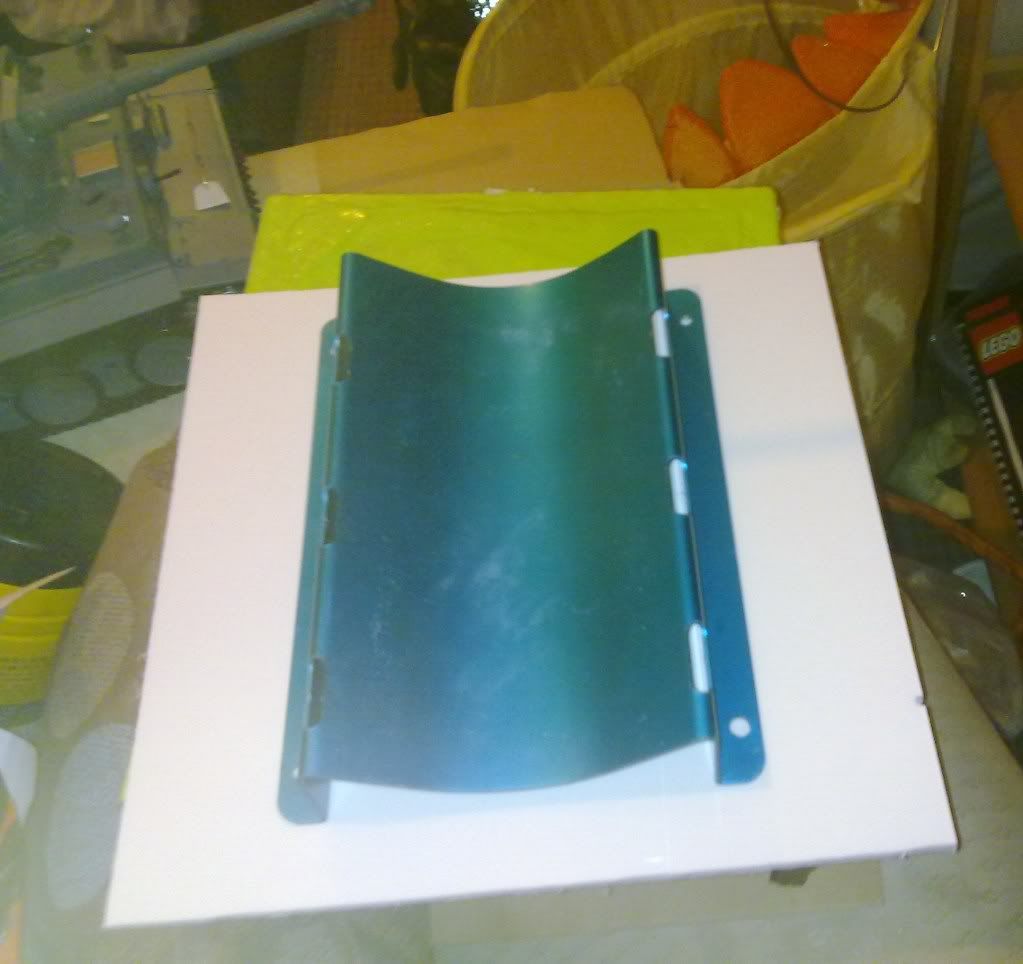
Needs to be cleaned up, polished and tidied a little. The holes and ends need filling so it can take a mould.
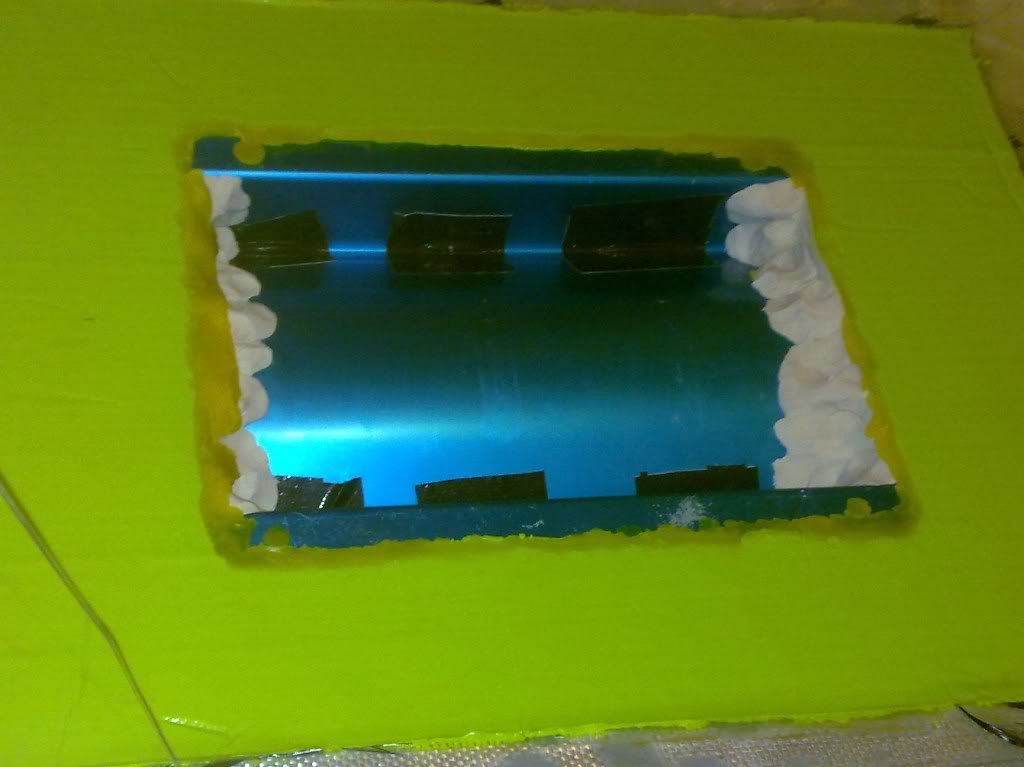
First of all i began by making the end plates out of plasticard. They are held in place with plasticine to support them and fill the gaps.
Ive gone quite chunky with the supports, and also taped over the strap holes so they can be filled from the other side later.
Made a baseboard out of card covered in the cheapest brown packing tape i can find. Resin doesnt stick to the tape you see!!
Then mounted the mount to the board with double sided tape. Then proceeded to use moulding wax to seal around the edge between the base board and part so that resin doesnt seep under and create a mechanical lock when it comes to demoulding.
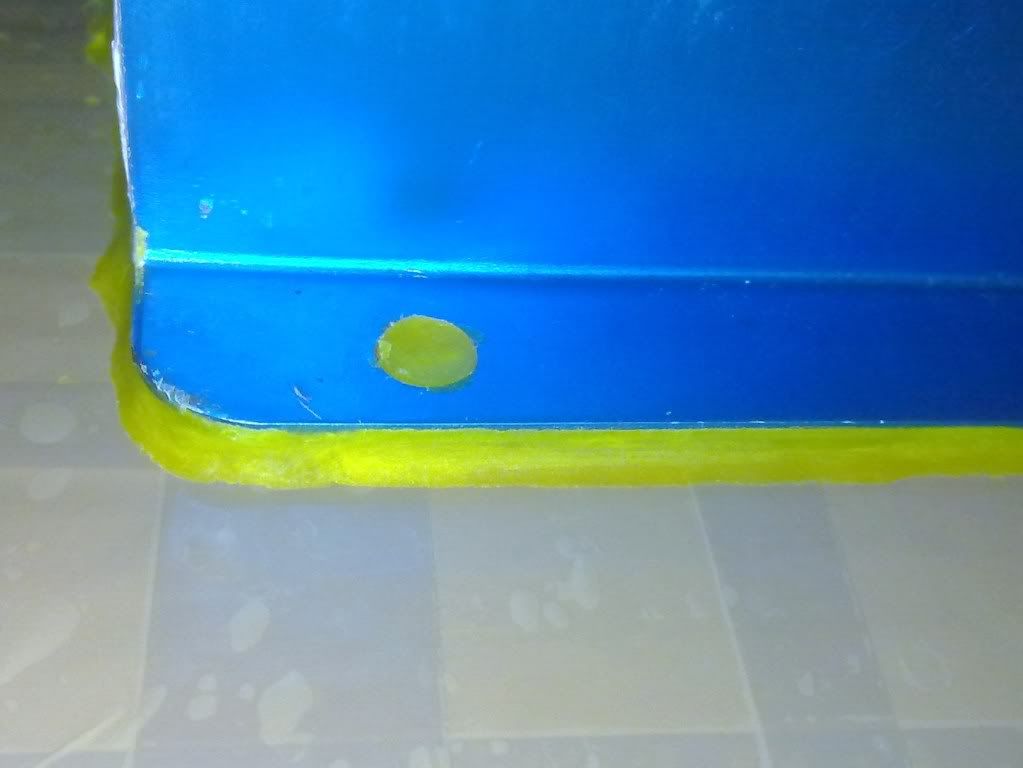
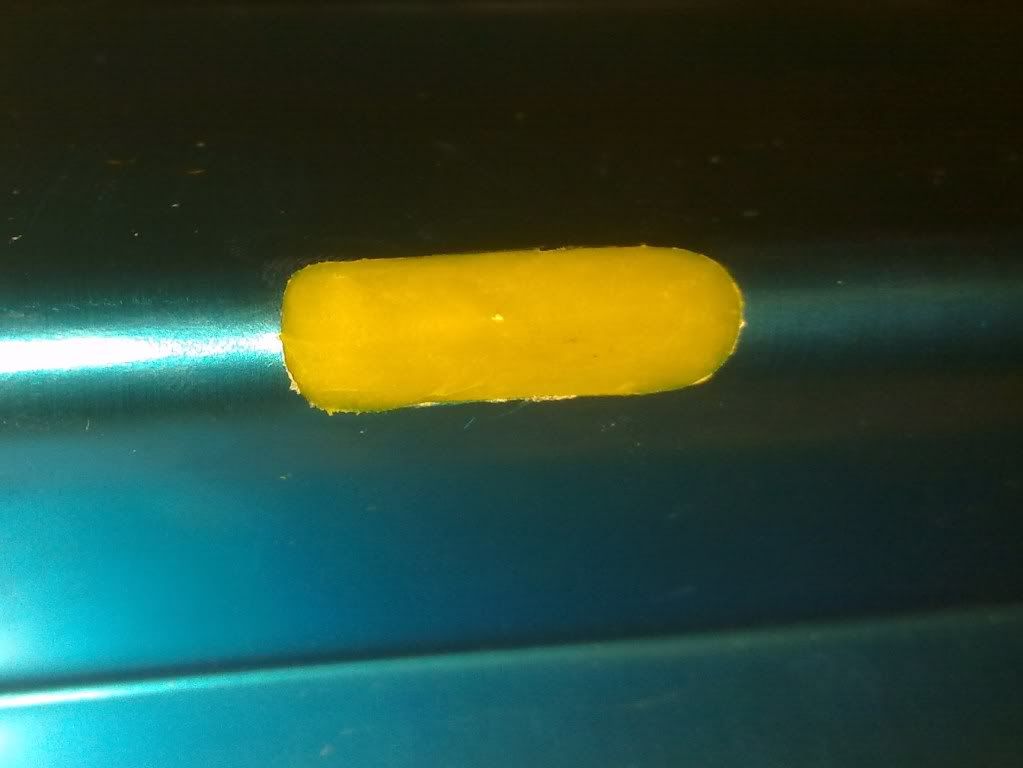
also filled in the mounting hole with wax too. There will be a slight impression on the carbon so new ones can be drilled. Did the same with the slots for the extinguisher metal straps:
Finished the wax all the way round and filled all the holes.
Just need to add approx 8 layers of mould release agent then its time to consider making the mould!!
First i had to paint the waxed "plug" with tooling gelcoat:
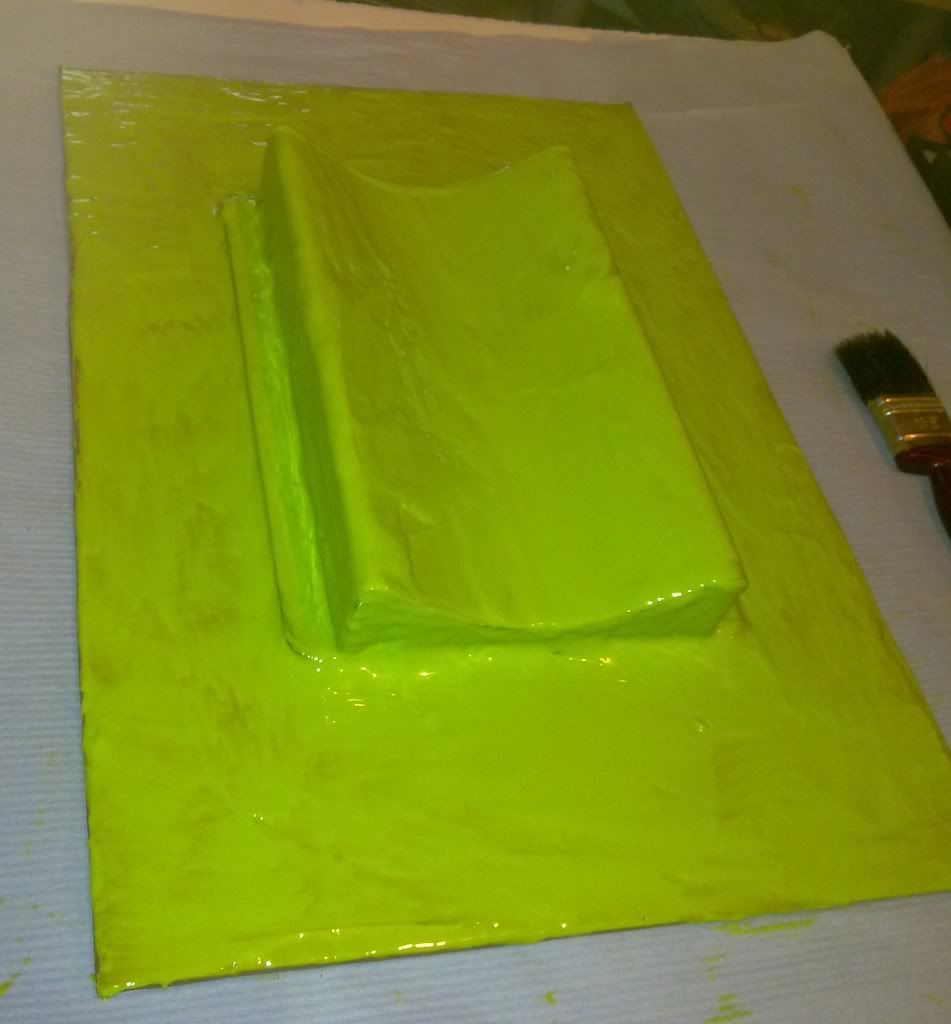
Left it until just beginning to set then added another layer, which was left until tacky. Thicker the better as it means you can sand things and tweak the mould if needs be without risking breaking through to the reinforcement underneath.
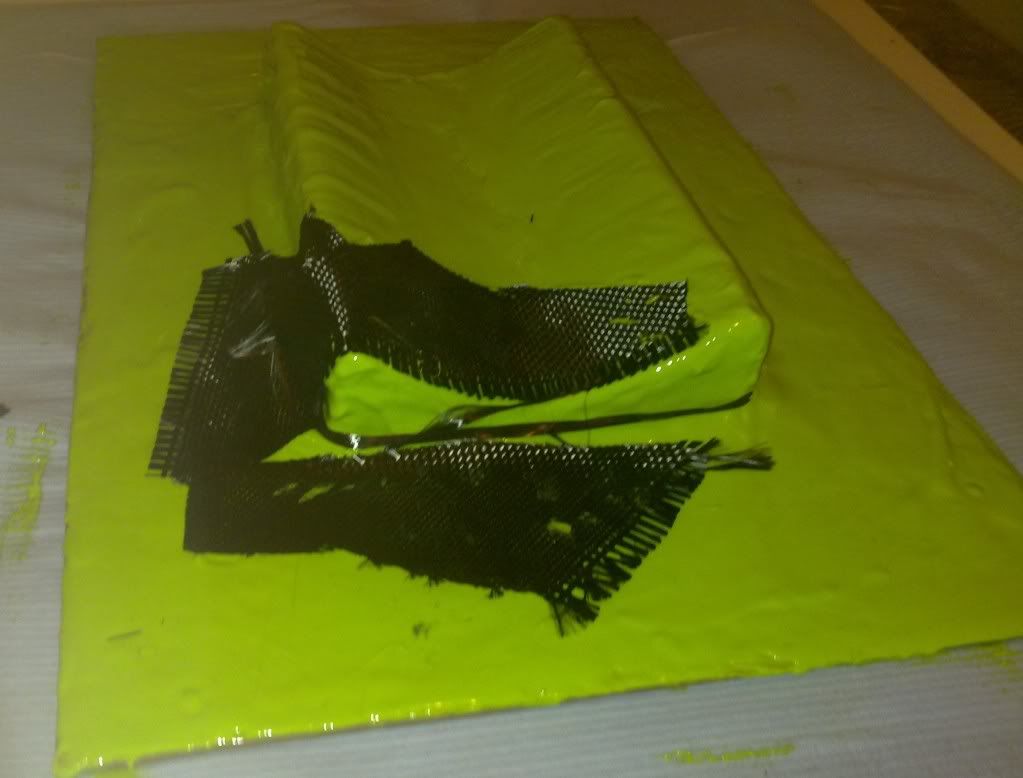
Then used some carbon offcuts for the tight corners and to add some strenth:
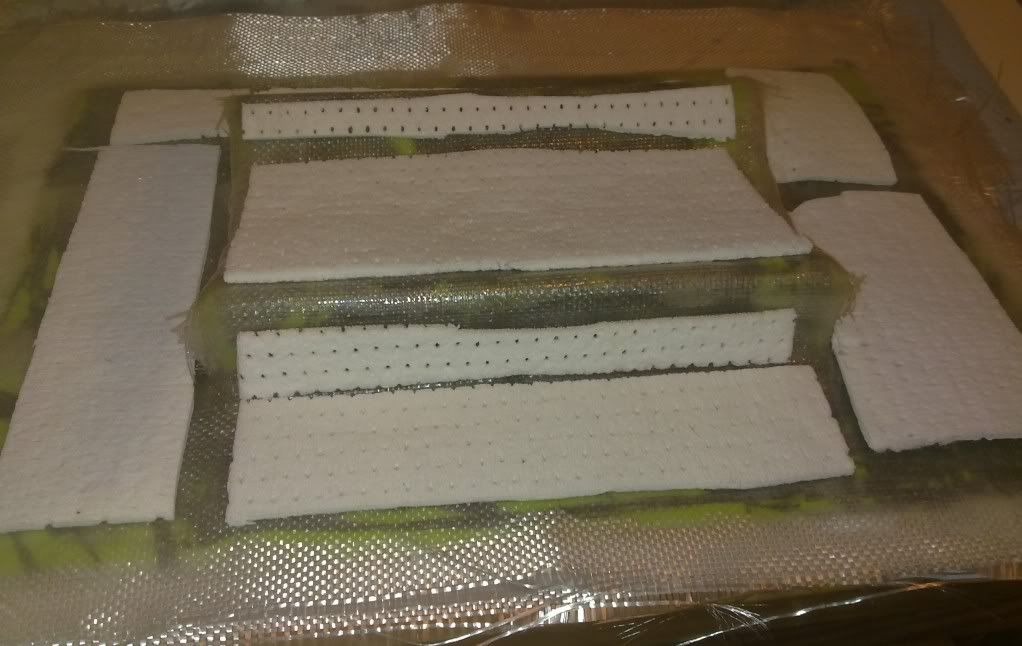
Then started layering on the fiberglass until i got to layer 4 where i added coremat to thicken up the mould. Coremat will stiffen the mould massively yet weighs much less than an equivilent thickness of fibreglass.
then another 3 layers of fibreglass and its time to leave it to set:
let the mould cure 24hours.
First thing to do is remove the baseboard. It prises off dead easy showing the release agent works well.
Next you need to prise out some of the wax and plasticine flanges with a flat blade:
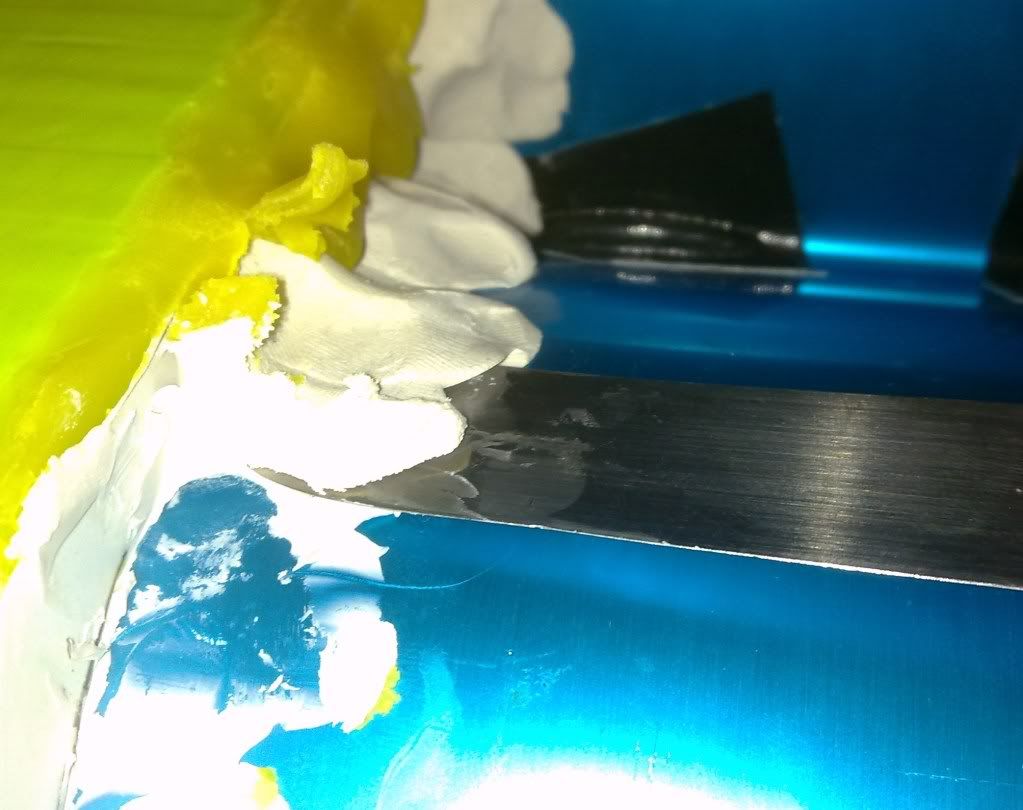
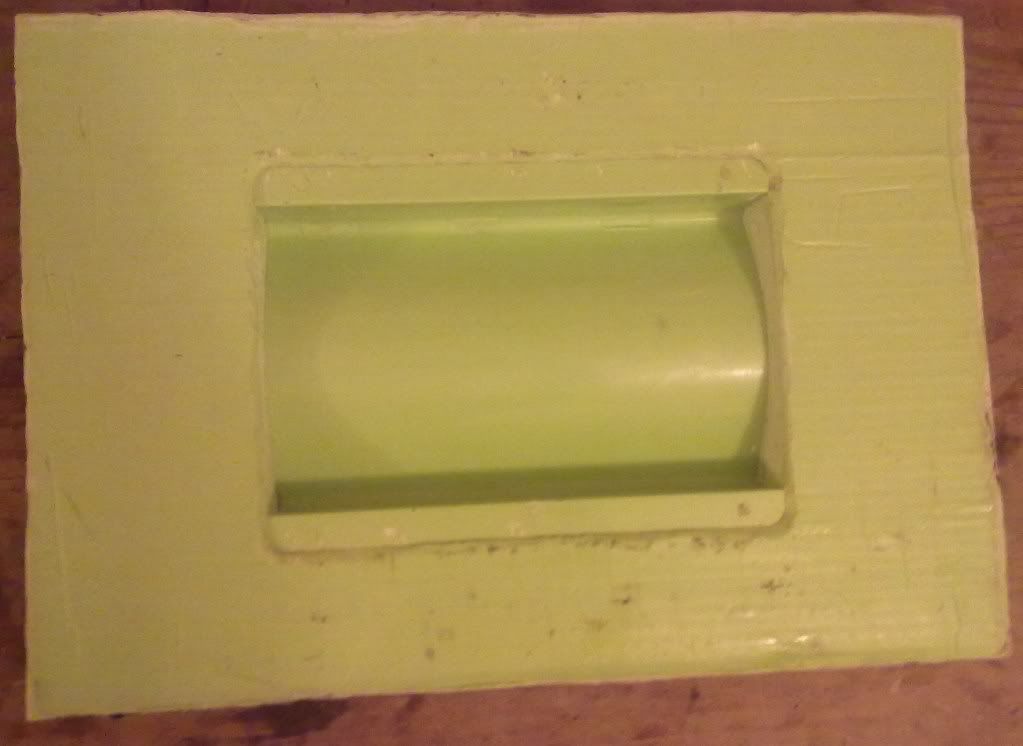
Once the flange is off you can see underneath:
Then you need to dig out the wax around the edge of the part so you can get under the part to release it from the mould:
It was really tightly in the mould due to the vertical edges so a few taps with a rubber mallet was needed to get it moving, then using a pry bar on the edges to wiggle the part out of the mould. Luckily when making the carbon parts it will be much easier as the carbon will flex a little bit easier than the aluminium.
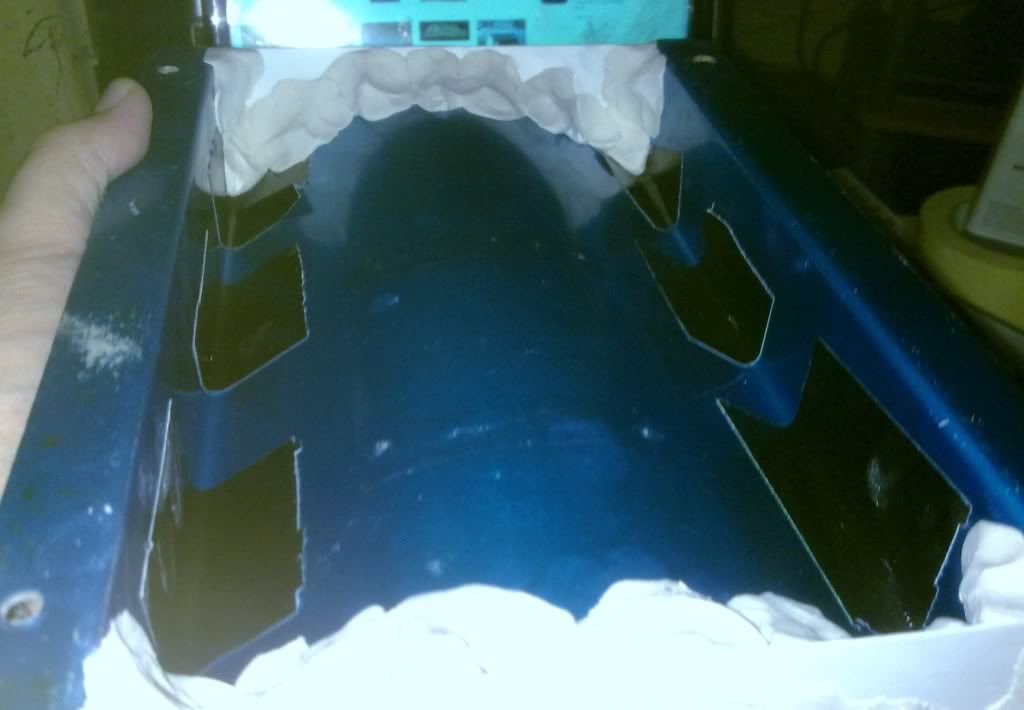
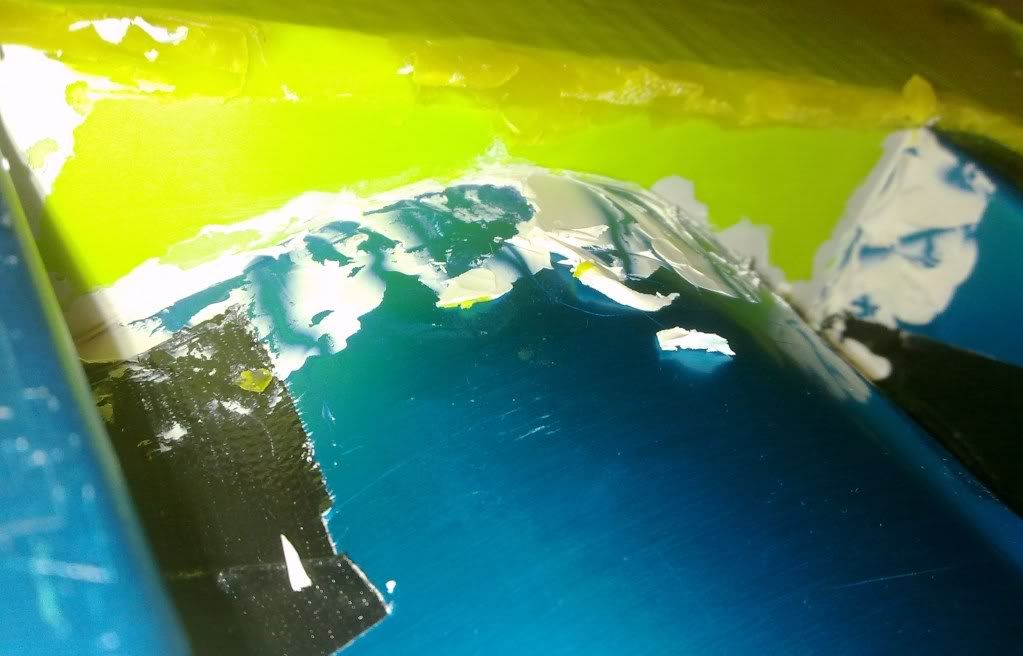
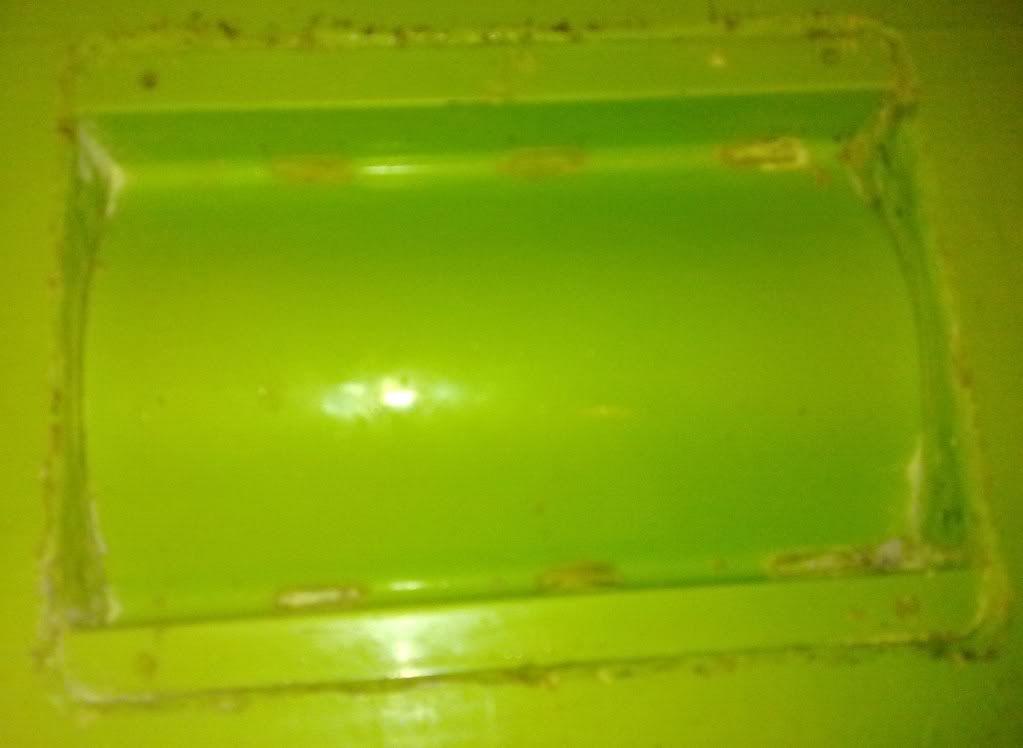
Part out the mould you can see the copied shape easily:
On looking closer, the surface is in good condition so will only need a few prising scratches sanded out:
all that needs to be done now is trim the edges of the mould, sand some of the flange edges on the mould to make part release easier next time, and a bit of polishing, then its ready for making a carbon part!!
This post will show the whole mould making.
Ok first of all this is the part i am making:
Needs to be cleaned up, polished and tidied a little. The holes and ends need filling so it can take a mould.
First of all i began by making the end plates out of plasticard. They are held in place with plasticine to support them and fill the gaps.
Ive gone quite chunky with the supports, and also taped over the strap holes so they can be filled from the other side later.
Made a baseboard out of card covered in the cheapest brown packing tape i can find. Resin doesnt stick to the tape you see!!
Then mounted the mount to the board with double sided tape. Then proceeded to use moulding wax to seal around the edge between the base board and part so that resin doesnt seep under and create a mechanical lock when it comes to demoulding.
also filled in the mounting hole with wax too. There will be a slight impression on the carbon so new ones can be drilled. Did the same with the slots for the extinguisher metal straps:
Finished the wax all the way round and filled all the holes.
Just need to add approx 8 layers of mould release agent then its time to consider making the mould!!
First i had to paint the waxed "plug" with tooling gelcoat:
Left it until just beginning to set then added another layer, which was left until tacky. Thicker the better as it means you can sand things and tweak the mould if needs be without risking breaking through to the reinforcement underneath.
Then used some carbon offcuts for the tight corners and to add some strenth:
Then started layering on the fiberglass until i got to layer 4 where i added coremat to thicken up the mould. Coremat will stiffen the mould massively yet weighs much less than an equivilent thickness of fibreglass.
then another 3 layers of fibreglass and its time to leave it to set:
let the mould cure 24hours.
First thing to do is remove the baseboard. It prises off dead easy showing the release agent works well.
Next you need to prise out some of the wax and plasticine flanges with a flat blade:
Once the flange is off you can see underneath:
Then you need to dig out the wax around the edge of the part so you can get under the part to release it from the mould:
It was really tightly in the mould due to the vertical edges so a few taps with a rubber mallet was needed to get it moving, then using a pry bar on the edges to wiggle the part out of the mould. Luckily when making the carbon parts it will be much easier as the carbon will flex a little bit easier than the aluminium.
Part out the mould you can see the copied shape easily:
On looking closer, the surface is in good condition so will only need a few prising scratches sanded out:
all that needs to be done now is trim the edges of the mould, sand some of the flange edges on the mould to make part release easier next time, and a bit of polishing, then its ready for making a carbon part!!
#229

- Group: Members
- Posts: 583
- Joined: 01-April 10
- Location:NW Scotland Highlands
Posted 26 May 2011 - 10:28 AM
Nice work Warren,
I am in awe of your CF work and moulding talents
I reckon you should do flat door cards and flat rear quarter cards next so I can buy a set off you
Cheers Dave
I am in awe of your CF work and moulding talents
I reckon you should do flat door cards and flat rear quarter cards next so I can buy a set off you
Cheers Dave
It's nice to be important but it's more important to be nice !!
#230
Posted 26 May 2011 - 05:20 PM
certainly is facinating 
searching is fruitful | I'm a sponge not a mechanic | please do try that if stuck with a Puma problem whilst waiting for a reply | For the Puma fan this read 'The Inside Story Book' is very nice to own sometimes still seen for sale
#231
- Group: Members
- Posts: 4142
- Joined: 22-January 04
- Location:Stoke on Trent
Posted 26 May 2011 - 10:03 PM
dave flat door cards would literally just be flat carbon sheet trimmed to shape! I doubt i can make carbon sheet much cheaper than buying it online. Unless you wanted it super thin out of like 2 layers or something. I could make that on a flat sheet of polyprop but it wouldnt be rigid but quite flexible.
did a bit more work on the carbon stuff and also, first did a minor mod to the car. I upgraded my engine monitor software which adds a lot of features as well as improved resolution on the data streams. It also means i can upload a custom start up screen image. So i got busy in paint and created a puma cosworth logo. Uploaded it to the car via USB and viola:

Next onto the carbon...
Got the dremel and permagrit cutting discs out and trimmed all the rough fibreglass edges. Then used a sanding drum on the dremel to blunt all the edges as well as fettle the edges of the mould itself to make it slightly smoother and easier to work with later.
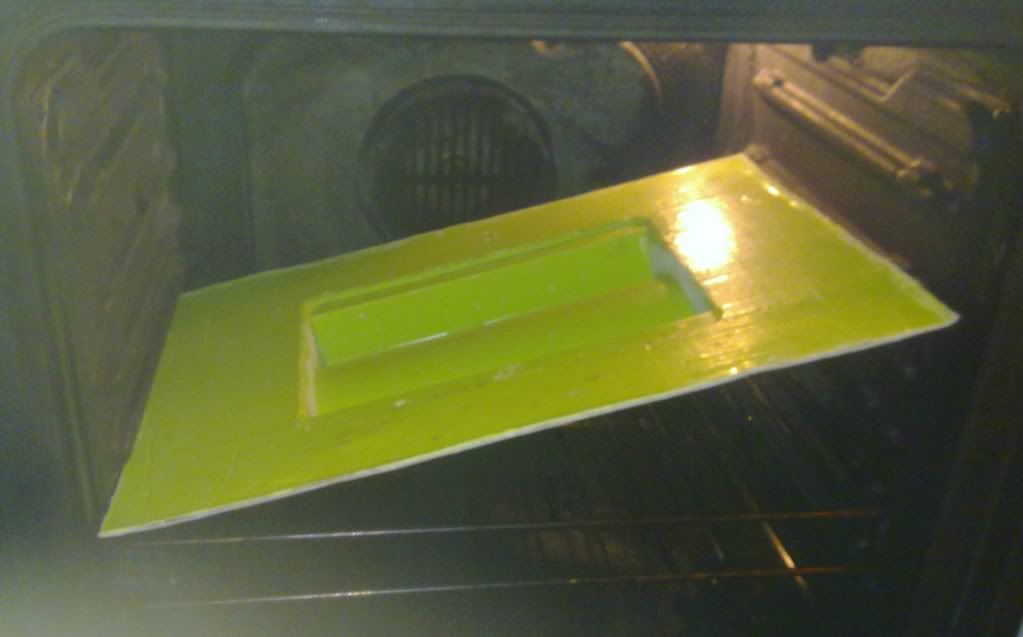
I then did a postcure in the oven!! technically at room temperature it can take a week or 2 for the resins fully to 100% cure and achieve maximum strength. This can be speeded up in the oven as well as the unique properties of epoxies meaning that a good bake actually means the end product ends up stronger than curing at room temperature.
The next stage is to fettle the mould with wet and dry sandpapers and then polish it up ready for use to make parts.
I have also got some sample materials to play with!
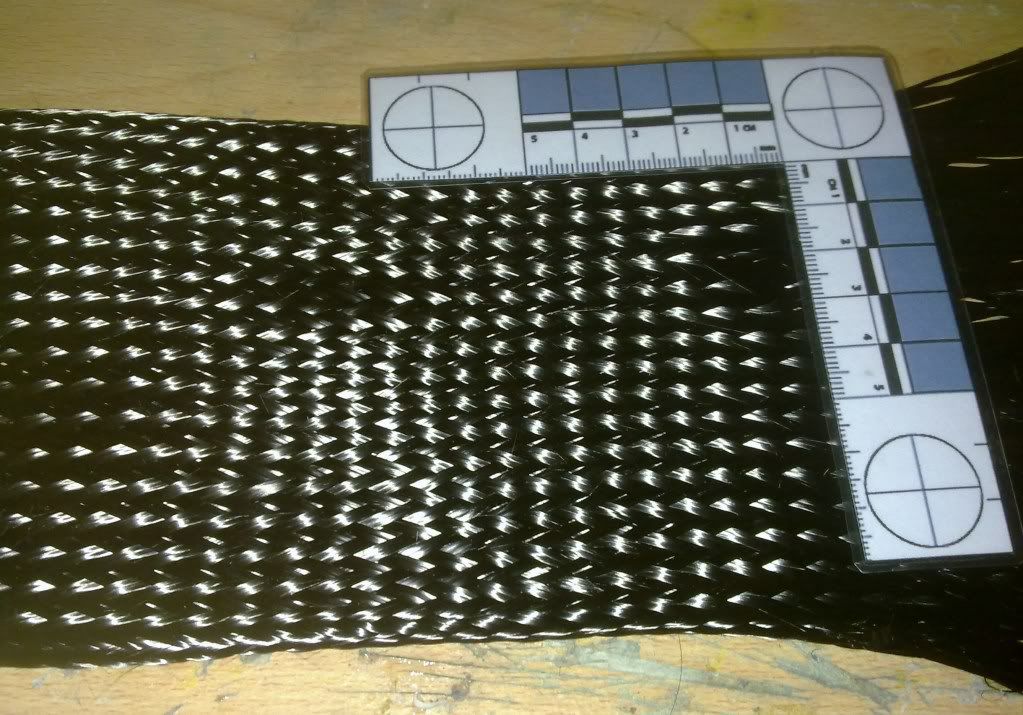
Its a carbon fibre woven tube, used in aerospace, prosthetic manufacture and simple tube manufacture! It is quite stretchable and much less fragile than normal carbon fabric.
did a bit more work on the carbon stuff and also, first did a minor mod to the car. I upgraded my engine monitor software which adds a lot of features as well as improved resolution on the data streams. It also means i can upload a custom start up screen image. So i got busy in paint and created a puma cosworth logo. Uploaded it to the car via USB and viola:
Next onto the carbon...
Got the dremel and permagrit cutting discs out and trimmed all the rough fibreglass edges. Then used a sanding drum on the dremel to blunt all the edges as well as fettle the edges of the mould itself to make it slightly smoother and easier to work with later.
I then did a postcure in the oven!! technically at room temperature it can take a week or 2 for the resins fully to 100% cure and achieve maximum strength. This can be speeded up in the oven as well as the unique properties of epoxies meaning that a good bake actually means the end product ends up stronger than curing at room temperature.
The next stage is to fettle the mould with wet and dry sandpapers and then polish it up ready for use to make parts.
I have also got some sample materials to play with!
Its a carbon fibre woven tube, used in aerospace, prosthetic manufacture and simple tube manufacture! It is quite stretchable and much less fragile than normal carbon fabric.
#232

- Group: Members
- Posts: 1217
- Joined: 08-March 03
- Location:Porsgrunn (Norway)
Posted 27 May 2011 - 04:31 PM
LOVE the novaboot
it's awsome, werry useful for asian cars, as the cv joints usualy stick as h.... on these
This post has been edited by CartMan: 27 May 2011 - 04:32 PM
1998 Puma 1.7 Replica FRP. innlet nr 138
Projekt tread http://www.pumapeopl...pic=104790&st=0
Time, is the fire in which we burn
Projekt tread http://www.pumapeopl...pic=104790&st=0
Time, is the fire in which we burn
#233
- Group: Members
- Posts: 4142
- Joined: 22-January 04
- Location:Stoke on Trent
Posted 19 June 2011 - 06:27 AM
bit of an update. Been making some more carbon dinner plates.
I now add a layer of kevlar into the plate so its impact proof:
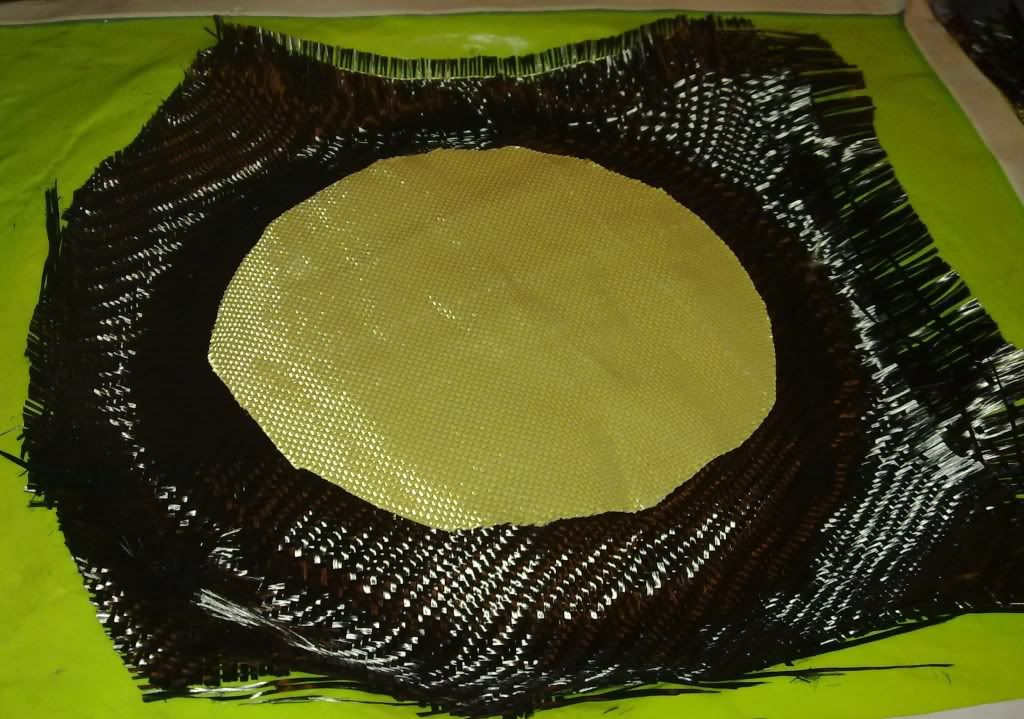
Also in this photo of the infusion process, you can see how the addition of the layer of perforated release film effects the resin flow with little blobs rather than a regular line of resin flow.
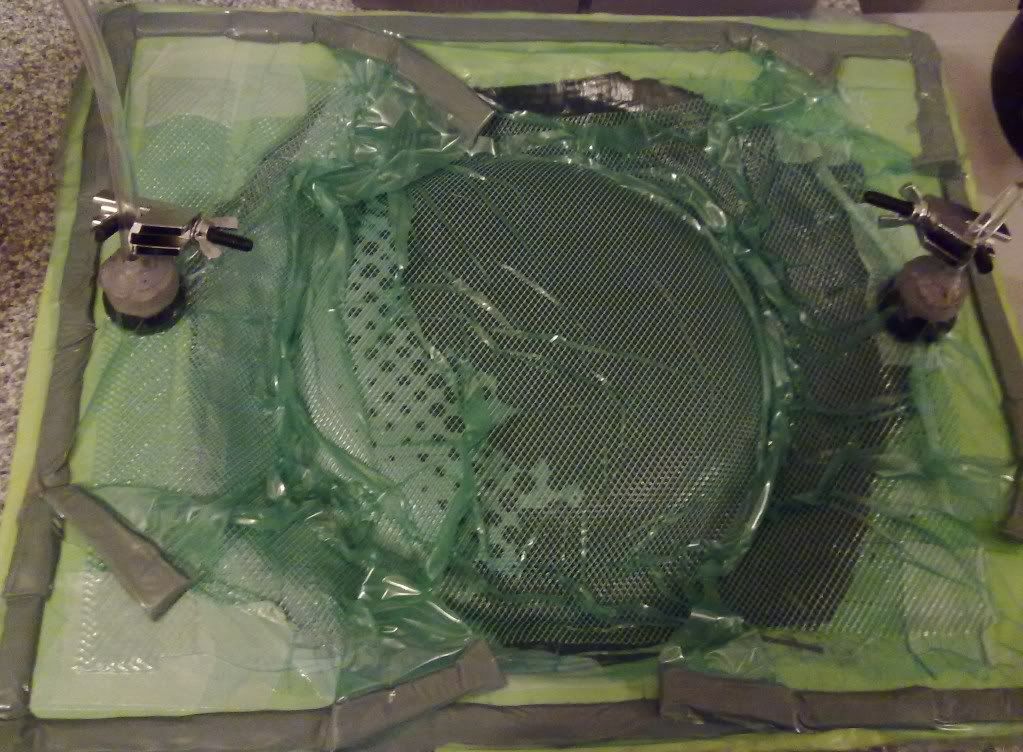
They are coming out ok now:
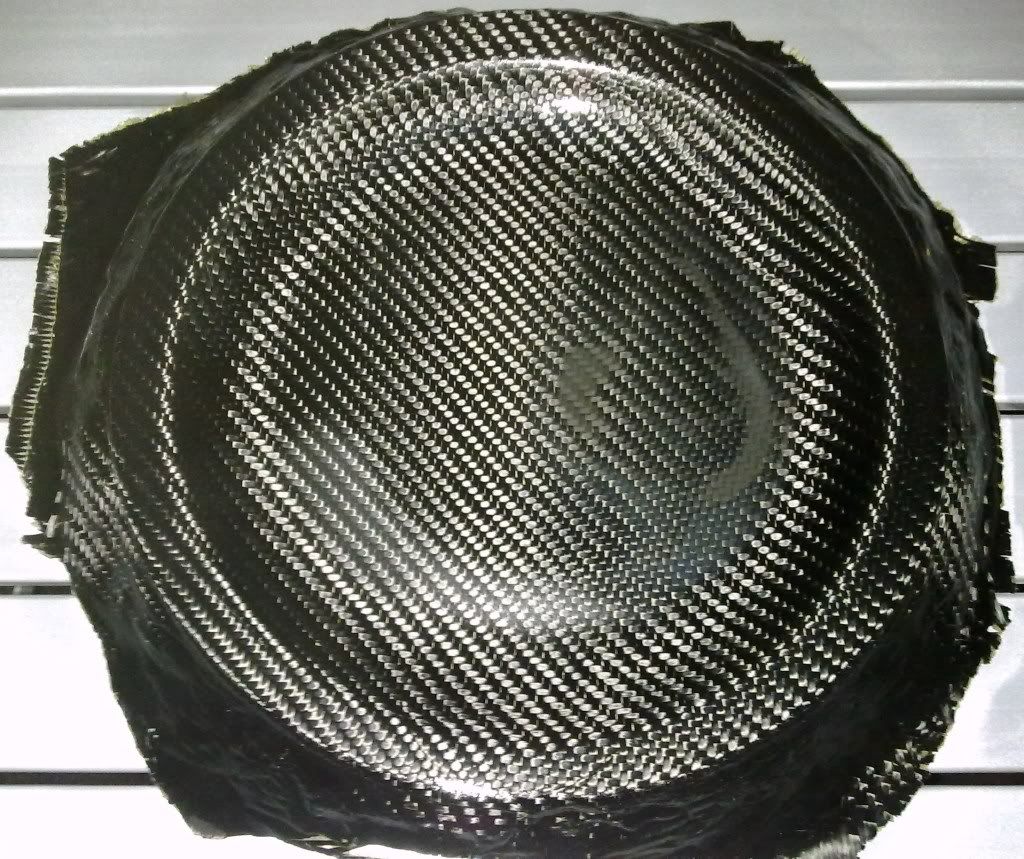
also experimented with lacquering the rear of the plate so you can see the weave on both sides which usually you cant on carbon parts.
Also finished prepping the mould for extinguisher mounts and started to do my first layup. The shape is a lot easier to lay the carbon in:

also adding a layer of kevlar so that worst case in a heavy crash the mount stays intact even if it was crushed/smashed up so the extinguisher cant break free.
Bagged it all up ready for resin infusion and its just sitting under vacuum to test the bag for leaks then i will infuse the part.
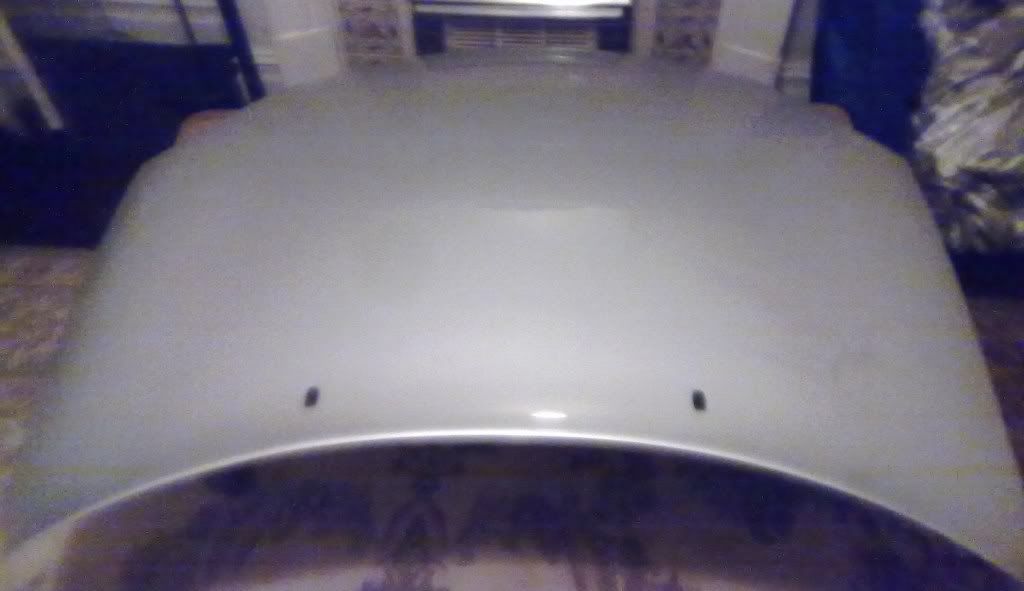
Also got myself a spare bonnet so i can make a mould of that!!
Also done a couple of bits on the car, replaced the alternator belt as it was disintegrating.
Also made up some beefy new earth straps as mine are knackered:
I now add a layer of kevlar into the plate so its impact proof:
Also in this photo of the infusion process, you can see how the addition of the layer of perforated release film effects the resin flow with little blobs rather than a regular line of resin flow.
They are coming out ok now:
also experimented with lacquering the rear of the plate so you can see the weave on both sides which usually you cant on carbon parts.
Also finished prepping the mould for extinguisher mounts and started to do my first layup. The shape is a lot easier to lay the carbon in:
also adding a layer of kevlar so that worst case in a heavy crash the mount stays intact even if it was crushed/smashed up so the extinguisher cant break free.
Bagged it all up ready for resin infusion and its just sitting under vacuum to test the bag for leaks then i will infuse the part.
Also got myself a spare bonnet so i can make a mould of that!!
Also done a couple of bits on the car, replaced the alternator belt as it was disintegrating.
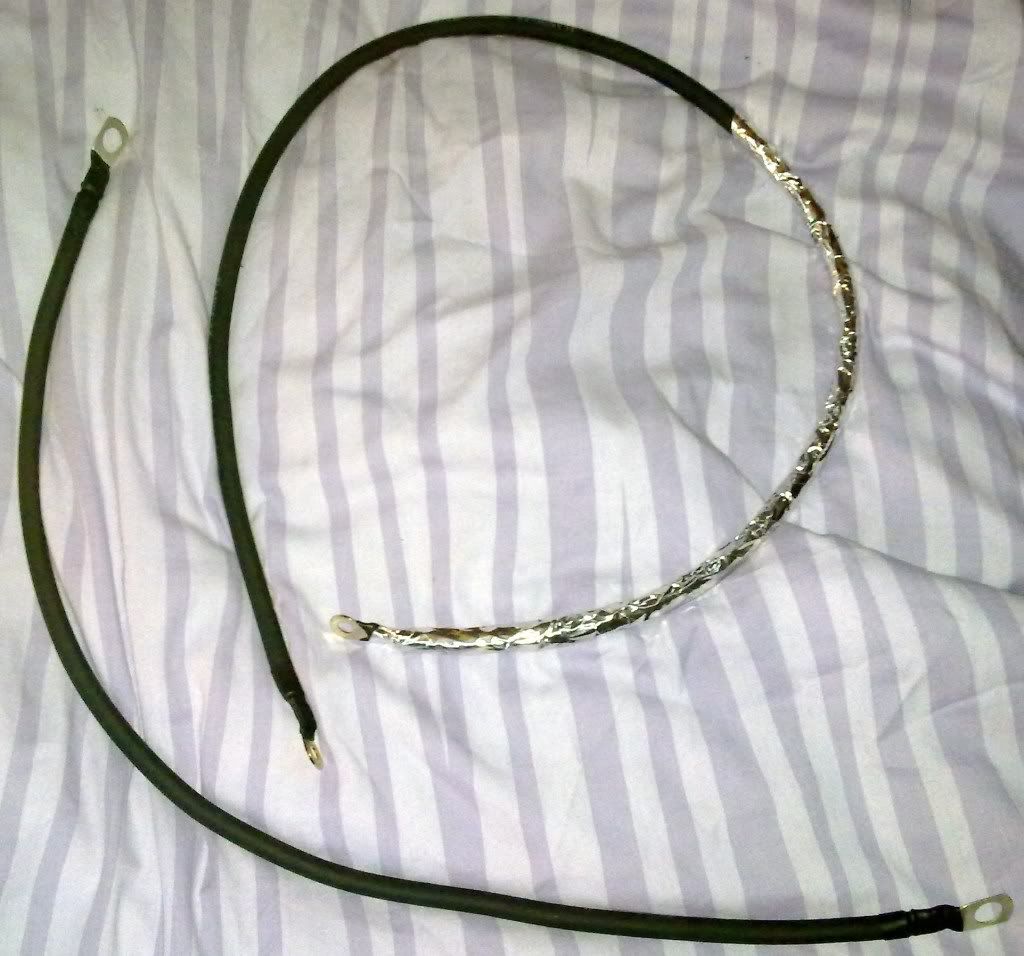
Also made up some beefy new earth straps as mine are knackered:
#234
Posted 19 June 2011 - 10:44 AM
You are so busy there Warren though they say always ask a busy person if you want something done
though they say always ask a busy person if you want something done
searching is fruitful | I'm a sponge not a mechanic | please do try that if stuck with a Puma problem whilst waiting for a reply | For the Puma fan this read 'The Inside Story Book' is very nice to own sometimes still seen for sale
#235
- Group: Members
- Posts: 4142
- Joined: 22-January 04
- Location:Stoke on Trent
Posted 19 June 2011 - 02:36 PM
yeah its a bit annoying when the number of projects gets a bit out of hand!!
current projects include:
carbon plate
carbon extinguisher mount
carbon brake resevoir
carbon cantre console/gear stick surround
carbon fan duct/air intake
carbon air filter heat shield
carbon bonnet
carbon doors
carbon qtr windows
carbon coffee table
carbon wall clock
new vynl number plates
fit bigger battery box
carputer build with carbon case and 4 camera DVR system
down pipe exhaust wrapping
new heat shield
replace inlet manifold gaskets
there's probably more!!
#236
Posted 20 June 2011 - 08:24 PM
bit of proritising will help brake that list down, say coffee table at the top
searching is fruitful | I'm a sponge not a mechanic | please do try that if stuck with a Puma problem whilst waiting for a reply | For the Puma fan this read 'The Inside Story Book' is very nice to own sometimes still seen for sale
#237
- Group: Members
- Posts: 4142
- Joined: 22-January 04
- Location:Stoke on Trent
Posted 21 June 2011 - 05:52 PM
little update. Made my first extinguisher mount in the mould.
all went well except demoulding which took an hour with a pry bar and various tools!!! I think i shall cut up the mould a bit to make it easier in future!!!
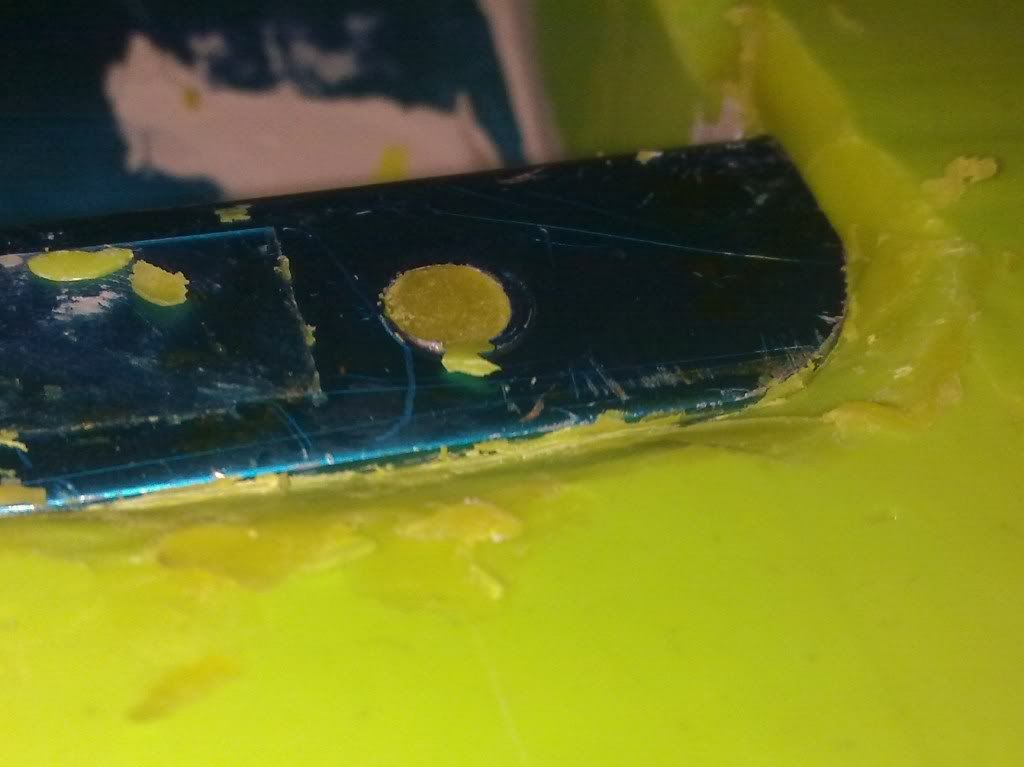
Also added a little logo to the underside of the part before infusion:
Might do that on all the parts i make so in future its easy to identify bits ive made.
Also bought my new bonnet inside to get it ready to be moulded:
all went well except demoulding which took an hour with a pry bar and various tools!!! I think i shall cut up the mould a bit to make it easier in future!!!
Also added a little logo to the underside of the part before infusion:
Might do that on all the parts i make so in future its easy to identify bits ive made.
Also bought my new bonnet inside to get it ready to be moulded:
#238

- Group: Members
- Posts: 187
- Joined: 07-December 10
- Location:birmingham
Posted 21 June 2011 - 06:15 PM
looking really good,
Its going to be really light!! and thats a long list too,
Its going to be really light!! and thats a long list too,
#239
- Group: Members
- Posts: 4142
- Joined: 22-January 04
- Location:Stoke on Trent
Posted 25 June 2011 - 01:57 AM
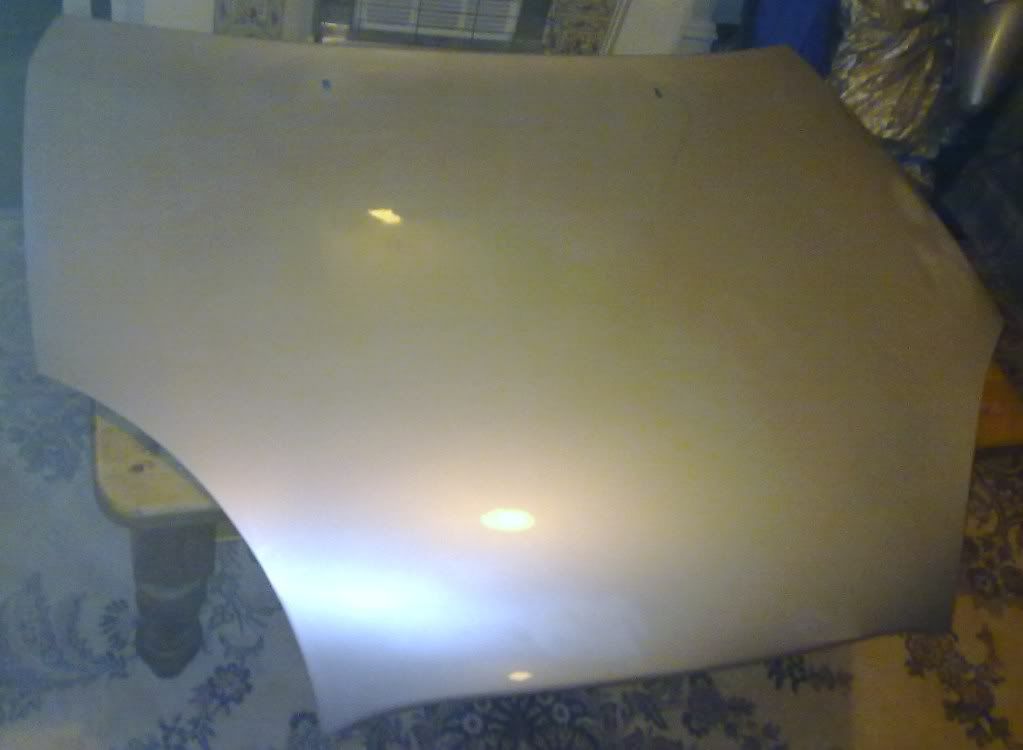
Cleaned the bonnet up then stripped the underside of all the liners and washer pipes that will just get in the way:

Also removed the washer jets, then cleaned the bonnet including claying it to get rid of any tars or dirt that could mess things up.
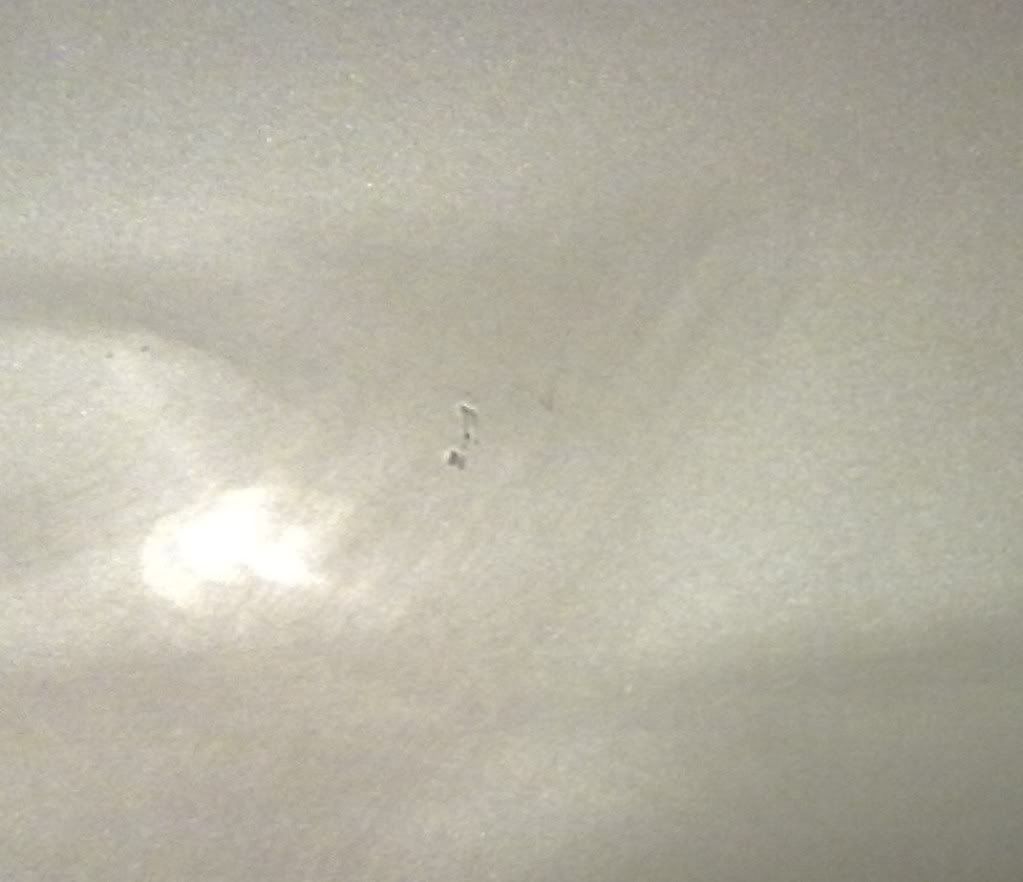
Also went round the bonnet with 2000 grit wet and dry to sand down any stone chips so they are more or less smooth including these two slightly bigger ones:
they will mostly be filled with wax so will have little impact. Also with the mould being the reverse image there will be a slight bump rather than dink so its easily sanded flat when i sand the mould.
the next stage is to get the wax going!
Needs a minimum of 5 layers of wax although i will be doing more like 8 to be safe.
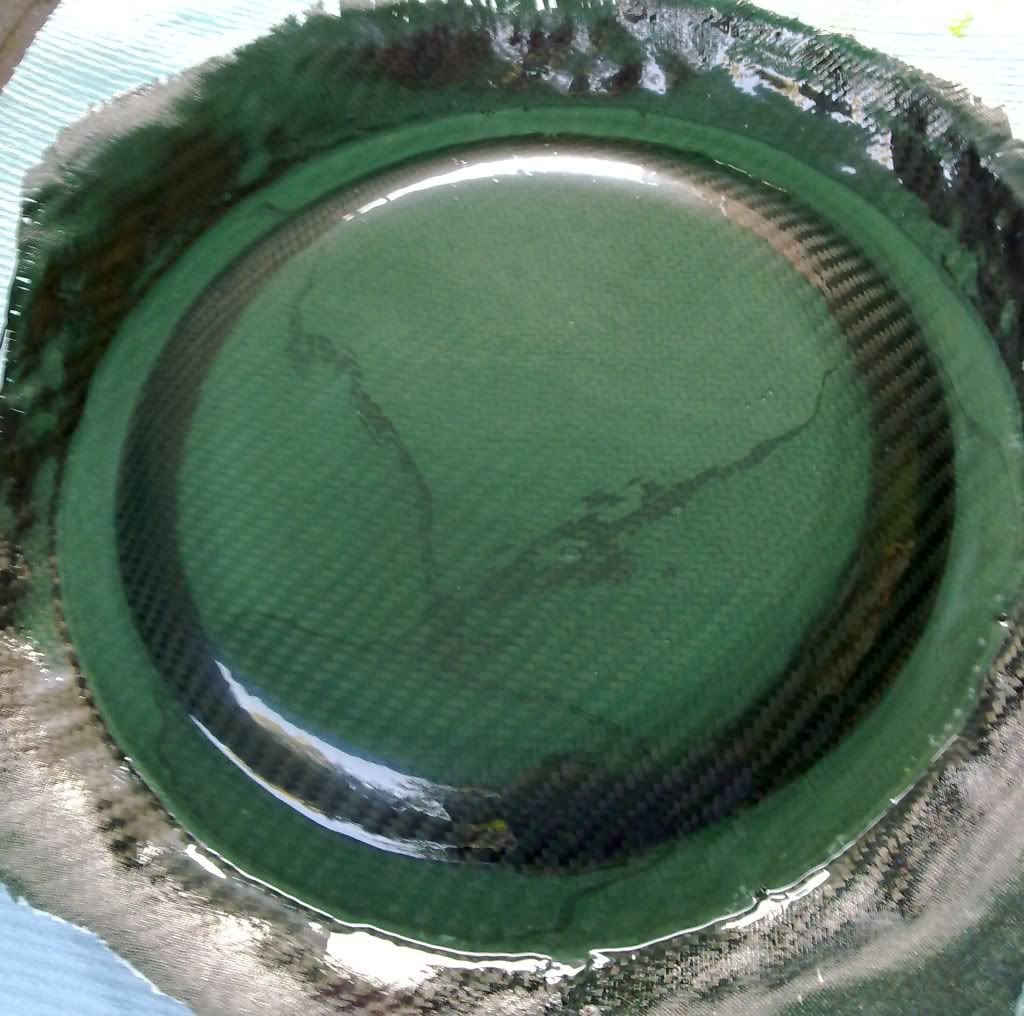
Also almost finished a couple of plates now:
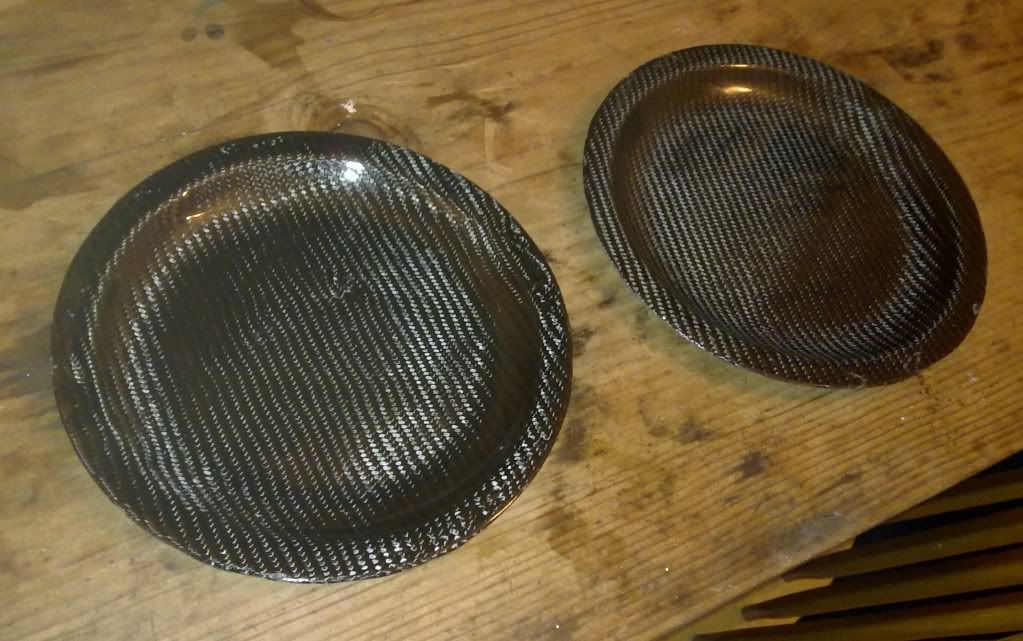
Just need sanding down to smooth the lacquer out then a good polish up.
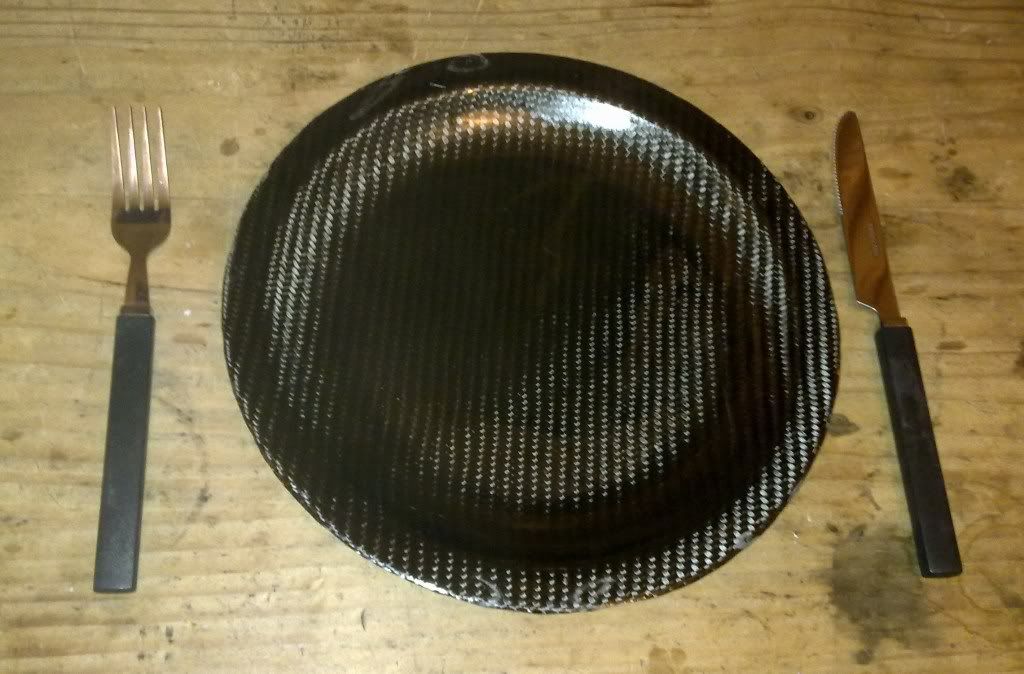
as you can see, proper size dinner plates!!
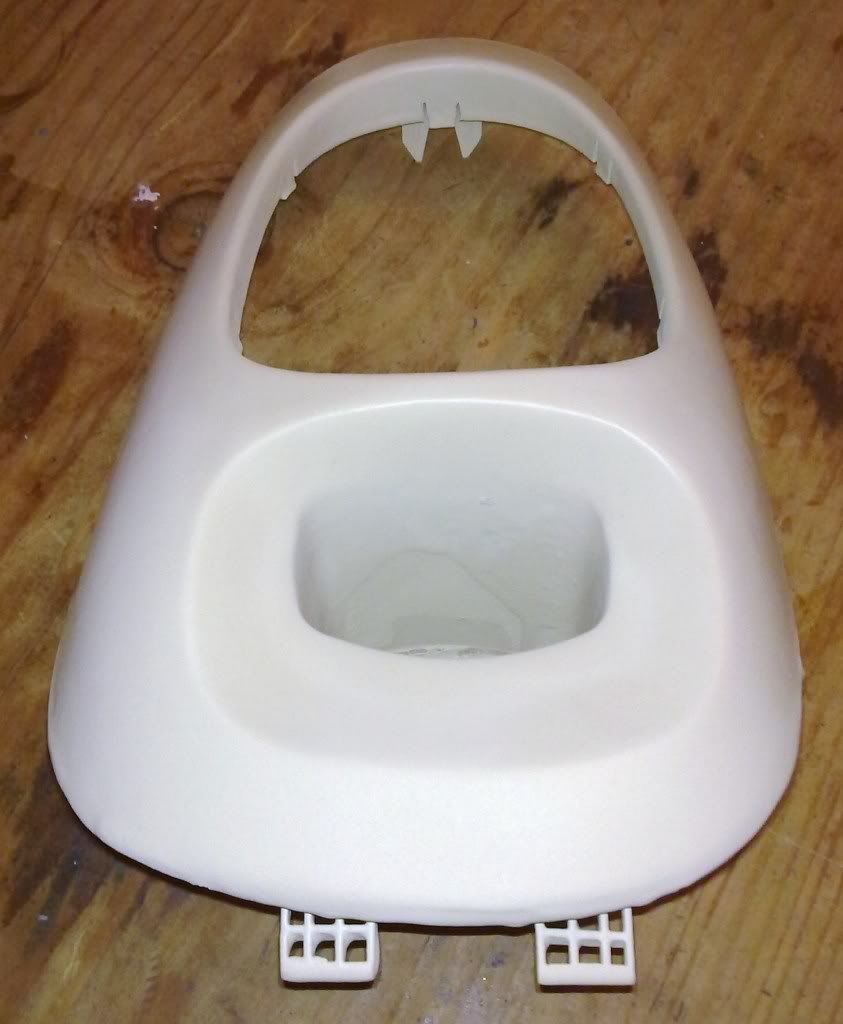
Also started my next item to mould which is a centre console/gear lever surround. Flatted the horrible eggshell found on most ford interior panels then sprayed on several layers of high build primer which i will flat down nice and smooth to get a good finish.
Also removed the washer jets, then cleaned the bonnet including claying it to get rid of any tars or dirt that could mess things up.
Also went round the bonnet with 2000 grit wet and dry to sand down any stone chips so they are more or less smooth including these two slightly bigger ones:
they will mostly be filled with wax so will have little impact. Also with the mould being the reverse image there will be a slight bump rather than dink so its easily sanded flat when i sand the mould.
the next stage is to get the wax going!
Needs a minimum of 5 layers of wax although i will be doing more like 8 to be safe.
Also almost finished a couple of plates now:
Just need sanding down to smooth the lacquer out then a good polish up.
as you can see, proper size dinner plates!!
Also started my next item to mould which is a centre console/gear lever surround. Flatted the horrible eggshell found on most ford interior panels then sprayed on several layers of high build primer which i will flat down nice and smooth to get a good finish.
#240
Posted 25 June 2011 - 08:49 PM
quite a sizeable project doing the bonnett wont be any room in your kitchen. The plates look very good.
The gear stick suround does not weigh much anyway, but it will look good from the manky plastic
wont be any room in your kitchen. The plates look very good.The gear stick suround does not weigh much anyway, but it will look good from the manky plastic
searching is fruitful | I'm a sponge not a mechanic | please do try that if stuck with a Puma problem whilst waiting for a reply | For the Puma fan this read 'The Inside Story Book' is very nice to own sometimes still seen for sale


