
 Help
Help

im guesing that is a mch better set up with it being on your race car. what have you done and how expensive would it be to buy the setup and fit to my car? thats if you want to divulge your race cars information hahaha
1.7 Project, Slow But Steady
Rate Topic:

#262

Posted 29 December 2012 - 04:07 PM
thanks to my wonderful fiancee by suprising me for my birthday with some money she has been saving for weeks i now have all the parts/fresh metal on the way to make my puma frp width at the front end, i f__king love her you know <3
sorry for being a soppy bugger hahahaha
cheers kieran
sorry for being a soppy bugger hahahaha
cheers kieran
#263

- Group: Moderators
- Posts: 2133
- Joined: 11-February 03
- Location:On a racetrack somewhere
Posted 31 December 2012 - 12:28 AM
We run standard lower wishbones with poweflex bushes, and the adjustable top mounts for camber / caster. I'm sure I posted pics a while ago... The car came with them fitted - AFAIK it was std on the German Puma Cup Cars
A little knowledge is a dangerous thing (Alexander Pope - 1709)
Stop being spoon fed and GOOGLE it!
Stop being spoon fed and GOOGLE it!
#264
Posted 31 December 2012 - 04:39 PM
thanks turby i thought you ran an frp front end, dont know why hahhaa i think i saw that pick a while back but couldnt find it. ive polybushed my wishbones and when i can im fitting concentric top mounts to get more ajustment of my suspension. do you think there is anything i should watch out for?
cheers kieran
cheers kieran
#265
- Group: Moderators
- Posts: 2133
- Joined: 11-February 03
- Location:On a racetrack somewhere
Posted 02 January 2013 - 02:05 PM
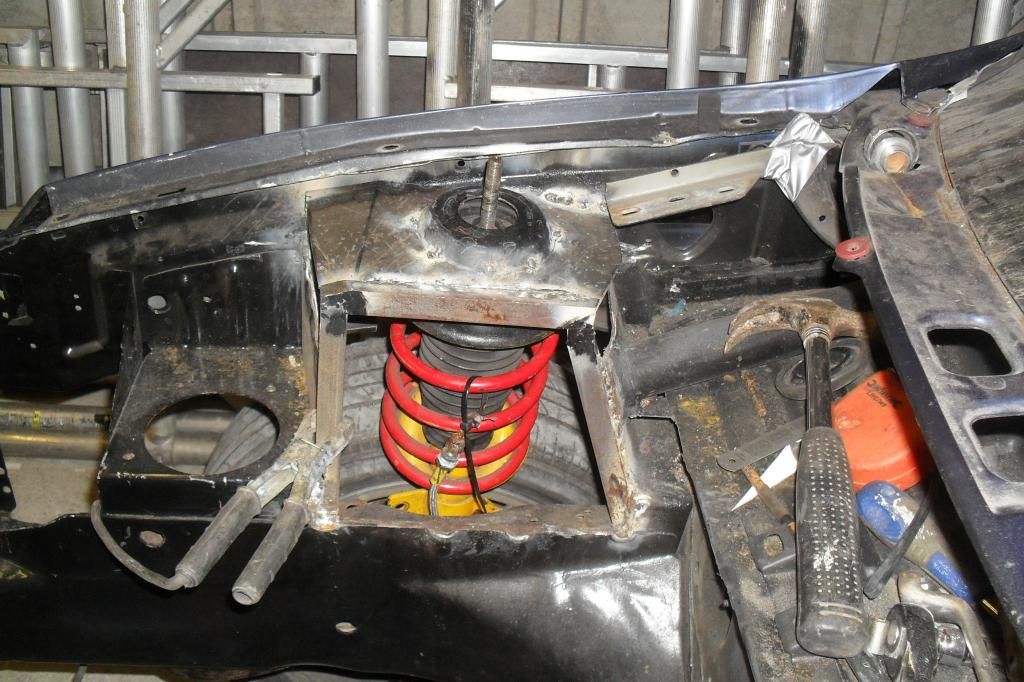
Depending on how low you want to go you might need to chop out and re-box the inner wing box section in order to maintain a decent amount of suspension travel.
A little knowledge is a dangerous thing (Alexander Pope - 1709)
Stop being spoon fed and GOOGLE it!
Stop being spoon fed and GOOGLE it!
#266
Posted 02 January 2013 - 05:30 PM
well i do want to keep good travel on the suspension so it doent just hit the bottom limit of the shock. also would like the car low enough to handlewell but not low enough to scrape the underside everytime i go over something bigger than a pebble. i was going to chop and rebuild the top mount and some of the wing box section so that it cleares the suspension leg and wheel on full travel of the suspension.
cheers kieran
cheers kieran
#267
Posted 09 January 2013 - 09:39 PM
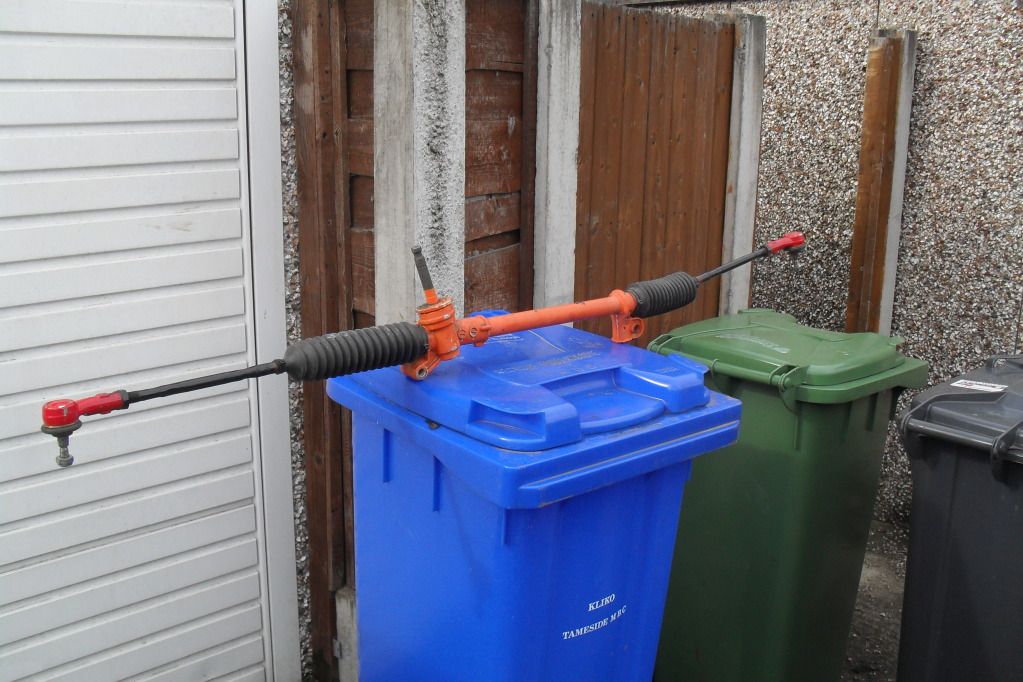
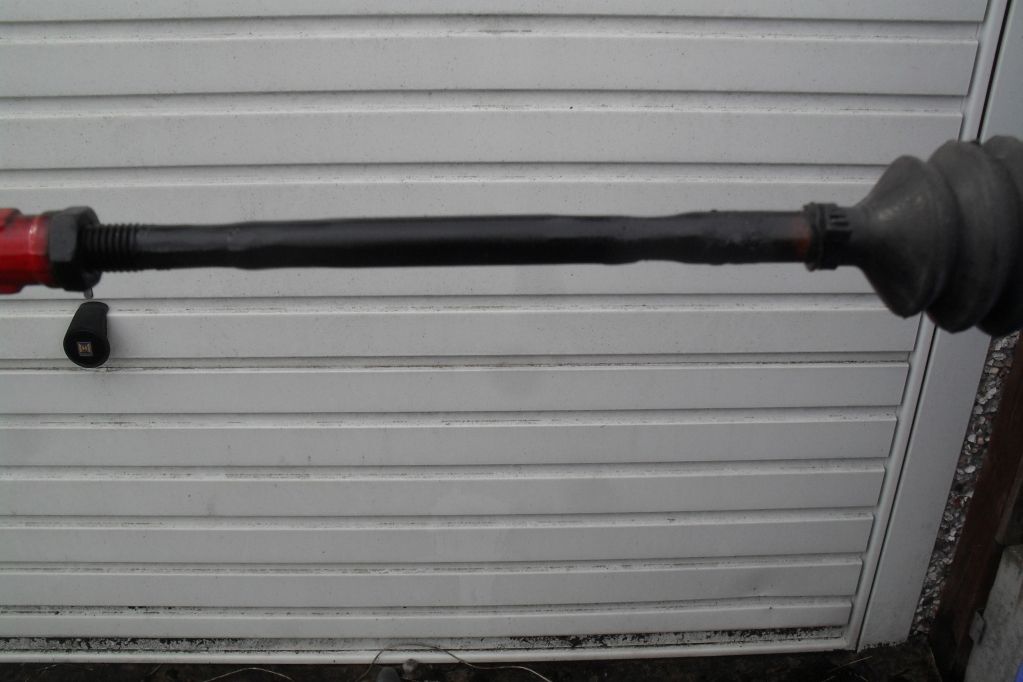
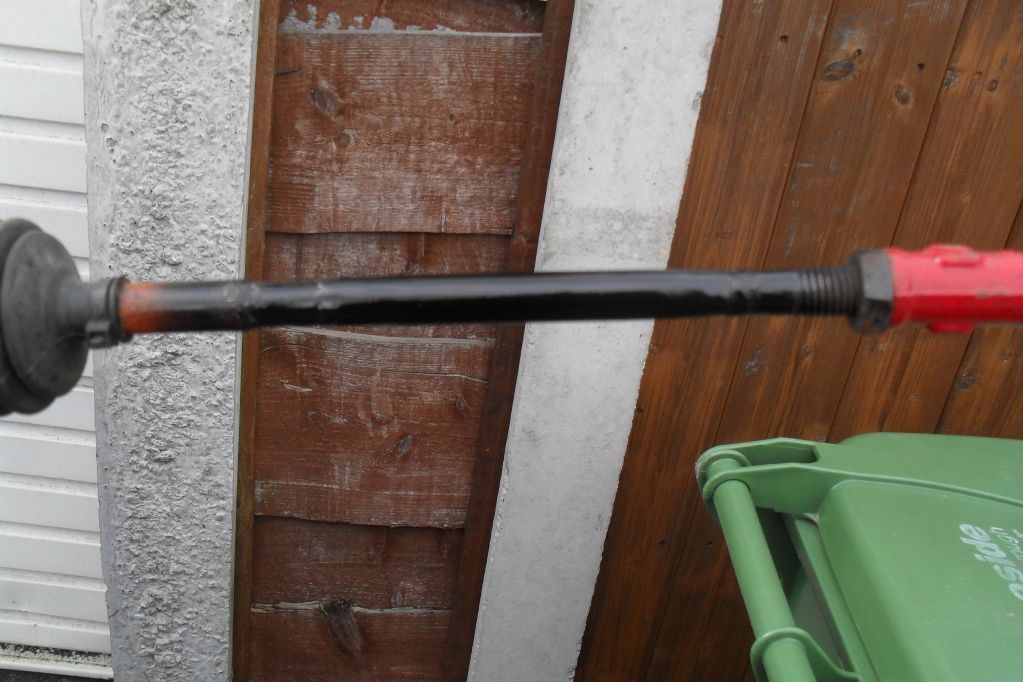
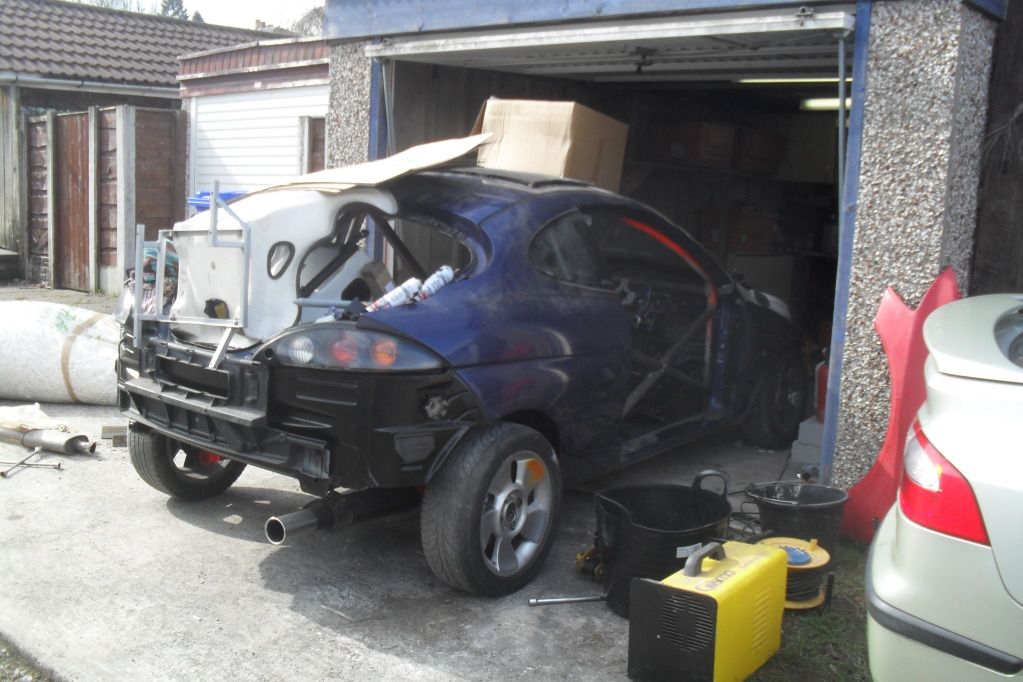
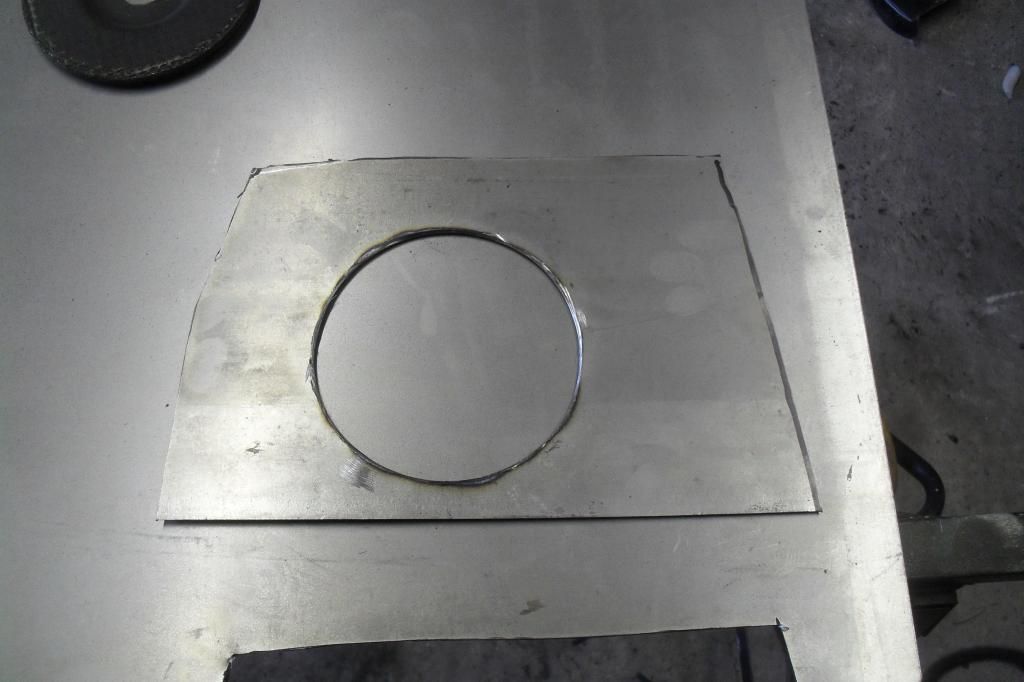
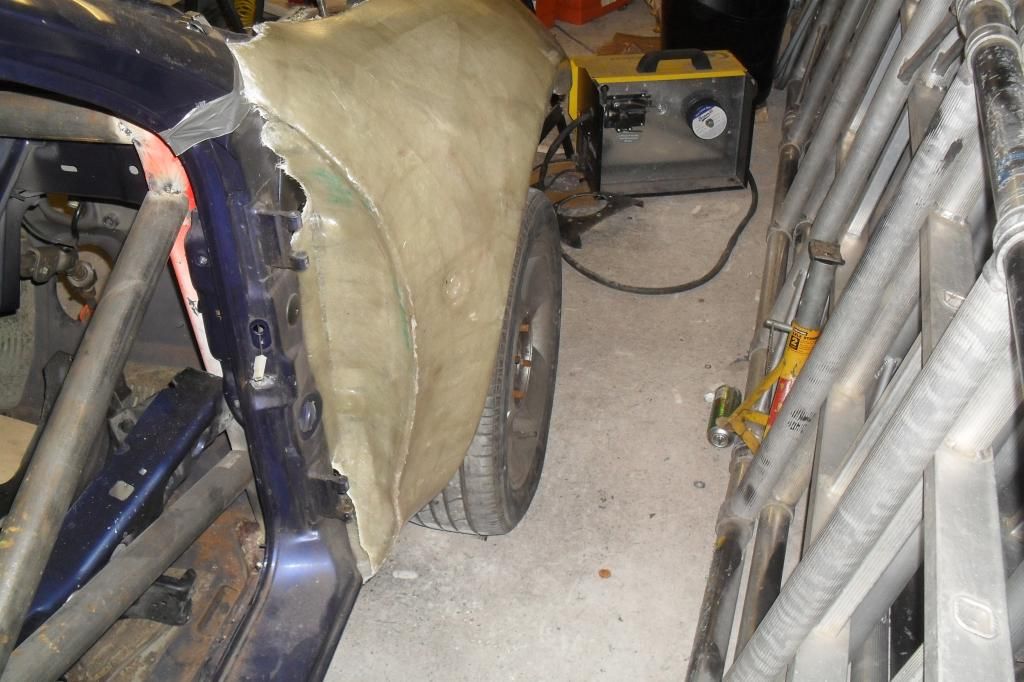
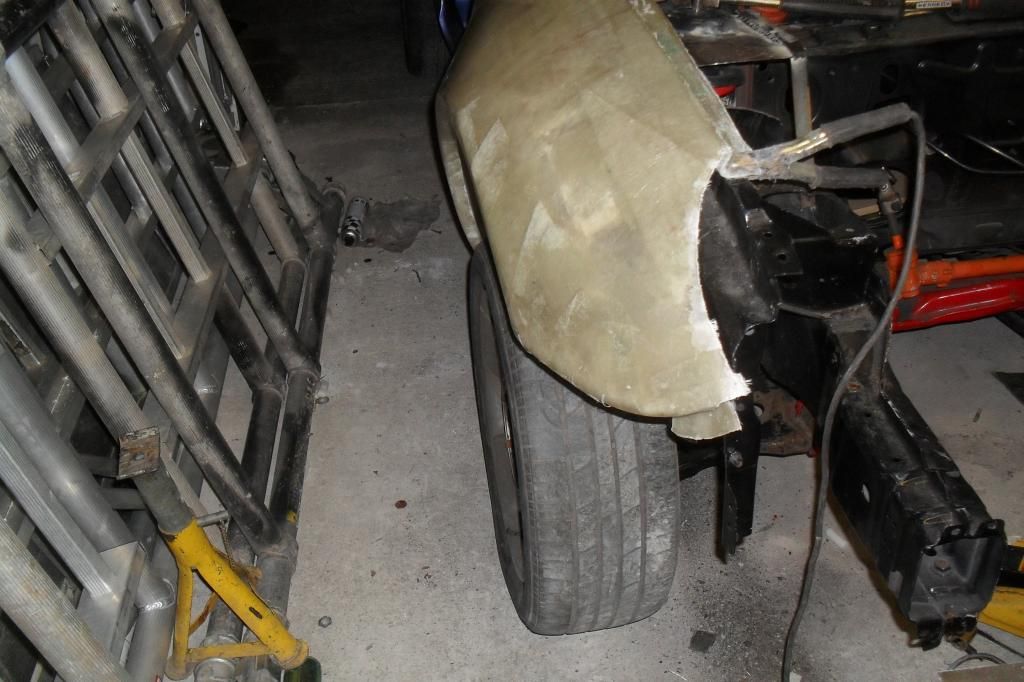
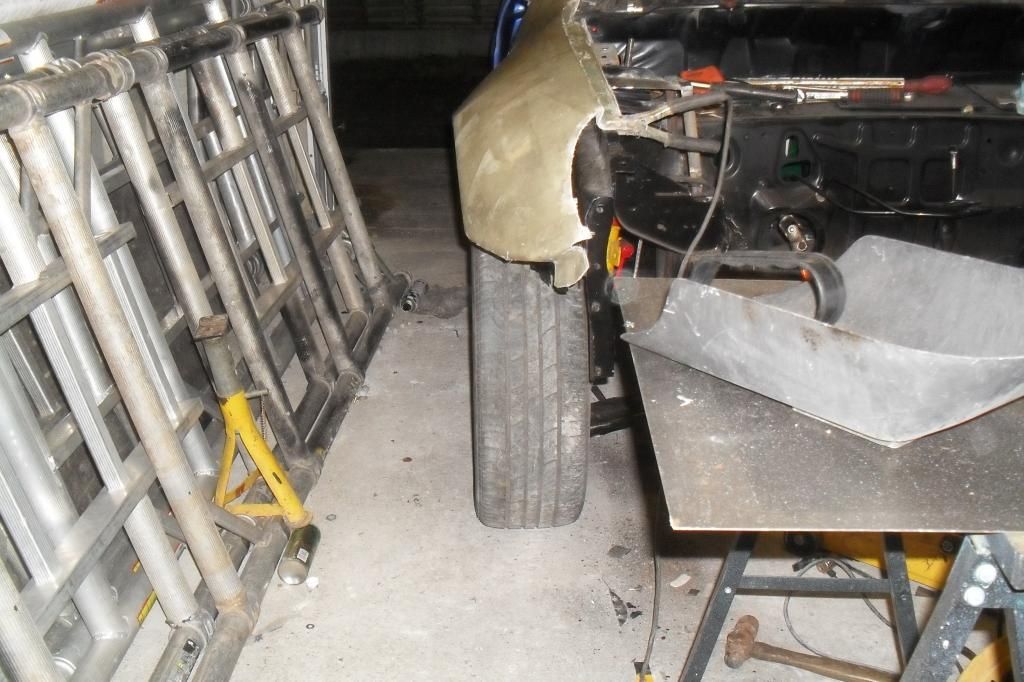
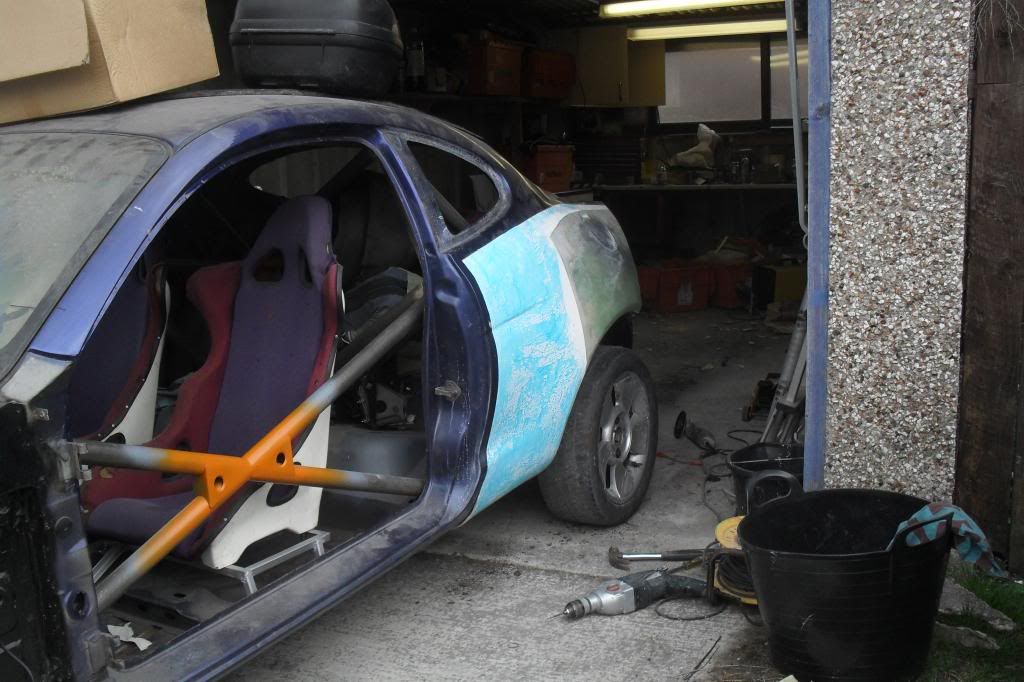
ive get everything i need to widern my cars track by 40mm now. although not alot of progress has been made right now with my other more important project on the go. i should beable to get bits done hear and there between drying times.
pics
the soon to be new position of the top mount
the first cut
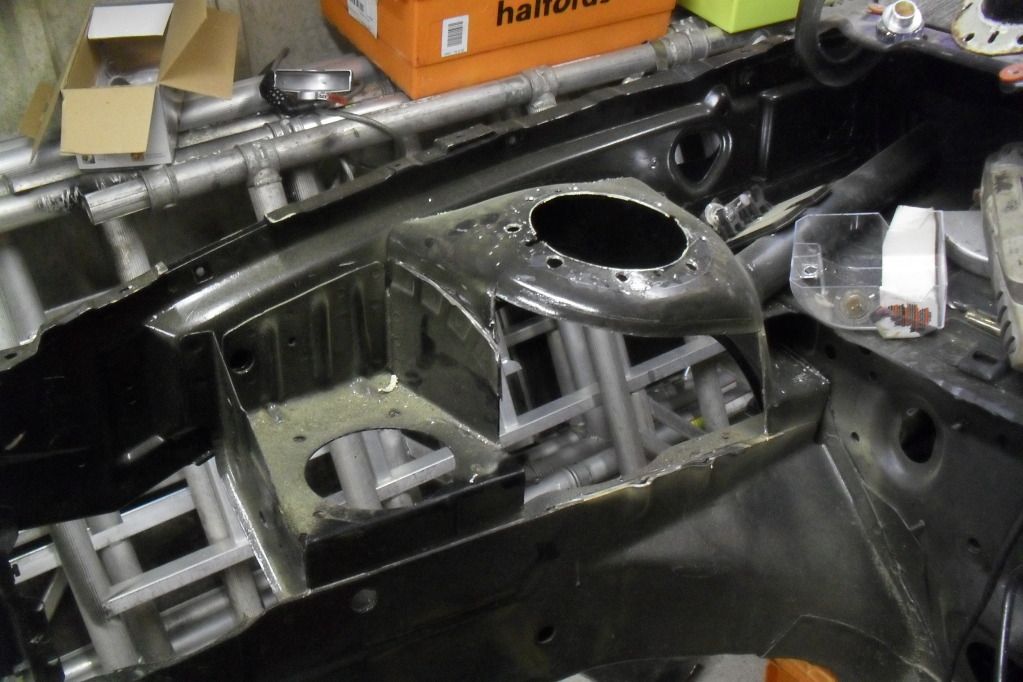
more to be added at some point soon
cheers kieran
pics
the soon to be new position of the top mount
the first cut
more to be added at some point soon
cheers kieran
#268
Posted 20 January 2013 - 01:23 AM
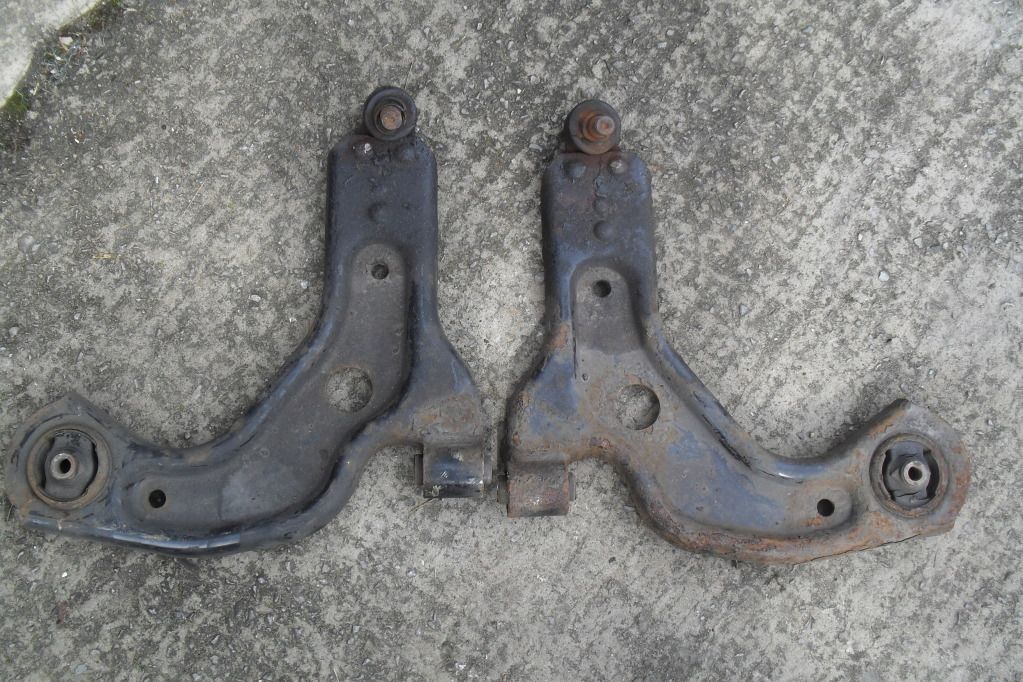
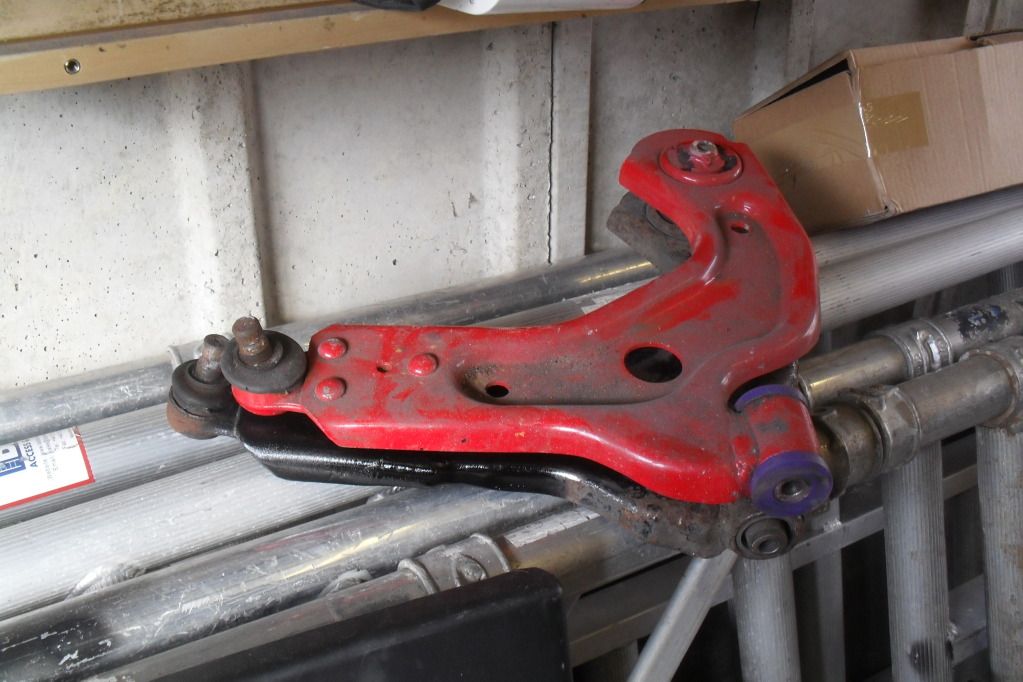
picked up some genuine ford wishbones from a friend. the bushes are nackered but im changing them anyway  going to be setting about making them longer soon as well as finishing the relocation of the strut top mount aslong with everything else i have planned.
#269
Posted 17 March 2013 - 06:57 PM
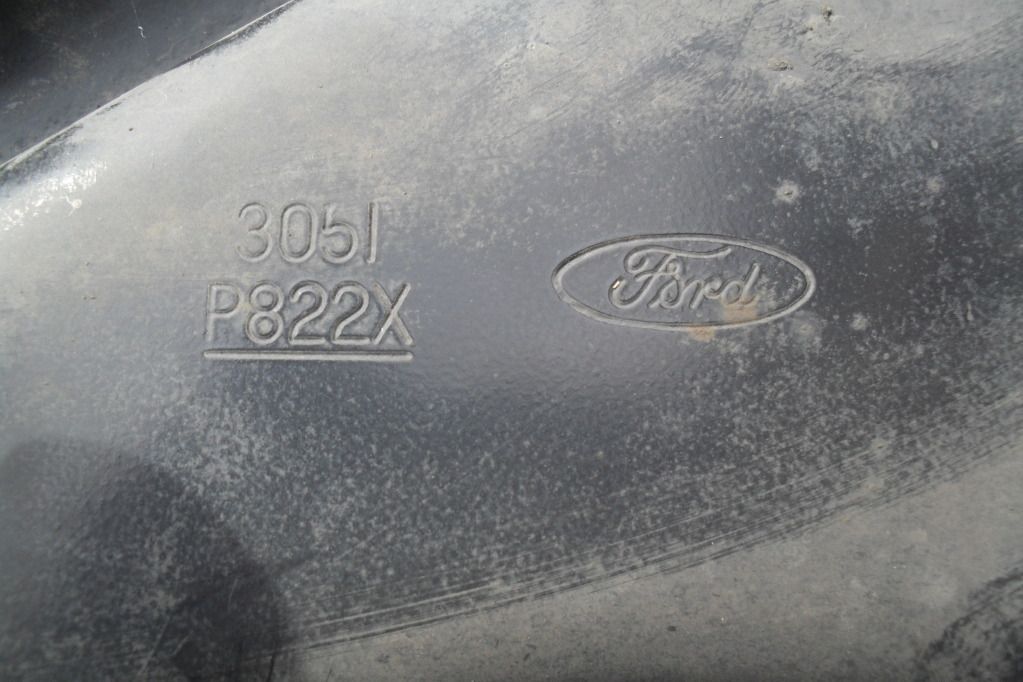
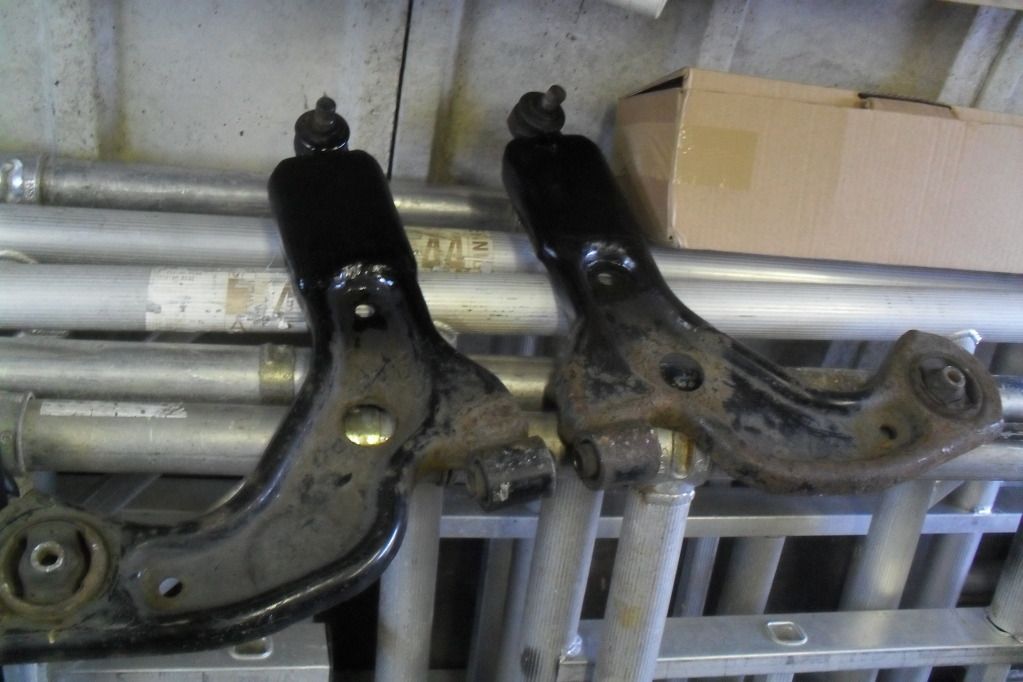
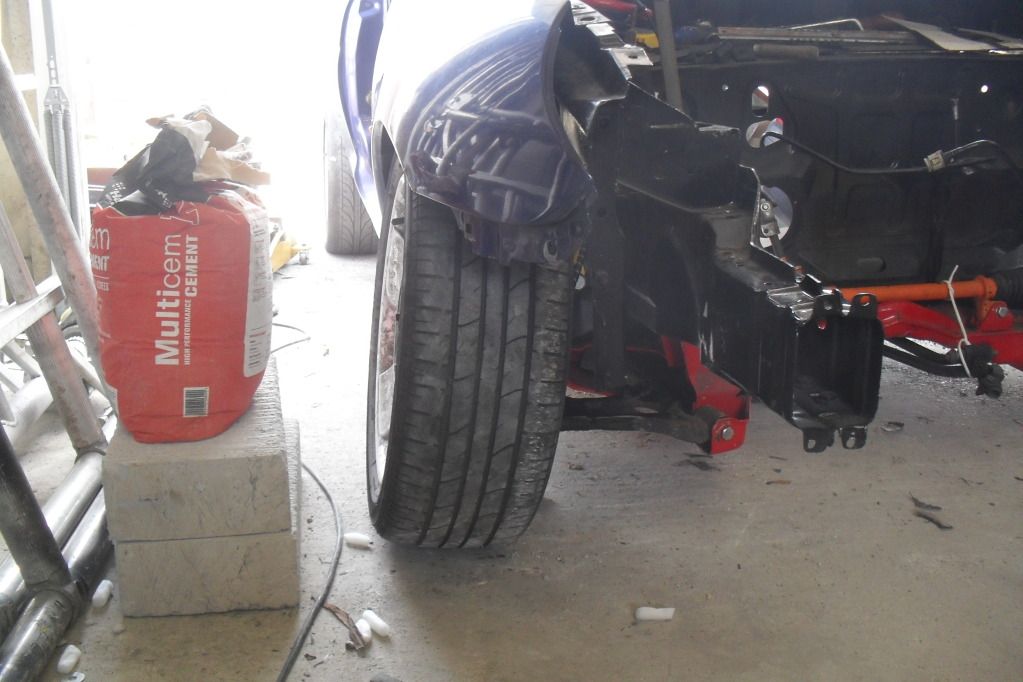
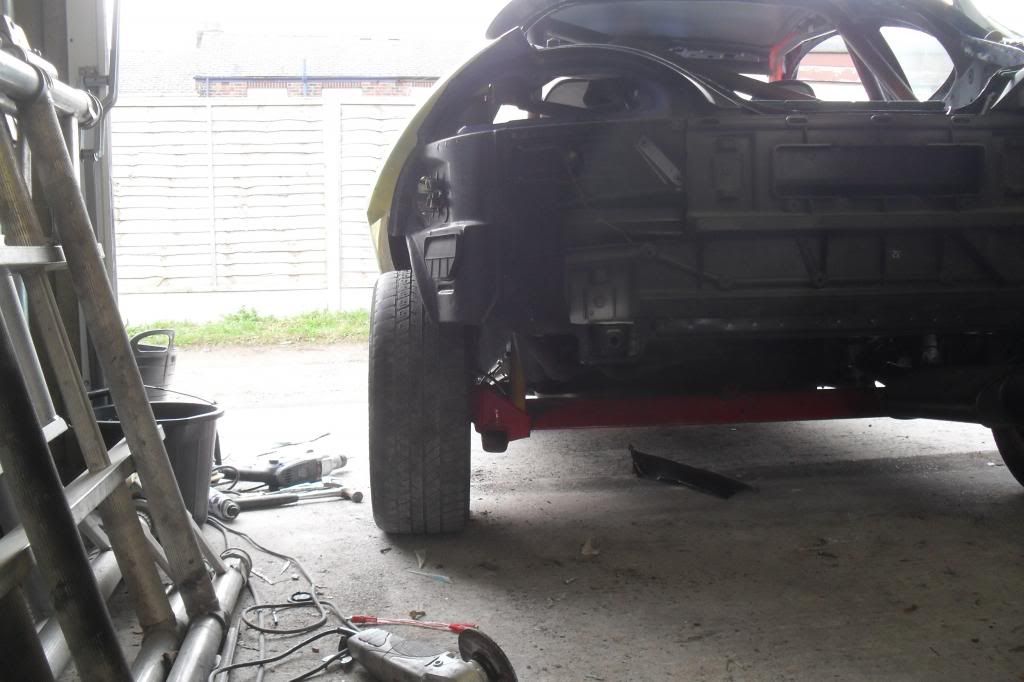
well ive been busy today working on the puma for the first time in a couple of months. ive now made the ford wishbones i picked up 40mm longer and the steering rack arms longer by 40mm a side
first i removed the buggered ball joints.
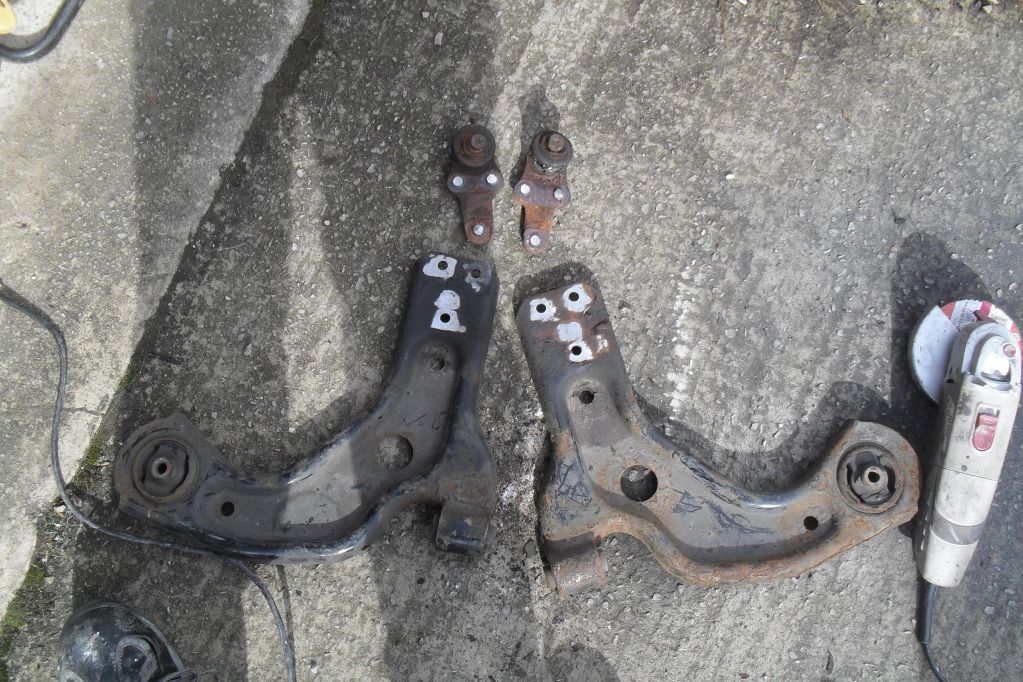
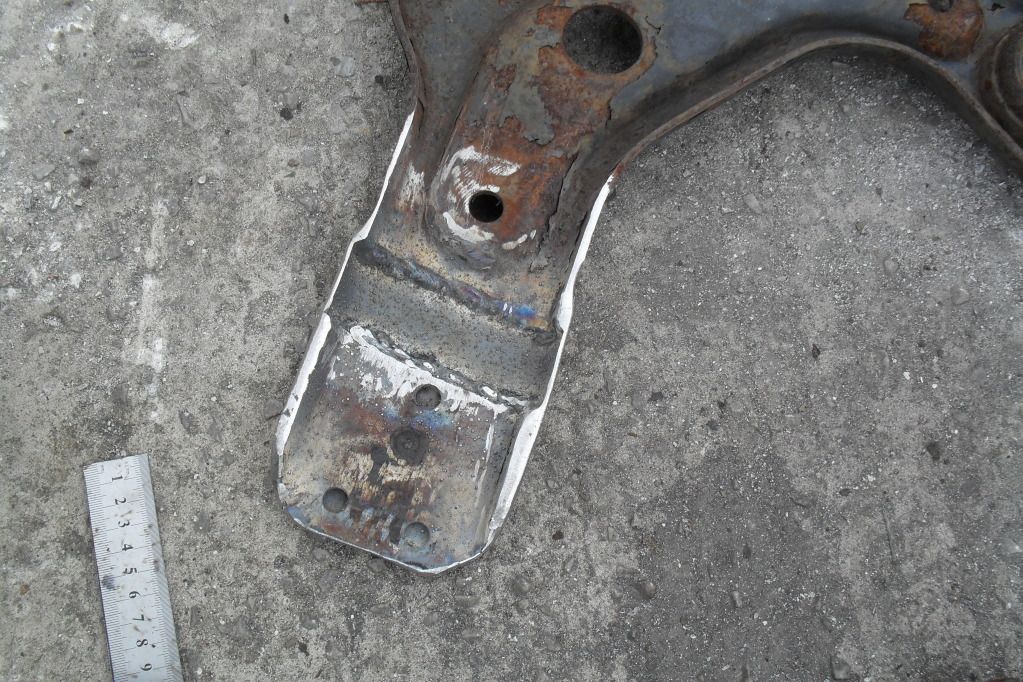
i then made the plates i needed to make the wishbones longer
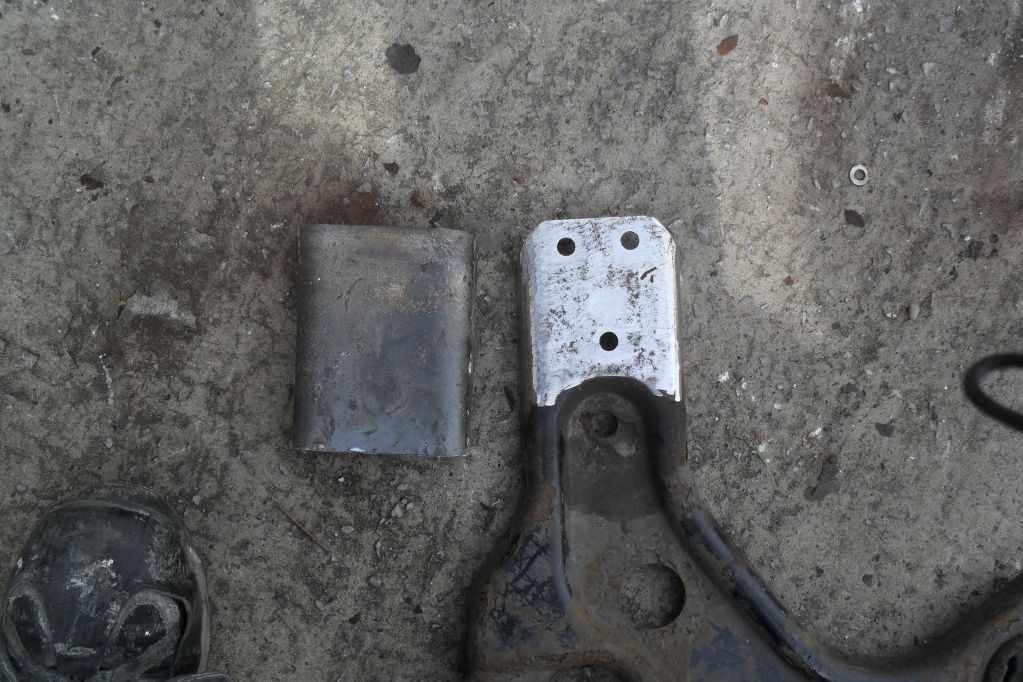
here is the first one finished. all it needs is the holes for the new ball joint but my drill is at the unit.
i have tacked the old ball joints back on so i can get the car back on its wheel.
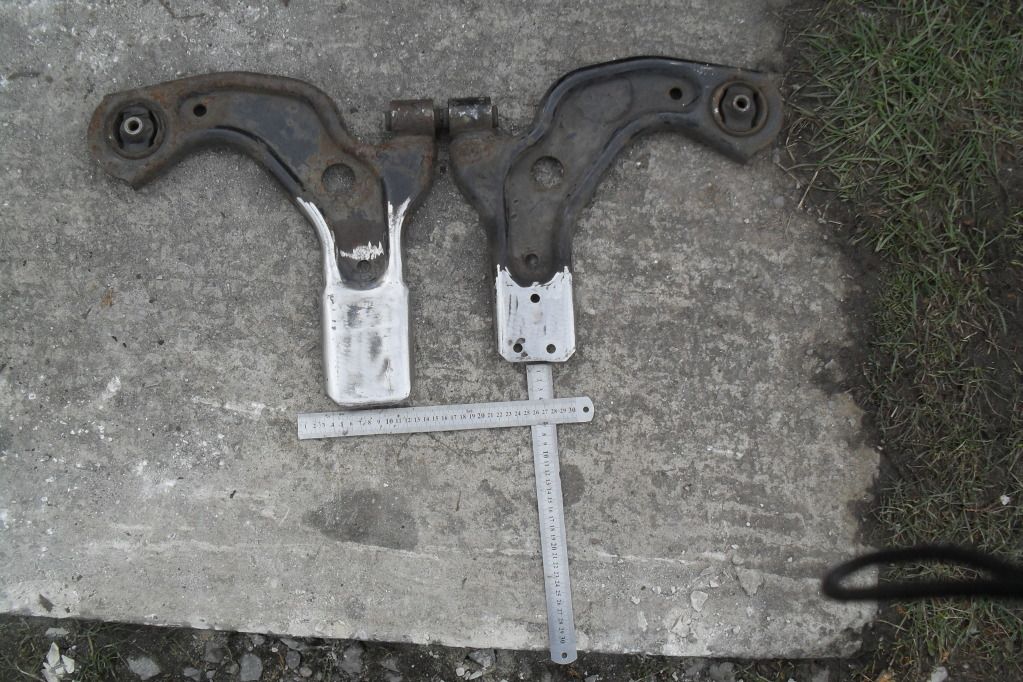
here it is against the old one.
here they are both finished together
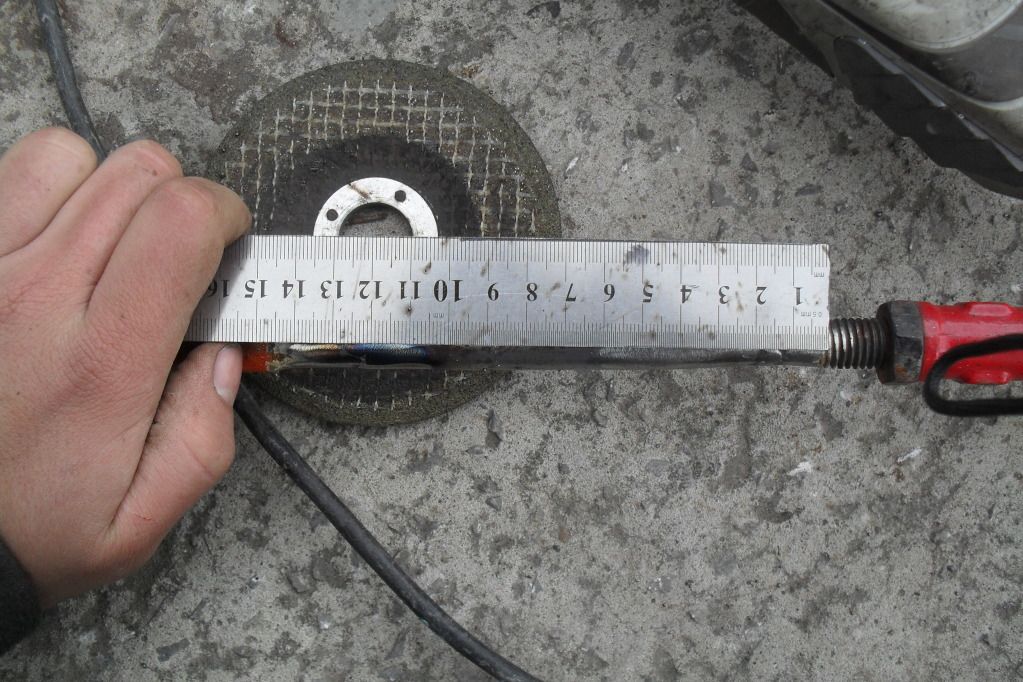
then i cracked on with the steering rack. its been cut and sleaved to make each side 40mm longer so 80mm overall at the front end.
pic of the none lengthered side. 110mm from the start of the thread to a step in the shaft
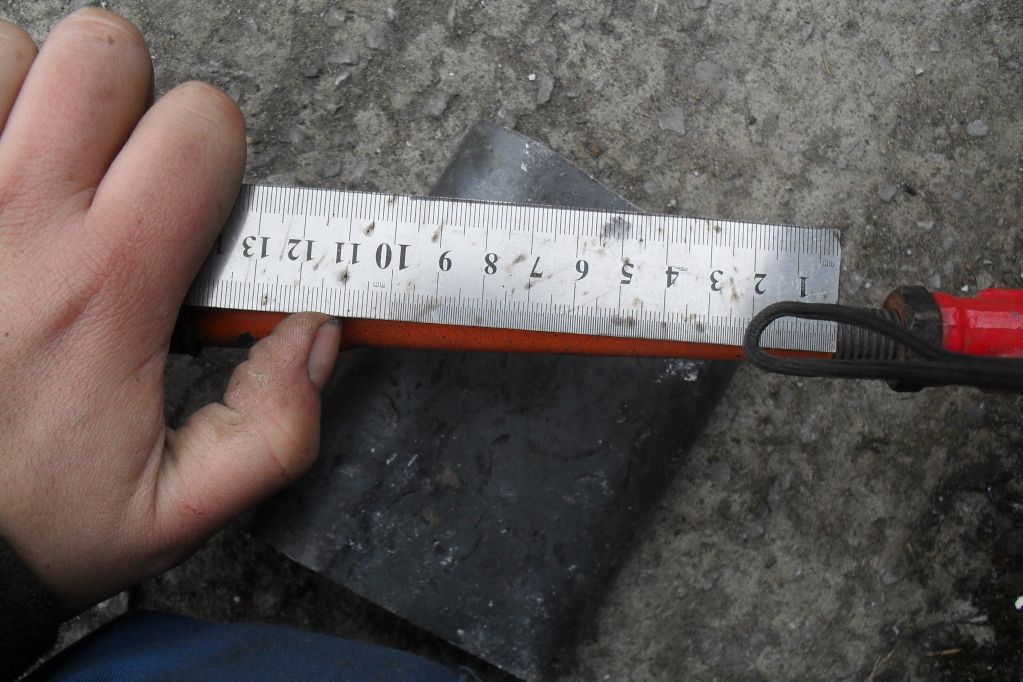
pic of the lengthered side. 150mm from the start of the thread to a step in the shaft
with both sides done.
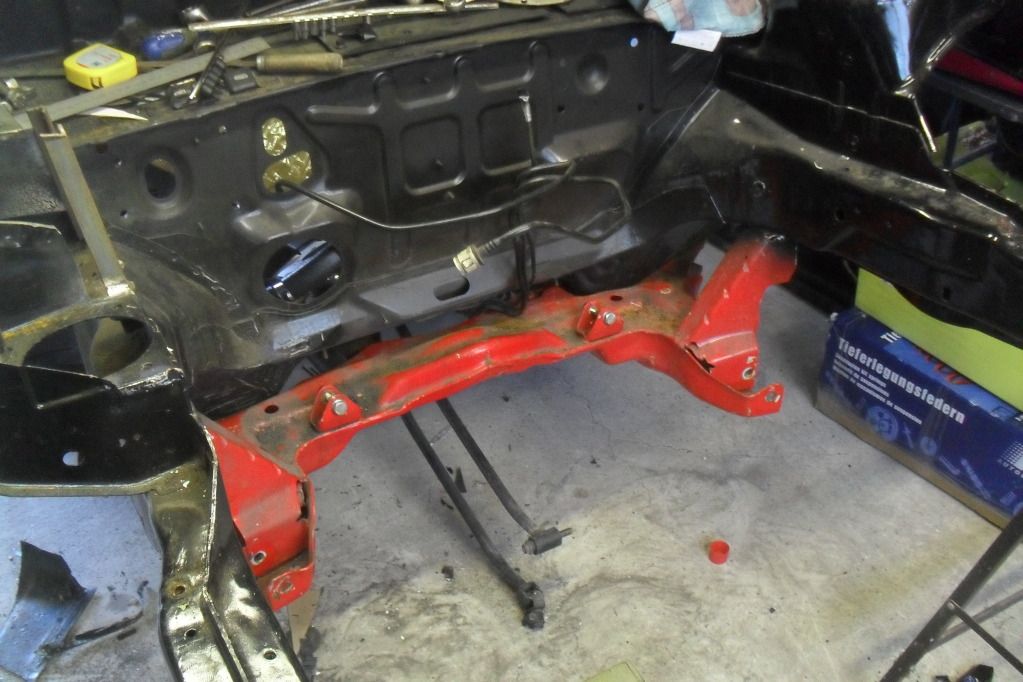
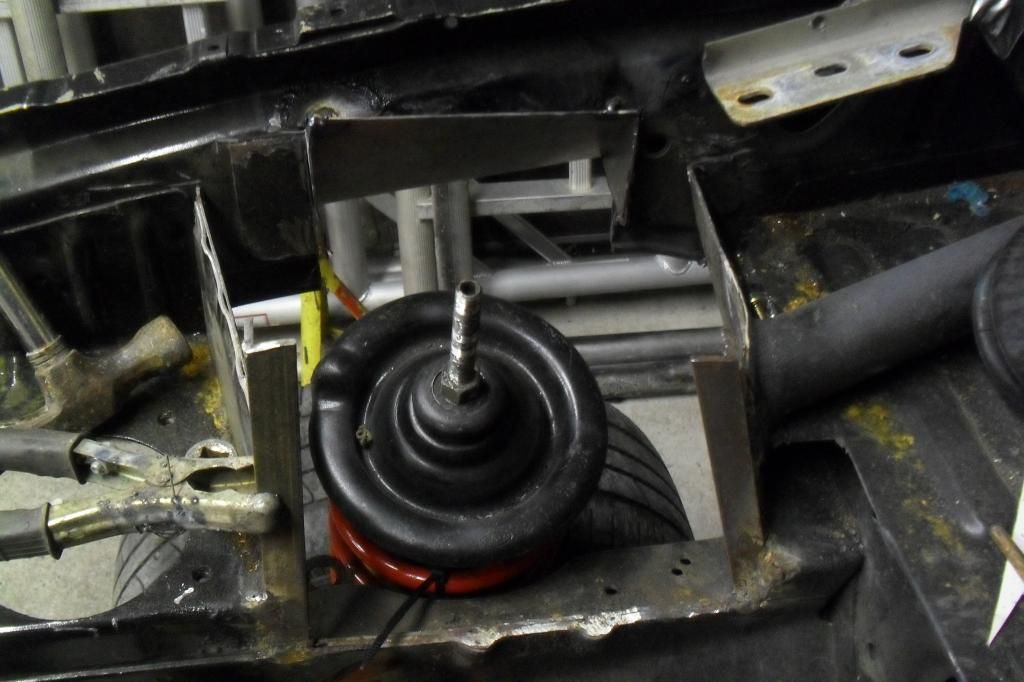
between making everything 40mm longer i stripped the subframe down retapped the holes in the body and fitted it back to the car so i can set the locations of the top mounts.

then i reattached the wishbones and the suspension, then popped a wheel on to see how it looks but without the top mount being finished it just looks like it has a massive amount of camber lol
pics

what do you all think so far?
first i removed the buggered ball joints.
i then made the plates i needed to make the wishbones longer
here is the first one finished. all it needs is the holes for the new ball joint but my drill is at the unit.
i have tacked the old ball joints back on so i can get the car back on its wheel.
here it is against the old one.
here they are both finished together
then i cracked on with the steering rack. its been cut and sleaved to make each side 40mm longer so 80mm overall at the front end.
pic of the none lengthered side. 110mm from the start of the thread to a step in the shaft
pic of the lengthered side. 150mm from the start of the thread to a step in the shaft
with both sides done.
between making everything 40mm longer i stripped the subframe down retapped the holes in the body and fitted it back to the car so i can set the locations of the top mounts.
then i reattached the wishbones and the suspension, then popped a wheel on to see how it looks but without the top mount being finished it just looks like it has a massive amount of camber lol
pics
what do you all think so far?
#270

- Group: Members
- Posts: 1217
- Joined: 08-March 03
- Location:Porsgrunn (Norway)
Posted 18 March 2013 - 07:00 AM
grate work  realy grate work
realy grate work
1998 Puma 1.7 Replica FRP. innlet nr 138
Projekt tread http://www.pumapeopl...pic=104790&st=0
Time, is the fire in which we burn
Projekt tread http://www.pumapeopl...pic=104790&st=0
Time, is the fire in which we burn
#271
Posted 18 March 2013 - 11:36 AM
Thanks pal />/>/> means alot ahah just put the puma on the ground with no suspension top on the drivers side and the ride is so firm its almost level  />/>/> now i can see where i need to chop to get it to where i want it. i will upload a couple of pics later of how its sitting right now. looks like its going to fill the frp arches rather well me thinks
  />/>/>
also got a set of rear arches in the moulds now that will be going into the puma soon />/>/>
cheers Kieran (FibreBuild)
/>/>/> means alot ahah just put the puma on the ground with no suspension top on the drivers side and the ride is so firm its almost level />/>/> now i can see where i need to chop to get it to where i want it. i will upload a couple of pics later of how its sitting right now. looks like its going to fill the frp arches rather well me thinks />/>/> also got a set of rear arches in the moulds now that will be going into the puma soon
/>/>/> cheers Kieran (FibreBuild)
This post has been edited by Kizza: 18 March 2013 - 11:39 AM
#272
Posted 18 March 2013 - 04:20 PM
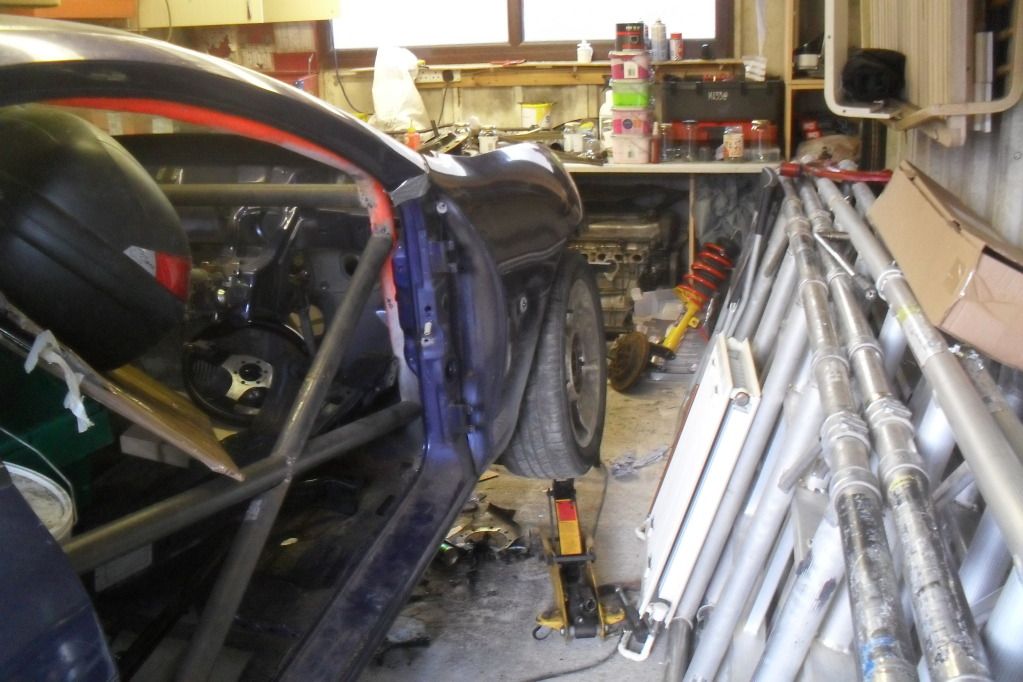
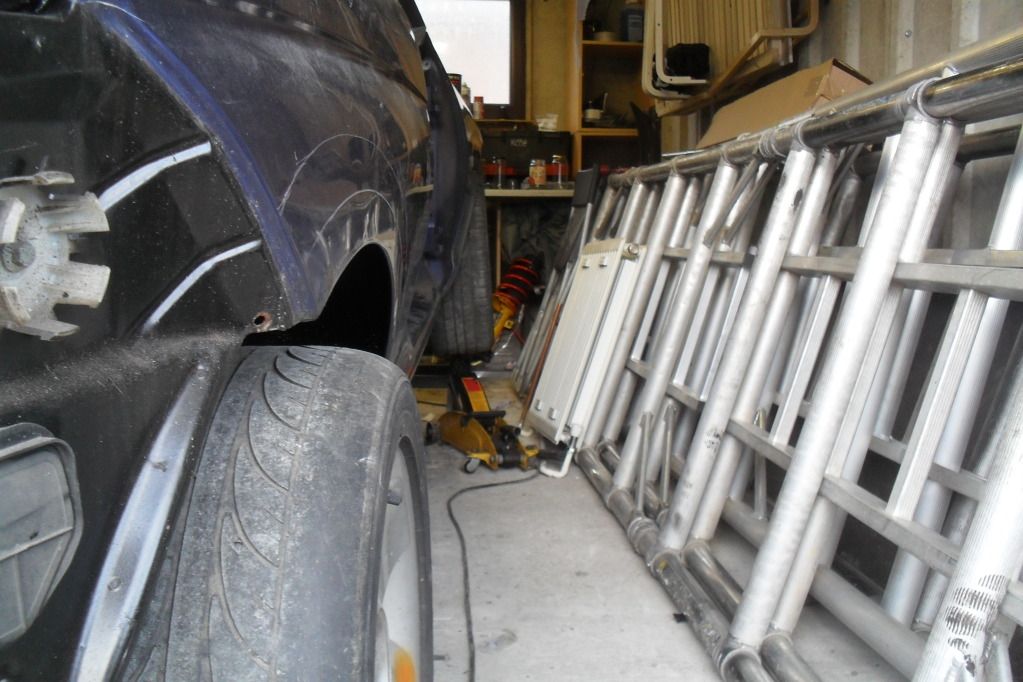
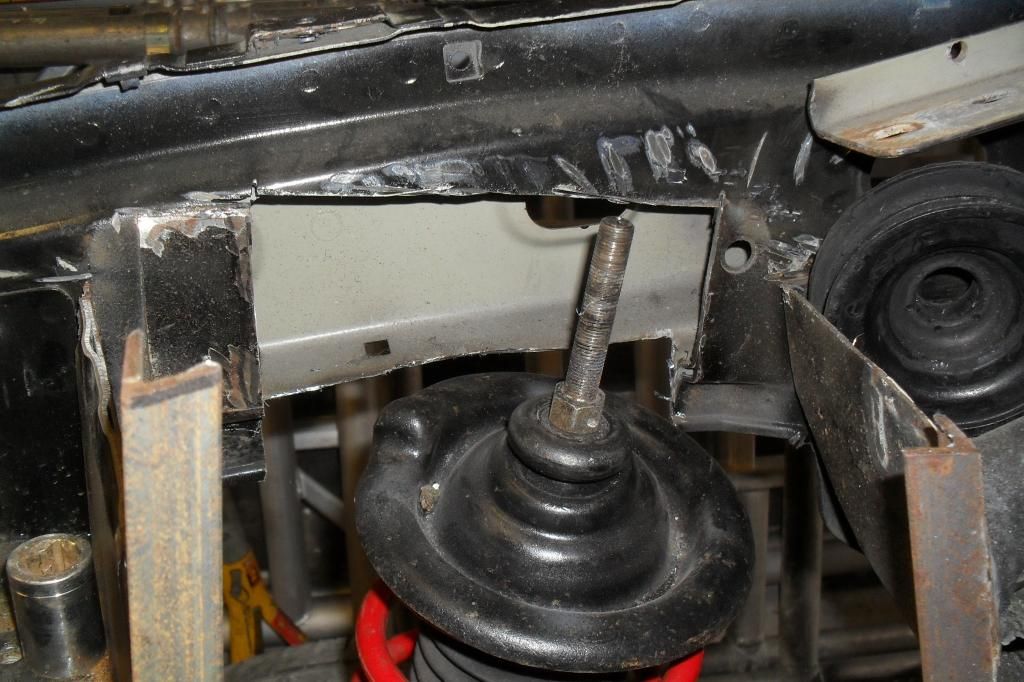
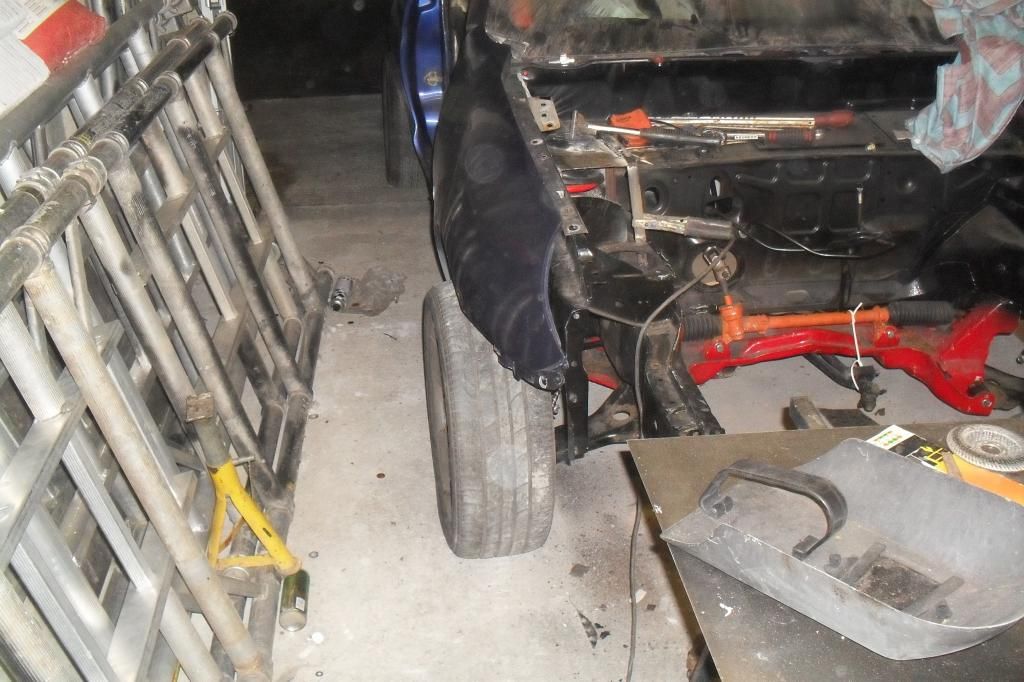
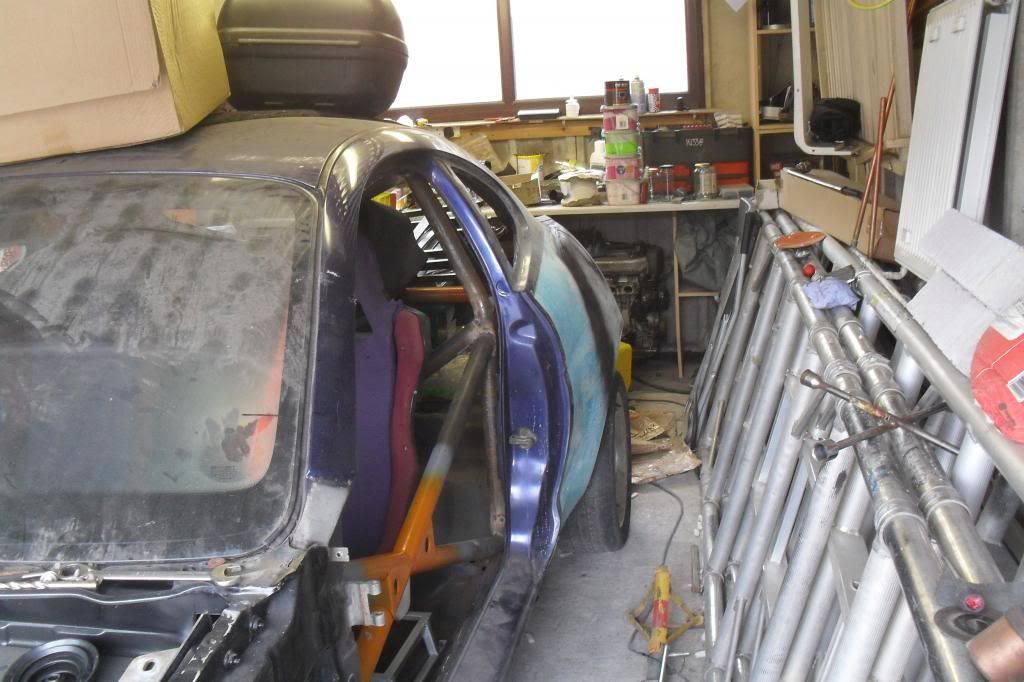
here are a couple of pics of the puma on it wheels for the first time this year and poking its bum out of the garage hehehe  />
/>

anybody order EPIC!!! camber??????? />
/>
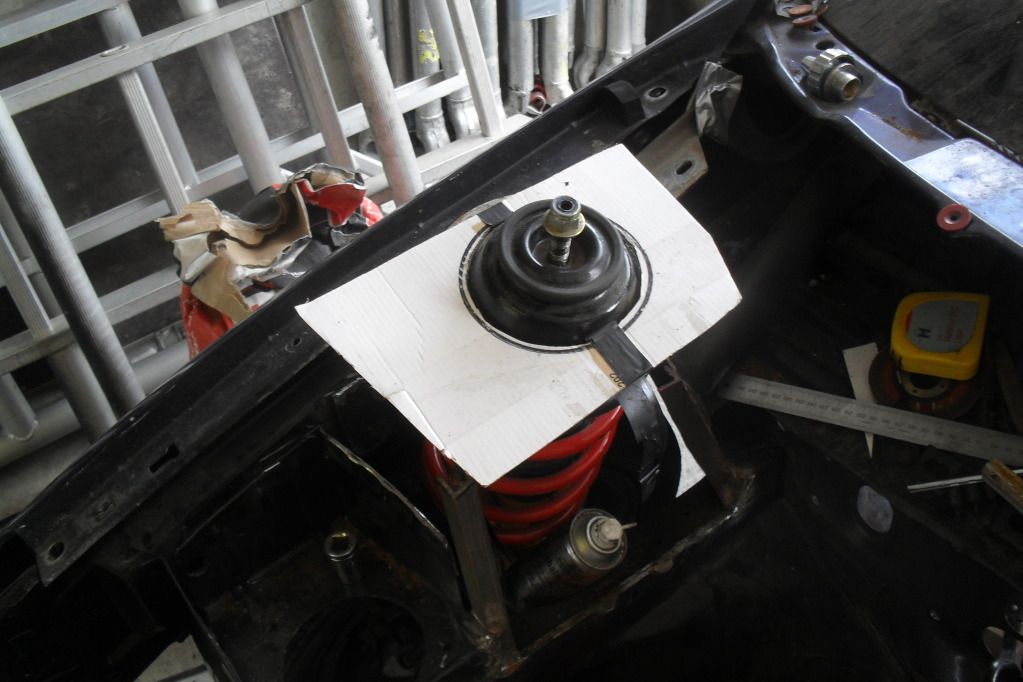
template of the new top of the suspension.
Doing more on the suspension tops tonight so will have more pics soon guys/>
cheers Kieran (FibreBuild)
/> anybody order EPIC!!! camber???????
/> template of the new top of the suspension.
Doing more on the suspension tops tonight so will have more pics soon guys
/> cheers Kieran (FibreBuild)
#273
Posted 18 March 2013 - 09:16 PM
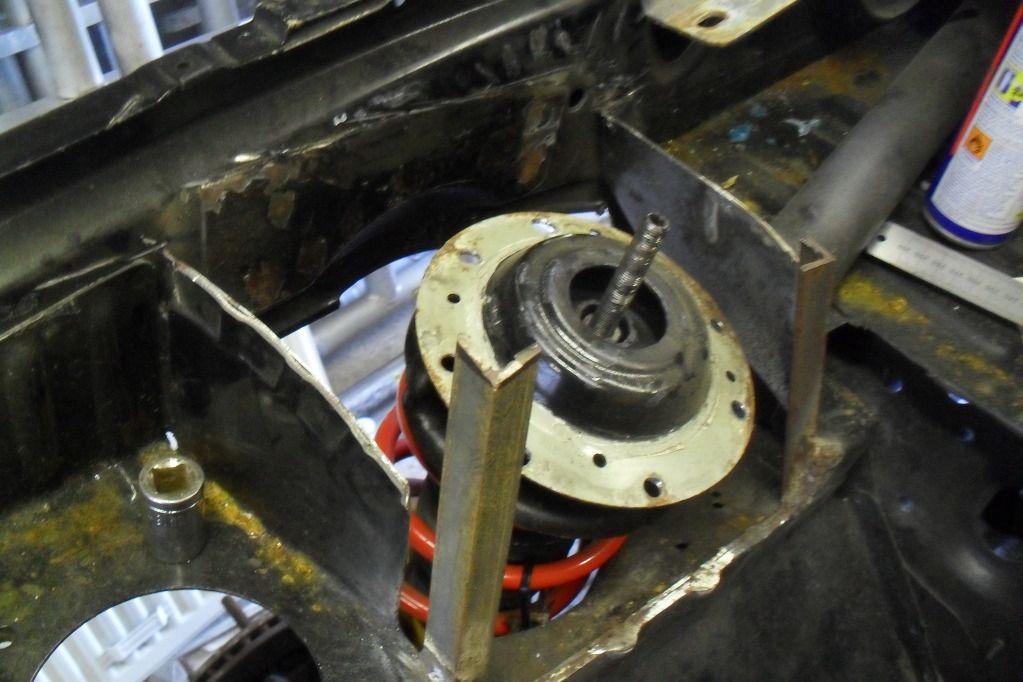
Well been working on the puma for the last couple of hours and now ive got the new top mount tacked into place, doesnt look the prettiest but its strong and over engineered and once its got the bigger tougher strunt brace fitted there will be great.
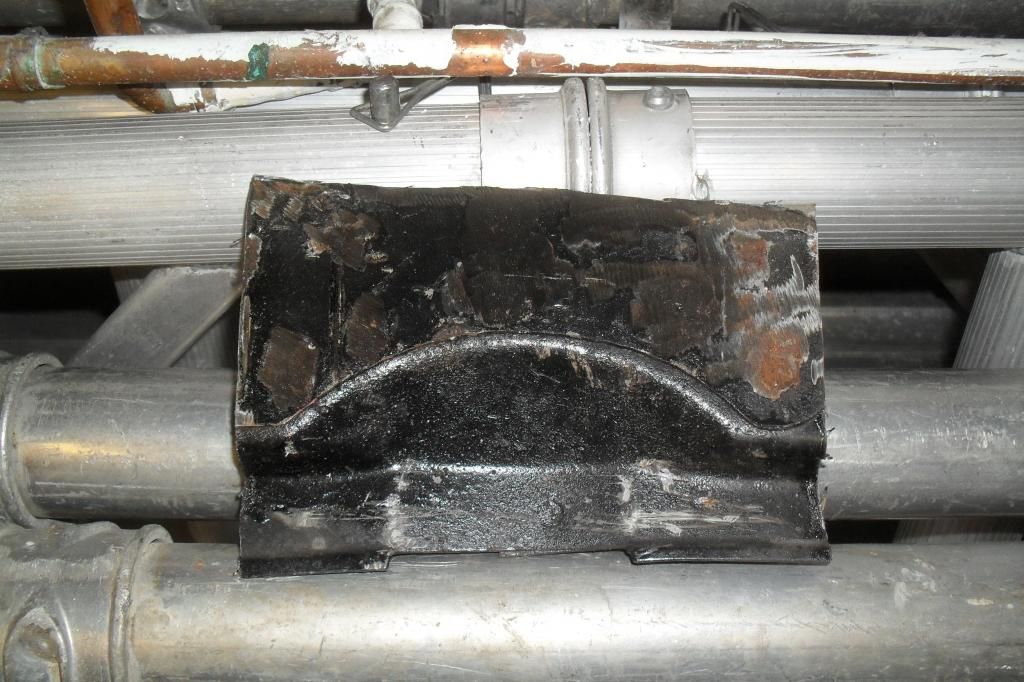
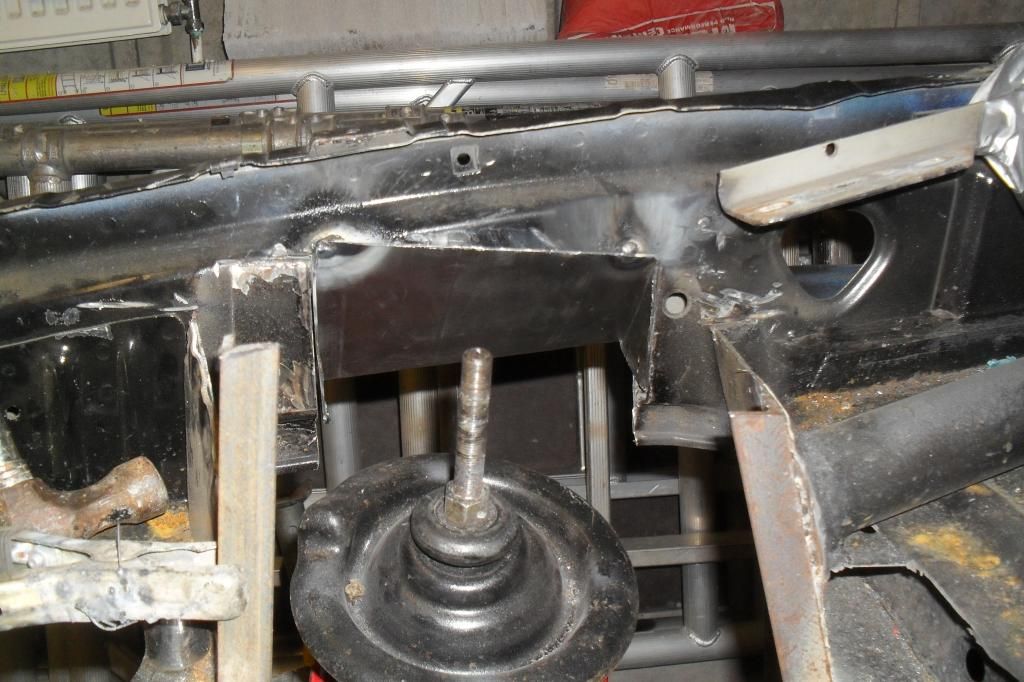
here how it sits now, the drivers side is now 40mm wider than standard. the passengers side still needs the top mount making wider.

sticks out a good 15-20mm of the standard arch.
looks like it fills the frp arch rather well even with the standard wheels on and no weight over the front end.
realy happy with the work ive done, still needs alot of work to finish it off but right now its sat back on the ground and looking good.
cheers Kieran (FibreBuild)
here how it sits now, the drivers side is now 40mm wider than standard. the passengers side still needs the top mount making wider.
sticks out a good 15-20mm of the standard arch.
looks like it fills the frp arch rather well even with the standard wheels on and no weight over the front end.
realy happy with the work ive done, still needs alot of work to finish it off but right now its sat back on the ground and looking good.
cheers Kieran (FibreBuild)
#274
- Group: Moderators
- Posts: 2133
- Joined: 11-February 03
- Location:On a racetrack somewhere
Posted 19 March 2013 - 01:21 PM
Have you thought about an adjustable top mount ? something like this http://www.ebay.co.u...-/181097114182?
It would allow you to adjust camber and caster to get exactly what you want and dial out any inaccuracies when you come to get the front end geometry setup. BY using an additional spacer between the inner wing and this plate you could also adjust the front end ride height very easily without getting shorter springs or using adjustable platform coilovers.
It would allow you to adjust camber and caster to get exactly what you want and dial out any inaccuracies when you come to get the front end geometry setup. BY using an additional spacer between the inner wing and this plate you could also adjust the front end ride height very easily without getting shorter springs or using adjustable platform coilovers.
A little knowledge is a dangerous thing (Alexander Pope - 1709)
Stop being spoon fed and GOOGLE it!
Stop being spoon fed and GOOGLE it!
#275
Posted 19 March 2013 - 01:54 PM
adjustable top mount, yes i have thought of them and i will be getting them at some point but money is realy tight right now. i have raised the mount by 20mm so the car has aditional suspension travel instead of restricting the travel with just shorter springs. it would be nice to have the ability to lower it further with spacers and i could look into that when i have the ajustable top mounts fitted.
Cheers Kieran (FibreBuild)
Cheers Kieran (FibreBuild)
#276
Posted 23 April 2013 - 09:22 AM
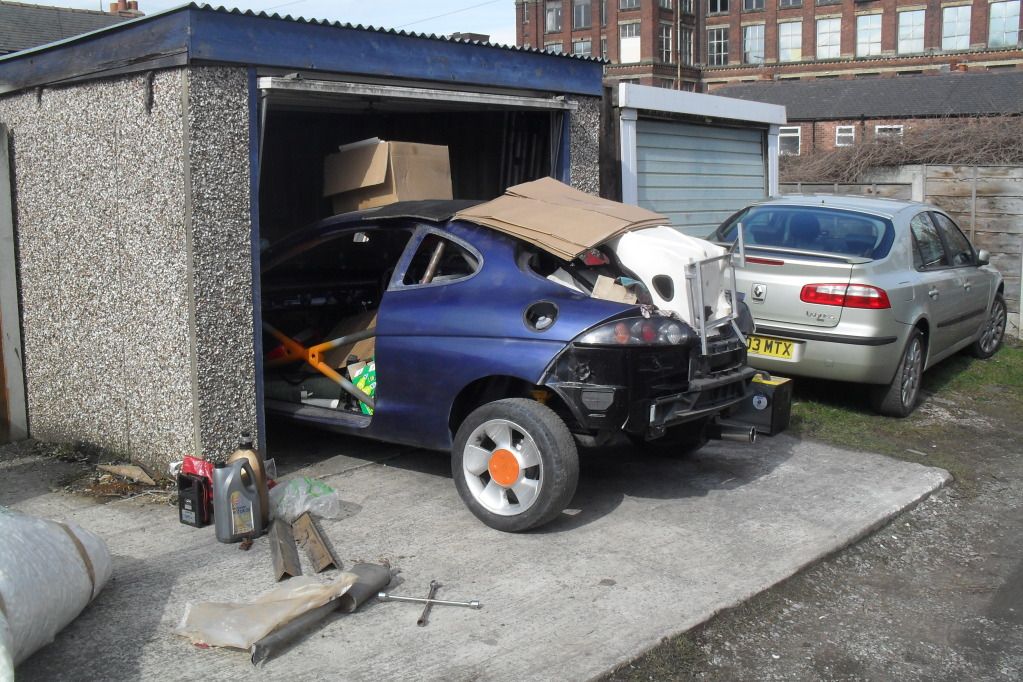
Hi all here a little update.
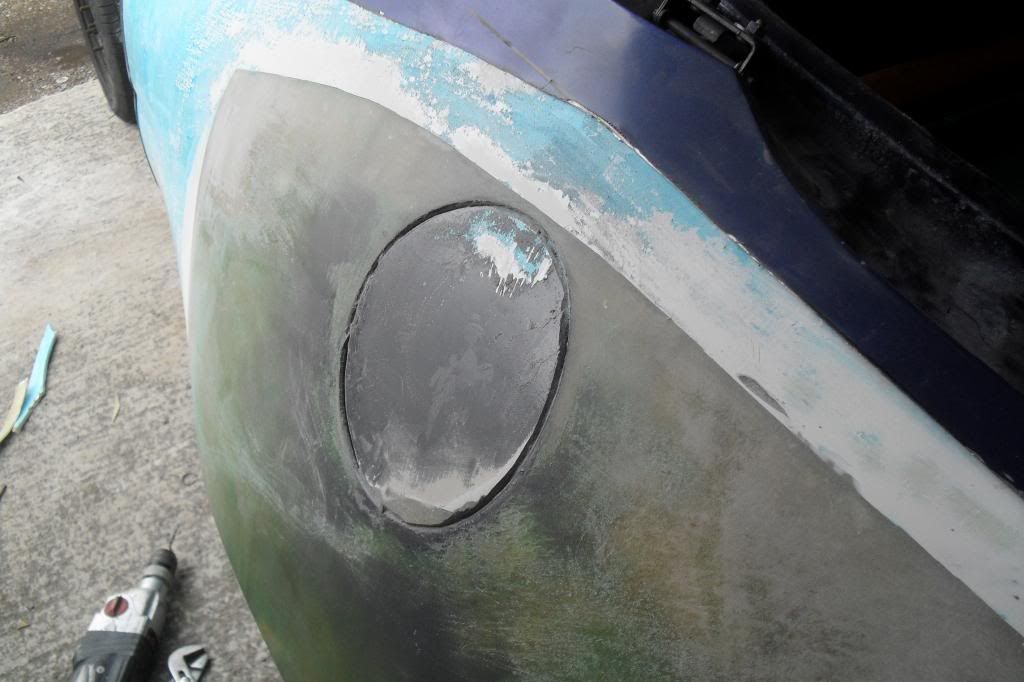
got one of the FRP rear quarters fitted (for now) and it looks good, I've plugged up the petrol cap hole with the remains of the ruined rear quarter that I fixed to put on my car. I haven't put the rear bumper on yet to see how the back lines up yet but it looks good.
pics

only took me about half an hour to fit it, im just pop riveting it in place.
Cheers Kieran (FibreBuild)
got one of the FRP rear quarters fitted (for now) and it looks good, I've plugged up the petrol cap hole with the remains of the ruined rear quarter that I fixed to put on my car. I haven't put the rear bumper on yet to see how the back lines up yet but it looks good.
pics
only took me about half an hour to fit it, im just pop riveting it in place.
Cheers Kieran (FibreBuild)
#277
Posted 02 May 2013 - 05:30 PM
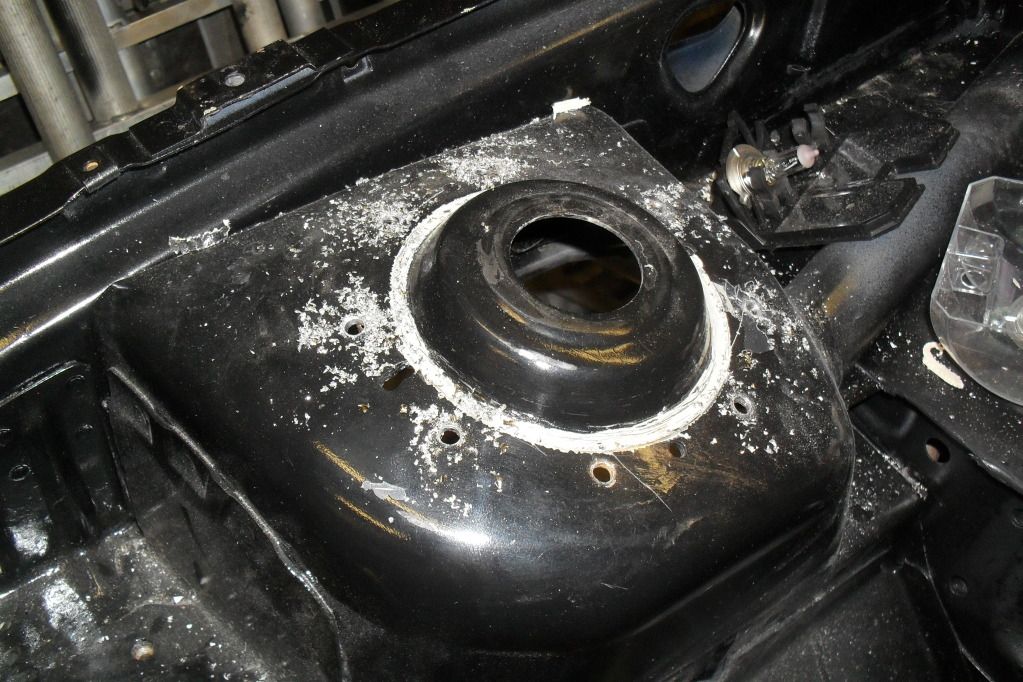
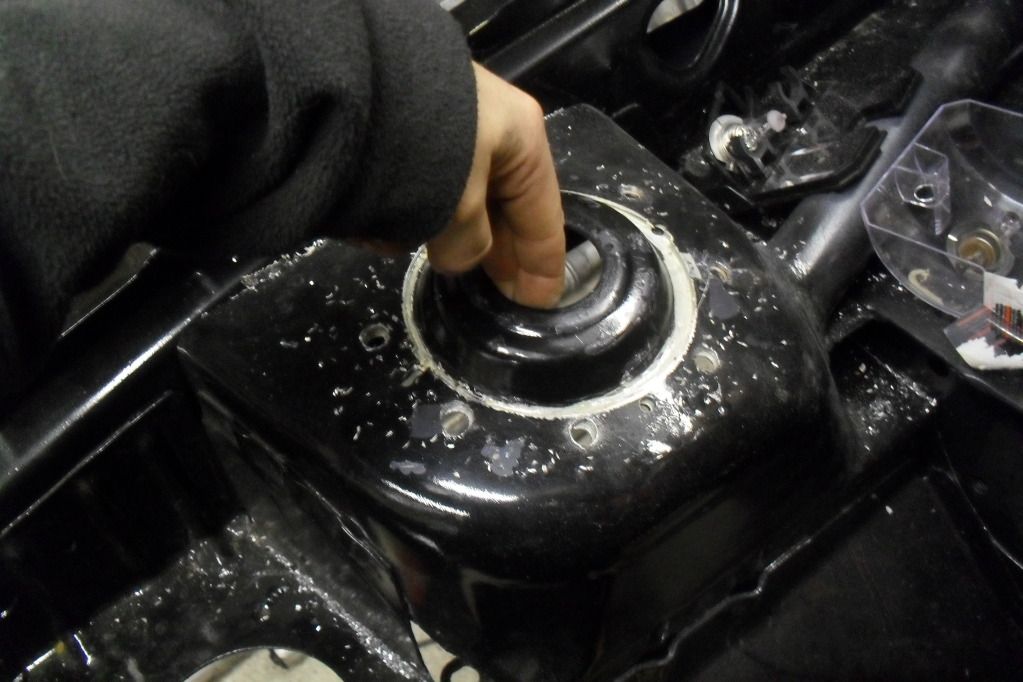
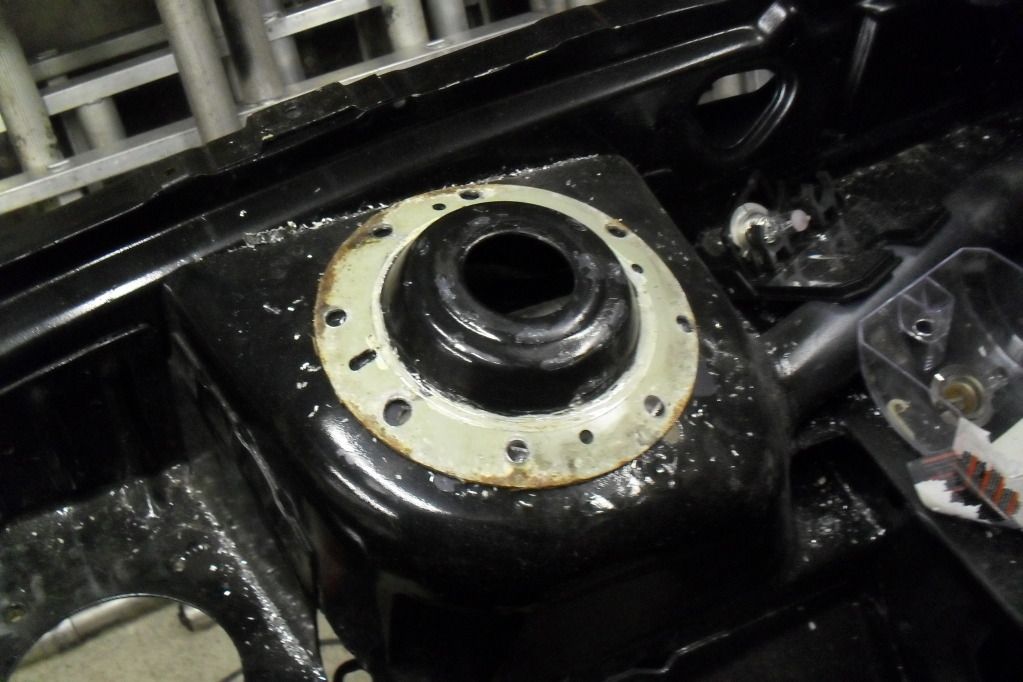
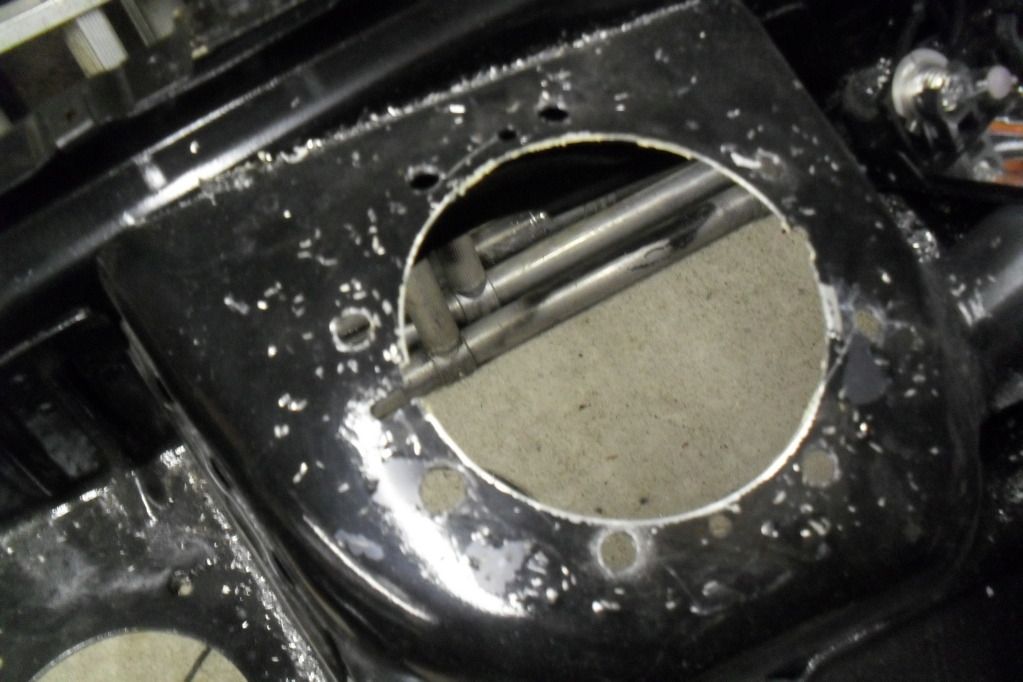
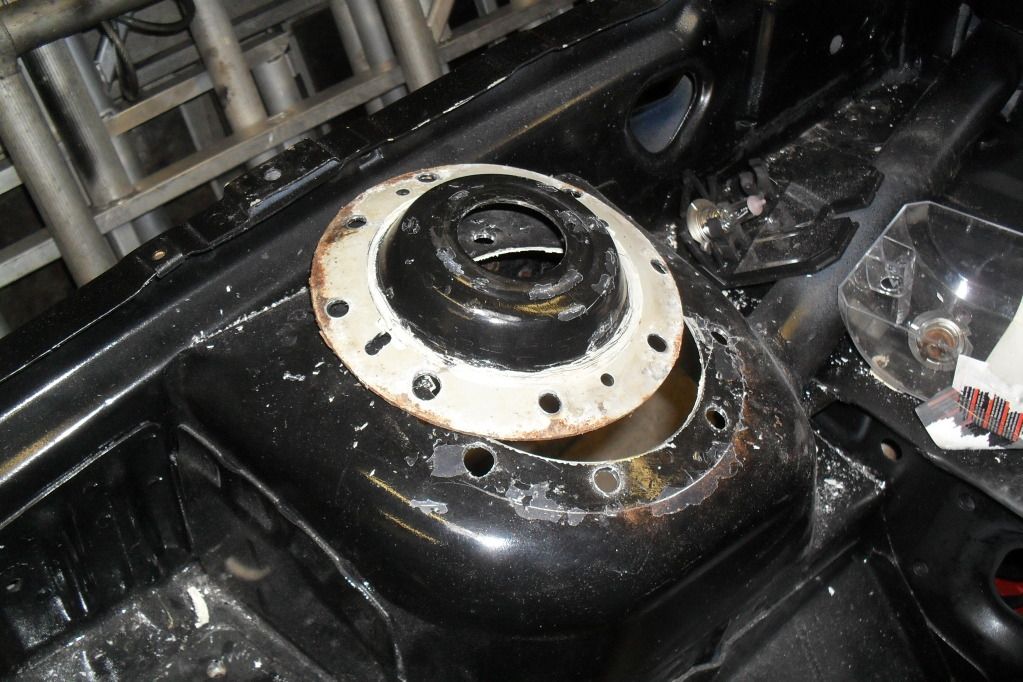
well I spent an hour marking out and drilling the passengers hub and here are the results.
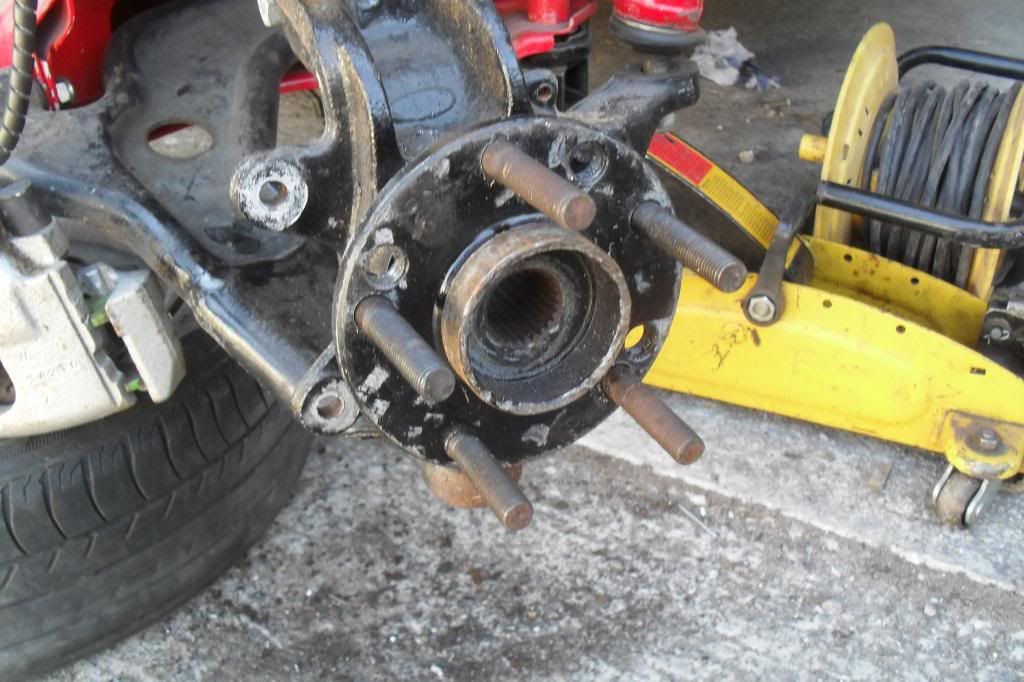
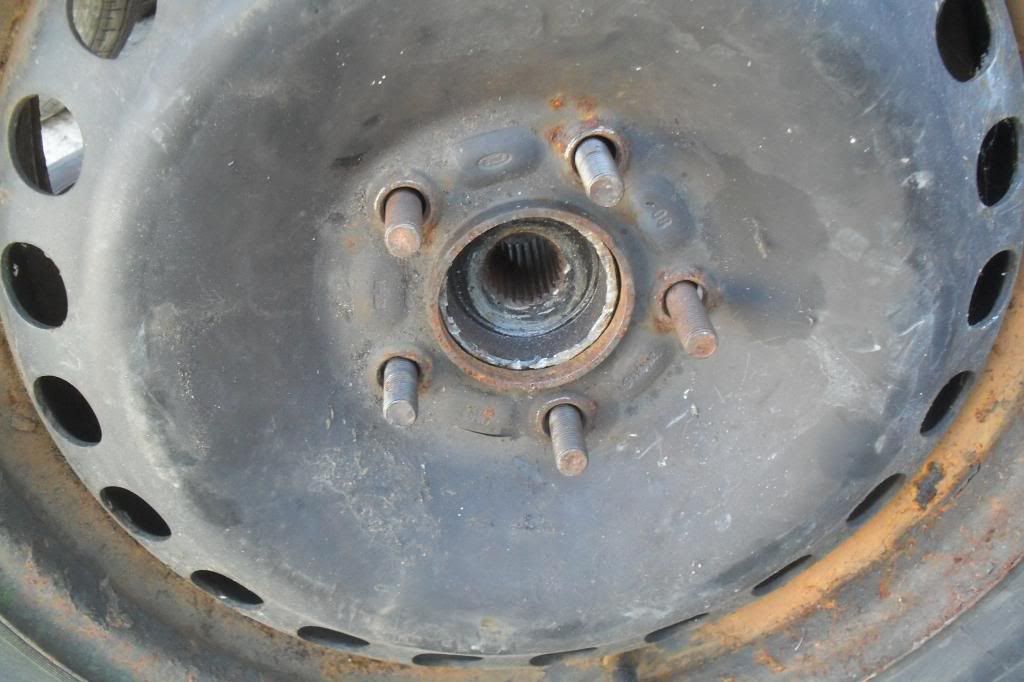
cost so far £3/>
Cheers Kieran (FibreBuild)
cost so far £3
/> Cheers Kieran (FibreBuild)
#278
Posted 03 May 2013 - 08:51 AM
certainly changing shape
searching is fruitful | I'm a sponge not a mechanic | please do try that if stuck with a Puma problem whilst waiting for a reply | For the Puma fan this read 'The Inside Story Book' is very nice to own sometimes still seen for sale
#280
- Group: Members
- Posts: 1217
- Joined: 08-March 03
- Location:Porsgrunn (Norway)
Posted 08 May 2013 - 07:43 AM
 Kizza, on 08 May 2013 - 07:26 AM, said:
I would like it to be changing faster but never mind />/>
/>/> I so know that feeling
1998 Puma 1.7 Replica FRP. innlet nr 138
Projekt tread http://www.pumapeopl...pic=104790&st=0
Time, is the fire in which we burn
Projekt tread http://www.pumapeopl...pic=104790&st=0
Time, is the fire in which we burn


