
 Help
Help


yea i've got bars across the floor of mine and can't beat the feel. Also the thaught of a solid bar between the car if the sill was hit hard. Who was it qho broke their pelvis, wrc co-driver....
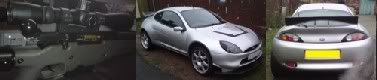
My Puma Cossie - Few Bits And Bobs. (very Picture Heavy!)
A running diary
Rate Topic:

#181

- Group: Members
- Posts: 1252
- Joined: 08-January 07
- Location:Hereford
Posted 12 November 2010 - 10:43 PM

All stuff puma - puma technical & all things rebuilt...
See my website for Snow School Information
#182

- Group: Members
- Posts: 4142
- Joined: 22-January 04
- Location:Stoke on Trent
Posted 12 November 2010 - 11:40 PM
yeah i reckon just one of the seat bars made out of decent box section will be stronger than the thin steel pressed cross bar thats already fitted there. with both your laughing.
#183

- Group: Members
- Posts: 583
- Joined: 01-April 10
- Location:NW Scotland Highlands
Posted 13 November 2010 - 12:42 PM
Hi Warren,
Nice Idea, but I did it slightly differently............
Before welding the tunnel in I tied each end of the floor cross brace to the chassis with steel plates. Across the chassis underneath is a box steel gearbox mounting crossmember, captive bolted across the chassis with 4 x M10 ISO8.8 bolts, so now every bit as strong as before.
Also the rollcage adds soooooo much stiffness to the shell I doubt it is an issue. Seatwise I stripped the original front seats, extracted and modded the subframes, they still pick up on the original floorpan mounting holes. I still have full fore and aft adjustment on the Corbeau's and they sit nice and low too
The Front TCA measurements on mine are.....
Inner Bush Centre to Ball Joint Centre:- 300mm
Inner Bush Centre to ARB Bush Centre:- 240mm
Cheers Dave
It's nice to be important but it's more important to be nice !!
#184
- Group: Members
- Posts: 4142
- Joined: 22-January 04
- Location:Stoke on Trent
Posted 13 November 2010 - 09:54 PM
 Dave2302, on 13 November 2010 - 12:42 PM, said:
Seatwise I stripped the original front seats, extracted and modded the subframes, they still pick up on the original floorpan mounting holes. I still have full fore and aft adjustment on the Corbeau's and they sit nice and low too
ahh cool. I presume your using later manual height adjust seat mountings??
Be interested in some photos if you can. Your using side mount buckets?
I was thinking just get everything really low with seat tubes pretty much on the floor with sparco seat slides mounted to them (only 1" thick) then mount either to base mount pro2000's or side mount seats. Still keep the seat adjust that way.
if your idea is easier and lower then cool i might look into that and rape an old fiesta mk4/5 for some mounts. Ive got fiesta mk3.5 seat mounts stashed away somewhere but i wasnt impressed with how low they went, as it only lowered seats about an inch.
Dave2302, on 13 November 2010 - 12:42 PM, said:
The Front TCA measurements on mine are.....
Inner Bush Centre to Ball Joint Centre:- 300mm
Inner Bush Centre to ARB Bush Centre:- 240mm
Inner Bush Centre to Ball Joint Centre:- 300mm
Inner Bush Centre to ARB Bush Centre:- 240mm
superb mate!! thats granny 4x4 TCA's?? I might switch to them so ive got all standard parts rather than custom TCAs.
#185
- Group: Members
- Posts: 1252
- Joined: 08-January 07
- Location:Hereford
Posted 15 November 2010 - 10:08 AM
side mounts are quite easy to fit, then you can move it exactly perfectly where you want? can't get people in the back though
All stuff puma - puma technical & all things rebuilt...
See my website for Snow School Information
#186
- Group: Members
- Posts: 583
- Joined: 01-April 10
- Location:NW Scotland Highlands
Posted 15 November 2010 - 11:29 AM
warrenpenalver, on 13 November 2010 - 09:54 PM, said:
ahh cool. I presume your using later manual height adjust seat mountings??
Be interested in some photos if you can. Your using side mount buckets?
superb mate!! thats granny 4x4 TCA's?? I might switch to them so ive got all standard parts rather than custom TCAs.
Be interested in some photos if you can. Your using side mount buckets?
superb mate!! thats granny 4x4 TCA's?? I might switch to them so ive got all standard parts rather than custom TCAs.
They were manual height adjustment ones from my V reg yes. I've done away with the height adjustment bit. The seats are to be base mounted not side
The seats defiitely sit a lot lower than stock ones, I'm 6'2" and have no clearance problems wearing a crashhat
I'm not sure they will be as low as you're suggesting, but they work for me  MSA Scrutineer has seen and approved what I've done too.
I'll sort you some better pics today or tommoz, there are some in my thread, but maybe not clear what I've done !!
Yes Granada Scorpio III 4x4 TCA's, although I'm considering modding them to make them length (camber)adjustable, I think there's enough meat on them, will get an old one and cut it up
Cheers for now Dave
It's nice to be important but it's more important to be nice !!
#187
Posted 15 November 2010 - 05:59 PM
Hello!
Your project is great!
I wanted to ask about the conversion of 3-button alarm.
Does the table correctly (rpms, speed), control key and everything?
Do I need to program the chip in the key?
And one last question, does the interior electronics is independent of the engine?
Thank you and to continue with the project!
#188
- Group: Members
- Posts: 1252
- Joined: 08-January 07
- Location:Hereford
Posted 15 November 2010 - 06:00 PM
Dave2302, on 15 November 2010 - 11:29 AM, said:
They were manual height adjustment ones from my V reg yes. I've done away with the height adjustment bit. The seats are to be base mounted not side
The seats defiitely sit a lot lower than stock ones, I'm 6'2" and have no clearance problems wearing a crashhat I'm not sure they will be as low as you're suggesting, but they work for me MSA Scrutineer has seen and approved what I've done too.
I'll sort you some better pics today or tommoz, there are some in my thread, but maybe not clear what I've done !!
Yes Granada Scorpio III 4x4 TCA's, although I'm considering modding them to make them length (camber)adjustable, I think there's enough meat on them, will get an old one and cut it up
Cheers for now Dave
snap, my seats almost as low as co-driver's. Its amazing how narrow a puma is when you have a helmet on too...
I notice with the new wrc cars and previous, how they have started moving hte driver to the middle of the car, obv for weight distribution but still a long way back.
All stuff puma - puma technical & all things rebuilt...
See my website for Snow School Information
#189
- Group: Members
- Posts: 4142
- Joined: 22-January 04
- Location:Stoke on Trent
Posted 24 January 2011 - 04:04 AM
Bit of an update.
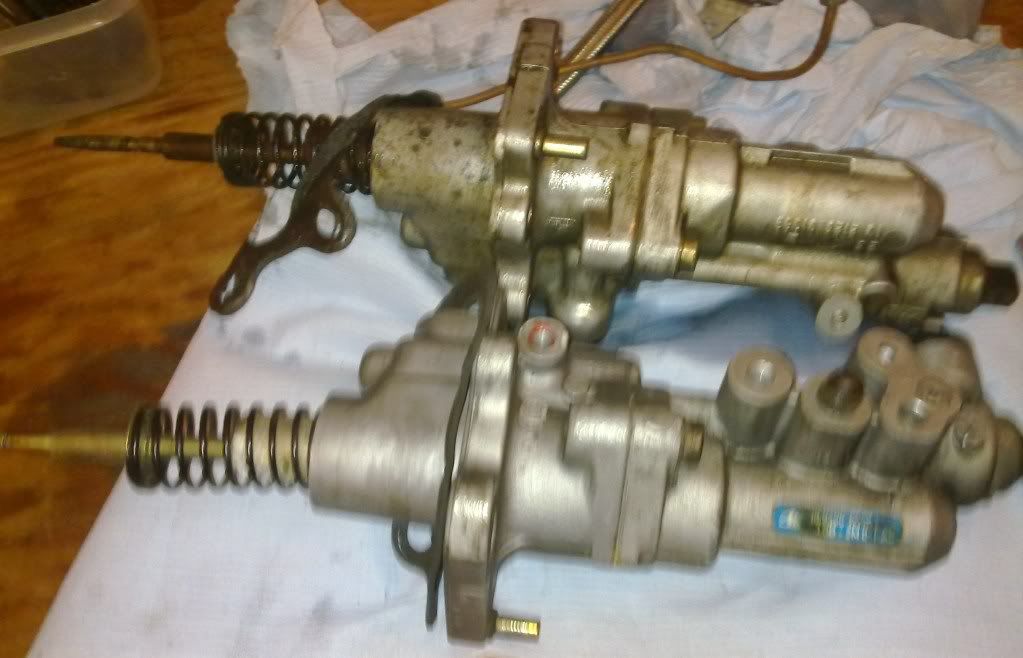
Brake master cylinder siezed up and ABS pump failed so had to rebuild the brakes.
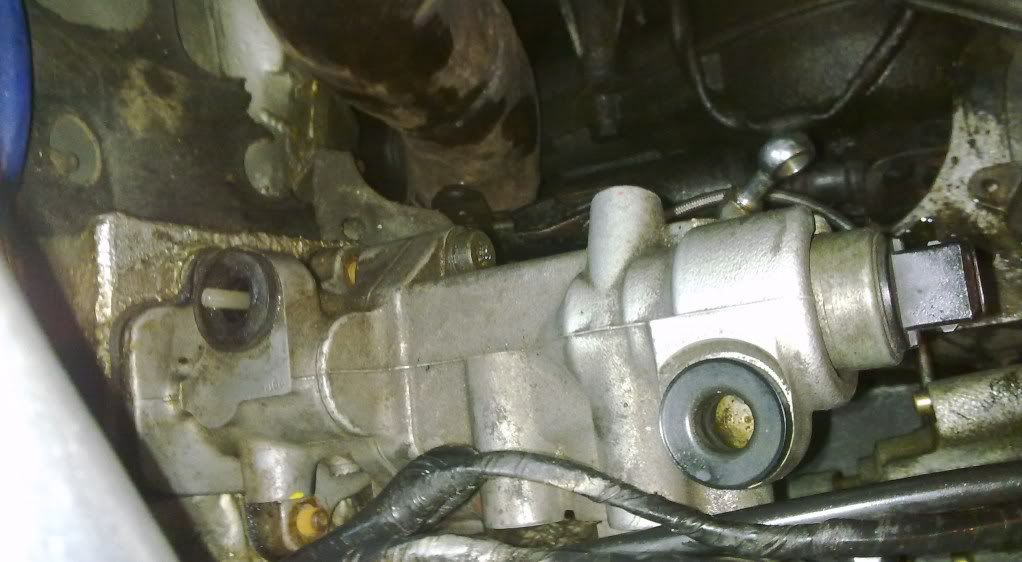
stripped it down and removed it. Comparing the new one with the old one you can clearly see the old one was skanking!
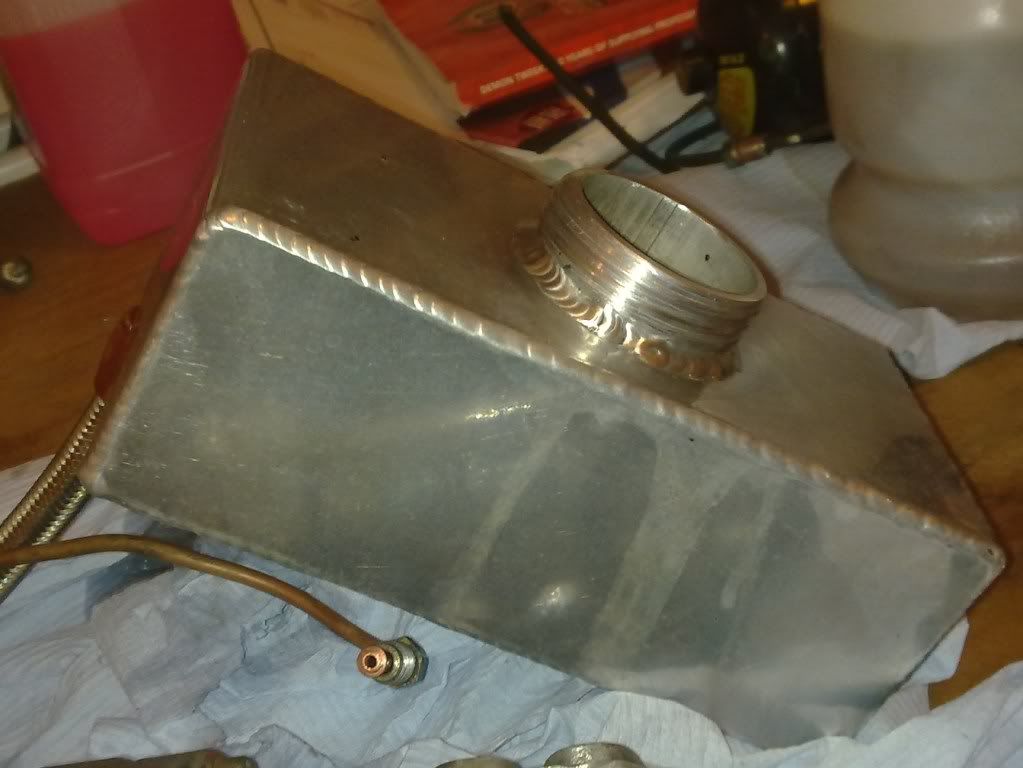
also took the reservoir off and cleaned it out to make sure there was no dirt in it.
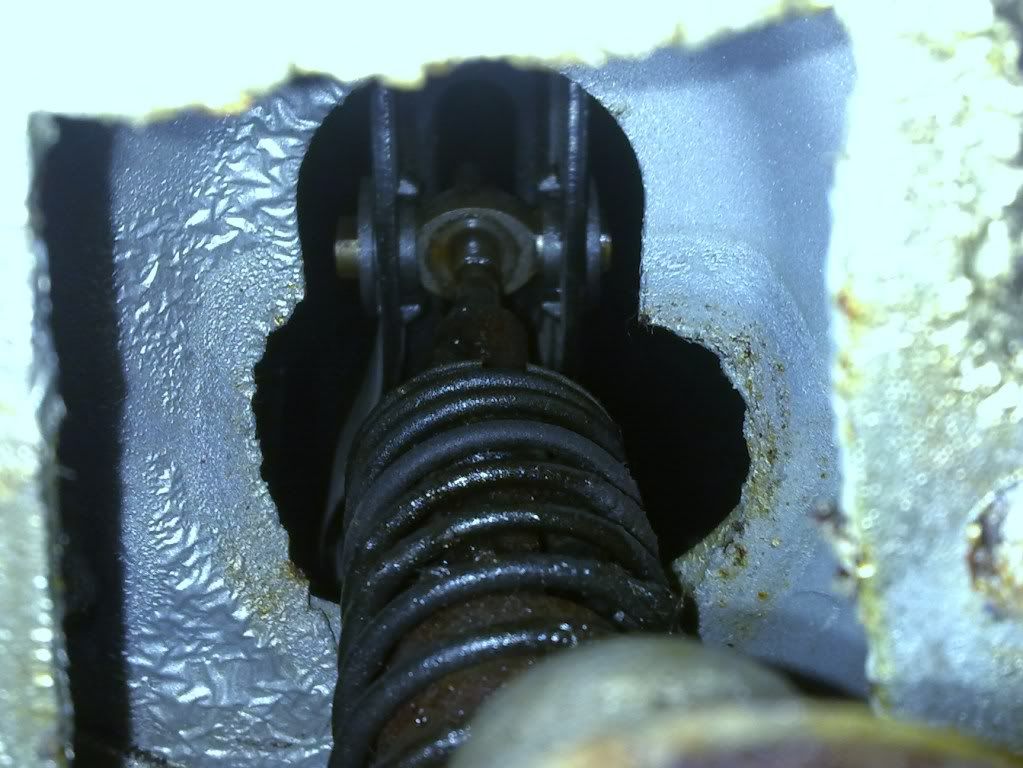
then refitted the new one. In this pic you can see you have to thread the master cylinder rod into the car and the pivot point on the pedal box:
just waiting on a abs pump to give servo assistance then all is fixed!!
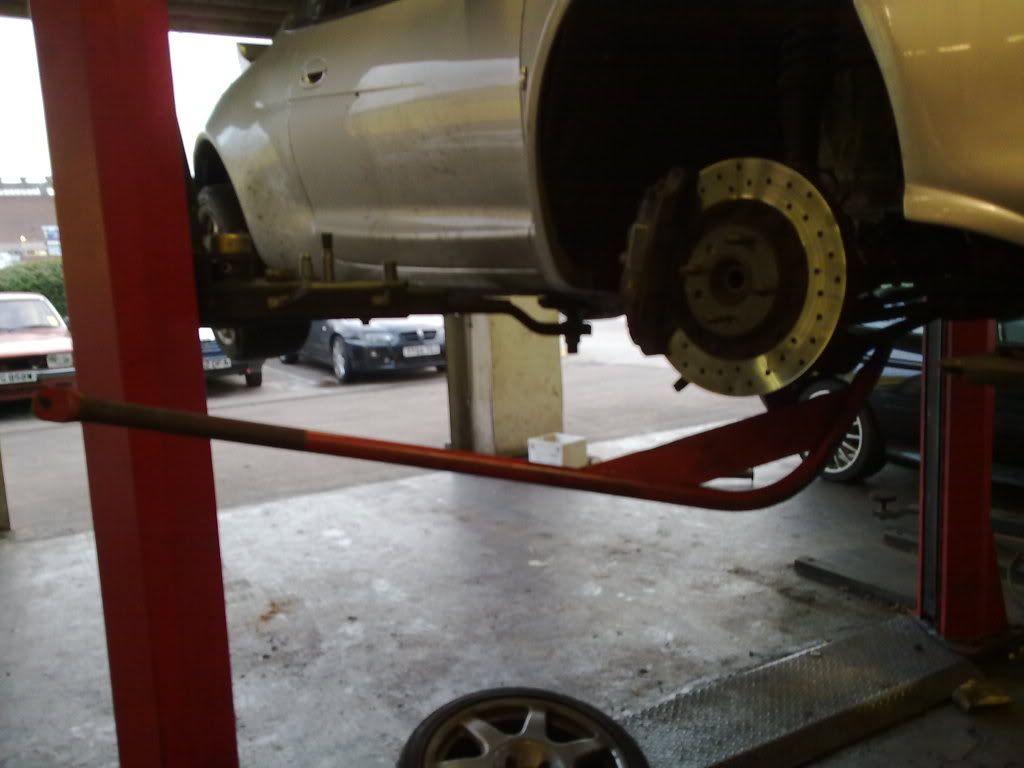
Also had a dodgy CV boot so had that replaced. cossiecrazy whos helped me loads had these fancy tools:
took seconds to do things that ive struggled with in the past with hammers etc!! me like!
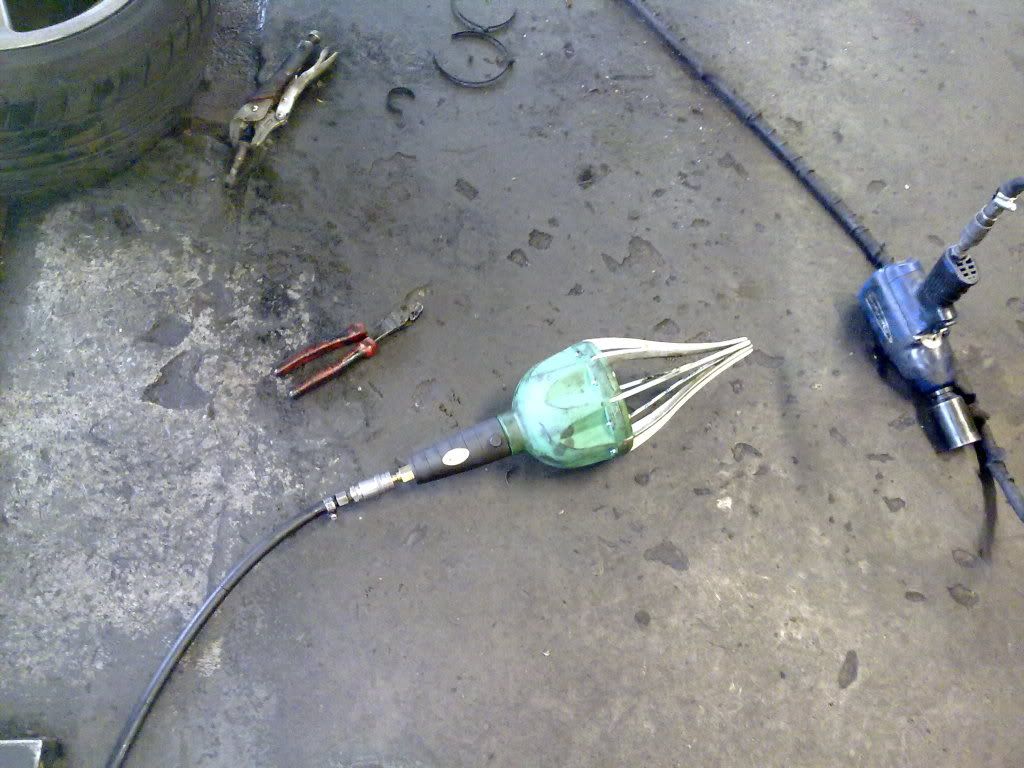
also this freaky contraption for stretching the CV boot:
Looks like it might be a good torture device too!!
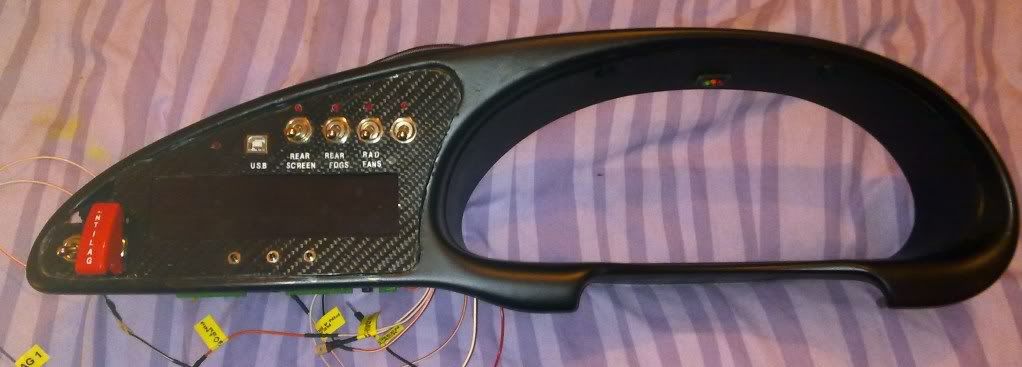
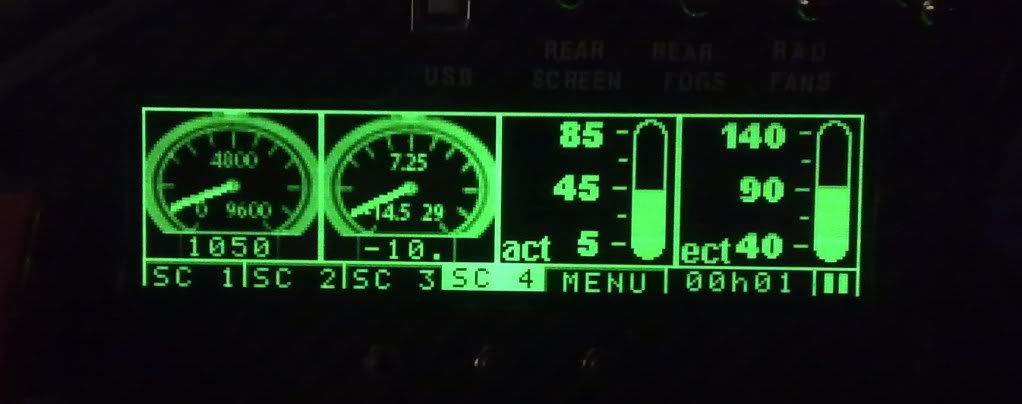
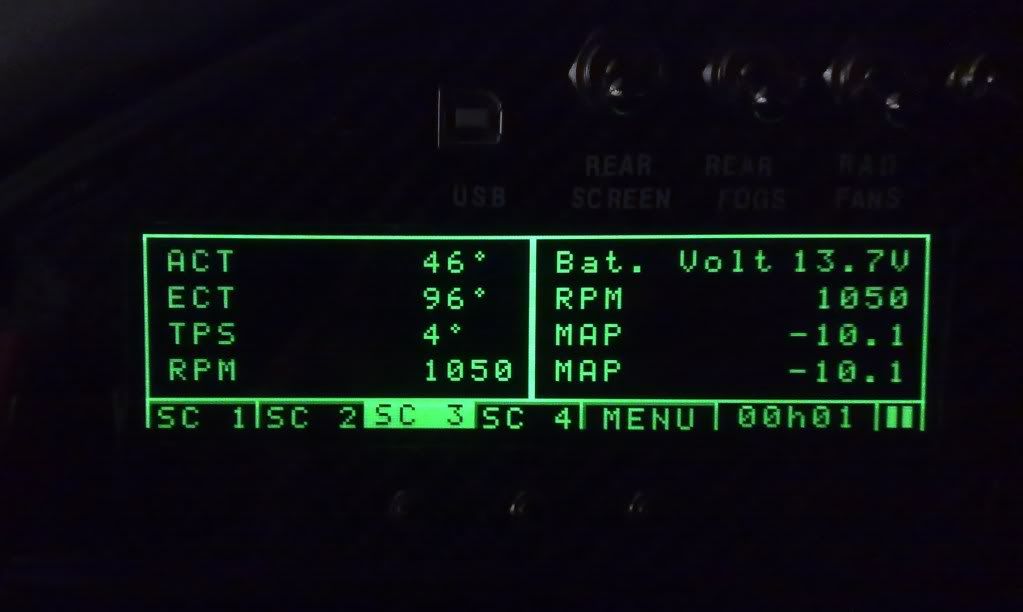
Back in september i bought a IECS engine monitor which ive only just got round to fitting. Shows me most of the useful sensor info off the ECU and has programmable screen layouts and alarm settings.
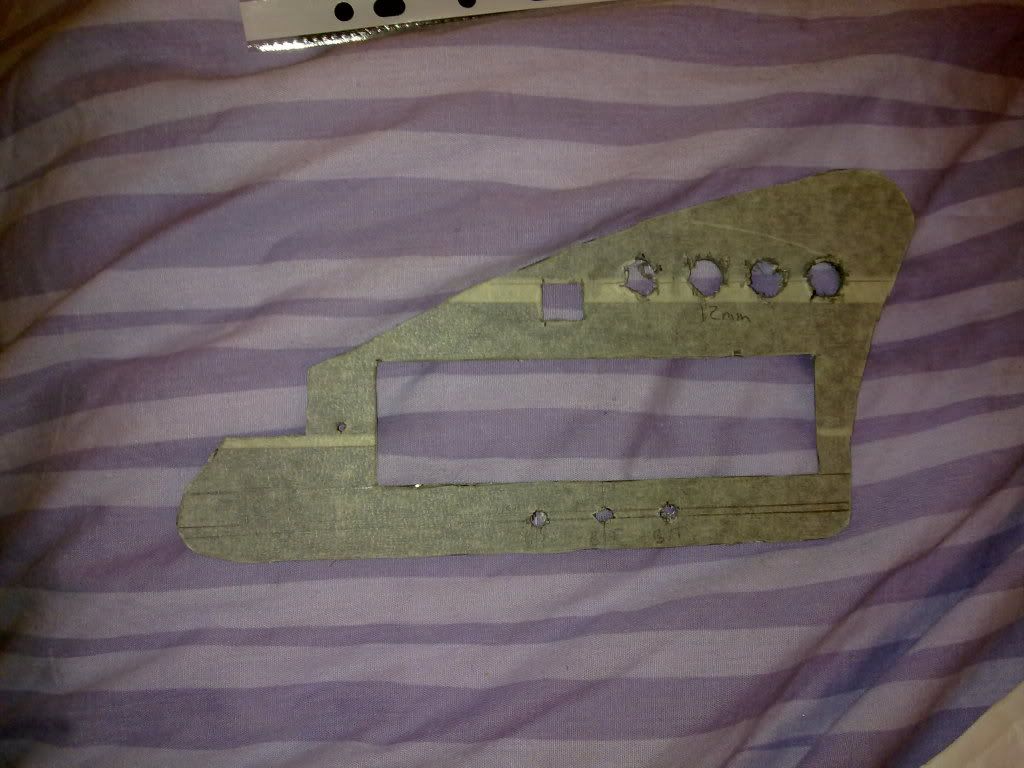
First of all i got a spare dash surround and hacked out the center vent area:

then got a piece of carbon measured for the hole and cut it out with holes for screen and buttons:
mounted the carbon to the dash surround and bonded in with glue, then preceeded to fit switches and begin to build a screen support/mount:
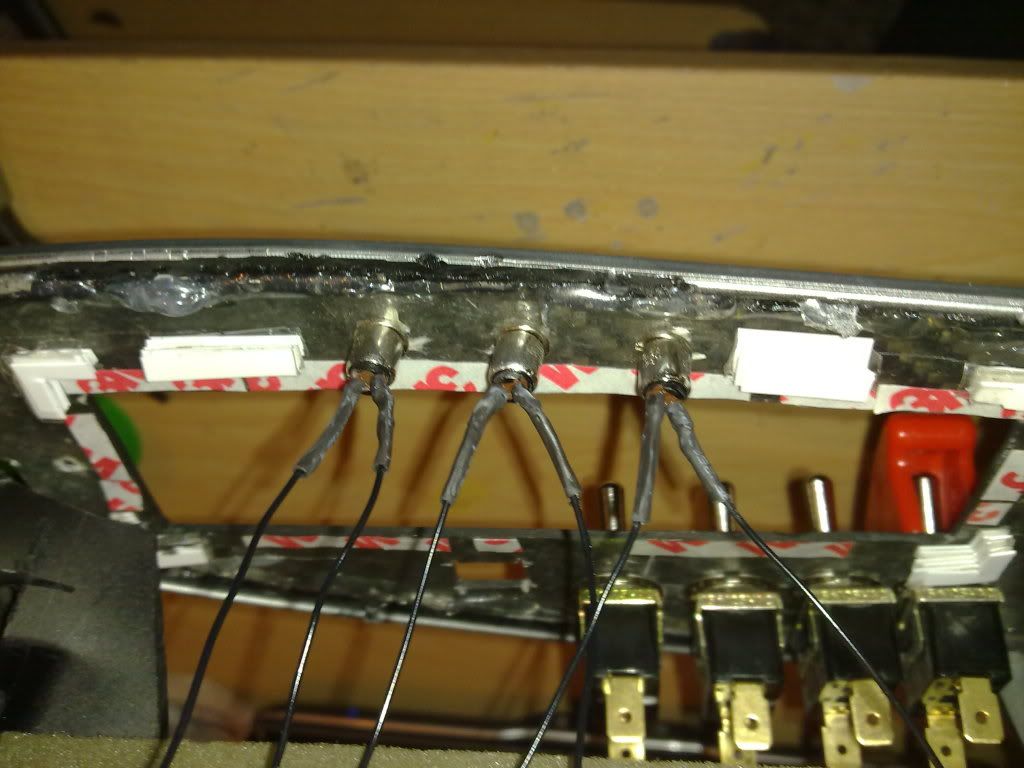
Then fitted the LCD screen:
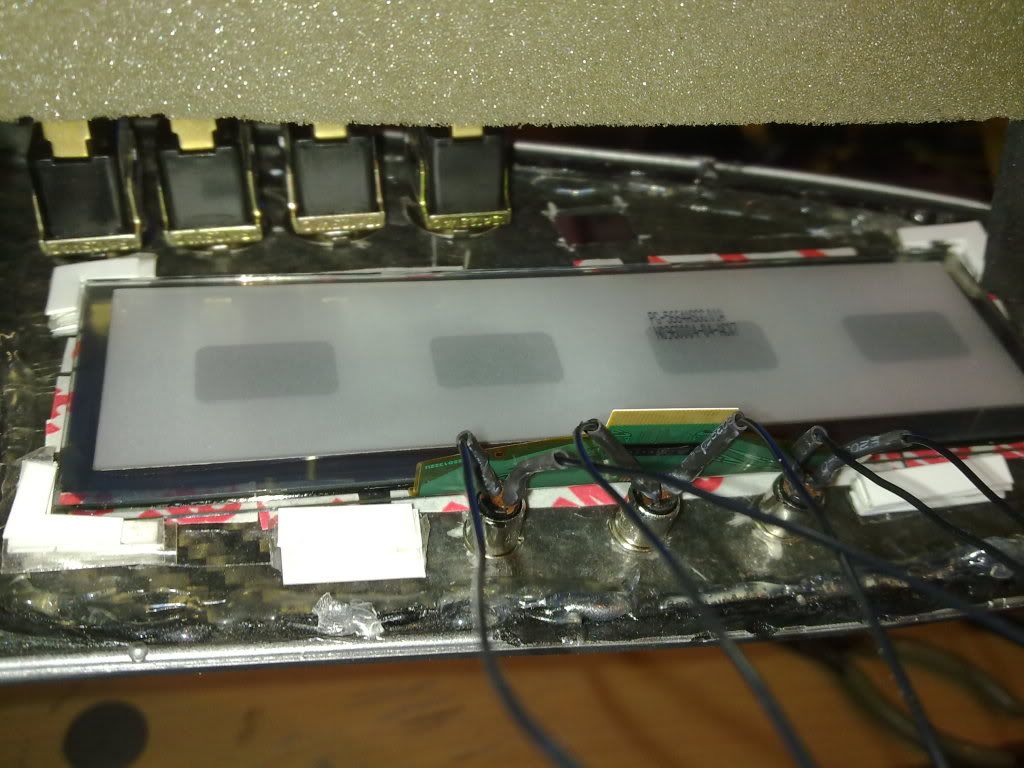
then built a support and brace for the screen. the face of the screen is mounted on foam to absorb shock and vibration and the screen was braced from behind with balsa to hold it in place:

i then fitted the PCB under where the vent would have been:
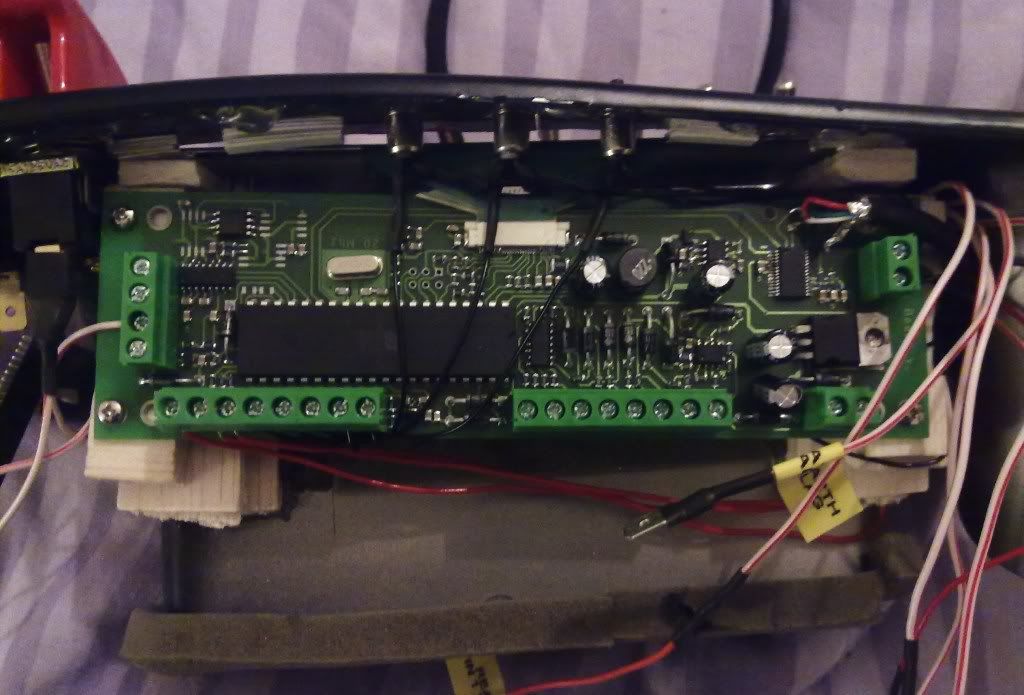
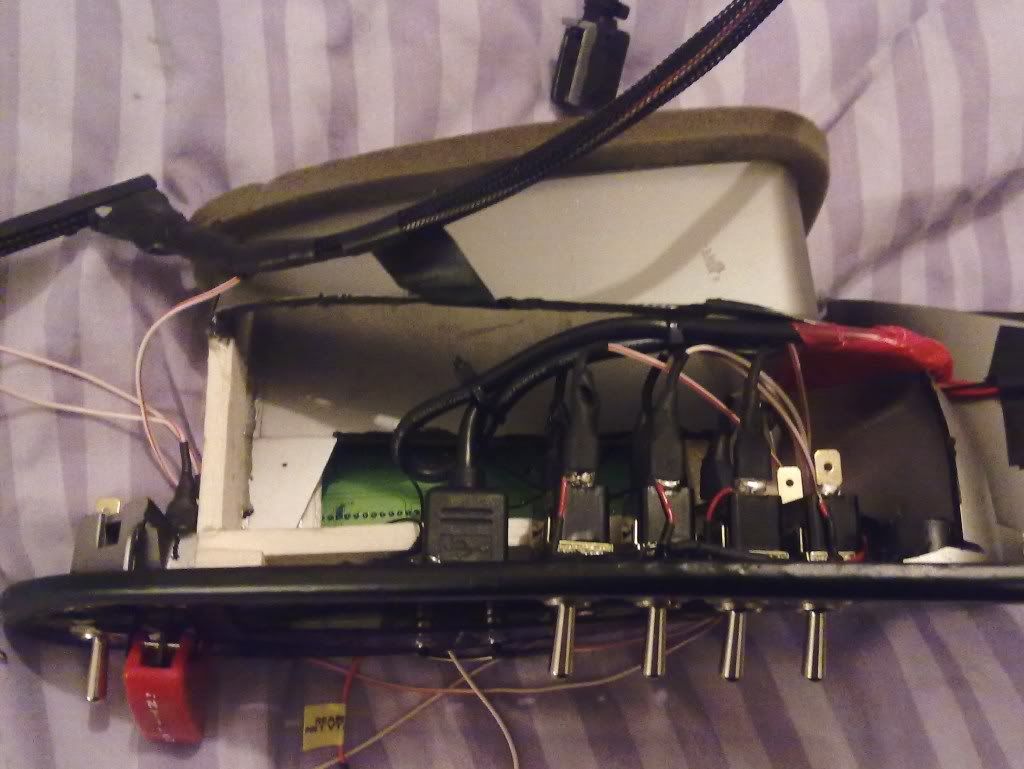
and finished off rewiring the old switches and wiring for the monitor:
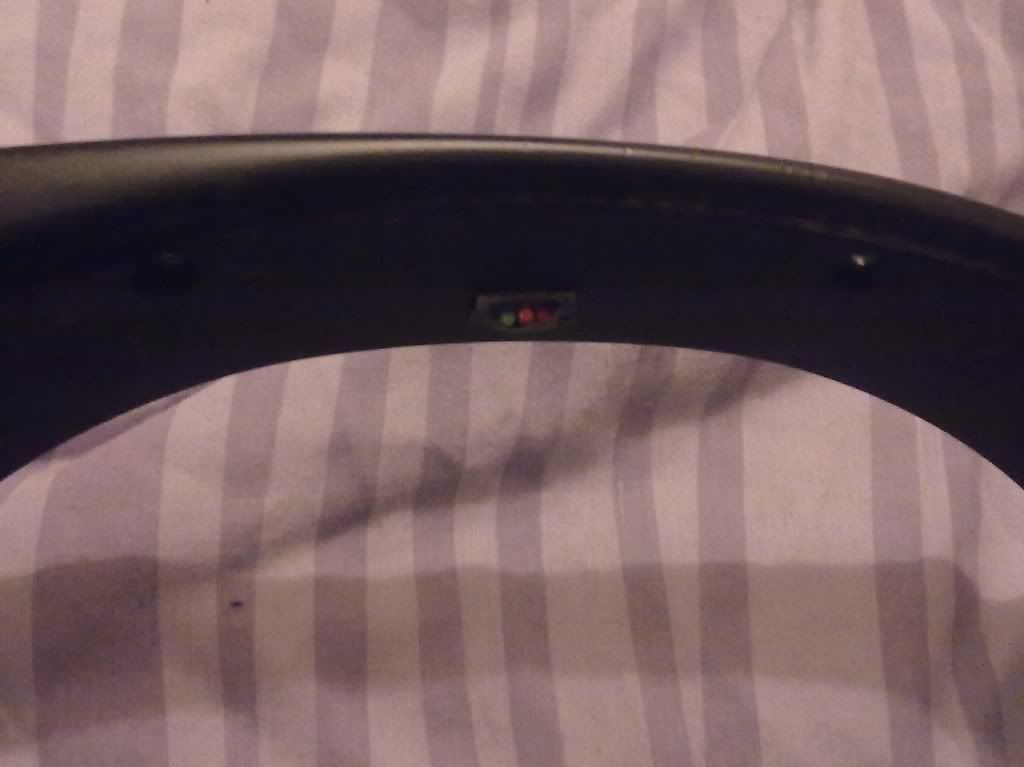
The unit has sequential shift light function so i fitted the 3 leds in the dash top:
All built up ready to go in car:
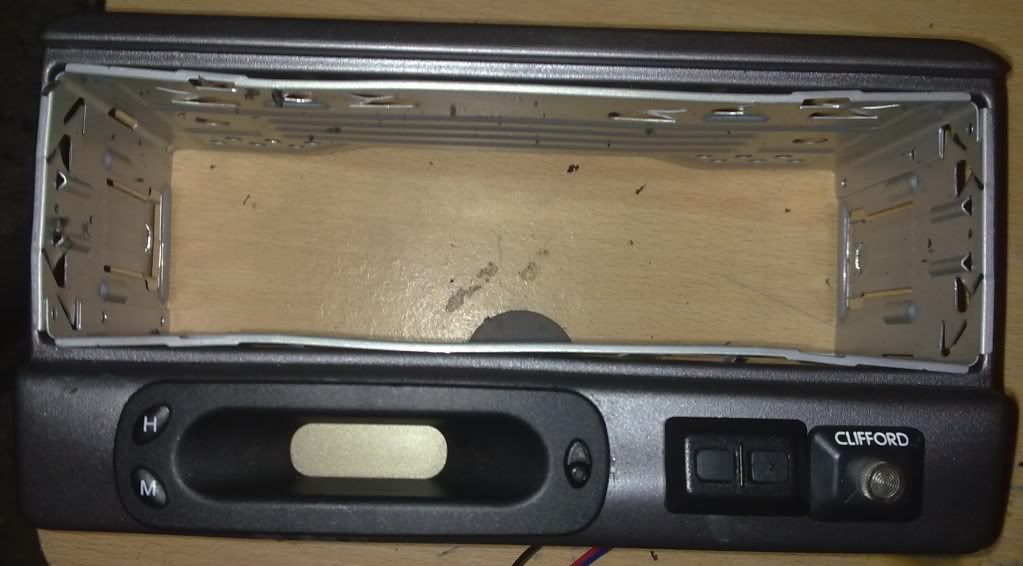
I also wanted to keep the clock so relocated it into the stereo surround:
Fitted the unit to the dash. Trimmed some bits of plastic and tucked wires away neatly (there's a lot of wire!!) fitted a clock wire extension and here is the finished article all fitted up:

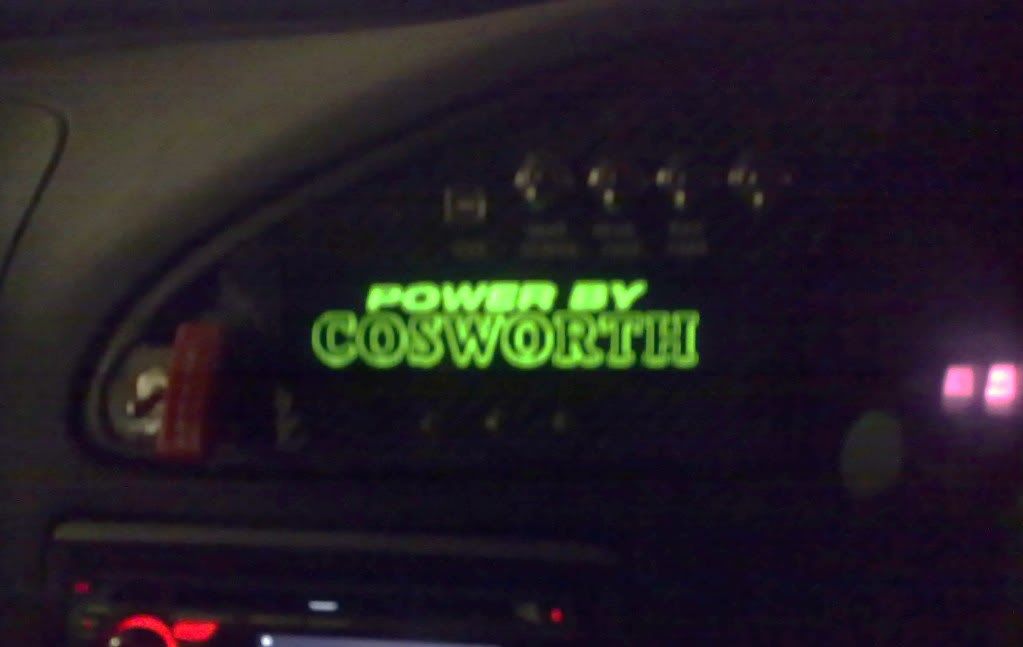
and this cool logo comes up on start up:
and a couple of example screens from messing around:
Brake master cylinder siezed up and ABS pump failed so had to rebuild the brakes.
stripped it down and removed it. Comparing the new one with the old one you can clearly see the old one was skanking!
also took the reservoir off and cleaned it out to make sure there was no dirt in it.
then refitted the new one. In this pic you can see you have to thread the master cylinder rod into the car and the pivot point on the pedal box:
just waiting on a abs pump to give servo assistance then all is fixed!!
Also had a dodgy CV boot so had that replaced. cossiecrazy whos helped me loads had these fancy tools:
took seconds to do things that ive struggled with in the past with hammers etc!! me like!
also this freaky contraption for stretching the CV boot:
Looks like it might be a good torture device too!!
Back in september i bought a IECS engine monitor which ive only just got round to fitting. Shows me most of the useful sensor info off the ECU and has programmable screen layouts and alarm settings.
First of all i got a spare dash surround and hacked out the center vent area:
then got a piece of carbon measured for the hole and cut it out with holes for screen and buttons:
mounted the carbon to the dash surround and bonded in with glue, then preceeded to fit switches and begin to build a screen support/mount:
Then fitted the LCD screen:
then built a support and brace for the screen. the face of the screen is mounted on foam to absorb shock and vibration and the screen was braced from behind with balsa to hold it in place:
i then fitted the PCB under where the vent would have been:
and finished off rewiring the old switches and wiring for the monitor:
The unit has sequential shift light function so i fitted the 3 leds in the dash top:
All built up ready to go in car:
I also wanted to keep the clock so relocated it into the stereo surround:
Fitted the unit to the dash. Trimmed some bits of plastic and tucked wires away neatly (there's a lot of wire!!) fitted a clock wire extension and here is the finished article all fitted up:
and this cool logo comes up on start up:
and a couple of example screens from messing around:
#190
- Group: Members
- Posts: 1252
- Joined: 08-January 07
- Location:Hereford
Posted 24 January 2011 - 05:51 PM
wow that looks ace mate. love your devotion to being anal. Your gana have to come up and sort out my new loom and switches. Omex 600 and unassembled loom ftw LOL
All stuff puma - puma technical & all things rebuilt...
See my website for Snow School Information
#191
- Group: Members
- Posts: 4142
- Joined: 22-January 04
- Location:Stoke on Trent
Posted 26 January 2011 - 03:01 AM
well quite a lots happened today
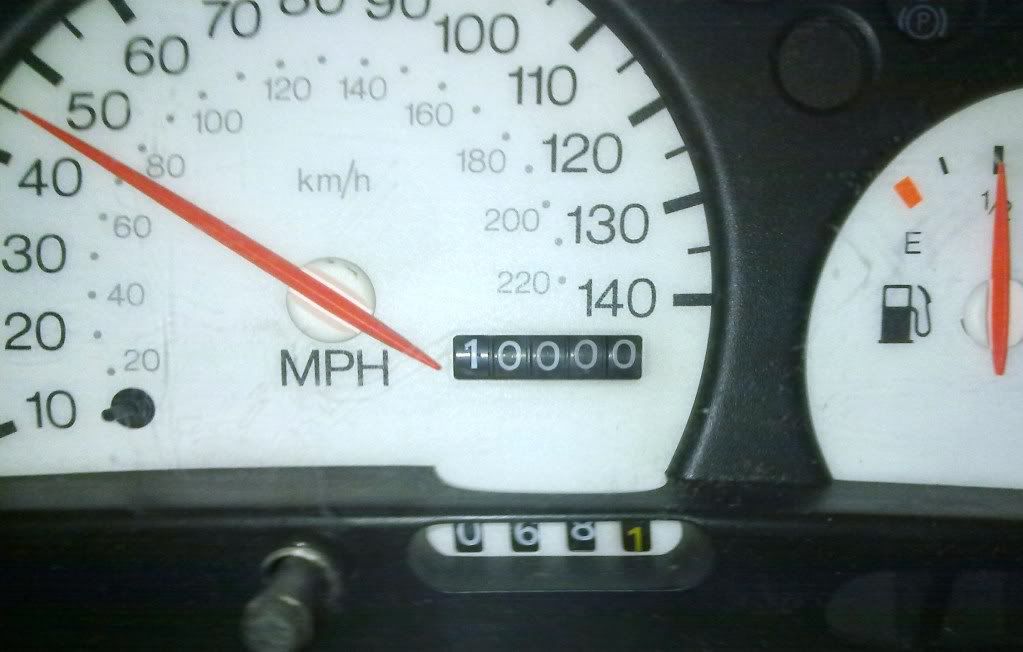
first of all, passed 10000miles on the clocks!
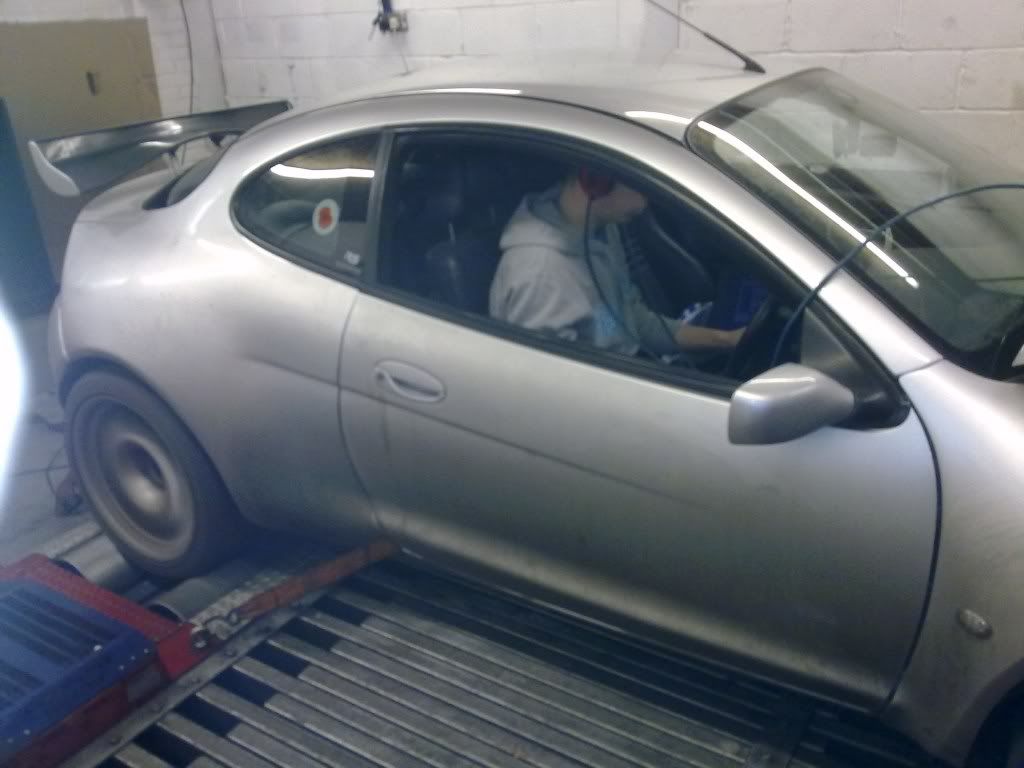
also have been down to have the car mapped at enhanced performance. Luke spent several hours sorting out the quite frankly shit map i had.
Had a few issues including the antilag air bypass valve being knackered and clearly its been like it a while and the last owner clearly knew as they wound the idle screw round as far as they could to compensate!! a few other bodges sorted :cry:
here's the man himself hard at work!
I'll let the graphs do the talking:
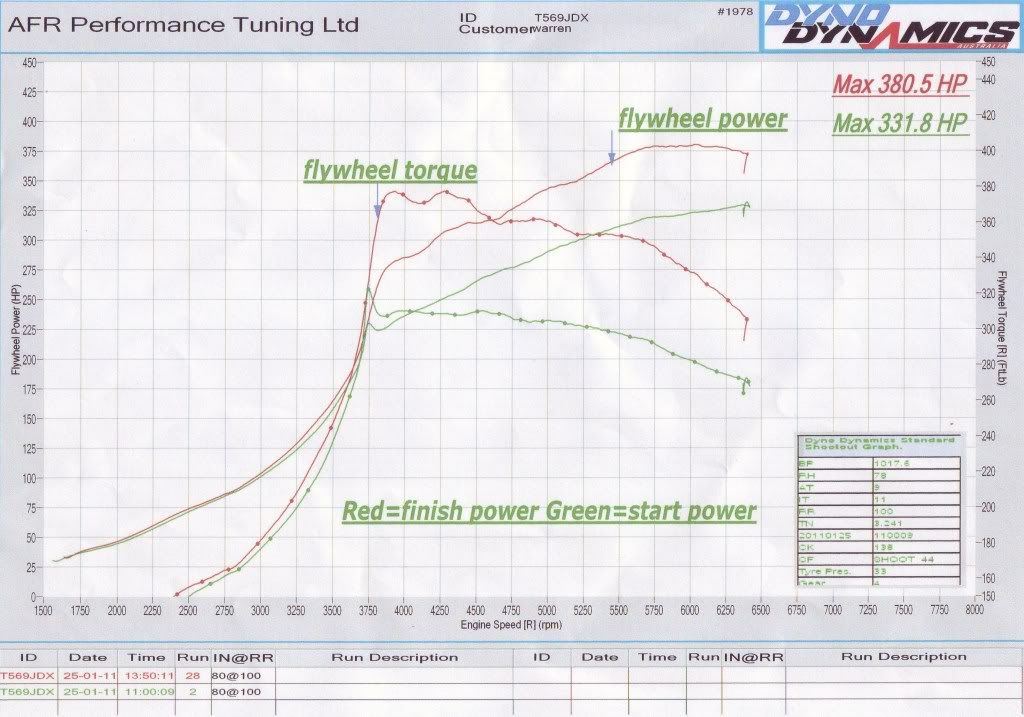
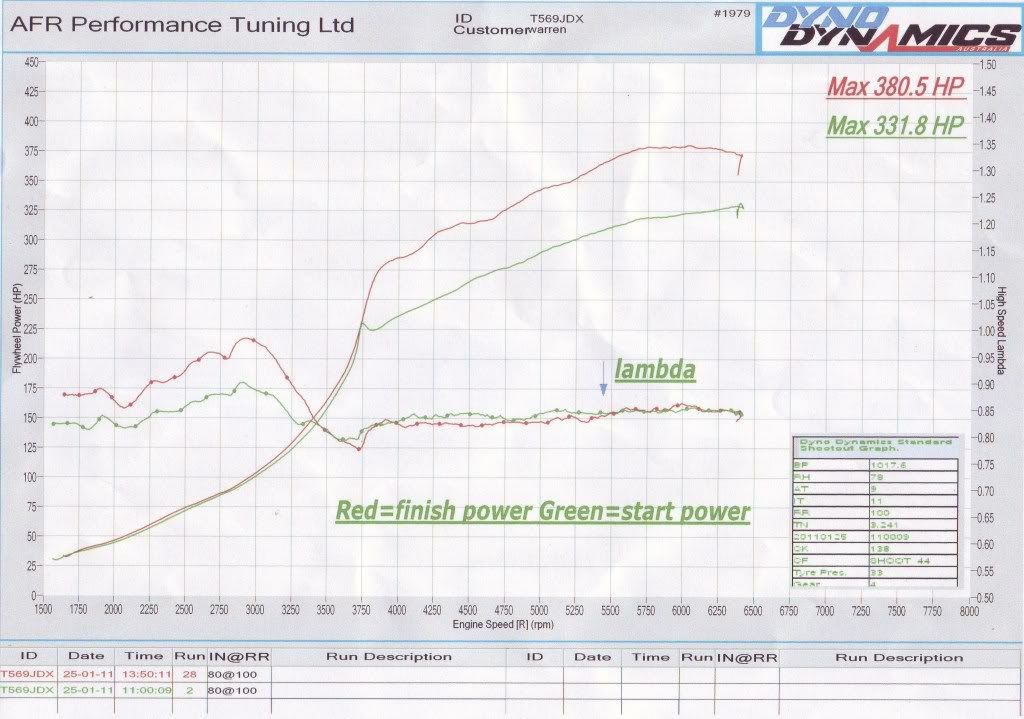
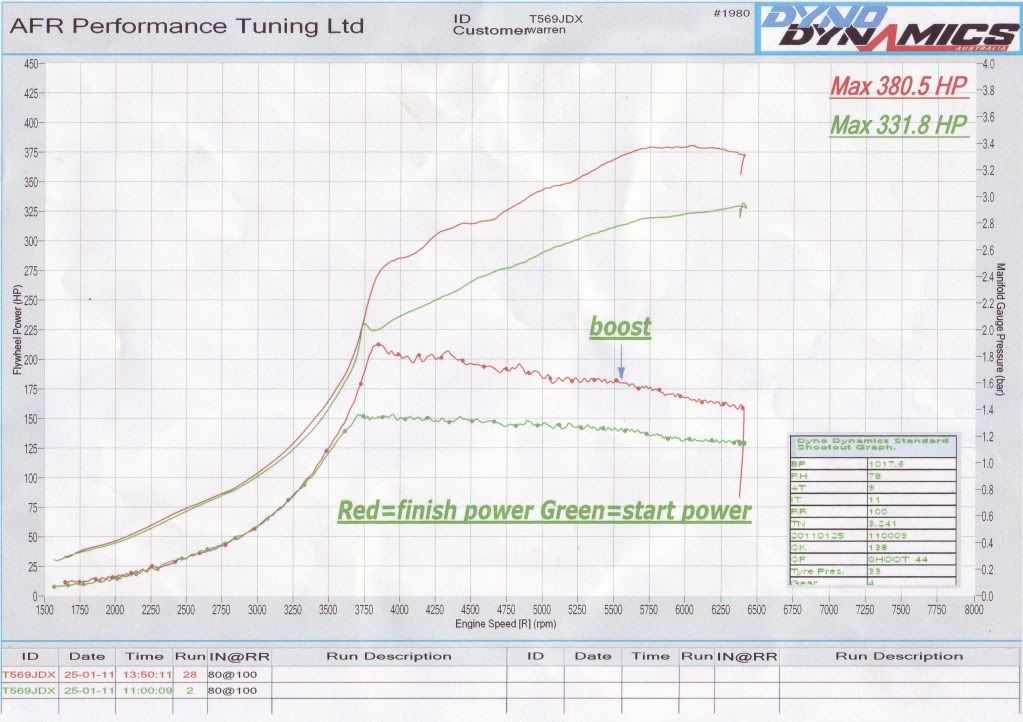
the car has been completely transformed!! sure its much faster at the top end as youd expect with the extra power and torque but its the way it responds lower down thats put a nice smile on my face! Soo much of the sluggishness/lag i had before is all gone! Im very happy with the results, unfortunately i know the temptation to boot it lots is going to be there so i think my gearbox wont like me any more
first of all, passed 10000miles on the clocks!
also have been down to have the car mapped at enhanced performance. Luke spent several hours sorting out the quite frankly shit map i had.
Had a few issues including the antilag air bypass valve being knackered and clearly its been like it a while and the last owner clearly knew as they wound the idle screw round as far as they could to compensate!! a few other bodges sorted :cry:
here's the man himself hard at work!
I'll let the graphs do the talking:
the car has been completely transformed!! sure its much faster at the top end as youd expect with the extra power and torque but its the way it responds lower down thats put a nice smile on my face! Soo much of the sluggishness/lag i had before is all gone! Im very happy with the results, unfortunately i know the temptation to boot it lots is going to be there so i think my gearbox wont like me any more
#192
- Group: Members
- Posts: 583
- Joined: 01-April 10
- Location:NW Scotland Highlands
Posted 26 January 2011 - 11:44 AM
LOL nice increase low down, well impressed.
Looks like it's time to start saving for a sequential 6 speed Barra or FFD
Cheers Dave
Looks like it's time to start saving for a sequential 6 speed Barra or FFD
Cheers Dave
It's nice to be important but it's more important to be nice !!
#193
- Group: Members
- Posts: 4142
- Joined: 22-January 04
- Location:Stoke on Trent
Posted 26 January 2011 - 03:59 PM
unless you just happen to have one lying around for pennies Dave, then i wont be able to afford one for a while  Might turn the boost back down!!
Might turn the boost back down!!
#194
Posted 26 January 2011 - 07:59 PM
Sounds like a plan Warren for long livity of your engine
You did a great looking finish on your dash mods.
You did a great looking finish on your dash mods.
searching is fruitful | I'm a sponge not a mechanic | please do try that if stuck with a Puma problem whilst waiting for a reply | For the Puma fan this read 'The Inside Story Book' is very nice to own sometimes still seen for sale
#195
- Group: Members
- Posts: 4142
- Joined: 22-January 04
- Location:Stoke on Trent
Posted 05 February 2011 - 02:30 AM
only a minor update really.
Been having a play with carbon fibre. Decided to make my own door handle inner surrounds in carbon.
made moulds using original parts, gelcoat and mould putty (much easier and cleaner than fibreglass).
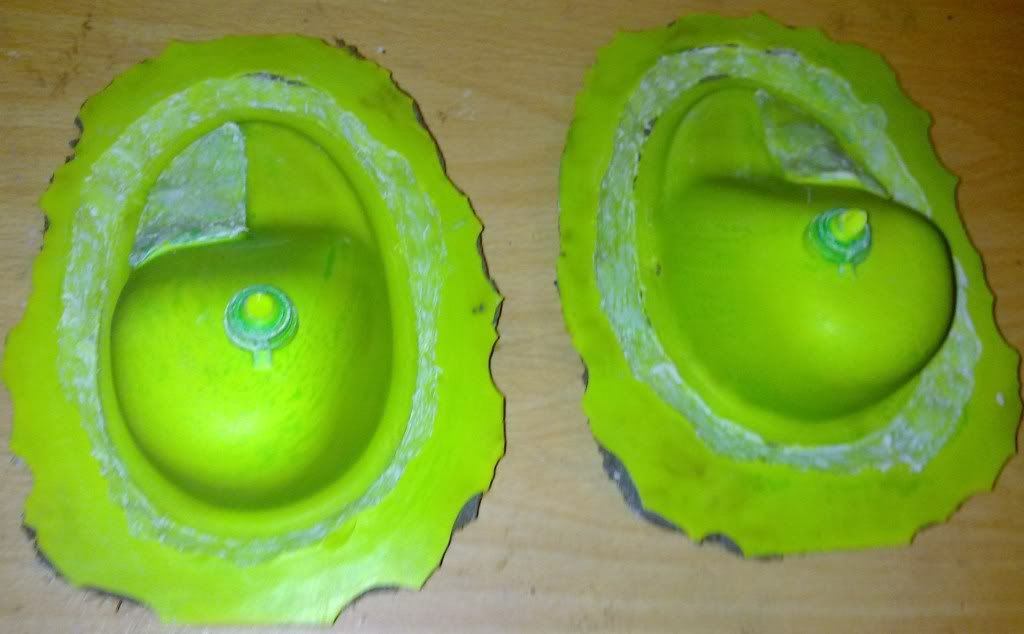
you have to polish up the moulds then give them a good wax and a coat of PVA release agent.
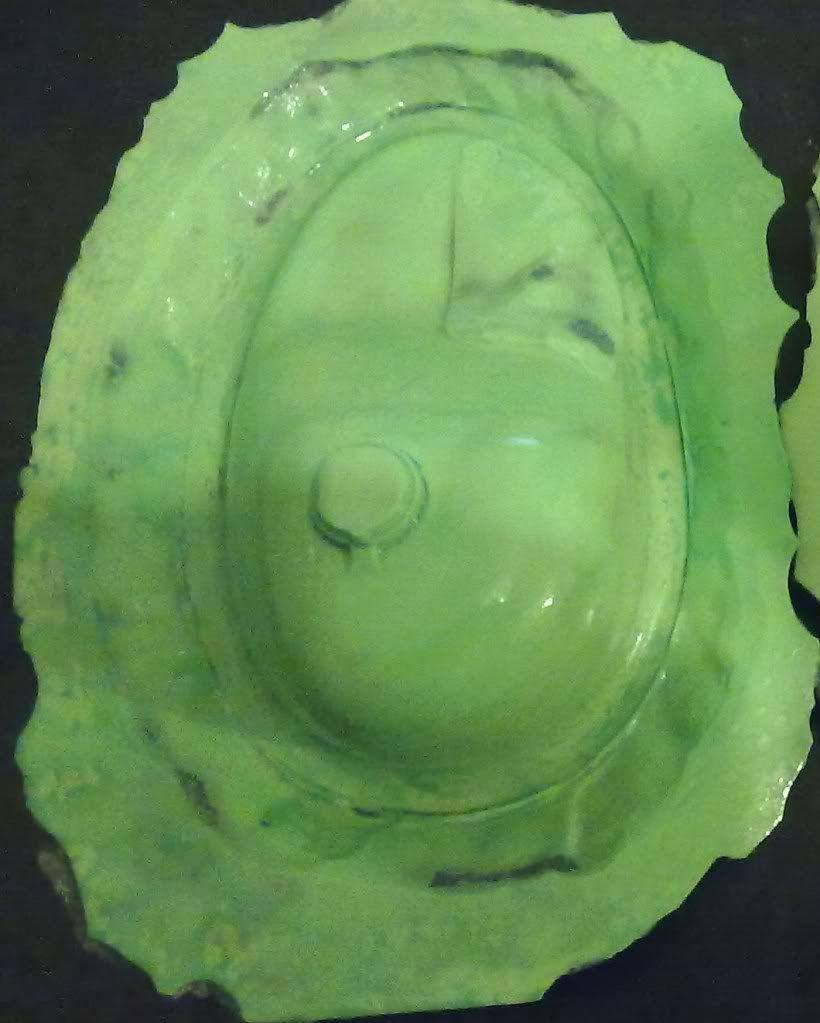
the slight bluey shine is the PVA.
then its lay the clear gelcoat, let it go tacky and then the all important visible layer of carbon:
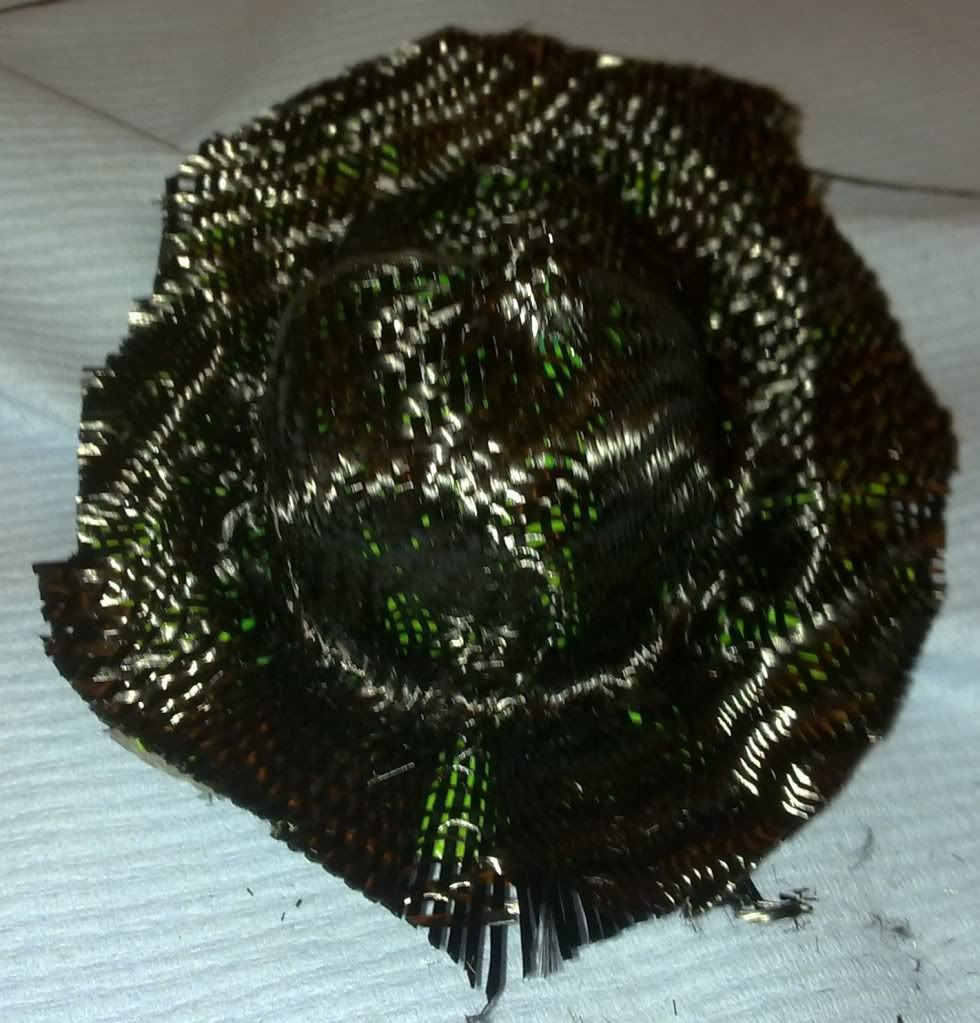
you can see how the weave is easily distorted. Considering its my first ever go, maybe i should have chosen a nice easy shape but we like a challenge!! doesnt look too bad so far.
The extra layers are added wetting out each layer with resin:
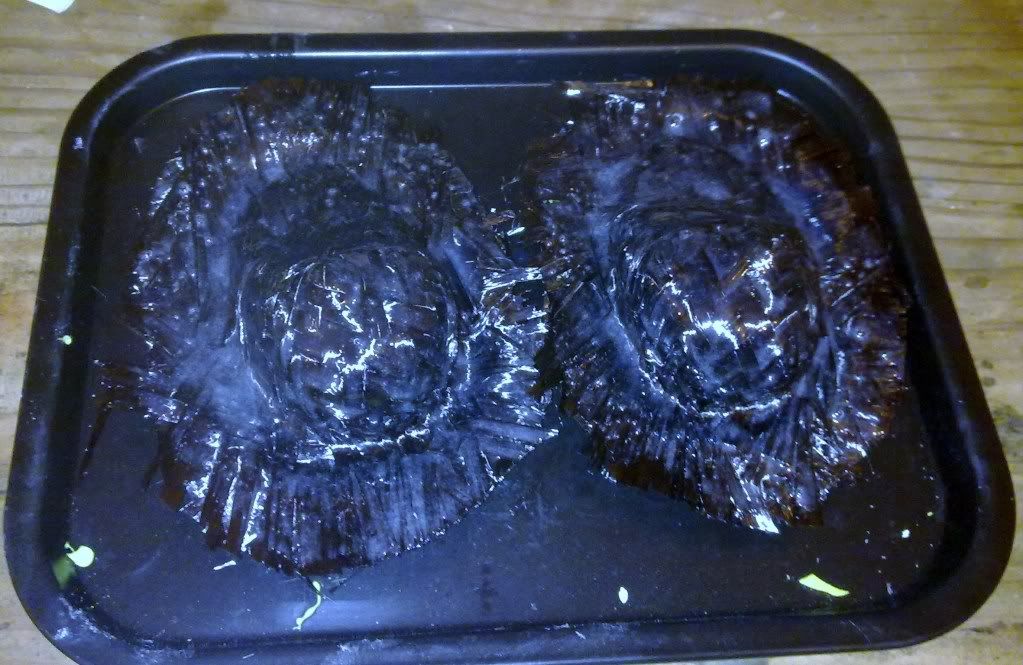
used a bit too much resin on the final layer. least you can sand it off!! you can see its too much as its slightly milky where too thick.
and after 24 hours setting i demoulded the part:
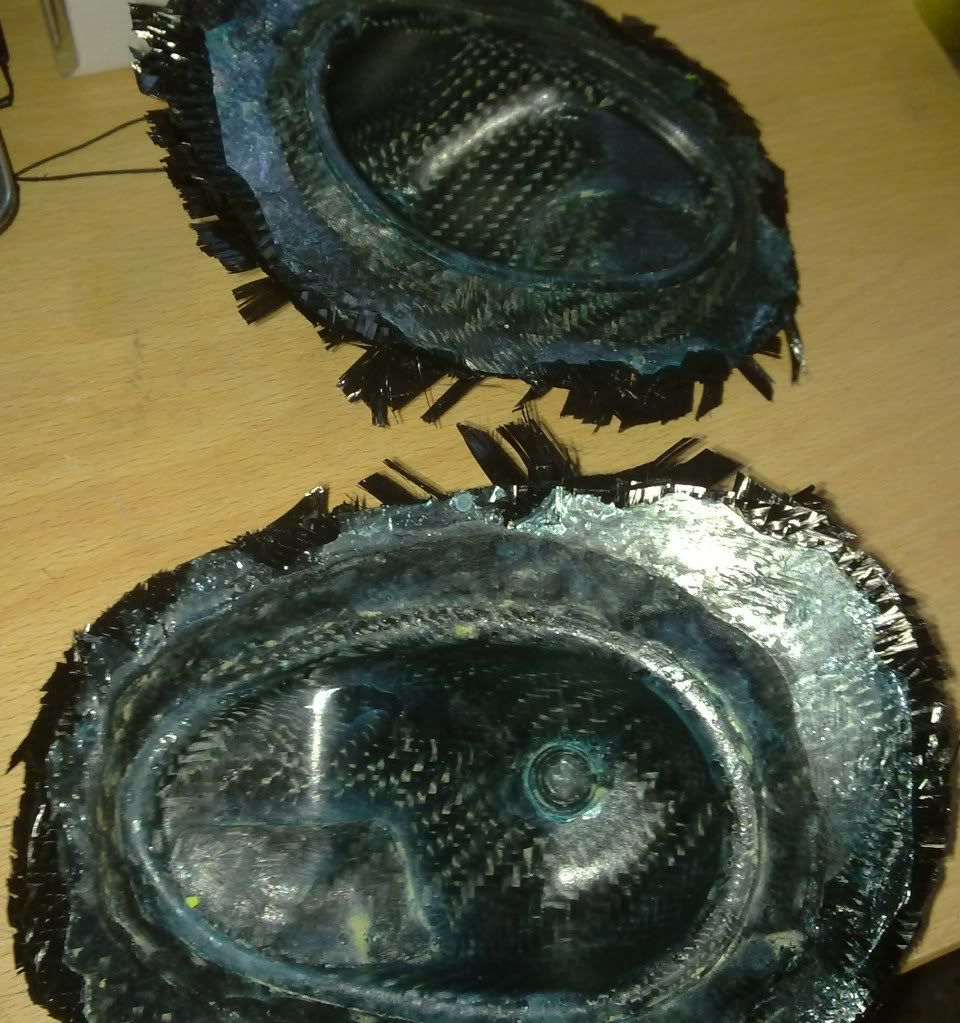
fresh out the mould and still covered in PVA and wax and im quite impressed with the finish. few bubbles and voids around the edges but to be honest thats not surprising considering the moulds complexity. Just needs trimming and polishing up and all good to go!!
quite pleased for a first attempt!
Been having a play with carbon fibre. Decided to make my own door handle inner surrounds in carbon.
made moulds using original parts, gelcoat and mould putty (much easier and cleaner than fibreglass).
you have to polish up the moulds then give them a good wax and a coat of PVA release agent.
the slight bluey shine is the PVA.
then its lay the clear gelcoat, let it go tacky and then the all important visible layer of carbon:
you can see how the weave is easily distorted. Considering its my first ever go, maybe i should have chosen a nice easy shape but we like a challenge!! doesnt look too bad so far.
The extra layers are added wetting out each layer with resin:
used a bit too much resin on the final layer. least you can sand it off!! you can see its too much as its slightly milky where too thick.
and after 24 hours setting i demoulded the part:
fresh out the mould and still covered in PVA and wax and im quite impressed with the finish. few bubbles and voids around the edges but to be honest thats not surprising considering the moulds complexity. Just needs trimming and polishing up and all good to go!!
quite pleased for a first attempt!
#196
- Group: Members
- Posts: 583
- Joined: 01-April 10
- Location:NW Scotland Highlands
Posted 05 February 2011 - 12:25 PM
Warren,
Your talents with detailing never cease to amaze me, nice job
I've got all the carbon fibre panels to make for mine at some point, flat door cards, flat rear 1/4 cards, centre dash panel where stereo came out, to take switches a couple of dials and the Scorpio type heater controls, guess I need to find a supplier of the "perspex" type carbon fibre sheet in 8' x 4' sheet size lol
Keep up the good work,
Regards Dave
It's nice to be important but it's more important to be nice !!
#197
- Group: Members
- Posts: 4142
- Joined: 22-January 04
- Location:Stoke on Trent
Posted 19 February 2011 - 01:42 PM
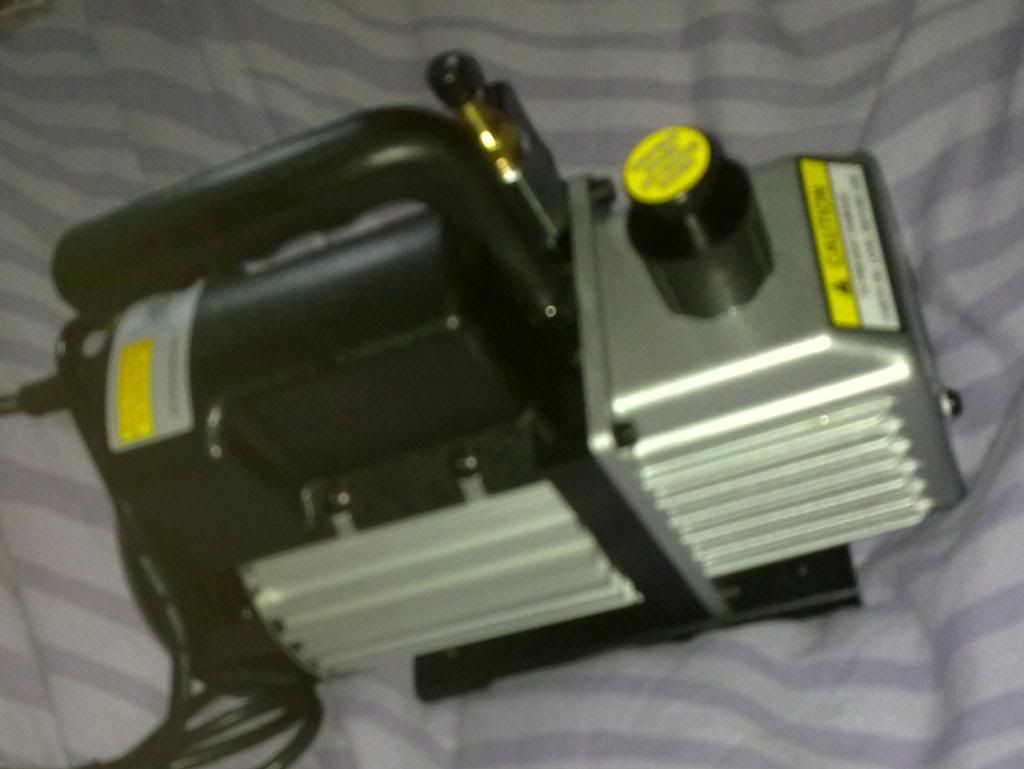
Well ive decided to invest a bit further in carbon fibre equipment.
Ive bought some bits so i can do vacuum resin infusion.
Got the most important bit, the pump:
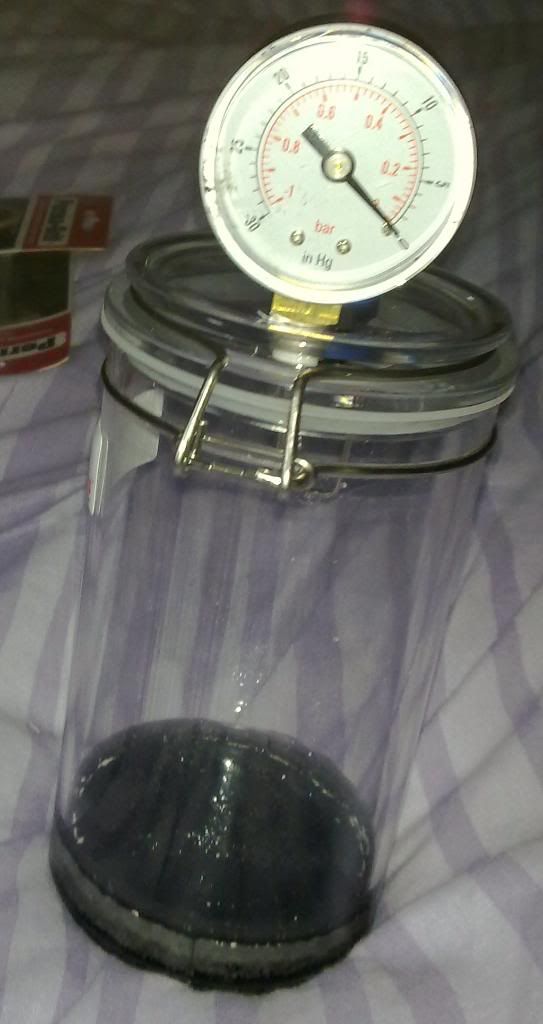
resin catch pot and vacuum guage:
tons of bagging stack consumables such as films, infusion mesh, tubes, sealing gum etc:

Got plenty of carbon in stock. I intend to be using the cosmetic fancy 2x2 3k twill everyone likes only for the outer visible layer of parts with 12k 2x2 twill for the rest of the layers with kevlar as needed.
resin infusion is so much better than wetlay. no resin rich parts and much easier to get a good surface finish. Also the real reason is well done infused parts are only 20% heavier than pre-preg and 80% strength of pre-preg yet less than 1/3rd the cost and still several times stronger than the original metal panel. Certainly the best value way to do carbon parts.
Ive bought some bits so i can do vacuum resin infusion.
Got the most important bit, the pump:
resin catch pot and vacuum guage:
tons of bagging stack consumables such as films, infusion mesh, tubes, sealing gum etc:
Got plenty of carbon in stock. I intend to be using the cosmetic fancy 2x2 3k twill everyone likes only for the outer visible layer of parts with 12k 2x2 twill for the rest of the layers with kevlar as needed.
resin infusion is so much better than wetlay. no resin rich parts and much easier to get a good surface finish. Also the real reason is well done infused parts are only 20% heavier than pre-preg and 80% strength of pre-preg yet less than 1/3rd the cost and still several times stronger than the original metal panel. Certainly the best value way to do carbon parts.
#198

- Group: Moderators
- Posts: 4071
- Joined: 20-March 05
- Location:Chippenham and Beyond
Posted 19 February 2011 - 02:20 PM
Nice little home made vacuum chamber Warren.
Looks like about the right size for the odd Ford Racing badge
10,000 miles, I'm not surprised with it's MPG and petrol prices
Looks like about the right size for the odd Ford Racing badge
10,000 miles, I'm not surprised with it's MPG and petrol prices
MK4 XR3i
Mk3 XR3i
R Reg 1.7 Puma
T Reg 1.7 Lux Puma
Now its Racing Puma 072
Graham

Mk3 XR3i
R Reg 1.7 Puma
T Reg 1.7 Lux Puma
Now its Racing Puma 072
Graham
#199
- Group: Members
- Posts: 4142
- Joined: 22-January 04
- Location:Stoke on Trent
Posted 19 February 2011 - 02:57 PM
lol not thought of that. would need to buy some extra valves for the top of the pot to seal the hose entry point. would make a good resin degassing pot!
#200
Posted 19 February 2011 - 08:53 PM
Look forward to seeing your new bits Warren.
Wear that mask
Wear that mask
searching is fruitful | I'm a sponge not a mechanic | please do try that if stuck with a Puma problem whilst waiting for a reply | For the Puma fan this read 'The Inside Story Book' is very nice to own sometimes still seen for sale


